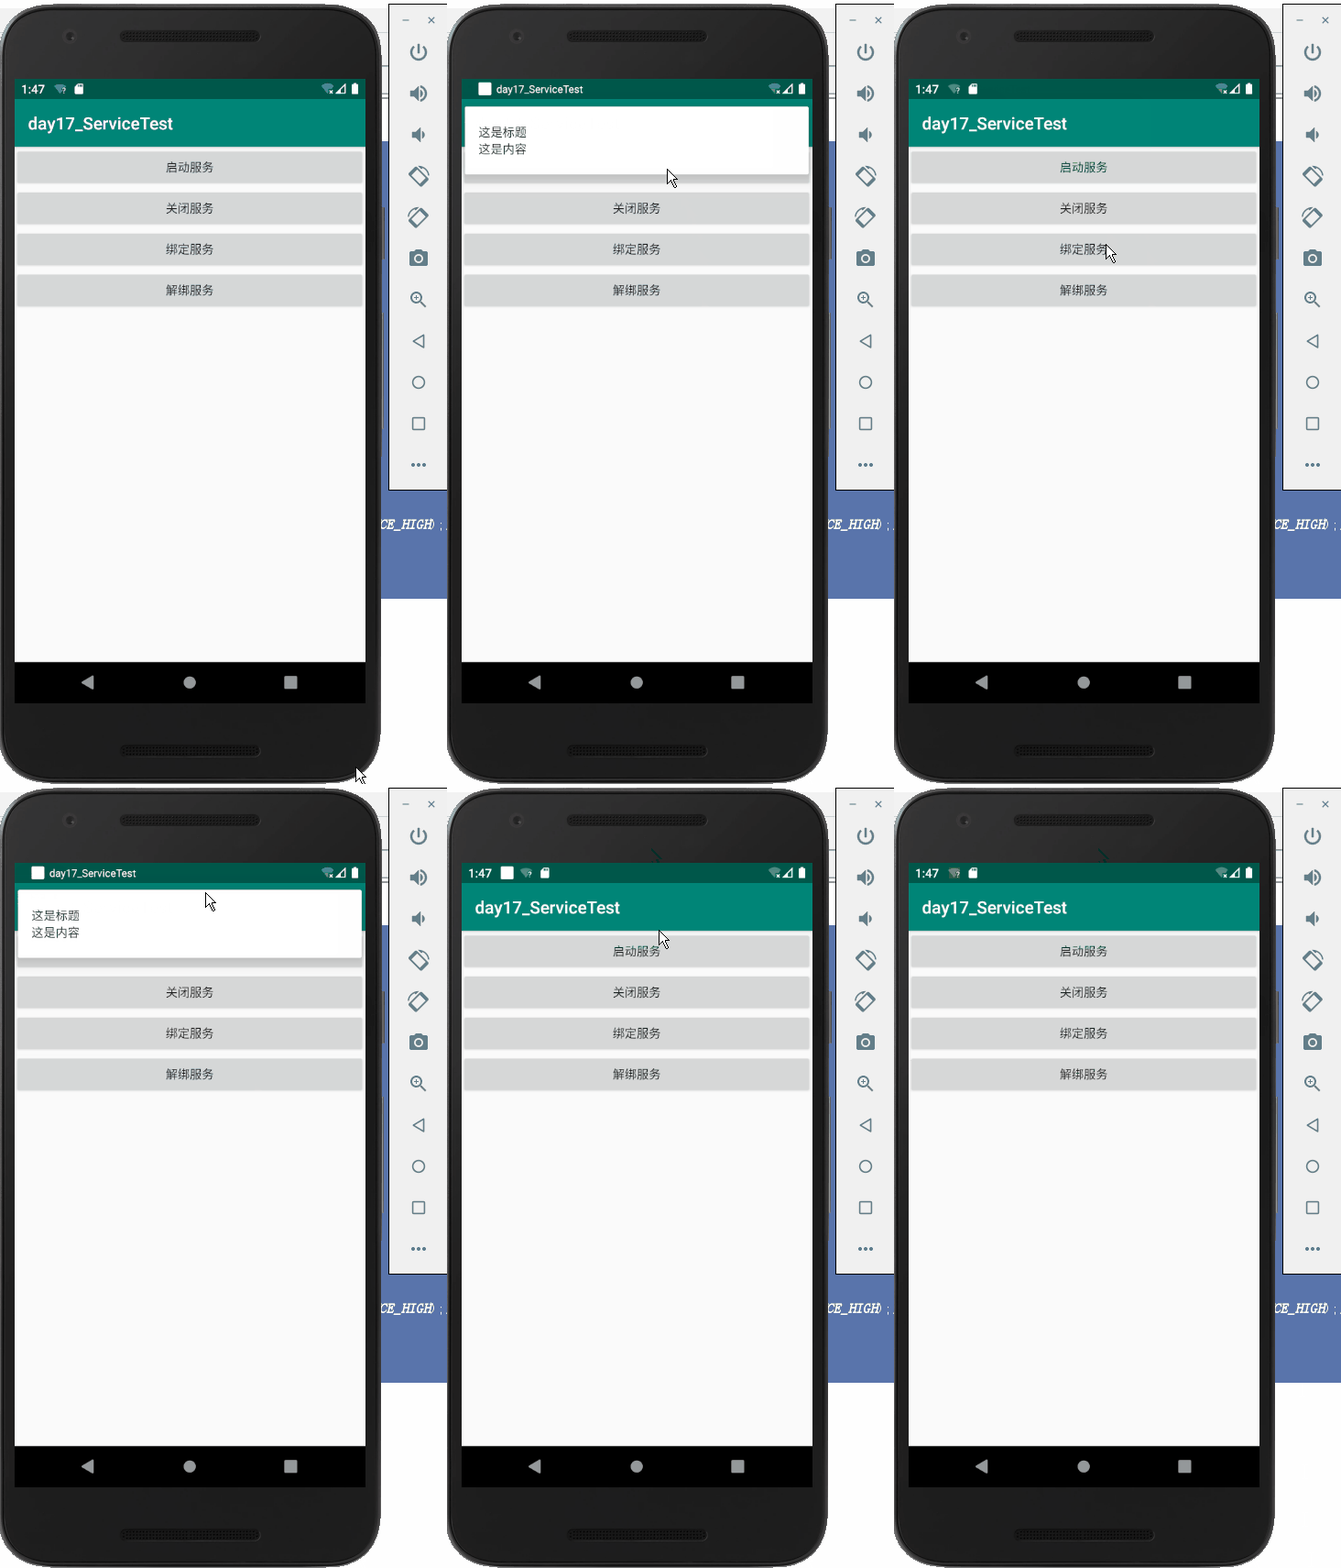
本文代码继续上文
day17_ServiceTest
一、前台服务
为了避免服务因系统内存不足而被回收,可以使用前台服务。前台服务会有通知栏常驻
修改myService.java:
 public void onCreate() {
     super.onCreate();
     Log.d(TAG, "onCreate: 创建服务");

     Intent intent = new Intent(this, MainActivity.class);
     PendingIntent pi = PendingIntent.getActivity(this, 0, intent, 0);
     NotificationCompat.Builder builder = new NotificationCompat.Builder(this, "channellId")
             .setContentTitle("这是标题")
             .setContentText("这是内容")
             .setWhen(System.currentTimeMillis())
             .setSmallIcon(R.mipmap.ic_launcher)
             .setLargeIcon(BitmapFactory.decodeResource(getResources(), R.mipmap.ic_launcher))
             .setContentIntent(pi);
     // 大于Android 8.0的版本适配
     if (android.os.Build.VERSION.SDK_INT >= android.os.Build.VERSION_CODES.O) {
         NotificationChannel notificationChannel = null;
         NotificationManager notificationManager = (NotificationManager) getSystemService(NOTIFICATION_SERVICE);
         notificationChannel = new NotificationChannel("channellId", "name", NotificationManager.IMPORTANCE_HIGH);// 注意此处channellId要和前面一样
         notificationManager.createNotificationChannel(notificationChannel);
     }
     startForeground(1, builder.build());
 }
这次并没有使用NotificationManger,而是使用startForeground()让MyService变成前台服务。
Android 8.0需要权限:
<uses-permission android:name="android.permission.FOREGROUND_SERVICE"/>
运行:

二、使用IntentService
主线程处理耗时任务很容易出现ANR(Application Not Responding),所以推荐在每个服务的具体方法里开启子线程,即以下形式:
public class MyService extends Service{
......
	@Override
	public int onStartCommand(Intent intent, int flags, int startId){
		new Thread(new Runnable(){
			@Override
			public void run(){
				//具体逻辑
				// stopSelf(); //自动停止
			}
		}).start();
		return super.onStartCommand(intent, flags, startId);
	}

}
但是程序员记性不好,总是忘记开多线程或者自动停止。为了解决这个问题,Android提供了IntentService类解决这个问题。
新建一个MyIntentService类继承自IntentService:
public class MyIntentService extends IntentService {
    private static final String TAG = "MyIntentService";
    public MyIntentService(){
        super("MyIntentService");  // 调用父类的有参构造函数
    }

    @Override
    protected void onHandleIntent(@Nullable Intent intent) {
        // 打印当前线程的id
        Log.d(TAG, "当前线程id是 "+Thread.currentThread().getId());
    }

    @Override
    public void onDestroy() {
        super.onDestroy();
        Log.d(TAG, "onDestroy: 服务已销毁");
    }
}
这个服务运行完会自动停止,来证实以下:
添加按钮:
<Button
     android:layout_width="match_parent"
     android:layout_height="wrap_content"
     android:id="@+id/intent_service"
     android:text="启动 IntentService"
/>
触发:
@Override
protected void onCreate(Bundle savedInstanceState) {
    super.onCreate(savedInstanceState);
    setContentView(R.layout.activity_main);
......

    Button button_IntentService = findViewById(R.id.intent_service);
    button_IntentService.setOnClickListener(this);
}

@Override
public void onClick(View v) {
    switch (v.getId()) {
......
        case R.id.intent_service:
            Log.d("MainActivity", "主线程id是 "+Thread.currentThread().getId());
            Intent intentService = new Intent(this, MyIntentService.class);
            startService(intentService);
            break;
......
    }
}
服务都需要在<application/>里注册:
<service android:name=".MyIntentService"/>
运行:

自动停止方便许多
