最近由于疫情紧张,遂在家办公,在领导的带领下,学习了一下.Net Core MVC。
一,构建web应用
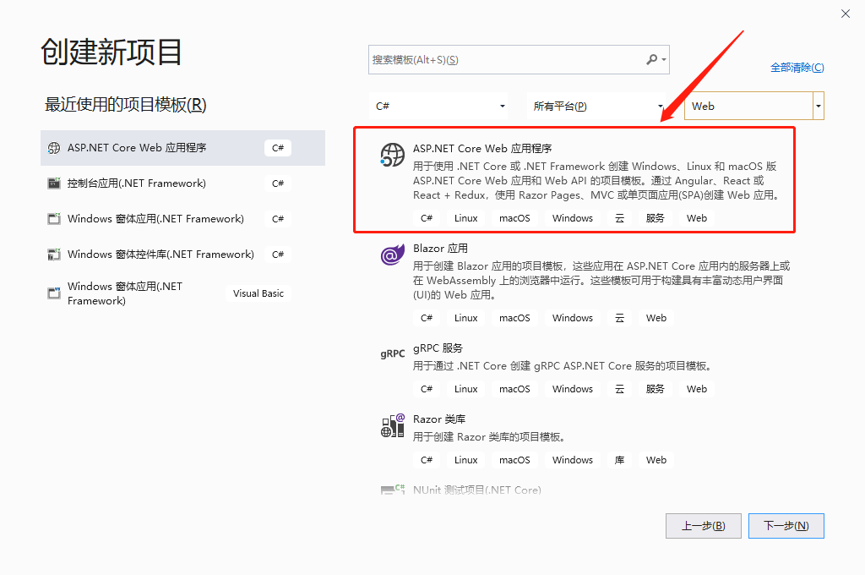
1.选择c#-所有平台-web 找到ASP.NET Core web应用程序
2.项目命名之后转至如下界面:选择Web应用程序(模型视图控制器)。
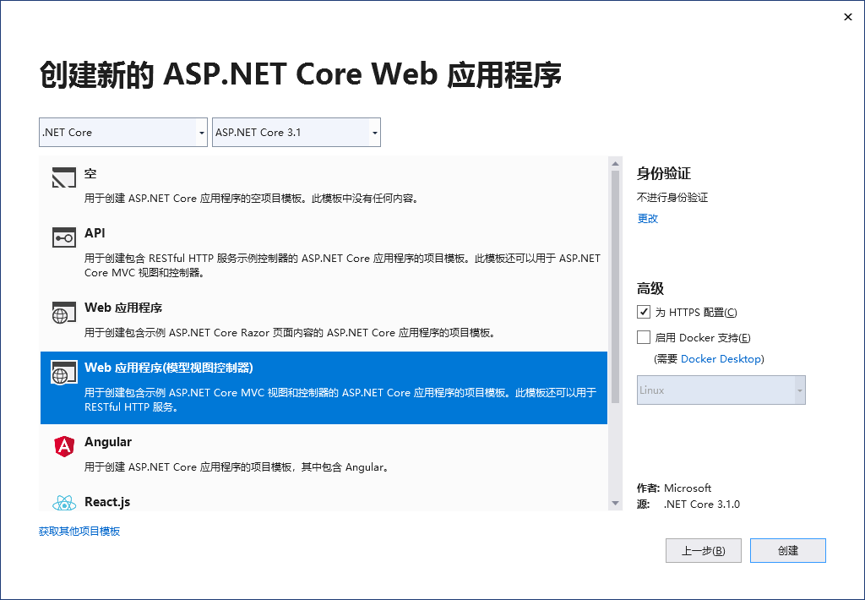
Ok点击创建,这个项目的基本框架就生成了。
二,EF-Code First 数据迁移
1,在Models里面新建实体类和数据库上下文类,并添加相对应的引用和框架
具体代码如下:
实体类:
    public class InfoUser
    {
        [Key]
        [StringLength(10)]
        [DisplayName("用户名")]
        [Required(ErrorMessage = "用户名不能为空")]
        public string UserName { get; set; }
        [StringLength(16)]
        [DisplayName("密码")]
        [Required(ErrorMessage = "密码不能为空")]
        public string Password { get; set; }
        [DisplayName("创建日期")]
        public DateTime DTCreate { get; set; }
        [DisplayName("登陆日期")]
        public DateTime DTLogin { get; set; }

        public byte[] HeaderImg { get; set; }
    }
    /// <summary>
    /// 博客表
    /// </summary>
    public class InfoBlog
    {
        public int ID { get; set; }
        [StringLength(10)]
        public string UserName { get; set; }
        [StringLength(64)]
        public string Title { get; set; }

        public string Content { get; set; }
        public int VisitCount { get; set; }
        public DateTime DTCreate { get; set; }
    }
    /// <summary>
    /// 回复表
    /// </summary>
    public class InfoReply
    {
        public int ID { get; set; }
        public int BlogID { get; set; }
        [StringLength(10)]
        public string UserName { get; set; }
        public string Content { get; set; }
        public DateTime DTCreate { get; set; }
    }
    /// <summary>
    /// 日志表
    /// </summary>
    public class InfoLog
    {
        public int ID { get; set; }
        [StringLength(64)]
        public string Title { get; set; }
        public string Content { get; set; }
        public DateTime DTCerate { get; set; }

    }
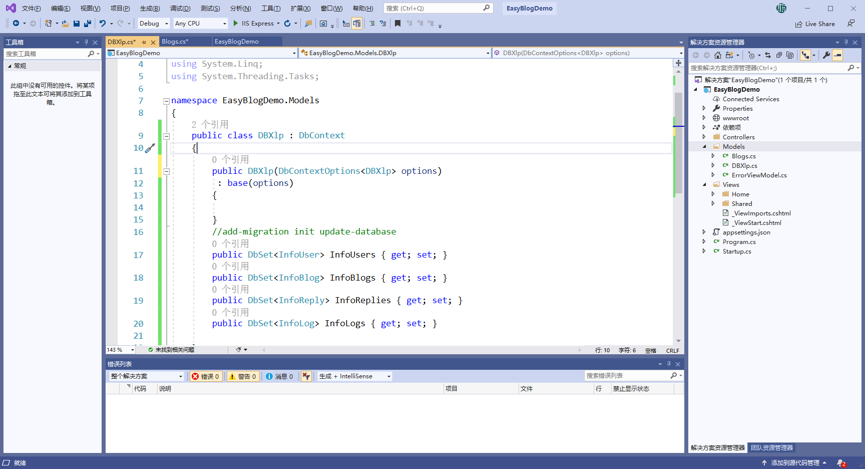
上下文类(需要继承DbContext):
 public class DBXlp : DbContext
    {
        public DBXlp(DbContextOptions<DBXlp> options)
         : base(options)
        {

        }
        //add-migration init update-database
        public DbSet<InfoUser> InfoUsers { get; set; }
        public DbSet<InfoBlog> InfoBlogs { get; set; }
        public DbSet<InfoReply> InfoReplies { get; set; }
        public DbSet<InfoLog> InfoLogs { get; set; }

    }
2,通过NuGet添加下面的两个包

3,在appsettings.json里面添加连接数据库的字符串
{
    "ConnectionStrings": {
      "DbXlp": "Server=.;Database=dbXlp;User id=sa;Password=123456"
    },
    "Logging": {
      "LogLevel": {
        "Default": "Information",
        "Microsoft": "Warning",
        "Microsoft.Hosting.Lifetime": "Information"
      }
    },
    "AllowedHosts": "*"
  }
4,然后在 Startup.cs 的 ConfigureServices(IServiceCollection services) 中,我们作为一个服务注册了上下文对象。
services.AddDbContext<DBXlp>(options=>options.UseSqlServer(Configuration.GetConnectionString("DbXlp")));
5,打开 工具->NuGet包管理器->程序包管理器控制台
- 输入命令:add-migration init(可随意)(为挂起的Model变化添加迁移脚本 )
- 输入命令:update-database( 将挂起的迁移更新到数据库 )

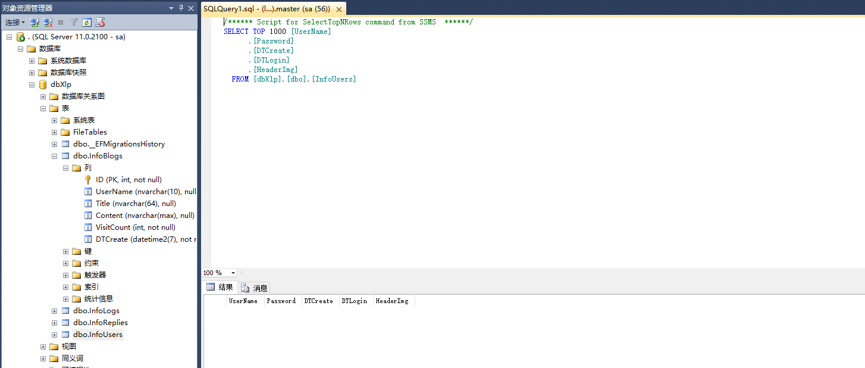
Ok 可以看到下面数据库里已经有了对应表信息!
三,使用Identity进行登录验证
在Startup中:
1.定义一个string类型的CookieScheme作为认证方案
public const string CookieScheme = "Cookies";
2.ConfigureServices中使用AddCookie设置选项
    services.AddAuthentication(CookieScheme)
            .AddCookie(CookieScheme, option =>
            {
                // 登录路径:这是当用户试图访问资源但未经过身份验证时,程序将会将请求重定向到这个相对路径。
                option.LoginPath = new PathString("/account/login");
                // 禁止访问路径:当用户试图访问资源时,但未通过该资源的任何授权策略,请求将被重定向到这个相对路径
                option.AccessDeniedPath = new PathString("/account/denied");
            });
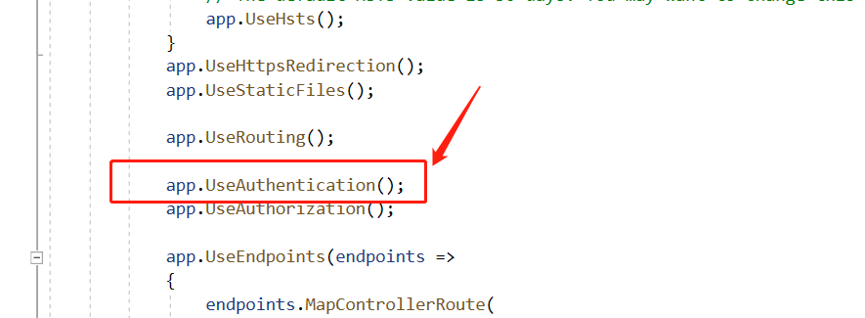
3.在Configure方法中使用 UseAuthentication来调用认证中间件(如下图所示位置)
控制器里面:
创建一个包含用户信息的 cookie可以构造一个ClaimsPrincipal。用户信息会被序列化然后保存在cookie 里面。
      public async Task<ActionResult> Logining()
        {
            var userName = Request.Form["UserName"];
            var password = Request.Form["Password"];
            var item = db.InfoUsers.Find(userName);
            if (item != null && password == item.Password)
            {
                item.DTLogin = DateTime.Now;
                db.SaveChanges();
                //用Claim来构造一个ClaimsIdentity,然后调用 SignInAsync 方法。
                var claims = new List<Claim>();
                claims.Add(new Claim(ClaimTypes.Name, userName));
                var claimsIdentity = new ClaimsIdentity(claims, "Cookies");
                //登录
                await HttpContext.SignInAsync("Cookies", new ClaimsPrincipal(claimsIdentity));
                return RedirectToAction("Index", "Blog");
            }
            else
                ViewBag.Msg = "登陆失败";
            return View();
        }

        public async Task<IActionResult> Logout()
        {
            //退出
            await HttpContext.SignOutAsync("Cookies");
            return RedirectToAction("Index", "Home");

        }
然后我们只需要对那些需要授权登陆才能执行的界面或者操作标记[Authorize]即可:

最后我们也可以在Razor中判断是否授权成功:
@if (User.Identity.IsAuthenticated)
{
<textarea id="TextArea1" rows="10" class="form-control"></textarea>
    <button onclick="Reply()" class="btn btn-primary">回复</button>
}
else
{
    <a asp-action="Login" asp-controller="Account">登录</a>
}
就写到这里。下次继续!