前面的一篇博客,就写了mysql的读写分离,具体配置如下:
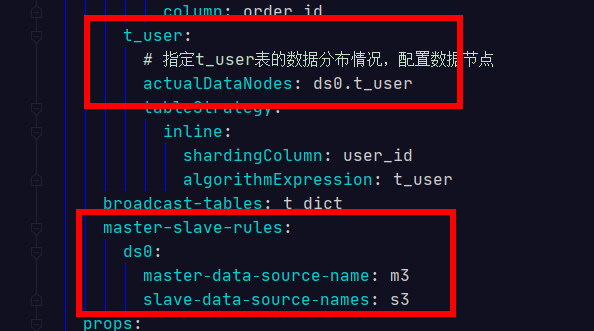
server:
  port: 56081
  servlet:
    context-path: /sharding-jdbc-simple-demo
spring:
  application:
    name: sharding-jdbc-simple-demo
  http:
    encoding:
      enabled: true
      charset: utf-8
      force: true
  main:
    allow-bean-definition-overriding: true
  shardingsphere:
    datasource:
      #新增一个m2库
      names: m2,m3,m1,s3
      m1:
        type: com.alibaba.druid.pool.DruidDataSource
        driverClassName: com.mysql.jdbc.Driver
        url: jdbc:mysql://xxxxx:3306/order_db_1?useUnicode=true
        username: root
        password: 123456
      s3:
        type: com.alibaba.druid.pool.DruidDataSource
        driverClassName: com.mysql.jdbc.Driver
        url: jdbc:mysql://xxxxxx:3306/user_db?useUnicode=true
        username: root
        password: 123456
      m2:
        type: com.alibaba.druid.pool.DruidDataSource
        driverClassName: com.mysql.jdbc.Driver
        url: jdbc:mysql://xxxxxxx:3306/order_db_2?useUnicode=true
        username: root
        password: 123456
      m3:
        type: com.alibaba.druid.pool.DruidDataSource
        driverClassName: com.mysql.jdbc.Driver
        url: jdbc:mysql://xxxxxx:3306/user_db?useUnicode=true
        username: root
        password: 123456
    sharding:
      tables:
        t_order:
          # 分库策略,以user_id为分片键,分片策略为user_id % 2 + 1,user_id为偶数操作m1数据源,否则操作m2。
          databaseStrategy:
            inline:
              shardingColumn: user_id
              algorithmExpression: m$->{user_id % 2 + 1}
          # 指定t_order表的数据分布情况,配置数据节点
          actualDataNodes: m$->{1..2}.t_order_$->{1..2}
          tableStrategy:
            inline:
              shardingColumn: order_id
              algorithmExpression: t_order_$->{order_id % 2 + 1}
          # 指定t_order表的分片策略,分片策略包括分片键和分片算法
          keyGenerator:
            type: SNOWFLAKE
            column: order_id
        t_user:
          # 指定t_user表的数据分布情况,配置数据节点
          actualDataNodes: ds0.t_user
          tableStrategy:
            inline:
              shardingColumn: user_id
              algorithmExpression: t_user
      broadcast-tables: t_dict
      master-slave-rules:
        ds0:
          master‐data‐source‐name: m3
          slave‐data‐source‐names: s3
    props:
      sql:
        show: true
mybatis:
  configuration:
    map-underscore-to-camel-case: true
swagger:
  enable: true
logging:
  level:
    root: info
    org.springframework.web: info
    com.topcheer.dbsharding: debug
    druid.sql: debug
需要修改2个地方

然后进行插入测试
    @Test
    public void testInsertUser(){
        for (int i = 20 ; i<24; i++){
            Long id = i + 1L;
            userDao.insertUser(id,"姓名"+ id );
        }

    }
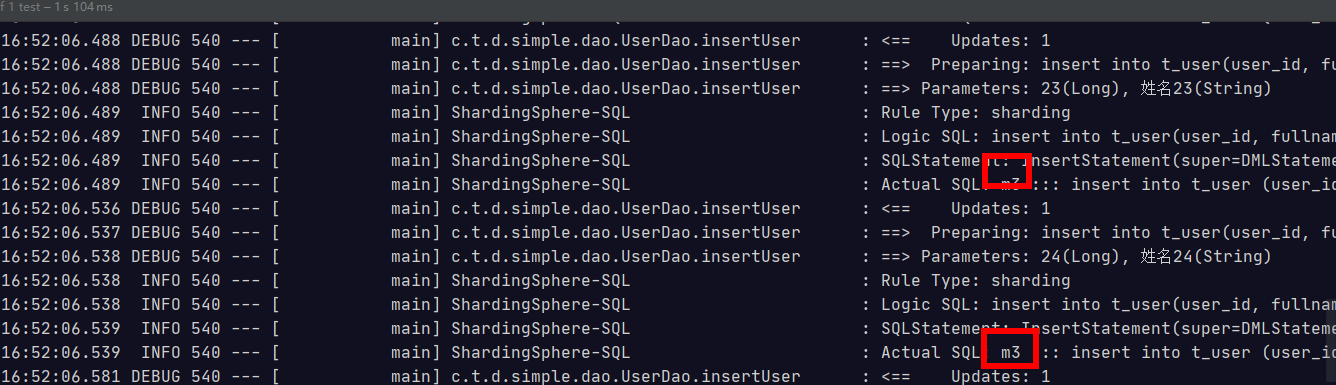
插入的时候实在主库
  @Test
    public void testSelectUserbyIds(){
        List<Long> userIds = new ArrayList<>();
        userIds.add(11L);
        userIds.add(12L);
        List<Map> users = userDao.selectUserbyIds(userIds);
        System.out.println(users);
    }
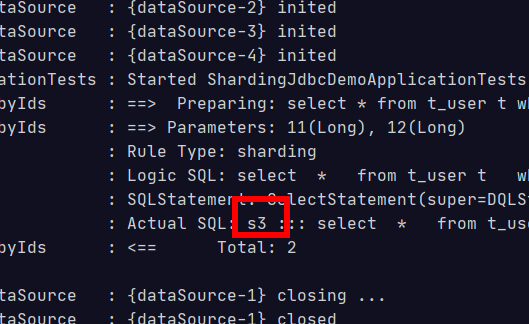
查询的实在从库。