之前在https://blog.csdn.net/fengbingchun/article/details/103735560 中介绍过在Windows上通过vs2017编译FFmpeg源码进行单步调试的步骤,为了进一步熟悉FFmpeg这里以提取FFmpeg dshow mjpeg源码为例介绍其实现过程及注意事项:
FFmpeg是用C实现的,为了加速,个别模块也有对应的汇编实现。之前在https://blog.csdn.net/fengbingchun/article/details/102641967中介绍过从OpenCV中提取dshow mjpeg的步骤,但是OpenCV中只能拿到解码后的数据不能拿到解码前即编码的数据,而FFmpeg可以获取到编码数据。
这里仅提取与获取dshow mjpeg编码数据仅包括视频不包括音频相关的code,涉及到的对外C接口包括11个:avdevice_register_all、avformat_alloc_context、av_find_input_format、av_dict_set、avformat_open_input、av_malloc、av_read_frame、av_packet_unref、av_freep、avformat_close_input、av_dict_free。主要代码实现在libavdevice模块,这里按照测试code的调用顺序依次说明:
1. avdevice_register_all:初始化avdevice模块,并注册所有输入输出设备。
因为我们只是获取dshow mjpeg的编码数据,不会用到AVOutputFormat相关内容,因此对于outdev_list数组不需要提取ff_opengl_muxer和ff_sdl2_muxer的实现,仅需令outdev_list[]={NULL};即可。
对于indev_list数组仅需要提取ff_dshow_demuxer的code,因此仅需令indev_list[]={&ff_dshow_demuxer, NULL};即可。ff_dshow_demuxer的实现在libavdevice模块的前缀为dshow的那些文件中,那些文件基本上都需要提取出来。
在av_format_init_next函数中用到的数组变量muxer_list和demuxer_list全部赋值为NULL即可。好像函数av_format_init_next什么都没做,也可直接去掉此函数。
2. avformat_alloc_context:分配AVFormatContext。对AVFormatContext执行malloc、memset(0)操作,以及一些默认设置。其中内部的回调函数io_open和io_close无需提取。并显式将编解码格式设置为mjpeg。
3. av_find_input_format:根据输入格式的名字即”dshow”查找AVInputFormat。其实就是将ff_dshow_demuxer赋值给了外部的AVInputFormat指针对象。
4. av_dict_set:设置一个AVDictionary项。这里主要是设置video size。其实就是将key即“video_size”和value即”1280x720”赋值给AVDictionary。
5. avformat_open_input:打开输入流并读取头信息。之前在上面第2步中对AVFormatContext作了memset全赋值为0操作,因此avformat_open_input函数中一些if判断始终会为false如pb,这些code可注释掉。这个函数里面最重要的是AVInputFormat中的回调函数read_header,它会开启摄像头。
6. av_malloc:为一个AVPacket分配内存块。以64位对齐方式调用系统_aligned_malloc函数。
7. av_read_frame:获取帧数据,每调用一次获取一帧mjpeg编码数据。这里的主要实现函数是read_frame_internal,调用完此函数后就会jump到return_packet处,其它部分code不会走到如for内code,因此这部分code可全注释掉。read_frame_internal实现有些复杂,不过里面的一些if判断会始终为false,可以注释掉那些code。
8. av_packet_unref:释放数据缓冲区并将AVPacket字段重置为默认值。每正常调用一次av_read_frame函数就应该对应调用一次av_packet_unref函数。
9. av_freep:释放申请的内存块,调用系统_aligned_free函数,如果AVPacket是有效的,在调用此函数前需要先调用av_packet_unref。
10. avformat_close_input:关闭打开的AVFormatContext并释放。
11. av_dict_free:释放为AVDictionary分配的内存,内部调用的是av_freep函数。
注意事项:
1. C语言语法与C++的差异:
(1).C中从void*到一个具体的结构体可以直接赋值,但C++需要使用static_cast。
(2).C中从int到enum可以直接赋值,但C++需要使用static_cast。
(3).C中对结构体赋值支持”.结构体成员变量名=value”,而且成员变量名的顺序可以任意,但C++需要完全按照变量名顺序依次直接给出各个变量名的value,不支持”.变量名=value”。
(4).C中会将class、this、new等当作普通变量名使用,但在C++中这些属于关键字,需要修改成其它名字。
(5).C中对union支持”.union成员变量名=value”,C++不支持,这里将union修改成了struct,如AVOption中的default_val。
2. 在移植dshow.c文件到c++文件时,发现需要define宏COBJMACROS和CINTERFACE,定义完这两个宏后,include文件ObjIdl.h和Shlwapi.h时总会有各种问题,好像定义那两个宏后,这两个include文件不能同时在同一个.cpp文件中,临时解决方法是将dshow.c拆分成几个.cpp文件。
3. 移植code中,有些分支或函数感觉执行不到,临时使用一个宏ERROR_POS占位,此宏定义如下,发现问题可快速定位:
#define ERROR_POS \
	fprintf(stderr, "Error, It should not execute to this position: file: %s, func: %s, line: %d\n", __FILE__, __FUNCTION__, __LINE__); \
	abort();
4. code中用到了一些系统接口,需要依赖两个系统库:strmiids.lib、shlwapi.lib。
5. 提取的全部code存放在:https://github.com/fengbingchun/OpenCV_Test/tree/master/src/fbc_cv
测试代码如下:将函数中的命名空间fbc去掉即可在原始ffmpeg中运行
#include <fstream>
#include <iostream>
#include "fbc_cv_funset.hpp"
#include <videocapture.hpp>
#include <opencv2/opencv.hpp>
#include <avdevice.hpp>
#include <avformat.hpp>
#include <avutil.hpp>
#include <avmem.hpp>
int test_ffmpeg_dshow_mjpeg()
{
#ifdef _MSC_VER
fbc::avdevice_register_all();
fbc::AVFormatContext* format_context = fbc::avformat_alloc_context();
fbc::AVCodecID id = fbc::AV_CODEC_ID_MJPEG;
format_context->video_codec_id = id;
fbc::AVInputFormat* input_format = fbc::av_find_input_format("dshow");
if (!input_format) {
fprintf(stderr, "Error: input format is not supported\n");
return -1;
}
fbc::AVDictionary* dict = nullptr;
int ret = fbc::av_dict_set(&dict, "video_size", "1280x720", 0);
if (ret < 0) {
fprintf(stderr, "Error: fail to av_dict_set: %d\n", ret);
return -1;
}
ret = fbc::avformat_open_input(&format_context, "video=Integrated Webcam", input_format, &dict);
if (ret != 0) {
fprintf(stderr, "Error: fail to avformat_open_input: %d\n", ret);
return -1;
}
int video_stream_index = -1;
for (unsigned int i = 0; i < format_context->nb_streams; ++i) {
const fbc::AVStream* stream = format_context->streams[i];
if (stream->codecpar->codec_type == fbc::AVMEDIA_TYPE_VIDEO) {
video_stream_index = i;
fprintf(stdout, "type of the encoded data: %d, dimensions of the video frame in pixels: width: %d, height: %d, pixel format: %d\n",
stream->codecpar->codec_id, stream->codecpar->width, stream->codecpar->height, stream->codecpar->format);
//break;
}
}
if (video_stream_index == -1) {
fprintf(stderr, "Error: no video stream\n");
return -1;
}
fbc::AVCodecParameters* codecpar = format_context->streams[video_stream_index]->codecpar;
if (codecpar->codec_id != id) {
fprintf(stderr, "Error: this test code only support mjpeg encode: %d\n", codecpar->codec_id);
return -1;
}
fbc::AVPacket* packet = (fbc::AVPacket*)fbc::av_malloc(sizeof(fbc::AVPacket));
if (!packet) {
fprintf(stderr, "Error: fail to alloc\n");
return -1;
}
std::ofstream out("E:/GitCode/OpenCV_Test/test_images/test.mjpeg", std::ios::binary | std::ios::out);
if (!out.is_open()) {
fprintf(stderr, "Error, fail to open file\n");
return -1;
}
int count = 0;
while (count++ < 100) {
ret = fbc::av_read_frame(format_context, packet);
if (ret >= 0 && packet->stream_index == video_stream_index && packet->size > 0) {
fprintf(stdout, "packet size: %d\n", packet->size);
out.write((char*)packet->data, packet->size);
}
else if (ret < 0 || packet->size <= 0) {
fprintf(stderr, "Warnint: fail to av_read_frame: %d, packet size: %d\n", ret, packet->size);
continue;
}
fbc::av_packet_unref(packet);
}
fbc::av_freep(packet);
fbc::avformat_close_input(&format_context);
fbc::av_dict_free(&dict);
out.close();
fprintf(stdout, "test finish\n");
return 0;
#else
fprintf(stderr, "Error: only support windows platform\n");
return -1;
#endif
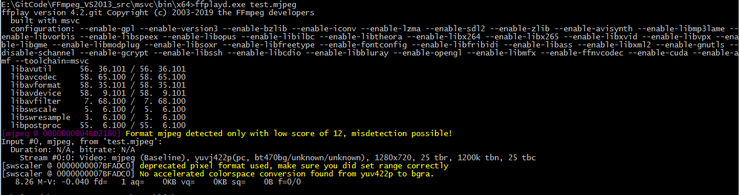
}生成的test.mjpeg文件可使用ffplay直接播放,执行结果如下: