jquery是一个快速、小巧,功能强大的javascript函数库。
jquery主要用来替代原生的javascript,简化代码。
前端最头疼的就是兼容:IE6/7/8兼容的最高版本是jQuery1.9.1

jQuery的操作在一个类中,不会污染顶级变量
基本不用考虑浏览器的兼容性
支持链式操作方式
隐式迭代
行为层和结构层分离
丰富的插件支持
jQuery符号:
jQuery=function jQuery(arg){
    alert(arg);
}
$=window.jQuery=jQuery;

$(arg)=jQuery(arg);
window.jQuery === window.$
$ === jQuery
typeof $ -> function
绝大多数情况下,直接使用 $ ,如果 $ 被占用,就使用 jQuery
jQuery.noConflict() 释放 $,但不释放 jQuery
$   //jQuery(selector,context)
jQuery.noConflict()   //释放 $,但不释放 jQuery
$   //undefined
jQuery   //jQuery(selector,context)
下面两句是等价的
$("div").addClass("div");
jQuery("div").addClass("div");
HTML加载完成的三种书写方式
//html加载完成
$(document).ready(function(){
    $("div").addClass("div");
});

//简写方式1
$().ready(function(){
    $("div").addClass("div");
});

//简写方式2
$(function(){
    $("div").addClass("div");
});
jquery 行为层方法简介:
.css({}) 改变元素样式
以下是原生js写法与jquery写法对比
    // 原生js
    var alinks=$("a");
    for(var i=0;i<alinks.length;i++){
        alinks[i].style.color="pink";
        alinks[i].style.backgroundColor="#abcdef";
        alinks[i].style.border="1px solid #fff";
    }

    // jquery
    var alinks=$("a");
    for(var i=0;i<alinks.length;i++){
        alinks.eq(i).css({
            "color":"pink",
            "background-color":"#abcdef",
            "border":"1px solid #fff"
        });
    }
.text() 改变元素内的文本
以下是原生js写法与jquery写法对比
    // 原生js
    var alinks=$("a");
    for(var i=0;i<alinks.length;i++){
        alinks[i].innerHTML="喵喵"+i;
    }

    // jquery
    var alinks=$("a");
    for(var i=0;i<alinks.length;i++){
        alinks.eq(i).text("喵喵"+i);
    }
.html() 改变元素内的内容,可以带HTML标签
以下是原生js写法与jquery写法对比
    // 原生js
    var alinks=$("a");
    for(var i=0;i<alinks.length;i++){
        alinks[i].innerHTML="喵喵"+i;
    }

    // jquery
    var alinks=$("a");
    for(var i=0;i<alinks.length;i++){
        alinks.eq(i).text("喵喵"+i);
        alinks.eq(i).html("<strong>"+"喵喵"+i+"</strong>");
    }
小案例:
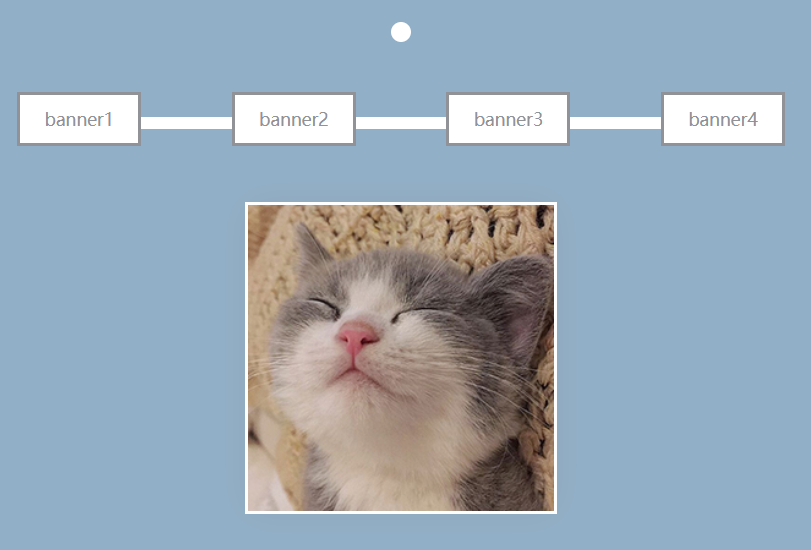
index.html
<!DOCTYPE html>
<html lang="en">
<head>
    <meta charset="UTF-8">
    <meta name="viewport" content="width=device-width, initial-scale=1.0">
    <title>jquery</title>
    <link rel="stylesheet" href="style.css">
    <script src="jquery.js"></script>
    <script src="script.js"></script>
</head>
<body>
    <span class="top"></span>
    <nav>
        <a href="#">banner1</a>
        <a href="#">banner2</a>
        <a href="#">banner3</a>
        <a href="#">banner4</a>
    </nav>
    <div class="img-box">
        <img src="image/cat1.jpg">
        <img src="image/cat2.jpg">
        <img src="image/cat3.jpg">
        <img src="image/cat4.jpg">
    </div>
</body>
</html>
style.css
* { margin: 0; padding: 0; border: none; }
html, body { overflow: hidden;/*解决因为盒模型溢出造成的垂直方向滚动条*/ height: 100%; background-color: rgb(145, 176, 200); }
span.top { display: block; width: 16px; height: 16px; margin: 30px auto 40px; border-radius: 50%; background-color: #fff; }
nav { position: relative; display: flex;/*弹性盒模型*/ width: 40%; margin: 0 auto 45px; justify-content: space-between;/*实现元素在容器内左右均匀分布*/ }
nav:before { position: absolute; top: 20px; display: block; width: 100%; height: 10px; content: '';/*激活伪元素*/ background-color: #fff; }
nav > a { font-size: 14px; position: relative;    /*默认是static定位,会被绝对定位覆盖 修改为相对定位之后,会覆盖前面的元素*/ padding: 10px 20px; text-decoration: none; color: rgb(144, 146, 152); border: 2px solid rgb(144, 146, 152); background-color: #fff; }
.img-box { position: relative; overflow: hidden; width: 250px; height: 250px; margin: 0 auto; background-color: #fff; box-shadow: 0 0 30px 0 rgba(144, 146, 152, .3); }
.img-box img { position: absolute; top: 0; right: 0; bottom: 0; left: 0; width: 98%; margin: auto;/*以上5句实现绝对定位的居中*/ }
/*# sourceMappingURL=style.css.map */
script.js
$(function(){
    $("a").click(function(){
        $("img").eq($(this).index()) // 获取当前点击的a的index
                .css({"opacity":"1"})
                .siblings()
                .css({"opacity":"0"});
    });
});
效果图