Docker(三):容器管理
一:Docker容器管理命令
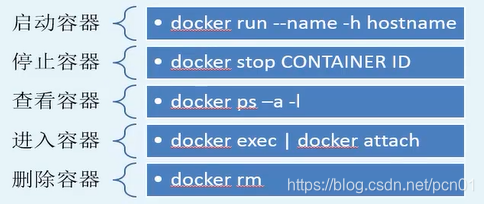
1.1 启动容器
root@testenv120:~/docker# docker run --name ubuntu -it ubuntu:16.04 /bin/bash
root@b7a9ec2d4ea0:/#    # 运行成功后会发现前的出现了该容器的ID号,表明已经进入到容器中了
# --name 给容器取名(将来对容器的管理主要通过ID与name)
# -i 打开容器的标准输入(input),因为要输入后面的命令(以交互式启动容器)
# -t 分配一个伪终端(tty)
# ubuntu:16.04 镜像的名称与版本(如果本地有,使用本地的镜像,如果本地没有从仓库拉取到本地后再启动容器)
root@testenv120:~/docker# docker ps
CONTAINER ID        IMAGE               COMMAND                  CREATED             STATUS              PORTS                                              NAMES
c463da8f1b91        ubuntu:16.04        "/bin/bash"              2 hours ago         Up 2 hours                                                             ubuntu
启动容器时添加域名解析到hosts文件:
root@testenv120:~/docker# docker run -itd --name ubuntu --add-host abc:172.17.8.2 ubuntu:16.04
7d68569fcc5adaac81b4b88f18f7dcd98f2cca27cc7bbd9126b53c985895f506
root@testenv120:~/docker# docker exec ubuntu cat /etc/hosts
127.0.0.1       localhost
::1     localhost ip6-localhost ip6-loopback
fe00::0 ip6-localnet
ff00::0 ip6-mcastprefix
ff02::1 ip6-allnodes
ff02::2 ip6-allrouters
172.17.8.2      abc				# 刚添加的域名解析记录
172.18.0.3      7d68569fcc5a
1.2 以守护进程方式启动docker
root@testenv120:~/docker# docker run -d --name ubuntu ubuntu:16.04
a5135c0ca130280b84ffe5e61c8e000a1b09d46fff33c503b92b52019014ae6d
以守护进程的方式启动docker后,使用docker ps命令查看正在运行的docker,发现docker居然停止了,为何?
重要的说明:Docker容器后台运行,就必须要有一个前台进程
这个是docker的机制问题,如你的web容器,我们以nginx为例,正常情况下,我们配置启动服务只需要启动响应的service即可,service nginx start但是这样做,nginx为后台进程模式运行,就导致docker前台没有运行的应用。这样的容器后台启动后,会立即自杀,因为他们觉得他没事何做了。
因此,最佳的解决方案是:将你要运行的程序以前台进程的形式运行。
1.3 容器中进程查看
# docker run --name ubuntu -itd ubuntu:16.04 /bin/bash
# docker top ubuntu		# ubuntu为容器名,也可以接容器ID
UID                 PID                 PPID                C                   STIME               TTY                 TIME                CMD
root                8863                8837                0                   14:07               pts/0               00:00:00            /bin/bash
1.4 查看容器详细信息
# docker inspect ubuntu
[
    {
        "Id": "84d604a1fc6b1d009b38b525daa7d94e71a784ffee85387e0b14816c54246890",
        "Created": "2019-11-08T06:07:06.354584388Z",
        "Path": "/bin/bash",
        "Args": [],
        "State": {
            "Status": "running",
            "Running": true,
            "Paused": false,
            "Restarting": false,
            "OOMKilled": false,
            "Dead": false,
            "Pid": 8863,
            "ExitCode": 0,
            "Error": "",
            "StartedAt": "2019-11-08T06:07:07.081852517Z",
            "FinishedAt": "0001-01-01T00:00:00Z"
        },
.............................
1.5 查看容器日志
首先我们需要一个正在运行的容器
root@testenv120:~/docker# docker run -d ubuntu:16.04 /bin/sh -c "while true;do echo hello zzyy;sleep 2;done"
0dc5d9066f2b218d85f0ada58146f60ff6e3002ebad3df27cff18d7f77f500cf
root@testenv120:~/docker# docker ps
CONTAINER ID        IMAGE               COMMAND                  CREATED             STATUS              PORTS                                              NAMES
0dc5d9066f2b        ubuntu:16.04        "/bin/sh -c 'while t…"   3 seconds ago       Up 1 second                                                            gracious_aryabhata
容器日志(简单):
root@testenv120:~/docker# docker logs 0dc5d9066f2b
hello zzyy
hello zzyy
hello zzyy
hello zzyy
hello zzyy
hello zzyy
hello zzyy
带时间格式的日志:
root@testenv120:~/docker# docker logs -t 0dc5d9066f2b
2019-11-08T06:13:12.549309623Z hello zzyy
2019-11-08T06:13:14.550551493Z hello zzyy
查看自定义行的格式日志:
root@testenv120:~/docker# docker logs -t --tail 3 0dc5d9066f2b
2019-11-08T06:15:16.666829945Z hello zzyy
2019-11-08T06:15:18.668903762Z hello zzyy
2019-11-08T06:15:20.670744948Z hello zzyy
监控日志:
docker logs -t -f 0dc5d9066f2b # 相当于tail -f
1.6 进入容器
# docker ps
CONTAINER ID        IMAGE               COMMAND                  CREATED             STATUS              PORTS                                              NAMES
84d604a1fc6b        ubuntu:16.04        "/bin/bash"              21 minutes ago      Up 21 minutes                                                          ubuntu
# docker attach ubuntu
root@84d604a1fc6b:/# exit	# 前面出现容器ID说明已经进来了。exit退出容器
exit
此时再执行docker ps命令,发现名为ubuntu的容器已经停止运行了
# docker ps -a
CONTAINER ID        IMAGE               COMMAND                  CREATED             STATUS                            PORTS                                              NAMES
84d604a1fc6b        ubuntu:16.04        "/bin/bash"              29 minutes ago      Exited (130) About a minute ago                                                      ubuntu
所以生产场景我们不使用docker attach命令进到容器中去,而使用nsenter
ns就是namespace的缩写
# docker inspect -f "{{ .State.Pid }}" ubuntu  # 获取容器中第一个进程的PID;如果是0说明该容器没有运行;如果容器停止了请先启动容器
9975
获取到上面的PID后,再使用nsenter命令进入到容器中
# nsenter -t 9975 -m -u -i -n -p
mesg: ttyname failed: No such file or directory
root@84d604a1fc6b:/# exit	# 退出容器,容器不停止运行
logout
使用nsenter命令进入容器时发现上面有一行报错,解决方法是在 nsenter 指令后面指定一个执行的shell,/bin/bash
# nsenter --target 9975 --mount --uts --ipc --net --pid /bin/bash
root@84d604a1fc6b:/#
查看容器中的进程:
root@84d604a1fc6b:/# ps -ef
UID        PID  PPID  C STIME TTY          TIME CMD
root         1     0  0 06:38 pts/0    00:00:00 /bin/bash 	# 容器执行的第一个进程
root        16     0  0 06:43 ?        00:00:00 /bin/bash	# 此bash是上面使用nsenter命令进入进创建的bash;所以此时退出容器,上面的bash进程还在运行,而不会停止容器的运行
root        21    16  0 06:44 ?        00:00:00 ps -ef
使用nsenter命令编写进入docker的脚本:
# cat docker_in.sh
#!/bin/bash
# Use nsenter to access docker
docker_in() {
        NAME_ID=$1
        PID=$(docker inspect -f "{{ .State.Pid }}" ${NAME_ID})
        nsenter -t $PID -m -u -i -n -p /bin/bash
}
docker_in $1
脚本使用方法:
# /data/docker_in.sh ubuntu # 传入容器名即可
1.7 不进入docker,在docker中执行命令
# docker exec ubuntu whoami
root
也可以通过exec命令的方式进入到dcoker:
# docker exec -it ubuntu /bin/bash	# 注意:尽量使用nsenter命令进入docker,此命令老版本会有bug
root@84d604a1fc6b:/#
1.8 拷贝文件
拷贝本地文件到容器:
# docker cp text.txt ubuntu:/tmp
# docker exec ubuntu ls -l /tmp
total 4
-rw-r--r-- 1 root root 5 Nov  8 06:54 text.txt
拷贝容器中的文件到本地:
# docker cp ubuntu:/tmp/text.txt ./test-docer.txt
# ll
total 12
-rw-r--r-- 1 root root    5 11月  8 14:54 test-docer.txt
-rw-r--r-- 1 root root    5 11月  8 14:54 text.txt
1.9 停止容器
# docker stop ubuntu		# 相当于按电脑主机上的关机键
# docker kill ubuntu		# 相当于长按电脑主机上的关机键
1.10 删除容器
# docker rm mydocker							# 删除未运行的容器
# docker rm -f mydocker							# 强制删除容器,不管是在运行还是没在运行
# docker run --rm centos /bin/echo 'hehe'		# 执行完一个命令后再删除容器
# docker rmi -f busybox							# 删除镜像
二:数据持久化

2.1 数据卷的概念
我们知道,当我们把一个运行中的容器关闭后,容器里面的数据就没有了(如果你做了docker commit操作,数据会保留到新的镜像里面)。所以我们就需要用容器数据卷来把数据进行持久化存储。
还有一种情况,就是希望容器之间有可能共享数据,这时也需要容器数据卷。
一句话,数据卷就是用来解决数据持久化和数据共享的
卷就是目录或文件,存在一个或者多个容器中,由docker宿主机挂载到容器上,但不属于联合文件系统,因此能绕过联合文件系统提供一些用于持久存储或共享数据的特性。
卷的设计目的就是数据的持久化,完全独立于容器的生存周期,因此docker不会在容器删除时删除其挂载的数据卷。
特点:
1)数据卷可在容器之间共享或重用数据;
2)卷的更改可以直接生效;
3)数据卷中的更改不会包含在镜像的更新中;
4) 数据卷的生命周期一直持续到没有容器使用它为止。
5)数据卷可以完成容器到宿主机、宿主机到容器之间的数据共享。
在容器内添加数据卷有两种方法,一个是直接用命令添加,一个是用dockerfile添加
2.2 容器内添加数据卷
# docker run -it -v /宿主机绝对路径目录:/容器内目录 镜像名
# 宿主机目录不用提前建立
docker run -it -v /data/ubuntu:/data ubuntu:16.04
查看数据卷是否挂载成功:
# docker inspect b9bab3b55781|grep Mounts -A 9
        "Mounts": [
            {
                "Type": "bind",
                "Source": "/data/ubuntu",
                "Destination": "/data",
                "Mode": "",
                "RW": true,
                "Propagation": "rprivate"
            }
        ],
挂载成功后,容器与宿主机之间即可共享数据。无论是在宿主机的/data/ubuntu目录还是在容器中的/data目录,都可以对文件增删改查且互相同步。容器停止退出后,/data/ubuntu中的数据也会被保留。
带权限的数据卷:
# docker run -it -v /宿主机绝对路径目录:/容器内目录:ro 镜像名 (ro:是read only)
# docker run -it -v /myDataVolume:/dataVolumeContainer:ro centos
# docker inspect c13998a78deb
 "Mounts": [
            {
                "Type": "bind",
                "Source": "/myDataVolume",
                "Destination": "/dataVolumeContainer",
                "Mode": "ro",
                "RW": false,  ##不能写,只能读
                "Propagation": "rprivate"
有时候可能会出现docker挂载的宿主机目录,容器访问出现cannot open directory:permission denied。
解决办法:在挂载目录后面多加一个–privileged=true参数即可。
docker run -it -v /myDataVolume:/dataVolumeContainer -privileged=true ubuntu
2.3 dockerfile方式添加数据卷
dockerfile中使用volume指令来给镜像添加一个或多个数据卷
语法:VOLUME ["/dataVolumeContainer",'/data/VolumeContainer2','/dataVolumeContainer3']
说明:出于可移植性和分享的考虑,在命令行使用 -v主机目录:容器目录 这种方法不能直接在dockerfile中实现。因为宿主机目录是依赖于特定宿主机的,并不能保证在所有的宿主机上都存在这样的特定目录。
1:创建Dockerfile文件
root@unode01:~/docker/ubuntu# cat Dockerfile
FROM ubuntu:16.04
VOLUME ["/dataVolumeContainer1","/dataVolumeContainer2"]
CMD echo "finished,--------success1"
CMD /bin/bash
2:build生成镜像
root@unode01:~/docker/ubuntu# docker build -t ginvip/ubuntu .
3:启动容器
docker run -it ginvip/ubuntu
root@e73383bfe0d6:/# ls
bin  boot  dataVolumeContainer1  dataVolumeContainer2
ls后看到容器内有dataVolumeContainer1和dataVolumeContainer2两个目录
4:查看容器内的卷目录地址对应宿主机目录地址
docker inspect e73383bfe0d6
"Mounts": [
            {
                "Type": "volume",
                "Name": "f4ec7871dba6ff24c478881ff528b1466c147b5c13d3a4200d6634dfedc6f721",
                "Source": "/var/lib/docker/volumes/f4ec7871dba6ff24c478881ff528b1466c147b5c13d3a4200d6634dfedc6f721/_data",
                "Destination": "/dataVolumeContainer2",
                "Driver": "local",
                "Mode": "",
                "RW": true,
                "Propagation": ""
            },
            {
                "Type": "volume",
                "Name": "966f523192287cb6f470fde51bfa09044cc1b8cb2d221531ca9a3b724a5a56e2",
                "Source": "/var/lib/docker/volumes/966f523192287cb6f470fde51bfa09044cc1b8cb2d221531ca9a3b724a5a56e2/_data",
                "Destination": "/dataVolumeContainer1",
                "Driver": "local",
                "Mode": "",
                "RW": true,
                "Propagation": ""
            }
        ],
2.4 数据卷容器
可以让一个容器访问另一个容器卷,无论容器是否运行(让数据在多个容器间共享)
命名的容器挂载数据卷,其他容器通过挂载这个父容器实现数据共享,挂载数据卷的容器,称之为数据卷容器。
1:先启动一个父容器dc01,并在dataVolumeContainer2中新增内容
我们通过前面新建的镜像ginvip/ubuntu为模板,生成的容器是挂载着/dataVolumeContainer1和/dataVolumeContainer2两个数据卷。
docker run -it --name dc01 ginvip/ubuntu
接着在/dataVolumeContainer1目录下创建一个文件
root@0c71df1fa054:/dataVolumeContainer1# touch dc01_add.txt
2:再以镜像ginvip/ubuntu为模板启动两个容器,dc02, dc03
root@unode01:~/docker# docker run -it --name dc02 --volumes-from dc01 ginvip/ubuntu
root@9bfbf5b35ef7:/# cd dataVolumeContainer1
root@9bfbf5b35ef7:/dataVolumeContainer1# touch dc02_add.txt
root@unode01:/etc/docker# docker run -it --name dc03 --volumes-from dc01 ginvip/ubuntu
root@f76c267d5451:/# cd dataVolumeContainer1/
root@f76c267d5451:/dataVolumeContainer1# touch dc03_add.txt
此时在三个容器中分别查看/dataVolumeContainer1目录,可以看到在三个容器中分别创建的文件
root@f76c267d5451:/dataVolumeContainer1# ll
total 8
drwxr-xr-x 2 root root 4096 Nov 11 02:23 ./
drwxr-xr-x 1 root root 4096 Nov 11 02:23 ../
-rw-r--r-- 1 root root    0 Nov 11 02:19 dc01_add.txt
-rw-r--r-- 1 root root    0 Nov 11 02:21 dc02_add.txt
-rw-r--r-- 1 root root    0 Nov 11 02:23 dc03_add.txt
结论:容器之间配置信息的传递。数据卷的生命周期一直持续到没有容器使用它为止。
