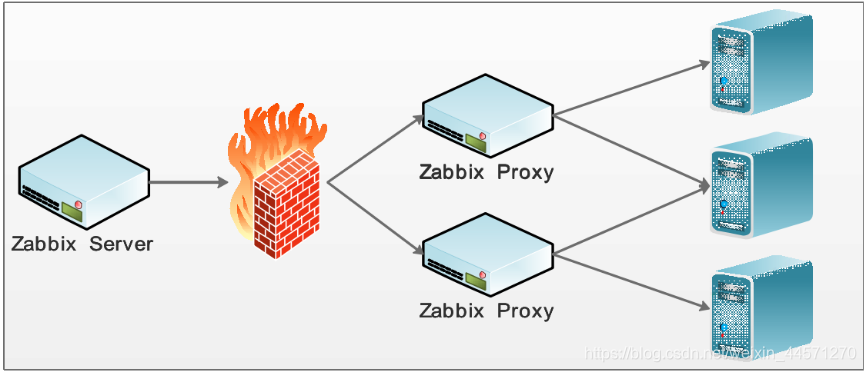
Zabbix是一个分布式监控系统,它可以以一个中心点、多个分节点的模式运行,使用Proxy能大大的降低Zabbix Server的压力,Zabbix Proxy可以运行在独立的服务器上,Proxy代替Server去监控客户端,将客户端数据收集回来,存储本地数据库同时会将数据定时上报给Zabbix Server,如图13-36所示:
 环境介绍:
环境介绍:
我的zabbix_agent、zabbix_server都在一台云服务器上,接下来把zabbix_proxy也部署在这上面。因此我不需要再去从其他服务器scpzabbix源码包
接下来我们开始部署:
创建proxy用的数据库:
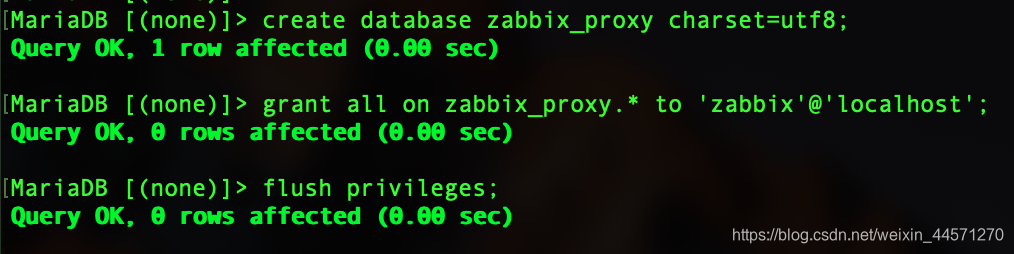
注意:上面图片中的grant授权里面不要写localhost,写网卡地址39.97.176.117,不然连接不上数据库。因为zabbix_proxy是以zabbix这个用户的身份运行的,所以需要指定zabbix为39.97.176.117
上面这样做了会有一个问题出现,访问zabbix的web页面,出现如下报错:
Access denied for user 'zabbix'@'localhost' (using password: YES)
因为把zabbix用户由localhost改为了远程登录,所以我们需要在zabbix网站配置中去改连接数据库的信息:
vim /usr/local/nginx/html/zabbix/conf/zabbix.conf.php
 把画红线的这个参数由127.0.0.1改成39.97.176.117
因为已经创建过这个用户所以不用再identified by指定密码。
数据库创建好了,接下来"格式化"数据库:
mysql -uroot -p123456 -S /data/mysql/3307/mysql3307.sock zabbix_proxy </usr/local/zabbix-3.2.6/database/mysql/schema.sql
mysql -uroot -p123456 -S /data/mysql/3307/mysql3307.sock zabbix_proxy </usr/local/zabbix-3.2.6/database/mysql/images.sql
好!到了这个地方数据库就准备好了。
接下来部署zabbix_proxy:
cd /usr/local/zabbix-3.2.6/
./configure --prefix=/usr/local/zabbix_proxy/ --enable-proxy --with-mysql --with-net-snmp --with-libcurl
make -j4&&make install
写一个名为zabbix_proxy的启动脚本:
vim /etc/init.d/zabbix_proxy
写入以下内容:
#!/bin/sh

# Zabbix
# Copyright (C) 2001-2017 Zabbix SIA
#
# This program is free software; you can redistribute it and/or modify
# it under the terms of the GNU General Public License as published by
# the Free Software Foundation; either version 2 of the License, or
# (at your option) any later version.
#
# This program is distributed in the hope that it will be useful,
# but WITHOUT ANY WARRANTY; without even the implied warranty of
# MERCHANTABILITY or FITNESS FOR A PARTICULAR PURPOSE. See the
# GNU General Public License for more details.
#
# You should have received a copy of the GNU General Public License
# along with this program; if not, write to the Free Software
# Foundation, Inc., 51 Franklin Street, Fifth Floor, Boston, MA  02110-1301, USA.

# Start/Stop the Zabbix agent daemon.
# Place a startup script in /sbin/init.d, and link to it from /sbin/rc[023].d

SERVICE="Zabbix proxy"
DAEMON=/usr/local/sbin/zabbix_proxy
PIDFILE=/tmp/zabbix_proxy.pid

case $1 in
  'start')
    if [ -x ${DAEMON} ]
    then
      $DAEMON
      # Error checking here would be good...
      echo "${SERVICE} started."
    else
      echo "Can't find file ${DAEMON}."
      echo "${SERVICE} NOT started."
    fi
  ;;
  'stop')
    if [ -s ${PIDFILE} ]
    then
      if kill `cat ${PIDFILE}` >/dev/null 2>&1
      then
        echo "${SERVICE} terminated."
        rm -f ${PIDFILE}
      fi
    fi
  ;;
  'restart')
    $0 stop
    sleep 10
    $0 start
  ;;
  *)
    echo "Usage: $0 start|stop|restart"
    ;;
esac
chmod o+x /etc/init.d/zabbix_proxy
 proxy启动成功。
备份proxy的配置文件,并重新编辑一个配置文件写入以下内容:
Server=39.97.176.117 //因为proxy要向server汇报数据,所以在这里需要指向server
Hostname=39.97.176.117 //proxy服务器所在的地址
LogFile=/tmp/zabbix_proxy.log
DBName=zabbix_proxy
DBUser=zabbix
DBPassword=zabbix
Timeout=4
LogSlowQueries=3000
DataSenderFrequency=30
HistoryCacheSize=128M
CacheSize=128M
再重启zabbix_proxy即可.
Zabbix客户端安装Agent,同时配置Agent端Server设置为Proxy服务器的IP地址或者主机名,zabbix_agentd.conf配置文件代码:
LogFile=/tmp/zabbix_agentd.log
Server=192.168.149.130  //这里填proxy服务器的ip地址
ServerActive=192.168.149.130 //这和上面一样
Hostname = 192.168.149.131 //本机客户端ip地址
web界面配置:

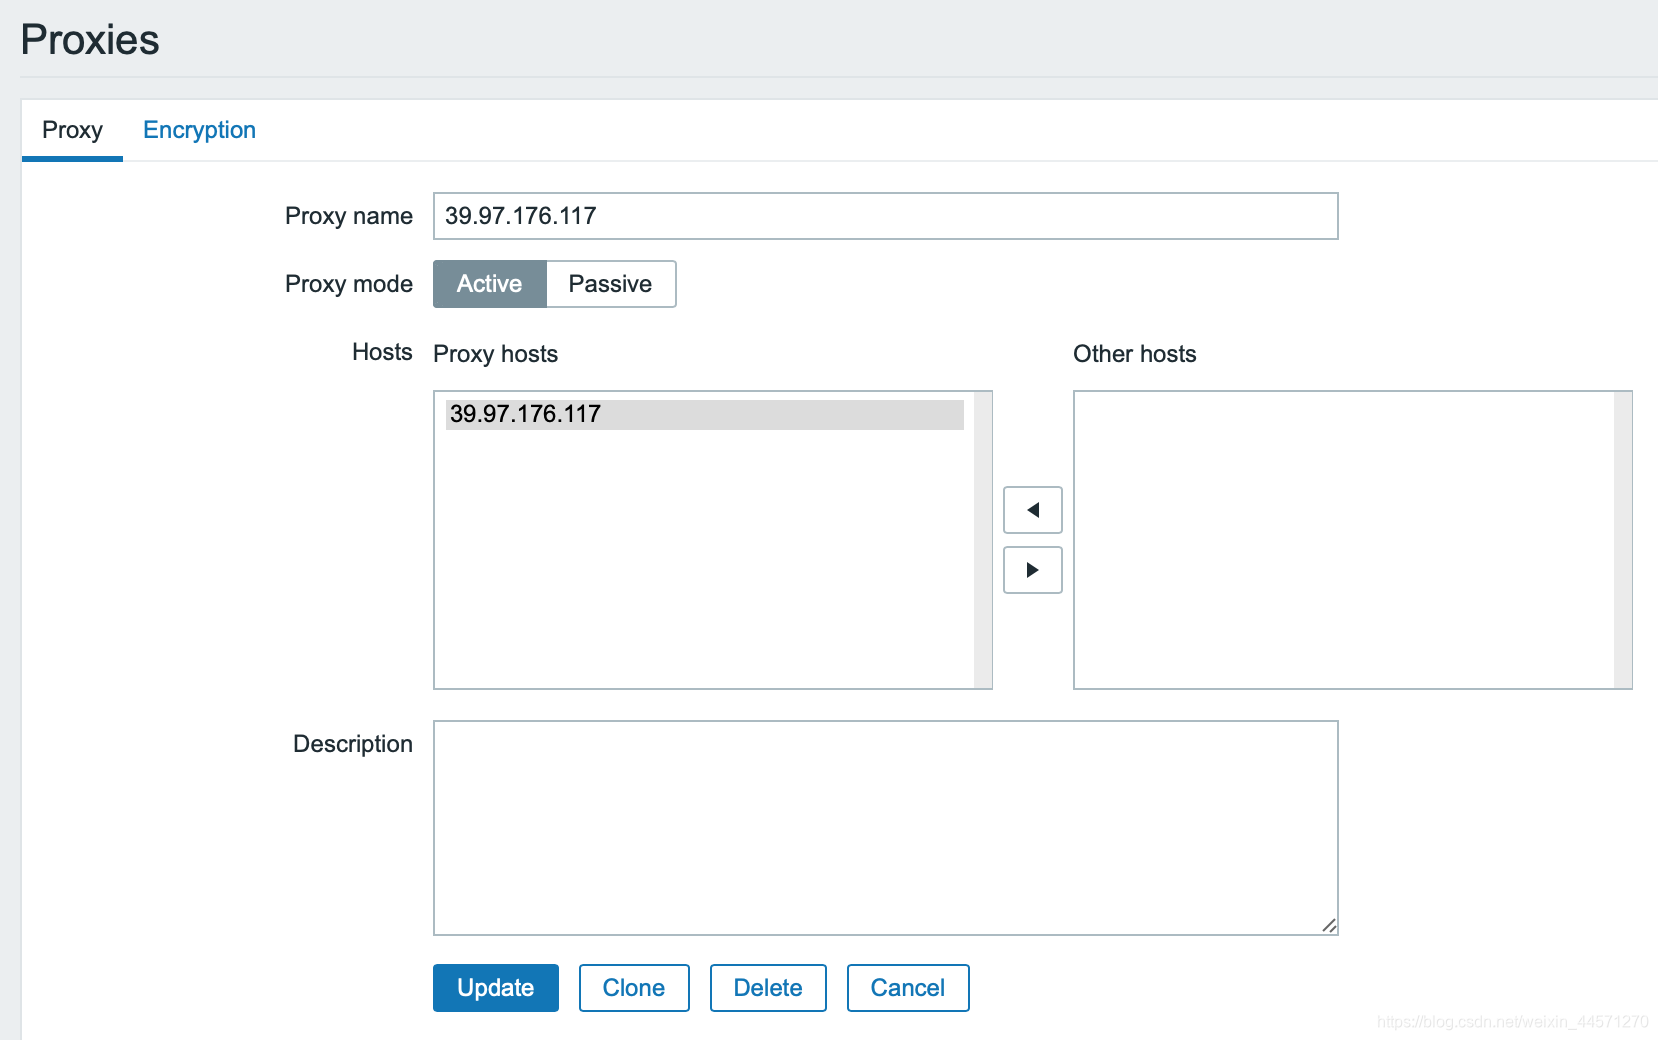 添加即可。
添加即可。
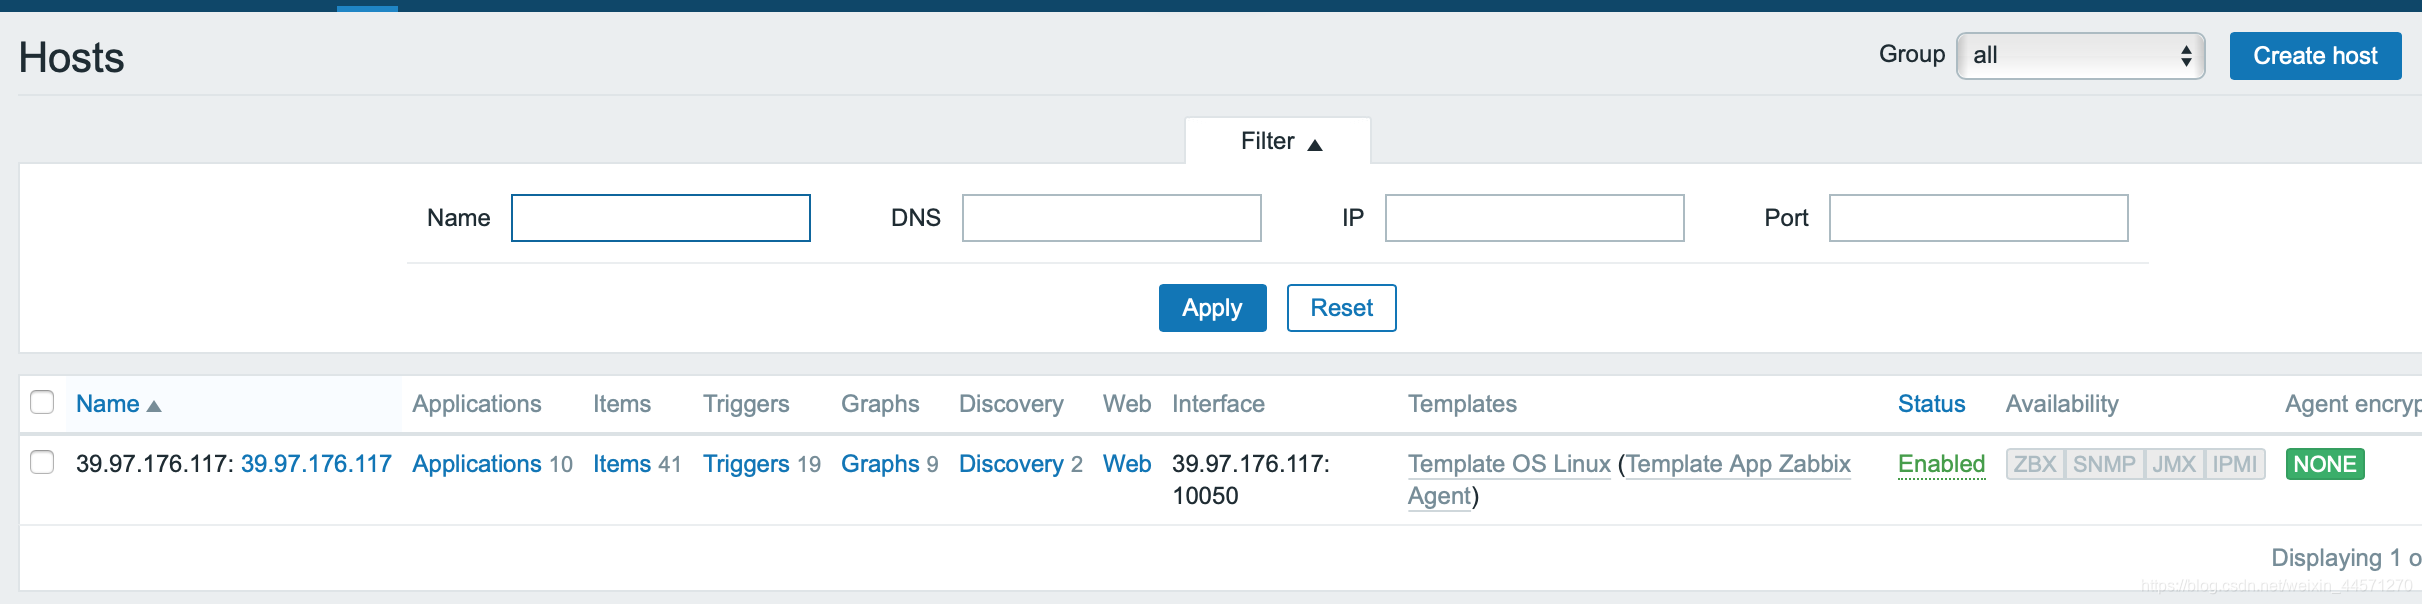 因为我条件有限,全部都在一台云主机上做的,它找10050还是去找的zabbix_server。应该在不同服务器上配置zabbix_proxy,zabbix_proxy默认监听10050端口。所以我这里最后zabbix_proxy相当于是废的
只是想说明一下做的流程!!

如果是在不同的服务器上配置的,这里的Host会有很多个,可以选择proxy的ip,查看其监控状态。实现分布式监控!!!
