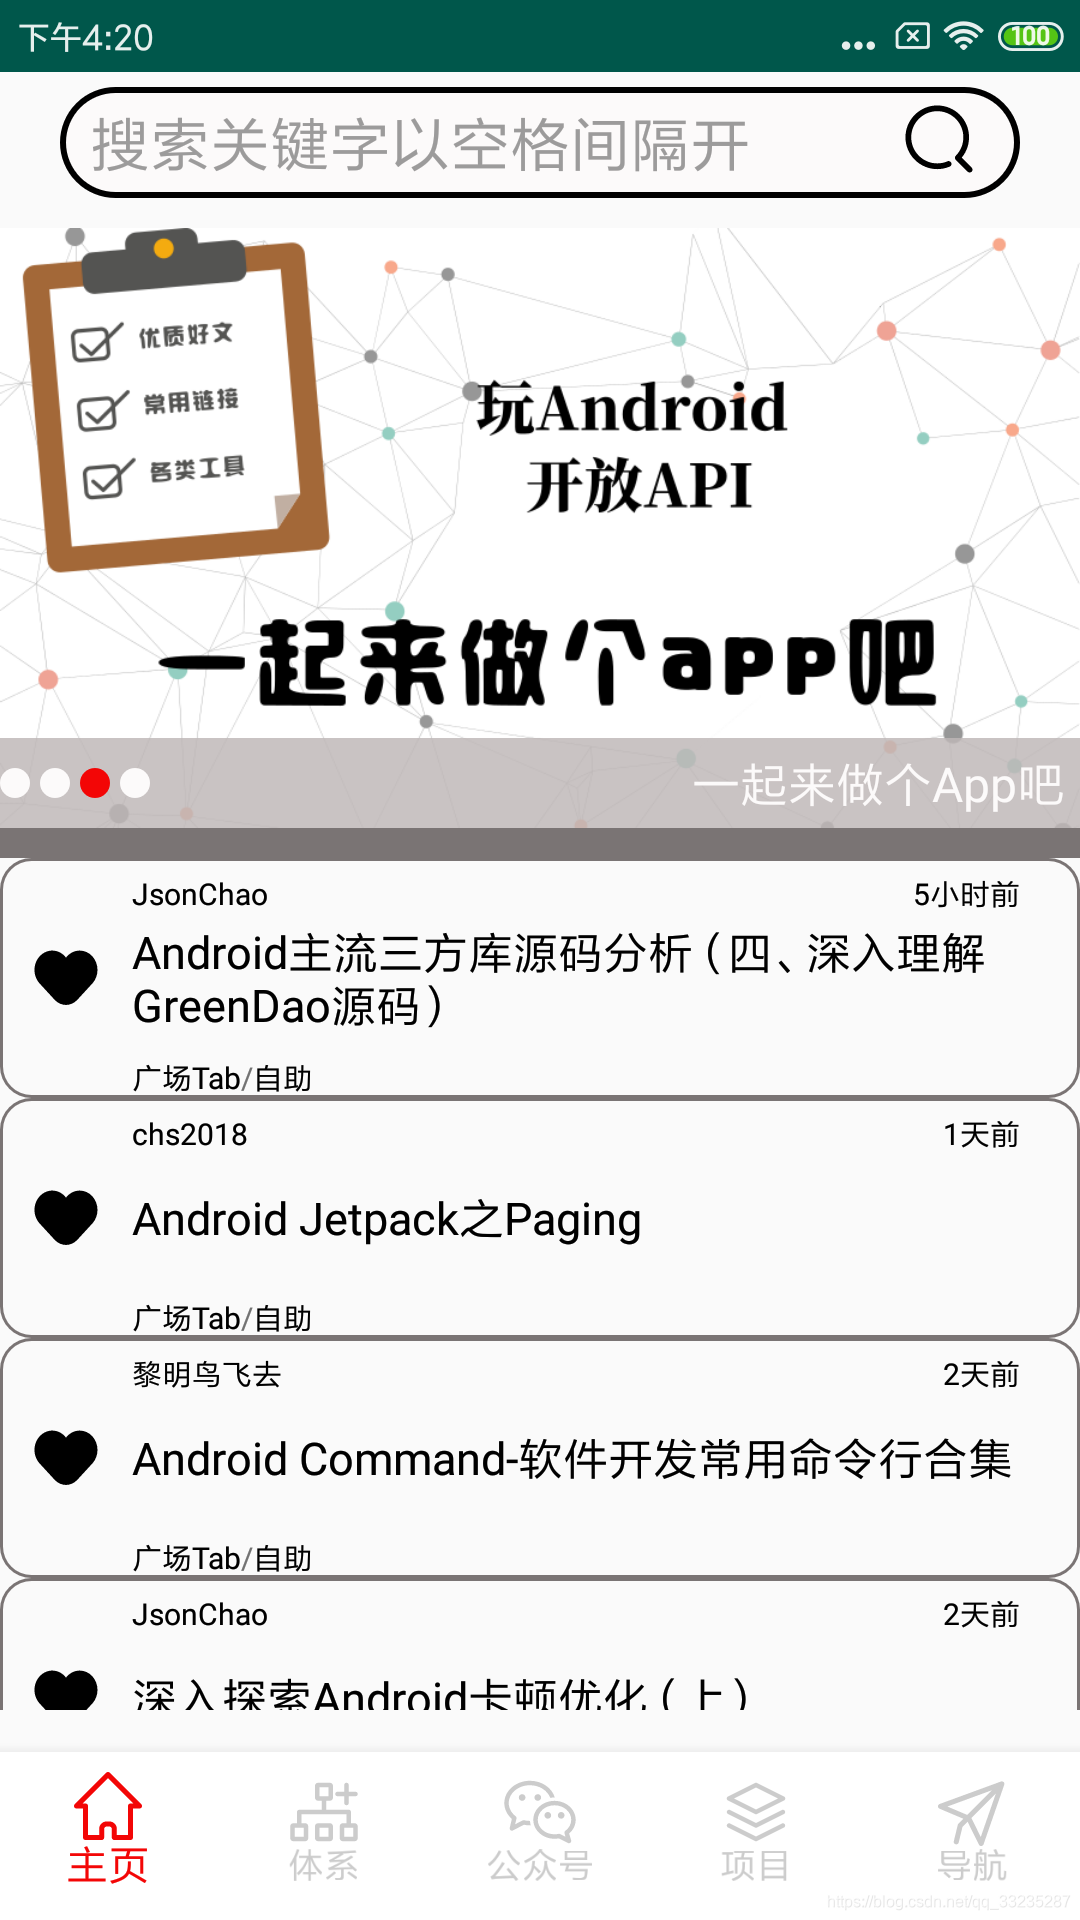
在首页的轮播完成之后,要完成文章列表界面的实现,实现的方式通过ListView实现。
1、实现第一页的文章加载
通过服务器返回的数据显示,一共是293页的数据,不可能1页就加载完成,先加载第一页的数据。
//获取文章列表  article/list/0/json
    @GET("article/list/{id}/json")
    public Call<AListBean> getArticleList(
           @Path("id") int id
    );
在获取文章列表的数据后,设置适配器,适配器代码:
public class ArticleListAdapter extends BaseAdapter {
    private Context context;
    private List<AListBean.DataBean.DatasBean> list;

    public ArticleListAdapter(Context context, List<AListBean.DataBean.DatasBean> list) {
        this.context = context;
        this.list = list;
    }

    @Override
    public int getCount() {
        return list.size();
    }

    @Override
    public Object getItem(int position) {
        return null;
    }

    @Override
    public long getItemId(int position) {
        return position;
    }

    @Override
    public View getView(int position, View convertView, ViewGroup parent) {
        ViewHolder viewHolder = null;
        if(convertView == null){
            convertView = View.inflate(context, R.layout.item_article_list,null);
            viewHolder = new ViewHolder();
            viewHolder.iv_collection = convertView.findViewById(R.id.iv_collection);
            viewHolder.tv_article_title = convertView.findViewById(R.id.tv_article_title);
            viewHolder.tv_shares = convertView.findViewById(R.id.tv_shares);
            viewHolder.tv_super_chaptername = convertView.findViewById(R.id.tv_super_chaptername);
            viewHolder.tv_chaptername = convertView.findViewById(R.id.tv_chaptername);
            viewHolder.tv_time = convertView.findViewById(R.id.tv_time);
            convertView.setTag(viewHolder);
        }else{
            viewHolder = (ViewHolder) convertView.getTag();
        }
        //设置每个Item的高度
        ViewGroup.LayoutParams params = new AbsListView.LayoutParams(ViewGroup.LayoutParams.MATCH_PARENT,
                200);
        convertView.setLayoutParams(params);

        AListBean.DataBean.DatasBean datasBean = list.get(position);
        viewHolder.tv_article_title.setText(datasBean.getTitle());
        viewHolder.tv_shares.setText(datasBean.getShareUser());
        viewHolder.tv_super_chaptername.setText(datasBean.getSuperChapterName());
        viewHolder.tv_chaptername.setText(datasBean.getChapterName());
        viewHolder.tv_time.setText(datasBean.getNiceDate());
        return convertView;
    }

    class ViewHolder{
        TextView tv_article_title,tv_shares,tv_super_chaptername,tv_chaptername,tv_time;
        ImageView iv_collection;
    }
}
设置每个Item宽高都一致:要记住在item布局中设置是无效的,必须通过适配器设置LayoutParams参数,设置每个Item的宽度和高度。
 //设置每个Item的高度
        ViewGroup.LayoutParams params = new AbsListView.LayoutParams(ViewGroup.LayoutParams.MATCH_PARENT,
                200);
        convertView.setLayoutParams(params);
ListView是继承自AbsListView,实现这个布局的适配器。
还有一个问题:在主页上方有一个搜索框,打开APP后会直接定位到搜索框,然后弹出键盘,通过以下方法解决。
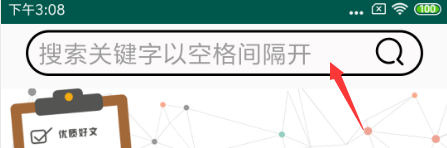
在外层布局RelativeLayout和EditText做处理:
<RelativeLayout xmlns:android="http://schemas.android.com/apk/res/android"
    android:layout_width="match_parent"
    android:layout_height="match_parent"
    android:focusable="true"
    android:focusableInTouchMode="true">
 android:imeOptions="actionSearch"
 android:singleLine="true"></EditText>
加上这4段代码,就解决这个问题了。
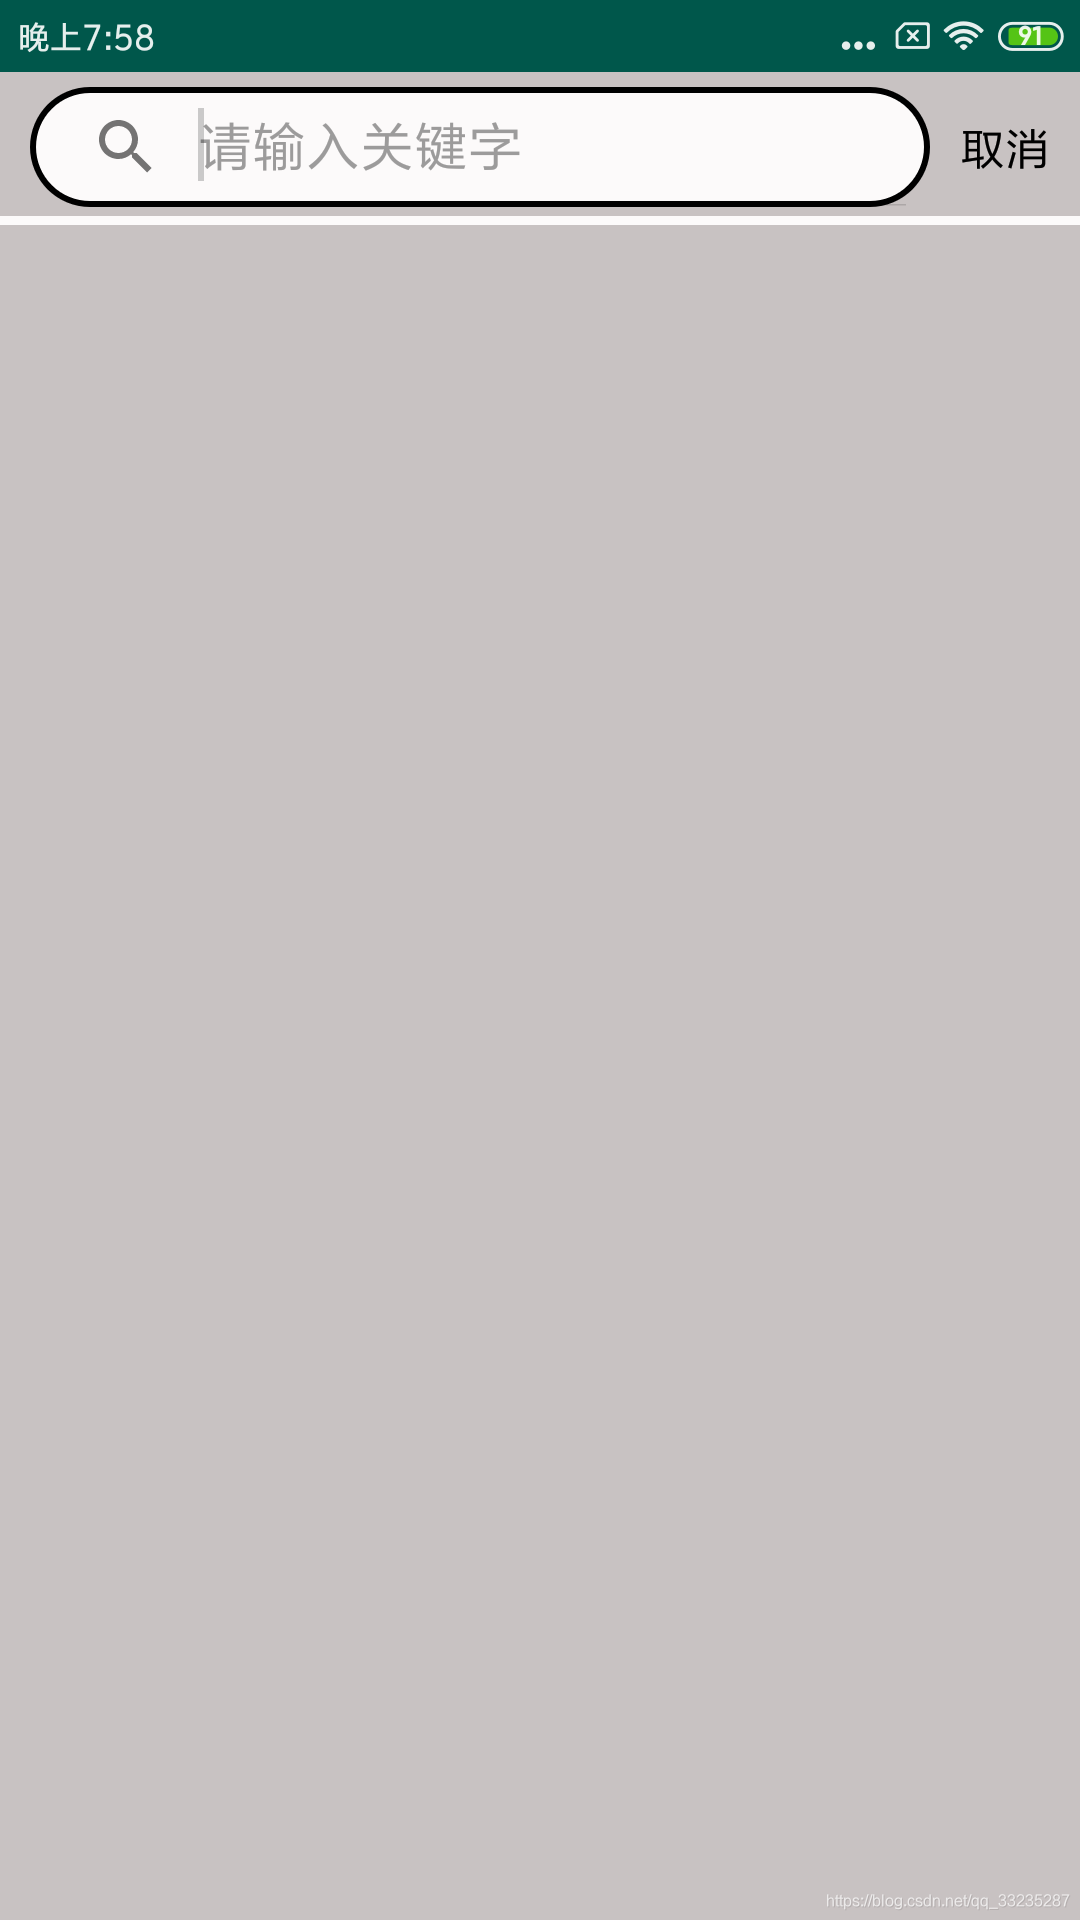
2、搜索界面
搜索框通过SearchView实现:
<androidx.appcompat.widget.SearchView
        android:id="@+id/sv_search"
        android:layout_width="300dp"
        android:layout_height="40dp"
        app:queryHint="请输入关键字"
        app:iconifiedByDefault="false"
        android:layout_marginLeft="10dp"
        android:layout_marginTop="5dp"
        android:background="@drawable/search_bg"
        ></androidx.appcompat.widget.SearchView>
(1)queryHint:类似于EditText的hint属性
(2)iconifiedByDefault:如果不加这个属性,那么queryHint设置的hint将不会显示在搜索框,只有点击的时候才会显示,将这个属性设置为false,然后hint值就能显示在框中。
3、FlexBoxLayout实现搜索热点流式布局
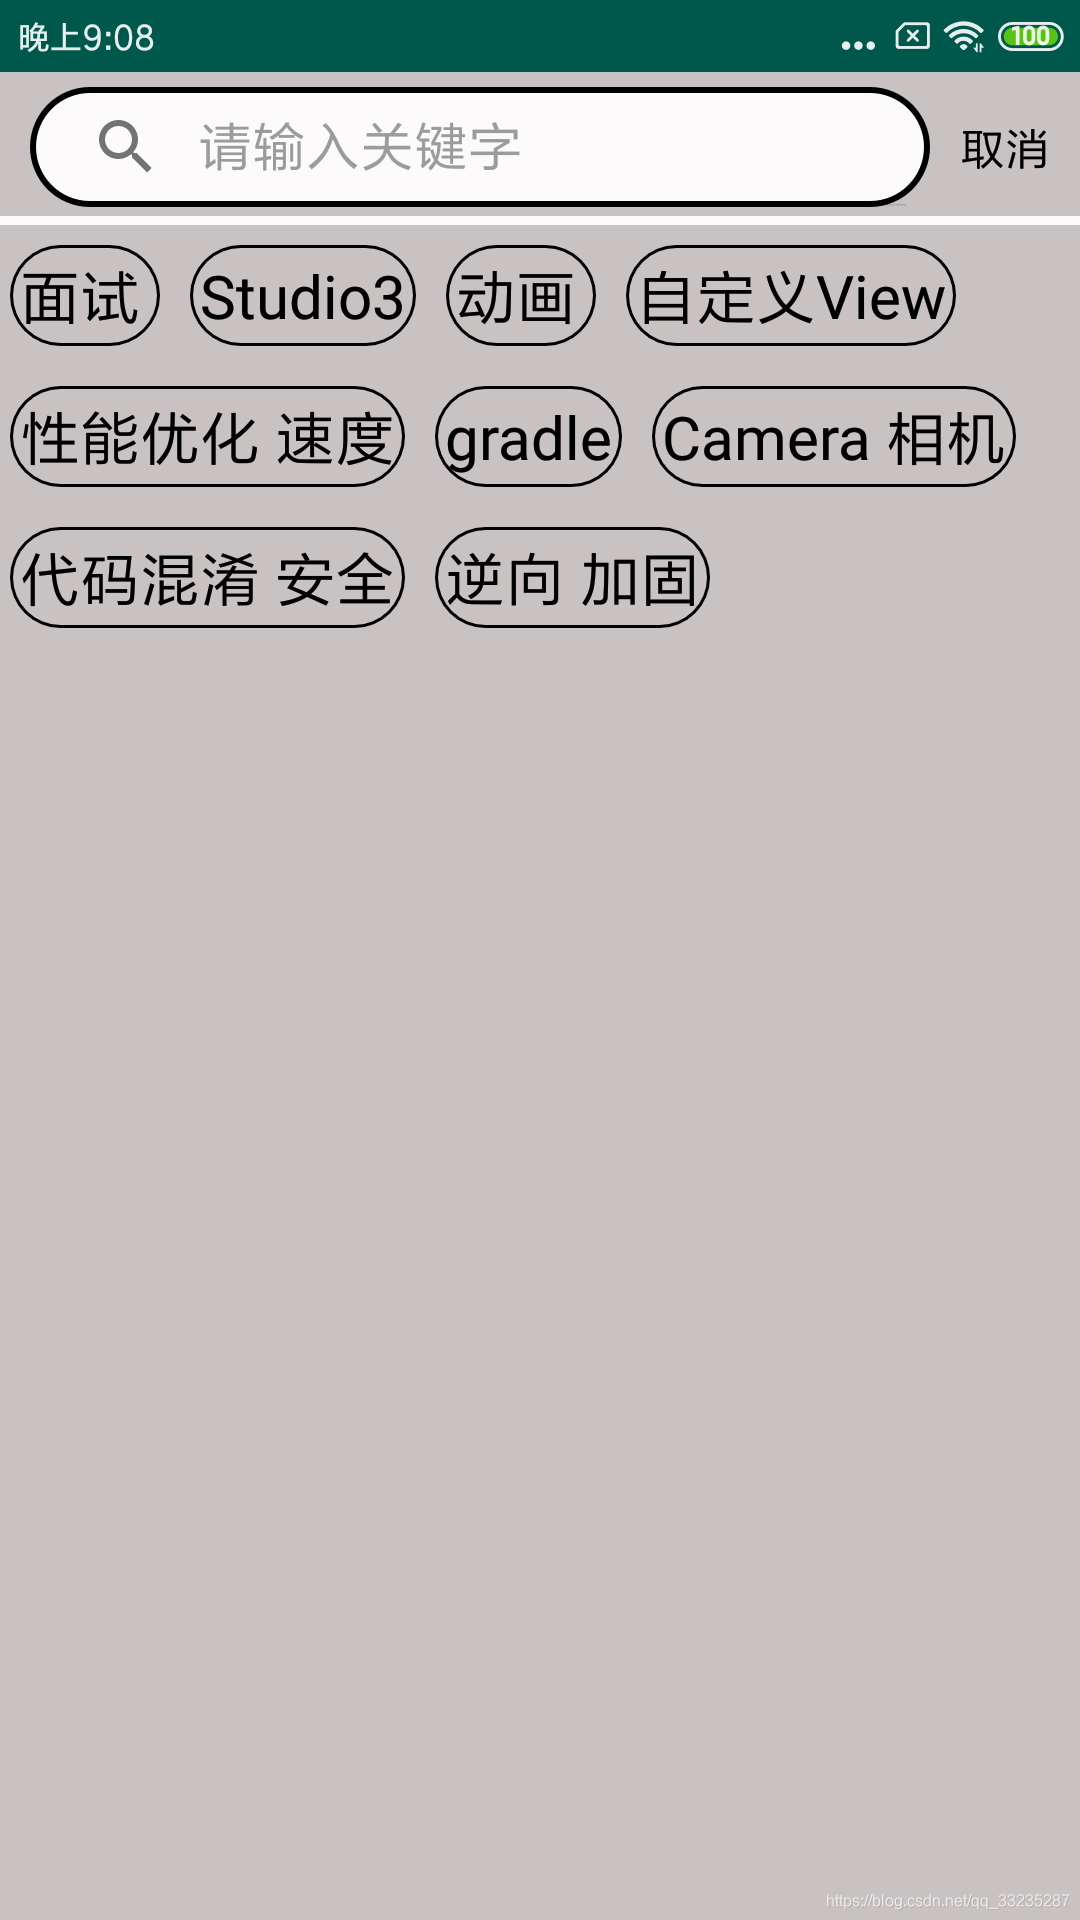
不知道你们在玩APP的时候,有没有碰到过下面的这种布局形式:
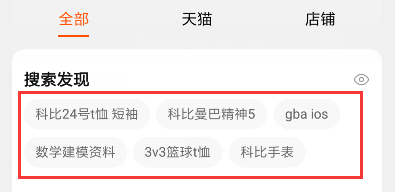
在购物类的APP,或者视频类的APP中,经常会见到这样的布局,那么接下来我们去实现搜索热点的流式布局,采用的布局方式就是FlexBoxLayout。

(1)首先导入依赖
implementation 'com.google.android:flexbox:1.0.0'
(2)属性值介绍
<com.google.android.flexbox.FlexboxLayout
     android:id="@+id/fl_search"
     android:layout_width="match_parent"
     android:layout_height="wrap_content"
     android:layout_below="@id/view_search"
     app:flexDirection="row"
     app:flexWrap="wrap"
     app:justifyContent="flex_start"
     app:alignItems="stretch"
     ></com.google.android.flexbox.FlexboxLayout>
----flexDirection:item的排列方向
row指的是x轴方向,从左到右;row_reverse跟row相反,从右向左;column指的是y轴方向,从上打下;column_reverse相反,从下到上。
----flexWrap :是否换行
nowrap 指的是不换行;rap换行
----justifyContent:对齐方式
flex_start:左对齐;center:居中;flex_end:右对齐;space_between:两端对齐
----alignItems:y轴的对齐方式(与item有关)
stretch:默认值,如果item没有设置高度,则默认为match_parent;
因为不知道item的数量,所以只能通过动态加载的方式去将TextView添加到FlexboxLayout中。
@Override
    public void showHot(List<HotSearchBean.DataBean> data) {
        for (int i = 0; i < data.size(); i++) {
            String name = data.get(i).getName();
            TextView textView = new TextView(this);
            FlexboxLayout.LayoutParams params = new FlexboxLayout.LayoutParams(ViewGroup.LayoutParams.WRAP_CONTENT,
                    ViewGroup.LayoutParams.WRAP_CONTENT);
            params.rightMargin = 20;
            params.bottomMargin = 20;
            params.leftMargin = 10;
            params.topMargin = 20;
            textView.setLayoutParams(params);
            textView.setText(name);
            textView.setTextColor(getResources().getColor(R.color.colorBlack));
            textView.setTextSize(20);
            textView.setPadding(10,10,10,10);
            textView.setBackgroundResource(R.drawable.hot);
            fl_search.addView(textView);
        }
    }
看下效果:
当然自己喜欢什么背景,什么颜色,自己设置。
