大家都知道,Java一共提供了4种线程池,通过Executors类的4个静态方法可以获得实例:
- Executors.newSingleThreadExecutor()
- Executors.newFixedThreadPool()
- Executors.newCachedThreadPool()
- Executors.newScheduledThreadPool
本文将通过源码分析和实例演示的方式来引导大家去了解这4种方式的差异,让大家彻底掌握。
4种线程池源代码
	public static ExecutorService newSingleThreadExecutor() {
        return new FinalizableDelegatedExecutorService
            (new ThreadPoolExecutor(1, 1,
                                    0L, TimeUnit.MILLISECONDS,
                                    new LinkedBlockingQueue<Runnable>()));
    }
    public static ExecutorService newFixedThreadPool(int nThreads) {
        return new ThreadPoolExecutor(nThreads, nThreads,
                                      0L, TimeUnit.MILLISECONDS,
                                      new LinkedBlockingQueue<Runnable>());
    }
	public static ExecutorService newCachedThreadPool() {
        return new ThreadPoolExecutor(0, Integer.MAX_VALUE,
                                      60L, TimeUnit.SECONDS,
                                      new SynchronousQueue<Runnable>());
    }
	public static ScheduledExecutorService newScheduledThreadPool(int corePoolSize) {
        return new ScheduledThreadPoolExecutor(corePoolSize);
    }

//从ScheduledThreadPoolExecutor的定义可以知道它也是ThreadPoolExecutor的子类
	public class ScheduledThreadPoolExecutor
        extends ThreadPoolExecutor
        implements ScheduledExecutorService {
 	......
 	}

	public ScheduledThreadPoolExecutor(int corePoolSize) {
		//super即父类的构造函数,也就是ThreadPoolExecutor()
        super(corePoolSize, Integer.MAX_VALUE, 0, NANOSECONDS,
              new DelayedWorkQueue());
    }
很容易看出,这4个静态方法实质上都是调用了ThreadPoolExecutor构造函数,差异只是在于参数不一样,newScheduledThreadPool稍微特殊一点,留在最后单独讲。
ScheduledThreadPoolExecutor构造函数
    public ThreadPoolExecutor(int corePoolSize,
                              int maximumPoolSize,
                              long keepAliveTime,
                              TimeUnit unit,
                              BlockingQueue<Runnable> workQueue) {
        this(corePoolSize, maximumPoolSize, keepAliveTime, unit, workQueue,
             Executors.defaultThreadFactory(), defaultHandler);
    }
这里主要几个参数解释如下:
- corePoolSize:the number of threads to keep in the pool, even if they are idle, unless {@code allowCoreThreadTimeOut} is set,中文意思:线程池中线程的数量,它们可以一直空闲,除非allowCoreThreadTimeOut被设置了。可以认为它是线程池里线程最小数量。
- maximumPoolSize:the maximum number of threads to allow in the pool,中文意思:线程池中允许的最大线程数量。
- keepAliveTime:when the number of threads is greater than the core, this is the maximum time that excess idle threads will wait for new tasks before terminating.中文意思:当实际线程数量大于corePoolSize时,如果空闲线程一直没有得到新任务,等待keepAliveTime时间后它将会被终止。
- unit:keepAliveTime的时间单位,可以是毫秒、秒等。
- workQueue:the queue to use for holding tasks before they are executed,中文意思:任务执行之前保存的队列。
继续看接下来的调用,删去各种逻辑判断后,核心代码如下:
    public ThreadPoolExecutor(int corePoolSize,
                              int maximumPoolSize,
                              long keepAliveTime,
                              TimeUnit unit,
                              BlockingQueue<Runnable> workQueue,
                              ThreadFactory threadFactory,
                              RejectedExecutionHandler handler) {
        .....
        this.corePoolSize = corePoolSize;
        this.maximumPoolSize = maximumPoolSize;
        this.workQueue = workQueue;
        this.keepAliveTime = unit.toNanos(keepAliveTime);
        this.threadFactory = threadFactory;
        this.handler = handler;
    }
很明显的,这个方法只是简单的赋值,用参数初始化了一下ThreadPoolExecutor对象的各个成员。也就是说,通过这4个静态方法获得线程池实例对象时,只是简单的赋值初始化了一下,没有其他任何复杂操作。
接下来,我们分别就这4种线程池进行代码示例和源码分析。
单线程池singleThreadPool示例和源码分析
首先,我们来完成一个newSingleThreadExecutor示例:
public class TestSingle {
    public static void main(String[] args) {
        ExecutorService singleExecutorService = Executors.newSingleThreadExecutor();

        System.out.println("singleExecutorService start...");
        //加入第一个任务
        singleExecutorService.execute(
                ()->{
                    try{
                        Thread.sleep(3000);
                    }catch (Exception e){
                        e.printStackTrace();
                    }
                    System.out.println("hello world...");
                }
        );

        //加入第二个任务
        singleExecutorService.execute(
                ()->{
                    try{
                        Thread.sleep(1000);
                    }catch (Exception e){
                        e.printStackTrace();
                    }
                    System.out.println("good morning...");
                }
        );
    }
}
执行结果:
singleExecutorService start...
hello world...
good morning...
在这个示例里面,我们为单线程池加入了2个任务,第1个任务延迟3秒打印hello world;第2个任务延迟1秒打印good morning。执行结果很简单:
- 先直接打印出singleExecutorService start…
- 3秒后打印出hello world…
- 1秒后打印出good morning…
这说明单线程池可以加入很多个任务,但是只有1个线程来执行,所有加入的任务会串行的依次执行;即时所有的任务执行完,该线程池中的线程也不会被释放,继续等待下一个任务的到来。
我们来看一下execute()方法的源码:
public void execute(Runnable command) {
		.....
        //如果当前工作线程数量少于指定的corePoolSize,那么创建一个新线程直接执行新任务
        if (workerCountOf(c) < corePoolSize) {
            if (addWorker(command, true))
                return;
            c = ctl.get();
        }

        //否则的话,将新任务加入到等待队列
        if (isRunning(c) && workQueue.offer(command)) {
            int recheck = ctl.get();
            if (! isRunning(recheck) && remove(command))
                reject(command);
            else if (workerCountOf(recheck) == 0)
                addWorker(null, false);		//特定情况下工作线程可能为0,需要启动新线程去执行等待队列里面第一个任务
        }
        else if (!addWorker(command, false))   //如果加入队列失败,试图启动一个新线程去执行;否则拒绝任务
            reject(command);
    }
需要说明的是:execute()这个方法并不是单线程池单独使用的方法,其他线程池也会使用到,因此它具有通有性。
这个方法有3个步骤:
- 线程池使用初期,当前工作线程数量少于指定的corePoolSize时,会创建一个新线程直接执行新任务
- 工作线程数量达到corePoolSize之后,会将新任务加入workQueue,即等待的工作队列。这里面有一种特殊的情况,执行到这一步的时候,要防止线程刚好死亡,所以再次判断工作线程的数量,如果它等于0,则启动一个新线程执行任务;此时新任务已经加入队列,新线程会从队列头取第一个任务进行执行。
- 如果新任务加入等待队列失败,则尝试启动一个新线程去执行它试试,努力完成任务;如果还是失败,则新任务被放弃。这是一种很极端的情况,前提是队列出问题或满了。
这里面有个很关键的方法:addWorker(),这个方法非常重要,是4个线程池都要使用的公共方法。这个方法我们后面再讲,先直接说明一下它的作用:Checks if a new worker can be added with respect to current pool state and the given bound (either core or maximum). If so,the worker count is adjusted accordingly, and, if possible, a new worker is created and started, running firstTask as its first task。大概意思是:根据当前线程池状态和给定的边界(即最大数量),判断一下新工作线程是否可以添加;如果可以,那么工作线程数需要加1;另外,如果可能,新工作线程会被创建并启动,取等待队列头的第一个任务开始执行。
基本上,4个线程池都是这个套路,只不过队列的类型不一样,single和fixed线程池使用LinkedBlockingQueue,这是一个简单的有序阻塞队列;cached线程使用SynchronousQueue,这是一个单点队列;scheduled线程池使用DelayedWorkQueue,这是一个等待队列。
我们再回过头来看看单线程池的初始化代码:
				(new ThreadPoolExecutor(1, 1,
                                    0L, TimeUnit.MILLISECONDS,
                                    new LinkedBlockingQueue<Runnable>()));
这里面透露出几个信息:
- 线程池中最少数量1个,最大数量1个。也就是说线程池里面永远就1个线程。
- 允许线程空闲。
- 等待队列是LinkedBlockingQueue,所有任务按进入队列的先后顺序排队。
结合execute()代码,我们可以分析单线程池执行流程如下:
- 第一个任务加入时,创建一个新线程执行任务;
- 之后加入的每一个任务,都会被放入阻塞队列,按进入的先后顺序排队,等待被线程依次执行。
可能有人会说:这哪是线程池?只有一个线程的话,为何不直接用Thread呢?我觉得它有以下2个特点:
1. 强调串行执行,严格按顺序来执行。
2. 如果执行的任务都是很短小而频繁的任务,线程创建和释放的开销就会很明显,使用线程池能够避免这部分开销。
固定大小线程池fixedThreadPool示例和分析
还是先给出一个示例:
public class TestFixed {

    public static void main(String[] args) {
        ExecutorService fixedExecutorService = Executors.newFixedThreadPool(2);

        System.out.println("singleExecutorService start...");
        //加入第一个任务
        fixedExecutorService.execute(
                ()->{
                    try{
                        Thread.sleep(5000);
                    }catch (Exception e){
                        e.printStackTrace();
                    }
                    System.out.println("first task...");
                }
        );

        //加入第二个任务
        fixedExecutorService.execute(
                ()->{
                    try{
                        Thread.sleep(3000);
                    }catch (Exception e){
                        e.printStackTrace();
                    }
                    System.out.println("second task...");
                }
        );

        //加入第三个任务
        fixedExecutorService.execute(
                ()->{
                    try{
                        Thread.sleep(1000);
                    }catch (Exception e){
                        e.printStackTrace();
                    }
                    System.out.println("third task...");
                }
        );
    }
}
执行结果:
fixedExecutorService start...
second task...
third task...
first task...
这里我创建了一个固定大小为2的线程池,创建了3个任务加入。完整的执行流程应该如下:
- 第1个任务直接开始执行,进入5秒休眠;
- 第2个任务直接开始执行,进入3秒休眠;
- 第3个任务进入阻塞队列等待;
- 第2个任务休眠3秒完成,打印输出,任务结束;
- 第3个任务从队列移出,开始执行,进入1秒休眠;
- 第3个任务休眠1秒完成,打印输出,任务结束;
- 第1个任务完成5秒休眠,打印输出,任务结束。
与单线程池相比较,固定大小线程池几乎没有什么区别,除了线程数量可以指定外,其他一模一样。
可缓存线程池cachedThreadPool示例和源码分析
cachedThreadPool示例如下:
public class TestCached {
    public static void main(String[] args) {
        ExecutorService cachedExecutorService = Executors.newCachedThreadPool();

        System.out.println("cachedExecutorService start...");
        //加入第一个任务
        cachedExecutorService.execute(
                ()->{
                    try{
                        Thread.sleep(3000);
                    }catch (Exception e){
                        e.printStackTrace();
                    }
                    System.out.println("first task...");
                }
        );

        //加入第二个任务
        cachedExecutorService.execute(
                ()->{
                    try{
                        Thread.sleep(2000);
                    }catch (Exception e){
                        e.printStackTrace();
                    }
                    System.out.println("second task...");
                }
        );

        //加入第三个任务
        cachedExecutorService.execute(
                ()->{
                    try{
                        Thread.sleep(1000);
                    }catch (Exception e){
                        e.printStackTrace();
                    }
                    System.out.println("third task...");
                }
        );
    }
}
执行结果:
cachedExecutorService start...
third task...
second task...
first task...
这个例子和fixedThreadPool差不多,但是我们看结果,第3个线程先完成,接着是第2个,最后是第1个。这说明了,3个任务都是一起开始执行的,先完成的先退出!
我们再看一次它的构造函数:
					new ThreadPoolExecutor(0, Integer.MAX_VALUE,
                                      60L, TimeUnit.SECONDS,
                                      new SynchronousQueue<Runnable>());
- 最小线程数为0;
- 最大线程数为整型最大正数,这个数字很大,基本不可能开这么多线程,可以直接理解为没有上限;
- 线程如果空闲,60秒后会关闭线程;
- 使用SynchronousQueue,只能存入一个任务。
再结合上面讲过的execute()方法,我们可以看出,execute()方法的第三个步骤会频繁执行,为线程池创建无数个新线程。摘选代码如下:
		if (isRunning(c) && workQueue.offer(command)) {		//因为队列只能保持1个元素,所以经常为false
            int recheck = ctl.get();
            if (! isRunning(recheck) && remove(command))
                reject(command);
            else if (workerCountOf(recheck) == 0)
                addWorker(null, false);
        }
        else if (!addWorker(command, false))				//所以这个分支会被执行,创建新线程去执行任务
            reject(command);
这里else if 分支的addWorker(command, false)会频繁执行,新线程不断被创建。空闲下来的线程,如果没有收到新任务,则在60秒后被结束。
因此,缓存线程池非常适合时间短的大量任务。
这个线程池的使用一定要多加小心,如果使用不当,不停加入大量执行长或被可能被阻塞的任务,那很可能会造成资源耗尽OOM。
延迟执行线程池scheduleThreadPool示例和源码分析
这个线程池是最特殊的一个,官方专门定义了一个ScheduledThreadPoolExecutor类去扩展它的功能:
	public class ScheduledThreadPoolExecutor
        extends ThreadPoolExecutor
        implements ScheduledExecutorService {
        .....
        }
它继承了ThreadPoolExecutor,上面我们讲到的所有的方法都是定义在这个类里面;它额外实现了ScheduledExecutorService接口,这个接口定义了4个方法:
	//任务延迟执行
    public ScheduledFuture<?> schedule(Runnable command,
                                       long delay, TimeUnit unit);

    //延迟执行1个方法,Callable:the function to execute
    public <V> ScheduledFuture<V> schedule(Callable<V> callable,
                                           long delay, TimeUnit unit);

    //延迟执行一个周期性重复任务
    public ScheduledFuture<?> scheduleAtFixedRate(Runnable command,
                                                  long initialDelay,
                                                  long period,
                                                  TimeUnit unit);
    //任务结束一段时间后,延时执行一个新任务
    public ScheduledFuture<?> scheduleWithFixedDelay(Runnable command,
                                                     long initialDelay,
                                                     long delay,
                                                     TimeUnit unit);
scheduleThreadPool添加任务时,不再使用execute()方法,而是通过上面这4个方法来完成。
我们常用的是第一个schedule()方法和scheduleAtFixedRate()方法。
schedule()方法
先看看schedule()方法,只保留主要代码如下:
    public ScheduledFuture<?> schedule(Runnable command,
                                       long delay,
                                       TimeUnit unit) {
        ......
        delayedExecute(t);
        ......
    }

    private void delayedExecute(RunnableScheduledFuture<?> task) {
        if (isShutdown())
            reject(task);
        else {
            super.getQueue().add(task);
            if (isShutdown() &&
                !canRunInCurrentRunState(task.isPeriodic()) &&
                remove(task))
                task.cancel(false);
            else
                ensurePrestart();
        }
    }
schedule三个参数,望文生义也能知道各自的含义:
- command:任务内容
- delay:延时多长时间才执行
- unit:delay的单位,常用毫秒或秒
我们可以看到,schedule调用了delayedExecute方法,这个方法里最核心的是2条语句:
super.getQueue().add(task);

ensurePrestart();
第一条语句很明显,将新任务加入延时队列。也就是无论当前线程池是什么情况,先把任务加入等待队列再说。
第二条语句我们看看源码:
    void ensurePrestart() {
        int wc = workerCountOf(ctl.get());
        if (wc < corePoolSize)
            addWorker(null, true);
        else if (wc == 0)
            addWorker(null, false);
    }
这个方法明显在线程池刚开始使用时会执行,当前工作线程数量小于corePoolSize或者为0时,会创建一个新线程,去延时队列取合适的任务执行。addWorker()方法刚才讲过作用,稍后再看源代码。
我们来看一个示例:
public class TestSchedule {
    public static void main(String[] args) {
        //此时不可再用ExecutorService
        ScheduledExecutorService scheduledExecutorService = Executors.newScheduledThreadPool(2);

        System.out.println("scheduledExecutorService start ...");

        //第一个任务
        scheduledExecutorService.schedule(()-> System.out.println("exec first task ..."),5, TimeUnit.SECONDS );
        System.out.println("scheduled the first task ...");

        //第二个任务
        scheduledExecutorService.schedule(()-> System.out.println("exec second task ..."),2, TimeUnit.SECONDS );
        System.out.println("scheduled the second task ...");

        //第三个任务
        scheduledExecutorService.schedule(()-> System.out.println("exec third task ..."),2, TimeUnit.SECONDS );
        System.out.println("scheduled the third task ...");
    }
}
执行结果
scheduledExecutorService start ...
scheduled the first task ...
scheduled the second task ...
scheduled the third task ...
exec second task ...
exec third task ...
exec first task ...
可以看出:
- 当前main所在主线程没有被阻塞,4条打印语句都直接执行;
- 第1个任务直接被执行,休眠5秒;
- 第2个任务被直接执行,休眠2秒;
- 第2个任务休眠2秒结束,打印语句;
- 第3个任务开始执行,休眠2秒;
- 第3个任务休眠2秒结束,打印语句;
- 第1个任务休眠5秒结束,打印语句。
延迟执行线程池的schedule()方法,通常可以用作定时器,在指定时间后执行预定任务。它和timer的比较网上到处是,在此不再多说。
scheduleAtFixedRate()方法
先给出一个简单示例:
public class TestScheduleAtFixedRate {
    public static void main(String[] args) {
        //此时不可再用ExecutorService
        ScheduledExecutorService scheduledExecutorService = Executors.newScheduledThreadPool(2);

        System.out.println("scheduledExecutorService start ...");

        //第一个任务
        scheduledExecutorService.scheduleAtFixedRate(()-> System.out.println("exec first task ..."),1, 1, TimeUnit.SECONDS );
        System.out.println("scheduled the first task ...");

    }
}
执行结果:
scheduledExecutorService start ...
scheduled the first task ...
exec first task ...
exec first task ...
exec first task ...
exec first task ...
exec first task ...
可以看到,和schedule一样,主线程无阻塞,新任务延时1秒后开始执行,并且是每隔1秒重复执行一次。因此,这个线程池非常适合需要定时重复执行的一些任务,比如定时去扫描数据库某个状态,等等。
当重复任务数超过线程池最大工作线程数量时,问题就复杂了。看下面示例:
public class TestScheduleAtFixedRate {
    public static void main(String[] args) {
        //此时不可再用ExecutorService
        ScheduledExecutorService scheduledExecutorService = Executors.newScheduledThreadPool(2);

        System.out.println("scheduledExecutorService start ...");

        //第一个任务
        scheduledExecutorService.scheduleAtFixedRate(()-> System.out.println("exec first task ..."),5, 1, TimeUnit.SECONDS );
        System.out.println("scheduled the first task ...");

        //第二个任务
        scheduledExecutorService.scheduleAtFixedRate(()-> System.out.println("exec second task ..."),2, 1, TimeUnit.SECONDS );
        System.out.println("scheduled the second task ...");

        //第三个任务
        scheduledExecutorService.scheduleAtFixedRate(()-> System.out.println("exec third task ..."),2, 1, TimeUnit.SECONDS );
        System.out.println("scheduled the third task ...");
    }
}
这个示例很有意思,多次执行的结果并不一样,试了一下:
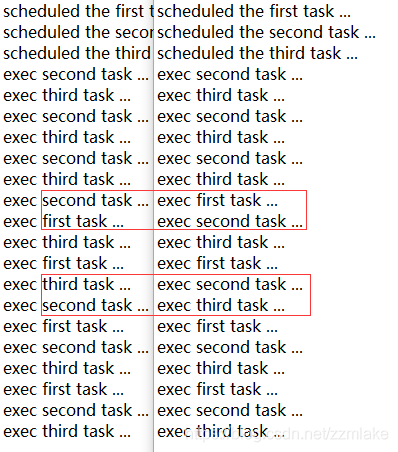
这里,我们在定长2的延时执行线程池里面加入3个重复延时任务,1个延时5秒,另外2个延时2秒,每个任务都是每隔1秒重复执行一次,也就是说,第4秒后,第2、3个任务就几乎同时要执行了;第5秒后,3个任务都是每隔1秒执行一次。周期性的任务执行完成一次后,肯定是要放回队列重新排队的,那么哪个任务会排到队列头,哪个任务就会先执行。这里面涉及的问题又够写一篇博客了,我们下回再来探讨一下延时队列。
还是看看scheduleAtFixedRate()源代码吧:
    public ScheduledFuture<?> scheduleAtFixedRate(Runnable command,
                                                  long initialDelay,
                                                  long period,
                                                  TimeUnit unit) {
        ......
        ScheduledFutureTask<Void> sft =
            new ScheduledFutureTask<Void>(command,
                                          null,
                                          triggerTime(initialDelay, unit),
                                          unit.toNanos(period));
        RunnableScheduledFuture<Void> t = decorateTask(command, sft);
        sft.outerTask = t;
        delayedExecute(t);
        return t;
    }
可以看出,除了ScheduledFutureTask的构造多了一个参数,scheduleAtFixedRate方法和schedule()基本相同。
addWorker()方法
最后,我们再看看看公用方法addWorker(),删去不重要的代码后,结果如下:
private boolean addWorker(Runnable firstTask, boolean core) {
        retry:
        for (;;) {
            ......
            for (;;) {
				......
                if (compareAndIncrementWorkerCount(c))		//关键语句,原子操作将c的值加1
                    break retry;
                c = ctl.get();  // Re-read ctl
                if (runStateOf(c) != rs)
                    continue retry;
                // else CAS failed due to workerCount change; retry inner loop
            }
        }

        try {
            w = new Worker(firstTask);		//关键语句,创建新工作线程,用firstTask初始化
            final Thread t = w.thread;
            if (t != null) {
                final ReentrantLock mainLock = this.mainLock;
                mainLock.lock();
                try {
                    // Recheck while holding lock.
                    // Back out on ThreadFactory failure or if
                    // shut down before lock acquired.
                    int rs = runStateOf(ctl.get());

                    if (rs < SHUTDOWN ||
                        (rs == SHUTDOWN && firstTask == null)) {
                        if (t.isAlive()) // precheck that t is startable
                            throw new IllegalThreadStateException();
                        workers.add(w);                        //一个HashSet,保存所有的工作线程
                        int s = workers.size();
                        if (s > largestPoolSize)
                            largestPoolSize = s;
                        workerAdded = true;
                    }
                } finally {
                    mainLock.unlock();
                }
                if (workerAdded) {
                    t.start();						//新线程开始执行
                    workerStarted = true;
                }
            }
        } finally {
            if (! workerStarted)
                addWorkerFailed(w);
        }
        return workerStarted;
    }
这段代码里最核心的几条语句如下:
- w = new Worker(firstTask); 创建新工作线程,用firstTask初始化
- final Thread t = w.thread;
- workers.add(w); 将新工作线程加入HashSet进行管理
- t.start(); 启动新工作线程
需要注意,firstTask是参数传进来的,我们看看前面代码可以发现,有时它为null,有时不为null。其实,仔细看看源码会发现,直接传递firstTask的情况,都是在线程池启动初期,工作线程没有达到指定数量时,直接创建新的工作线程并执行这个firstTask;其他情况下,新任务都是加入队列,统一进行调度。
总结
写了很长了,不知道兄弟们是不是有耐心看完,这里面其实还有一小半没有讲,就是从队列取任务执行的那一半,特别是和延时队列相关的那部分。下回再开一篇博客专门谈谈。
通过今天的分析,我们可以看出:
- 只有cachedThreadPool是不定长线程池,它的数量不受限制,使用时要小心;其他3个都是定长的。
- 只有cachedThreadPool的等待队列很短,只能有1个元素;其他3种线程池的等待队列都是不限长,可以放入很多任务来排队。
4种线程池使用的场景:
- 单线程池适用强调任务必须串行执行的场景,强调次序。
- 定长线程池比较中庸,适用一般场景。
- 缓存线程池适合需要及时处理、处理时间短、数量大的任务,需要规避线程阻塞。
- 延时线程池可以替代定时器,处理定时任务和定时重复任务。
好了,本文到此结束,下次继续探讨线程池的另外一部分。如有任何疑问,欢迎和我探讨,QQ:1446125822。
