环境搭建
本文主要是针对ubuntu/mac编译环境搭建和调试环境
1.运行环境
选择了虚拟机里安装了ubuntu版本和内核号如图

2. 安装emscripten
按照https://emscripten.org/docs/getting_started/index.html的方式安装最新版emscripten编译器
首先下载
# Get the emsdk repo
git clone https://github.com/emscripten-core/emsdk.git

# Enter that directory
cd emsdk
然后安装em++
# Fetch the latest version of the emsdk (not needed the first time you clone)
git pull

# Download and install the latest SDK tools.
./emsdk install latest

# Make the "latest" SDK "active" for the current user. (writes ~/.emscripten file)
./emsdk activate latest

# Activate PATH and other environment variables in the current terminal source ./emsdk_env.sh
选择安装Python CMake Java
# Install Python
sudo apt-get install python2.7

# Install CMake (optional, only needed for tests and building Binaryen)
sudo apt-get install cmake

# Install Java (optional, only needed for Closure Compiler minification)
sudo apt-get install default-jre
当然你也可以选择安装特定版本的em++这里我就选择最新版拉下面步骤跳过y
./emsdk install 1.38.45
可以指定特定版本的后台
# Get a specific version using the upstream backend.
./emsdk install latest-upstream

# Get a specific version using the fastcomp backend.
./emsdk install 1.38.45-fastcomp
输入查看版本
em++ --version

能显示出emcc版本号 到此编译器安装成功
3.编译安装qt
1. 已经安装qt 5.14以上的小伙伴打开qt目录下的 MaintenanceTool进行修改增加qt的源码
新安装的小伙伴在
https://download.qt.io/official_releases/qt/5.14/5.14.1/
下载对应的版本并运行
chmod +x 程序 ./程序
填上邮箱开始安装拉
钩上4.11的qt和源码开始安装拉
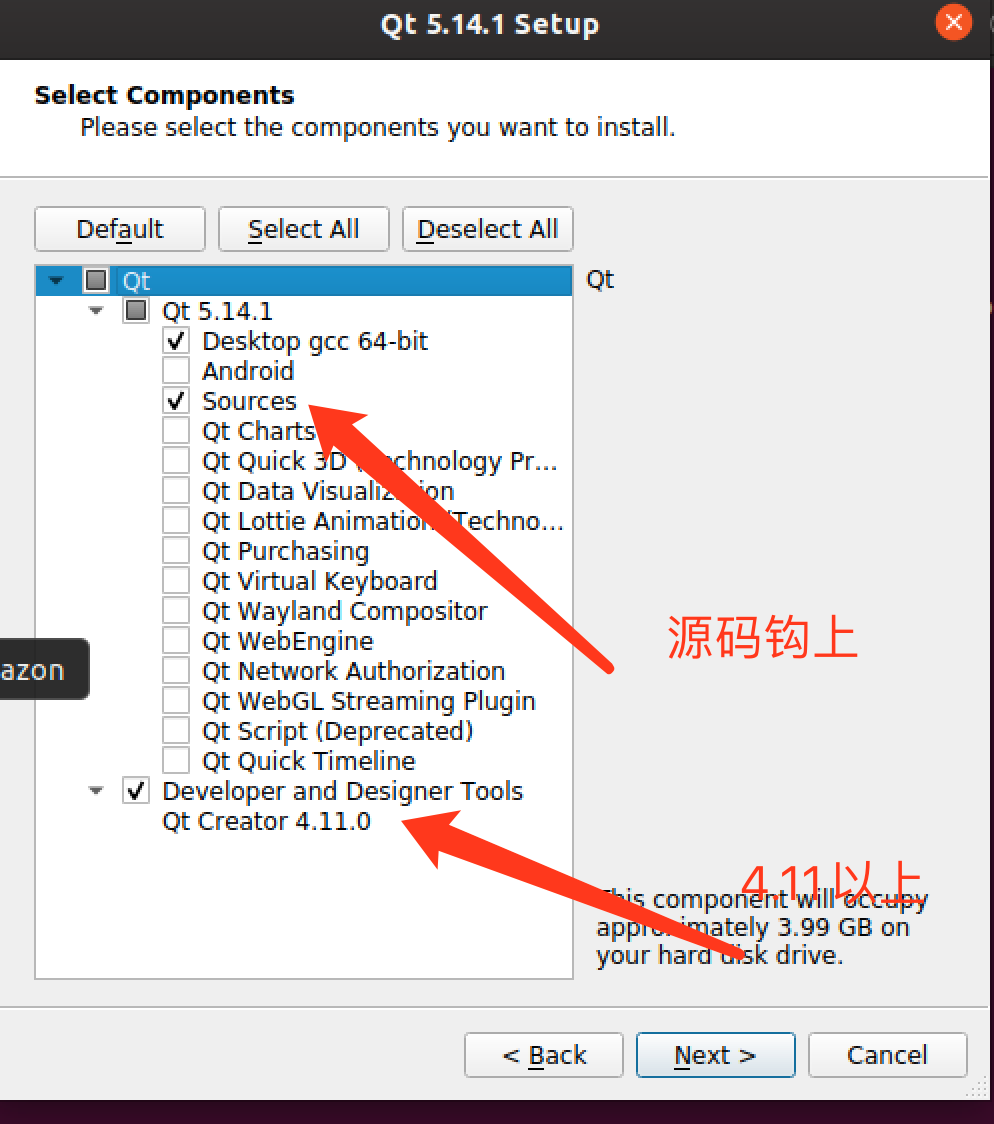
安装完成后关闭。
考虑到编译器版本兼容问题,决定手动编译qt源码生产成webassembly二进制。
不想编译的可以用在线版本安装编译好的webassembly二进制
下载地址在里面可以选择编译好的webassembly版本这里我们跳过这一部直接开始编译
https://download.qt.io/official_releases/online_installers/
4.编译qt库
qt目录下新建一个目录来存放编译的进制库
比如我在qt目录下建了一个wasmbuild的目录方便存文件

cd进入qt源码目录 输入刚才建的目录开始编译确认。
~/Qt5.14.1/5.14.1/Src
./configure -xplatform wasm-emscripten -nomake examples -prefix ../wasmbuild/qtbase
其中要选择开源版并同意协调
开始编译吧 这步比较久,喝个茶再回来
make module-qtbase module-qtdeclarative
这个时候就能用编译的qmake 编译项目拉,配置一下qtcreator会比较方便下一步
比如
$ /path/to/qt-wasm/qtbase/bin/qmake
$ make
配置一下qtcreator会比较方便界面调试哈
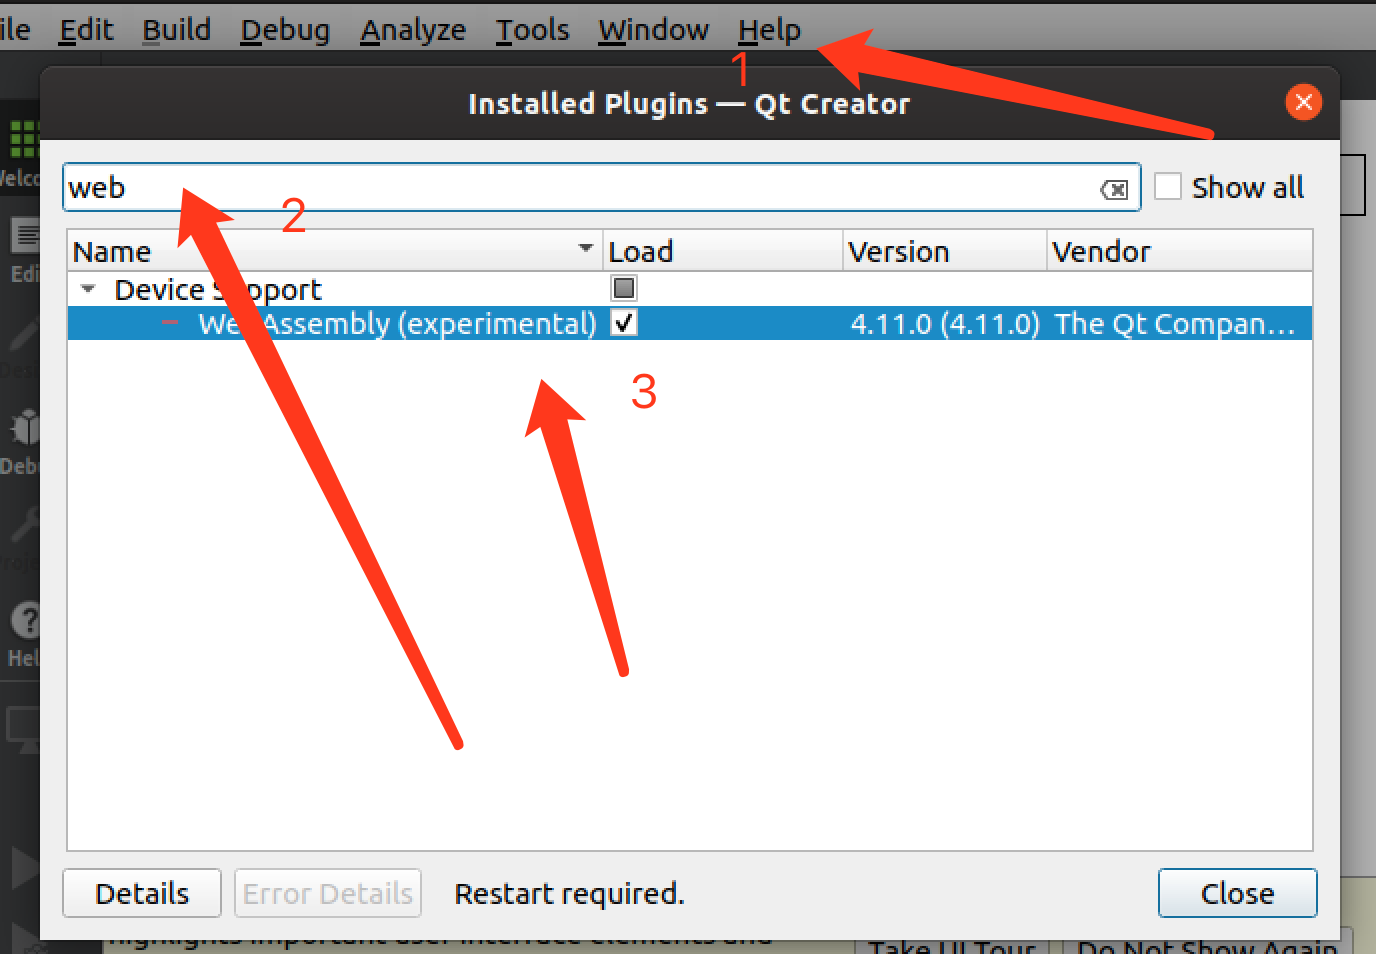
5.设置调试
1.qt creator打开webassembly的插件
6.运行demo
参考资料:
1.Qt for WebAssembly官方教程
https://doc.qt.io/qt-5/wasm.html
2. WebAssembly的限制
https://doc.qt.io/qt-5/qtwebassembly-platform-notes.html