- 通过内置命令快速实现登录认证功能
- 用户登录注册流程及多字段登录实现
- 基于多表的用户认证功能实现
- 基于 API 的用户认证功能实现
- 用户认证相关事件触发及监听
- 邮箱验证及找回密码功能实现
- 不同系统用户单点登录实现
- 基于 ACL 的用户权限管理实现
- 基于 RBAC的用户权限管理实现
系统自带脚手架
larevel 为我们提供了一些用户认证需要的脚手架代码,包含数据库迁移文件,用户模型,用户认证中间件和控制器等。
数据库迁移
Laravel自带包含两个迁移文件,分别用于创建用户表和密码重置表,这两张表可用在用户认证与找回密码的过程中用到。
User模型类
Laravel框架有个自带的Model类User在基于Eloquent模型驱动的认证提供者中,我们通过该模型类实现用户登录认证,在config/auth.php查看相应配置。
<?php

return [

    /*
    |--------------------------------------------------------------------------
    | Authentication Defaults
    |--------------------------------------------------------------------------
    |
    | This option controls the default authentication "guard" and password
    | reset options for your application. You may change these defaults
    | as required, but they're a perfect start for most applications.
    |
    */

    'defaults' => [
        'guard' => 'web',
        'passwords' => 'users',
    ],

    /*
    |--------------------------------------------------------------------------
    | Authentication Guards
    |--------------------------------------------------------------------------
    |
    | Next, you may define every authentication guard for your application.
    | Of course, a great default configuration has been defined for you
    | here which uses session storage and the Eloquent user provider.
    |
    | All authentication drivers have a user provider. This defines how the
    | users are actually retrieved out of your database or other storage
    | mechanisms used by this application to persist your user's data.
    |
    | Supported: "session", "token"
    |
    */

    'guards' => [
        'web' => [
            'driver' => 'session',
            'provider' => 'users',
        ],

        'api' => [
            'driver' => 'token',
            'provider' => 'users',
        ],
    ],

    /*
    |--------------------------------------------------------------------------
    | User Providers
    |--------------------------------------------------------------------------
    |
    | All authentication drivers have a user provider. This defines how the
    | users are actually retrieved out of your database or other storage
    | mechanisms used by this application to persist your user's data.
    |
    | If you have multiple user tables or models you may configure multiple
    | sources which represent each model / table. These sources may then
    | be assigned to any extra authentication guards you have defined.
    |
    | Supported: "database", "eloquent"
    |
    */

    'providers' => [
        'users' => [
            'driver' => 'eloquent',
            'model' => App\User::class,
        ],

        // 'users' => [
        //     'driver' => 'database',
        //     'table' => 'users',
        // ],
    ],

    /*
    |--------------------------------------------------------------------------
    | Resetting Passwords
    |--------------------------------------------------------------------------
    |
    | You may specify multiple password reset configurations if you have more
    | than one user table or model in the application and you want to have
    | separate password reset settings based on the specific user types.
    |
    | The expire time is the number of minutes that the reset token should be
    | considered valid. This security feature keeps tokens short-lived so
    | they have less time to be guessed. You may change this as needed.
    |
    */

    'passwords' => [
        'users' => [
            'provider' => 'users',
            'table' => 'password_resets',
            'expire' => 60,
        ],
    ],

];
如果过你不想通过User模型进行认证 可以修改providers的model配置项。
查看UserModel类
<?php

namespace App;

use Illuminate\Notifications\Notifiable;
use Illuminate\Foundation\Auth\User as Authenticatable;

class User extends Authenticatable
{
    use Notifiable;

    /**
     * The attributes that are mass assignable.
     *
     * @var array
     */
    protected $fillable = [
        'name', 'email', 'password',
    ];

    /**
     * The attributes that should be hidden for arrays.
     *
     * @var array
     */
    protected $hidden = [
        'password', 'remember_token',
    ];
}
如果某个模型类需要用于认证,则必须继承自Illuminate\Foundation\Auth\User基类,否则报错
在我们这个模型类里面使用了NotifiableTrait。里面提供了用户发送通知的相关方法。在白名单$fillable中配置了三个字段,在$hidden属性设置了返回查询结果的时候将敏感信息过滤的字段。
认证中间件
Laravel框架内置了几个认证的中间件,用于在需要认证用户的路由中使用
在app\Http\Kernel.php 的$routeMiddleware可以看到预定义的中间件:
 protected $routeMiddleware = [
        'auth' => \Illuminate\Auth\Middleware\Authenticate::class,
        'auth.basic' => \Illuminate\Auth\Middleware\AuthenticateWithBasicAuth::class,
        'bindings' => \Illuminate\Routing\Middleware\SubstituteBindings::class,
        'can' => \Illuminate\Auth\Middleware\Authorize::class,
        'guest' => \App\Http\Middleware\RedirectIfAuthenticated::class,
        'throttle' => \Illuminate\Routing\Middleware\ThrottleRequests::class,
    ];
用得最多的是auth和guest中间件,其中throttle中间件在用户多次登录失败时使用
auth中间件是\App\Http\Middleware\Authenticate::class的别名,主要用于将未登录用户重定向到登录页面
guest中间件是\App\Http\Middleware\RedirectIfAuthenticated::class的别名,注意用于将已经登录的用户重定向到认证页面,未登录则继续原来的请求
<?php

namespace App\Http\Middleware;

use Closure;
use Illuminate\Support\Facades\Auth;

class RedirectIfAuthenticated
{
    /**
     * Handle an incoming request.
     *
     * @param  \Illuminate\Http\Request  $request
     * @param  \Closure  $next
     * @param  string|null  $guard
     * @return mixed
     */
    public function handle($request, Closure $next, $guard = null)
    {
        if (Auth::guard($guard)->check()) {
            return redirect('/home');
        }
        return $next($request);
    }
}
认证控制器
Laravel还为我们提供了注册,登录,重置密码,邮箱验证,忘记密码对应的控制器
ForgotPasswordController用于忘记密码后通过填写注册邮箱发送重置密码的链接,对应的逻辑存放在Illuminate\Foundation\Auth\SendPasswordResetEmails中。LoginController用于用户登录和退出 对应逻辑位于Illuminate\Foundation\Auth\AuthenticatesUsers中。RegisterController用于新用户注册 对应逻辑位于Illuminate\Foundation\Auth\RegistersUsers中ResetPasswordController用于重置密码,对应逻辑位于Illuminate\Foundation\Auth\ResetsPassword中VerificationController用于新用户邮箱验证,对应逻辑位于Illuminate\Foundation\Auth\VerifiesEmails这个是Laravel5.7才有的
通过Artisan命令实现快速注册登录
通过Artican命令 make:auth,该命令会自动生成认证路由及认证视图
php artisan make:auth
生成以下路由
Auth::routes();
Route::get('/home', 'HomeController@index')->name('home');
home路由是用户认证成功后默认跳转的路由
Auth::routes()包含以下路由
// Authentication Routes...
$this->get('login', 'Auth\LoginController@showLoginForm')->name('login');
$this->post('login', 'Auth\LoginController@login');
$this->post('logout', 'Auth\LoginController@logout')->name('logout');

$this->get('register', 'Auth\RegisterController@showRegistrationForm')->name('register');
$this->post('register', 'Auth\RegisterController@register');

// Password Reset Routes...
$this->get('password/reset', 'Auth\ForgotPasswordController@showLinkRequestForm')->name('password.request');
$this->post('password/email', 'Auth\ForgotPasswordController@sendResetLinkEmail')->name('password.email');
$this->get('password/reset/{token}', 'Auth\ResetPasswordController@showResetForm')->name('password.reset');
$this->post('password/reset', 'Auth\ResetPasswordController@reset')->name('password.update');

// Email Verification Routes...
$this->get('email/verify', 'Auth\VerificationController@show')->name('verification.notice');
$this->get('email/verify/{id}', 'Auth\VerificationController@verify')->name('verification.verify');
$this->get('email/resend', 'Auth\VerificationController@resend')->name('verification.resend');
同时该命令还会在resources/views下生成用户认证的相关视图文件
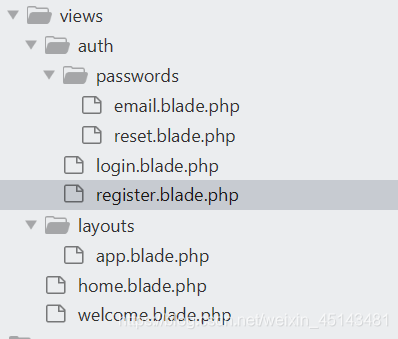
- resources/views/home.blade.php
- resources/views/layouts/app.blade.php
- resources/views/auth/login.blade.php
- resources/views/auth/register.blade.php
- resources/views/auth/verify.blade.php
- resources/views/auth/passwords/email.blade.php
- resources/views/auth/passwords/reset.blade.php

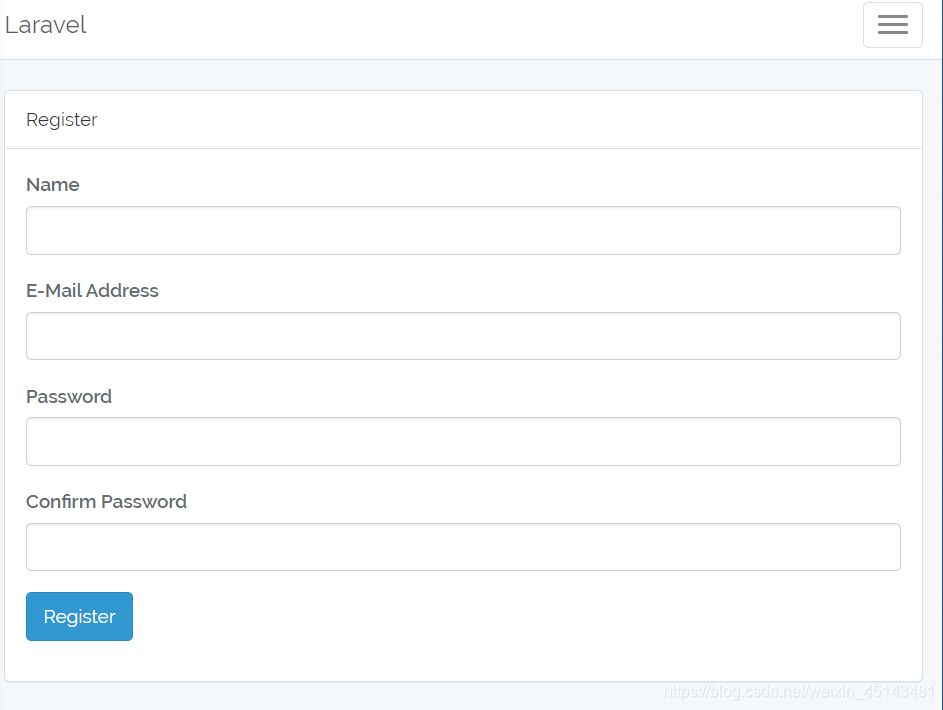
操作完成后页面出现登录与注册按钮
用户注册
当系统中没有任何用户时,我们需要先注册,点击注册界面
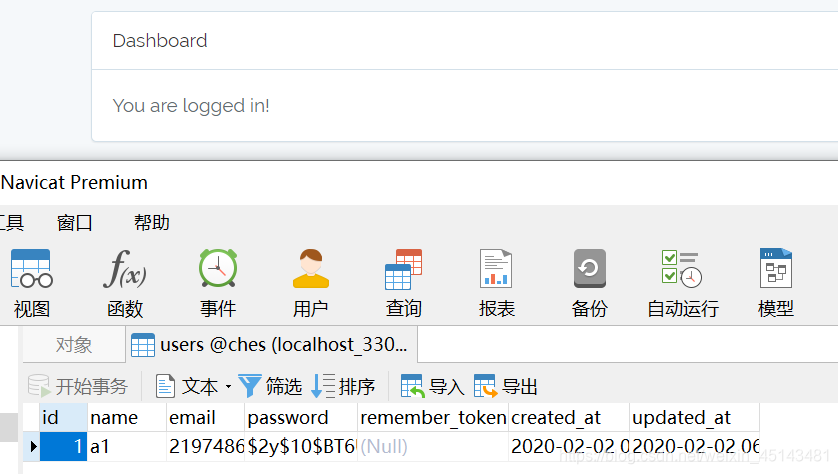
注册登录成功,并写入到数据库
获取用户信息
用户登录后,就可以获取用户信息了,这里有多种方式
1.Auth门面
在控制器中使用Auth门面类获取当前登录用户信息
 public function user(){
    	dump(Auth::user());//获取用户完整实例
    	dump(Auth::id());//获取用户id
    }
同时还可以使用Auth的check()方法判断用户是否登录,如果登录返回true否则返回false,还可以使用guest()与check相反。
还可以使用前面提到的用户认证指令
在Blade模板中
@auth
//用户登录
@endauth
@guest
//用户未登录
@endguest
2.通过Request实例
除了使用Auth外,还可使用 Request请求对象实例获取用户信息
 public function user(Request $res){
    	// dump(Auth::user());
    	dump($res->user());
    	dump($res->user()->id);

    }
尽量不要在控制器和视图以外的地方使用 Auth 门面获取用户信息,在其他地方获取可以通过数据传递的方式,因为服务类或模型类的应用场景不一定是 Web 层,有可能出现获取不到 Session 而导致获取数据为空的情况。
登录失败次数限制
有时候我们需要做登录次数限制功能,保证系统安全性,在Laravel中会自动校验登录失败次数,超过指定的阈值会报错
默认的阈值是1分钟内尝试5次,超过次数则报错。
如果你想修改这个阈值可在LoginController控制器中通过设置 maxAttempts(单位时间内尝试的最大次数),decayMinutes(单位时间值)
protected $maxAttempts = 3;

protected $decayMinutes = 30;
用户名/邮箱登录
Laravel支持用户名和邮箱登录,默认通过邮箱登录,如果你想设置用户名登录,直接在LoginController控制器中 定义一个username()方法,返回登录字段名
public function username()
{
    return 'name';
}
在将Blade模板登录字段换成name即可
多字段登录
没看明白…
