1、注解的方式获取对象
(1)导包:

(2)书写配置文件(要保证已经导入了约束):
<?xml version="1.0" encoding="UTF-8"?>
<beans xmlns:xsi="http://www.w3.org/2001/XMLSchema-instance"
       xmlns="http://www.springframework.org/schema/beans" xmlns:util="http://www.springframework.org/schema/util"
       xmlns:context="http://www.springframework.org/schema/context"
       xsi:schemaLocation="http://www.springframework.org/schema/beans http://www.springframework.org/schema/beans/spring-beans-4.2.xsd http://www.springframework.org/schema/util http://www.springframework.org/schema/util/spring-util.xsd http://www.springframework.org/schema/context http://www.springframework.org/schema/context/spring-context.xsd">
<context:component-scan base-package="pers.zhb.domain"></context:component-scan>
</beans>
配置文件的核心就一句话,它的作用是:扫描pers.zhb.domain包下的所有类的注解。
(3)创建Student对象,并在里面添加注解:
import org.springframework.stereotype.Component;
@Component("student")
public class Student {
    private String snum;
    private String sname;
    private String sex;
    private Course course;
    public Student(String snum, String sname, String sex, Course course) {
        this.snum = snum;
        this.sname = sname;
        this.sex = sex;
        this.course = course;
    }
    public Course getCourse() {
        return course;
    }

    public void setCourse(Course course) {
        this.course = course;
    }

    public Student(){
        System.out.println("Student对象创建了!");
    }
    public String getSnum() {
        return snum;
    }

    public void setSnum(String snum) {
        this.snum = snum;
    }

    public String getSname() {
        return sname;
    }

    public void setSname(String sname) {
        this.sname = sname;
    }

    public String getSex() {
        return sex;
    }

    public void setSex(String sex) {
        this.sex = sex;
    }
    @Override
    public String toString() {
        return "Student{" +
                "snum='" + snum + '\'' +
                ", sname='" + sname + '\'' +
                ", sex='" + sex + '\'' +
                ", course=" + course +
                '}';
    }
}
该注解中的参数student相当于<bean>里面的name,通过student可以获取到Student对象。
(4)创建测试类:
public class Test {
    public void test1(){
        ApplicationContext applicationContext=new
                ClassPathXmlApplicationContext("applicationContext.xml");//创建容器对象
        Student student  =(Student)applicationContext.getBean("student");
        student.setSname("zhai");
        System.out.println(student);
    }
    public static void main(String[] args){
        Test test=new Test();
        test.test1();
    }
}
![]()
(5)注解的四种方式:

第二个可以用于Service层对象的创建,第三个web层,第四个dao层。这四个注解只是名字不同而已,功能是相同的。
2、对象的单例 / 多例
(1)单例对象:

测试:
Student student1  =(Student)applicationContext.getBean("student");
        Student student2  =(Student)applicationContext.getBean("student");
        System.out.println(student1==student2);
返回结果为true,说明创建的是同一个对象。
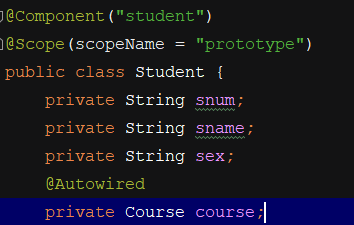
(2)多例对象:

测试:
Student student1  =(Student)applicationContext.getBean("student");
        Student student2  =(Student)applicationContext.getBean("student");
        System.out.println(student1==student2);

返回的结果为false,创建的是两个不同的对象。
3、值的注入
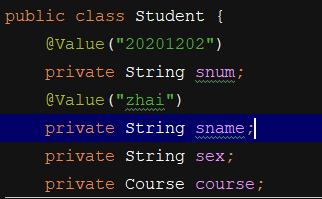
(1)在属性处赋值:

此种方式破坏了封装性,不推荐,因此set方式更优。
(2)在set方法处赋值:

(3)注入引用数据类型的数据:
方式一:
创建Course对象,并将对象引入到容器:


但是,这种方式有一个弊端,就是在有多个对象的情况下,将无法选择具体选择哪一个。
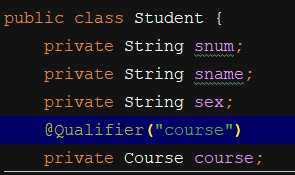
方式二:

指定注入哪一个对象。

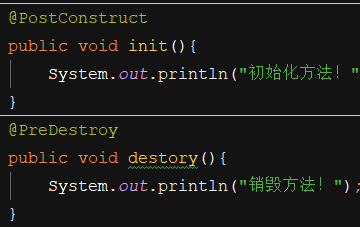
4、初始化、销毁方法
