【版权申明】非商业目的可自由转载
博文地址:https://blog.csdn.net/ShuSheng0007/article/details/103246642
出自:shusheng007
文章目录
概述
Android大神 JakeWharton 开发的一代神器 ButterKnife 即将落幕了。怎么回事呢?就是因为View Binding 的横空出世。在那个满屏都是findViewById的蛮荒年代,JakeWharton 大神给我们送来了神器ButterKnife,使我们从石器时代进化到了青铜时代,这次ViewBinding是不是又将使我们跨越到一个全新的时代呢,让我们拭目以待。话说编程正在变的越来越简单,估计再过10年,软件开发将是是小学生的必备技能了。
对了,ButterKnife 即将落幕可不是我说的,大家不要喷我,是大神自己在此项目的ReadMe上说的:
Attention: Development on this tool is winding down. Please consider switching to view binding in the coming months.
那让我们一起看看这个牛逼乎乎的东东吧。
ViewBinding
本文力求说明如下几个问题:
- ViewBinding 解决什么问题?
- 如何使用?
- 与现有方法相比较的优势?
- 什么原理?
相信弄懂了上面几个问题,基本上也就抓住了ViewBinding的精髓了,希望你可以在此基础上更近一步:给Google提出一些改进方案,这一步貌似有点难…
注意:要使用ViewBinding功能,AndroidStudio至少要升级到3.6,建议直接使用 AS4.0 Canary
解决什么问题
顾名思义ViewBinding的意思就是如何将view与代码绑定在一起。所以其主要解决如何安全优雅地从代码中引用到XML layout文件中的view控件的问题。直到目前为止,Android构建用户界面的主流方式仍然是使用XML格式的layout文件。
如何使用
ViewBinding实在是太容易上手了,几乎没有使用成本。
-
在要使用ViewBinding的 module 的gradle文件中开启ViewBinding
android { ... viewBinding{ enabled = true } } -
编译此module获得XML
layout文件对应的绑定类在gradle文件中开启
ViewBinding功能后,编译此module。编译器就会为此模块下的每个layout文件都产生一个对应的绑定类。假设我们有如下XML
layout文件<?xml version="1.0" encoding="utf-8"?> <androidx.constraintlayout.widget.ConstraintLayout xmlns:android="http://schemas.android.com/apk/res/android" xmlns:app="http://schemas.android.com/apk/res-auto" xmlns:tools="http://schemas.android.com/tools" android:layout_width="match_parent" android:layout_height="match_parent" tools:context=".DescriptionActivity"> <ImageView android:id="@+id/img_backgroud" android:layout_width="0dp" android:layout_height="250dp" android:scaleType="centerCrop" app:layout_constraintEnd_toEndOf="parent" app:layout_constraintStart_toStartOf="parent" app:layout_constraintTop_toTopOf="parent" tools:srcCompat="@tools:sample/backgrounds/scenic" /> <TextView android:id="@+id/tv_description" android:layout_width="0dp" android:layout_height="wrap_content" app:layout_constraintEnd_toEndOf="parent" app:layout_constraintStart_toStartOf="parent" app:layout_constraintTop_toBottomOf="@+id/img_backgroud" android:layout_marginTop="25dp" android:textColor="@android:color/black" android:textSize="20sp"/> </androidx.constraintlayout.widget.ConstraintLayout>这个类名称的命名规则为:XML
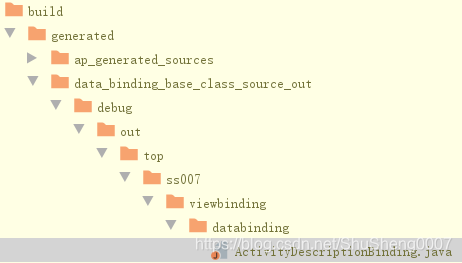
layout文件名去掉下划线,下划线首字母大写,最后加上Binding。例如我有一个layout文件叫activity_description.xml,那对应生成的类文件为ActivityDescriptionBinding.java。生成的类文件位于Module的
build\generated\data_binding_base_class_source_out\debug\out\包名\databinding下,如下图所示:
-
使用此生成类引用XML
layout文件中的控件调用生成类
ActivityDescriptionBinding的inflate()方法获得类实例对象,通过getRoot()方法可以获得layout文件的最外层View,此例中是一个ConstraintLayout. 通过Activity的setContentView()方法可以为Activity设置内容。layout文件中只要是有id的view, 在这个生成类中都会对应的生成一个 public final 的属性,例如<TextView android:id="@+id/tv_description" ... />对应的生成字段为
  @NonNull
  public final TextView tvDescription;
那就可以直接使用对象实例访问了,如下代码所示:
	class DescriptionActivity : AppCompatActivity() {

		    private lateinit var  binding: ActivityDescriptionBinding

		    override fun onCreate(savedInstanceState: Bundle?) {
		        super.onCreate(savedInstanceState)
		        binding=ActivityDescriptionBinding.inflate(layoutInflater)
		        setContentView(binding.root)

		        binding.tvDescription.text = "关关雎鸠,在河之洲.窈窕淑女,君子好逑."
		        binding.tvDisplayDate?.text = SimpleDateFormat("yyyy-MM-dd HH:mm:ss").format(Date())
		    }
     }
注意: 如果你不想把XMLlayout文件中某个含有Id的view包含到生成类中的话,就设置此view的tools:viewBindingIgnore属性为true
下图演示了横竖屏使用不同layout文件的情形
与现有方法相比较的优势
目前Android开发中完成View映射的方法主要有 findViewById、 ButterKnife, 如果使用kotlin的话还可以使用Kotlin Android Extensions。
ViewBinding对比以上方法有如下几点优势:
- Type safety: findViewById, ButterKnife 均存在类型转换问题,例如不小心将一个
TextView错误的赋值给一个Button变量,都会报错,这一错误很容易出现,关键在错误还出现在运行时,而不是编译时!
而ViewBinding中,产生的binding类中的属性是依据XML layout文件生成的,所以类型不会错,生成的时候已经处理好了。
- Null safety: findViewById, ButterKnife与Kotlin Android Extensions 均存在Null不安全问题。这个什么意思呢?就是在我们访问那个View的时候它不存在。为什么会出现这种情况呢?例如不小心使用了错误的Id,或者访问的时候那个view还不存在。
使用了错误Id这个估计大家都有此类经历,但是访问时候那个view不存在怎么理解呢?例如我们在手机横屏和竖屏的时候分别使用一套XMLlayout文件,假设横屏中包含了一个竖屏中没有的view,那么在屏幕从横屏旋转到竖屏的时候,NullPointer问题就出现了。
而ViewBinding中, 产生的binding类中的属性是依据XML layout文件生成的,所以Id不会错。而且其将仅存在某一个配置下的layout文件的那些view对应的字段标记为@Nullable ,例如本例中的
 @Nullable
  public final TextView tvDisplayDate;
而且,生成类中还会很贴心的给你加上详细的注释。这一切都是为了提醒程序员,注意对这个view特别处理,它在某些情况下为Null。
- 简洁优雅: 将绑定view的模板代码自动生成到了其他类中,使controlor类(Activity,Fragment)更加清晰了。
什么原理
其实通过上面的分析,估计你对其原理也猜的的八九不离十了。就是Google在那个用来编译的gradle插件中增加了新功能,当某个module开启ViewBinding功能后,编译的时候就去扫描此模块下的layout文件,生成对应的binding类。那些你所熟悉的findViewById操作都是在这个自动生成的类里面呢,如下所示
	public final class ActivityDescriptionBinding implements ViewBinding {
			  @NonNull
			  private final ConstraintLayout rootView;

			  @NonNull
			  public final ImageView imgBackgroud;

			  @NonNull
			  public final TextView tvDescription;

			  /**
			   * This binding is not available in all configurations.
			   * <p>
			   * Present:
			   * <ul>
			   *   <li>layout-land/</li>
			   * </ul>
			   *
			   * Absent:
			   * <ul>
			   *   <li>layout/</li>
			   * </ul>
			   */
			  @Nullable
			  public final TextView tvDisplayDate;

			  private ActivityDescriptionBinding(@NonNull ConstraintLayout rootView,
			      @NonNull ImageView imgBackgroud, @NonNull TextView tvDescription,
			      @Nullable TextView tvDisplayDate) {
			    this.rootView = rootView;
			    this.imgBackgroud = imgBackgroud;
			    this.tvDescription = tvDescription;
			    this.tvDisplayDate = tvDisplayDate;
			  }

			  @Override
			  @NonNull
			  public ConstraintLayout getRoot() {
			    return rootView;
			  }

			  @NonNull
			  public static ActivityDescriptionBinding inflate(@NonNull LayoutInflater inflater) {
			    return inflate(inflater, null, false);
			  }

			  @NonNull
			  public static ActivityDescriptionBinding inflate(@NonNull LayoutInflater inflater,
			      @Nullable ViewGroup parent, boolean attachToParent) {
			    View root = inflater.inflate(R.layout.activity_description, parent, false);
			    if (attachToParent) {
			      parent.addView(root);
			    }
			    return bind(root);
			  }

			  @NonNull
			  public static ActivityDescriptionBinding bind(@NonNull View rootView) {
			    // The body of this method is generated in a way you would not otherwise write.
			    // This is done to optimize the compiled bytecode for size and performance.
			    String missingId;
			    missingId: {
			      ImageView imgBackgroud = rootView.findViewById(R.id.img_backgroud);
			      if (imgBackgroud == null) {
			        missingId = "imgBackgroud";
			        break missingId;
			      }

			      TextView tvDescription = rootView.findViewById(R.id.tv_description);
			      if (tvDescription == null) {
			        missingId = "tvDescription";
			        break missingId;
			      }

			      TextView tvDisplayDate = rootView.findViewById(R.id.tv_display_date);

			      return new ActivityDescriptionBinding((ConstraintLayout) rootView, imgBackgroud,
			          tvDescription, tvDisplayDate);
			    }
			    throw new NullPointerException("Missing required view with ID: ".concat(missingId));
			  }
	}
其中核心代码是bind(@NonNull View rootView)方法,除此之外还有两个inflate()重载方法,一般情况下我们使用这两个方法获得binding类的实例,这些方法都是public static的,通过bind(@NonNull View rootView)这个方法应该可以实现延迟绑定,但是其使用场景应该很少。
注意
	@Nullable
    public final TextView tvDisplayDate;
字段,被标记为@Nullable了,那是因为本例给横屏和竖屏分别设置了一个layout文件,此view只存在于横屏中的layout文件中. 所以在使用的时候就要注意null的情况。
如何改进
好了,文章到此也该结束了!等等,这段不是应该讲如何改进吗?让大家失望了,因为我也不知道如何改进,我此刻甚至都不是非常清楚那个编译器是如何生成那个binding类的。丢人了,丢人了。。。我下去再研究一下吧
总结
让们一起免回一下那些使用ButterKnife的日子吧!事实再一次证明平台的强大性,就算强如ButterKnife也会在ViewBindingt推出的1年内消亡吧,现在可以明白为什么一个微信公众号搞的很大时,就要考虑发展自己的App了吧,因为你是依附于别人的平台上,平台规则变动对你来说就是地动山摇。
本文源码gitbub地址: AndroidDevMemo
