配合哔哩哔哩视频学习【SSM 框架】SpringMVC+Spring+Mybatis SSM 整合+实战+源码14-16集
6.整合SpringMVC
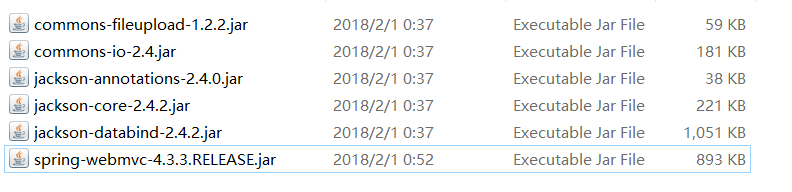
6.1.导入spring-mvc包
6.2.配置web.xml
1)启动spring,加载applicationContext.xml
2)启动springMVC,加载spring-mvc
<?xml version="1.0" encoding="UTF-8"?>
<web-app xmlns:xsi="http://www.w3.org/2001/XMLSchema-instance" xmlns="http://java.sun.com/xml/ns/javaee" xsi:schemaLocation="http://java.sun.com/xml/ns/javaee http://java.sun.com/xml/ns/javaee/web-app_2_5.xsd" id="WebApp_ID" version="2.5">
  <display-name>01.mybatis</display-name>

  <!-- 启动springMVC -->
  <servlet>
  	<servlet-name>DispatcherServlet</servlet-name>
  	<servlet-class>org.springframework.web.servlet.DispatcherServlet</servlet-class>
  	<!-- 参数:读取 spring-mvc.xml-->
  	<init-param>
  		<param-name>contextConfigLocation</param-name>
  		<param-value>classpath:spring-mvc.xml</param-value>
  	</init-param>
  </servlet>
  <servlet-mapping>
  	<servlet-name>DispatcherServlet</servlet-name>
  	<url-pattern>*.action</url-pattern>
  </servlet-mapping>


  <!-- 启动spring -->
  <listener>
  	<listener-class>org.springframework.web.context.ContextLoaderListener</listener-class>
  </listener>
  <!-- 修改路径 -->
  <context-param>
  	<param-name>contextConfigLocation</param-name>
  	<param-value>classpath:applicationContext.xml</param-value>
  </context-param>

  <welcome-file-list>
    <welcome-file>index.html</welcome-file>
    <welcome-file>index.htm</welcome-file>
    <welcome-file>index.jsp</welcome-file>
    <welcome-file>default.html</welcome-file>
    <welcome-file>default.htm</welcome-file>
    <welcome-file>default.jsp</welcome-file>
  </welcome-file-list>
</web-app>
6.3.配置spring-mvc.xml
<?xml version="1.0" encoding="UTF-8"?>
<beans xmlns="http://www.springframework.org/schema/beans"
    xmlns:mvc="http://www.springframework.org/schema/mvc"
    xmlns:contenxt="http://www.springframework.org/schema/context"
    xmlns:xsi="http://www.w3.org/2001/XMLSchema-instance"
    xsi:schemaLocation="
        http://www.springframework.org/schema/beans
        http://www.springframework.org/schema/beans/spring-beans.xsd
        http://www.springframework.org/schema/mvc
        http://www.springframework.org/schema/mvc/spring-mvc.xsd
        http://www.springframework.org/schema/context
        http://www.springframework.org/schema/context/spring-context.xsd">

	<!-- 扫描Controller所在的包 -->
	<contenxt:component-scan base-package="com.ssm.controller"/>

	<!-- 注解驱动 -->
	<mvc:annotation-driven></mvc:annotation-driven>

	<!-- 视图解析器:简化在Controller类编写的视图路径 -->
	<bean class="org.springframework.web.servlet.view.InternalResourceViewResolver">
		<!-- 前缀 -->
		<property name="prefix" value="/WEB-INF/jsp/"/>
		<!-- 后缀 -->
		<property name="suffix" value=".jsp"/>
	</bean>

</beans>
6.4.编写Controller
package com.ssm.controller;

import org.springframework.stereotype.Controller;
import org.springframework.web.bind.annotation.RequestMapping;

@Controller
@RequestMapping("/customer")
public class CustomerController {

	@RequestMapping("/test")
	public String test()
	{
		return "test";
	}
}
6.5.编写页面
<%@ page language="java" import="java.util.*" pageEncoding="utf-8"%>
<%
String path = request.getContextPath();
String basePath = request.getScheme()+"://"+request.getServerName()+":"+request.getServerPort()+path+"/";
%>

<!DOCTYPE HTML PUBLIC "-//W3C//DTD HTML 4.01 Transitional//EN">
<html>
  <head>
    <base href="<%=basePath%>">

    <title>My JSP 'test.jsp' starting page</title>

	<meta http-equiv="pragma" content="no-cache">
	<!--
	<link rel="stylesheet" type="text/css" href="styles.css">
	-->

  </head>

  <body>
    测试springMVC <br>
  </body>
</html>
结果

