首先上结论,简单来说就是:
- 把解析的所有模块变成一个对象
- 通过一个微入口去按顺序进行加载
- 依次实现一个递归依赖关系
- 通过入口对应的value(方法)去执行文件
一、准备工作
1-首先准备需要打包的demo :
a.js
module.exports = "学习webpack"
Index.js
let str = require('./a.js')
console.log(str);
可以看出,代码的结果是打印 ”学习webpack”
2- 在package.json中进行以下打包指令配置
"scripts": {
 "build": "webpack --config webpack.config.my.js"
},
准备工作做好后就可以执行 npm run build 进行打包了
二、分析文件
在dist目录(打包生成目录)中可以看到生成的bundle.js文件,原文件比较大,精简后可得到以下结果:
现在我们来分析这个文件的打包原理:
(function (modules) {
    var installedModules = {};
    function __webpack_require__(moduleId) {
        if (installedModules[moduleId]) {
            return installedModules[moduleId].exports;
        }
        var module = (installedModules[moduleId] = {
            i: moduleId,
            l: false,
            exports: {}
        });
        modules[moduleId].call(
            module.exports,
            module,
            module.exports,
            __webpack_require__
        );
        module.l = true;
        return module.exports;
    }

    return __webpack_require__((__webpack_require__.s = "./src/index.js"));
})({
    "./src/a.js":
        function (module, exports) {
            eval(
                'module.exports = "学习webpack"\n\n//# sourceURL=webpack:///./src/a.js?'
            );
        },
    "./src/index.js":
        function (module, exports, __webpack_require__) {
            eval(
                'let str = __webpack_require__(/*! ./a.js */ "./src/a.js")\r\n\r\nconsole.log(str);\r\n\n\n//# sourceURL=webpack:///./src/index.js?'
            );
        }
});
1. 看整体首先是一个匿名自执行函数,这是webpack启动函数
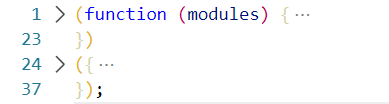
2.执行的时候会传一个对象,对象有几部分,第一部分是我们的key,第二部分是我们的value ;
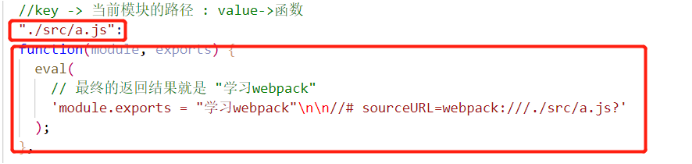
key -> 当前模块的路径 : value->函数, 将此对象传入module中
({
    "./src/a.js":
        function (module, exports) {
            eval(
                'module.exports = "学习webpack"\n\n//# sourceURL=webpack:///./src/a.js?'
            );
        },
    "./src/index.js":
        function (module, exports, __webpack_require__) {
            eval(
                'let str = __webpack_require__(/*! ./a.js */ "./src/a.js")\r\n\r\nconsole.log(str);\r\n\n\n//# sourceURL=webpack:///./src/index.js?'
            );
        }
});
3.先定义一个缓存,模块加载完了从缓存中拿 :
  var installedModules = {};
  /* 一个对象关系,例如
  key -> "./src/index.js"
  value -> {
      i: moduleId,
      l: false,
      exports: {}
    }
  */
4. 实现一个require方法(require是不能在浏览器中运行的) :
  function __webpack_require__(moduleId) {  // "./src/index.js"
    // Check if module is in cache - 检查模块是否在缓存中
    if (installedModules[moduleId]) {
      //如果在直接就返回了
      return installedModules[moduleId].exports;
    }
    //  安装这个模块
    // Create a new module (and put it into the cache)
    var module = (installedModules[moduleId] = {
      i: moduleId,
      l: false,
      exports: {}
    });

    // Execute the module function
    // 从参数对象中找到那个函数并执行
    modules[moduleId].call(
      module.exports, // this 指向
      module, // 模块
      module.exports, // 模块空对象
      __webpack_require__ // 前面的 require 方法
    );

    // Flag the module as loaded
    module.l = true;

    // Return the exports of the module - 返回的结果
    return module.exports;
  }
5. 在启动函数的结尾去调用 require 方法,
并传入 在webpack.config.js配置文件中设定的入口模块, 这里是 "./src/index.js"

6. 调用参数中入口模块对应的函数方法:

7. 可以看到该方法中存在一次递归关系,将 "./src/a.js" 再次传入require方法中找到以下函数,重走逻辑,找到以下方法:
最后附上全注释版本:
//webpack打包出的文件解析

/*
  把解析的所有模块变成一个对象
  通过一个微入口去按顺序进行加载
  依次实现一个递归依赖关系
  通过入口对应的value(方法)去执行文件
*/

//自执行函数
//对象当作参数传入整个 modules 里
(function(modules) {
  // webpackBootstrap - webpack启动函数
  // The module cache - 先定义一个缓存,模块加载完了从缓存中拿
  var installedModules = {};
  /* 一个对象关系,例如
  key -> "./src/index.js"
  value -> {
      i: moduleId,
      l: false,
      exports: {}
    }
  */

  // The require function - 实现一个require方法(require是不能在浏览器中运行的)
  function __webpack_require__(moduleId) {  // "./src/index.js"
    // Check if module is in cache - 检查模块是否在缓存中
    if (installedModules[moduleId]) {
      //如果在直接就返回了
      return installedModules[moduleId].exports;
    }
    //  安装这个模块
    // Create a new module (and put it into the cache)
    var module = (installedModules[moduleId] = {
      i: moduleId,
      l: false,
      exports: {}
    });

    // Execute the module function
    // 从参数对象中找到那个函数并执行
    modules[moduleId].call(
      module.exports, // this 指向
      module, // 模块
      module.exports, // 模块空对象
      __webpack_require__ // 前面的 require 方法
    );

    // Flag the module as loaded
    module.l = true;

    // Return the exports of the module - 返回的结果
    return module.exports;
  }

  // Load entry module and return exports
  return __webpack_require__((__webpack_require__.s = "./src/index.js")); //传入入口模块
})({
  //key -> 当前模块的路径 : value->函数
  "./src/a.js": function(module, exports) {
    eval(
      // 最终的返回结果就是 "学习webpack"
      'module.exports = "学习webpack"\n\n//# sourceURL=webpack:///./src/a.js?'
    );
  },

  "./src/index.js": function(module, exports, __webpack_require__) {
    eval(
      // 再次找到 "./src/a.js" 传入__webpack_require__方法 重新再走流程,
      // 最终的返回结果就是 "学习webpack",将它赋值给 str 通过console.log()打印
      'let str = __webpack_require__("./src/a.js")\r\n\r\nconsole.log(str);\r\n\n\n//# sourceURL=webpack:///./src/index.js?'
    );
  }
});