xml
一 目的:通过ApplicationContext对象的getBean方法获取所需类的对象.
编写一个service类
public class service {
    private String name;public void add(){
        System.out.println("add ....");
    }
}
编写applicationContext.xml文件
<bean id="service" class="spring_xml_aop_start.service" />
编写测试类
public class test {
    public static void main(String[] args) {
        ApplicationContext context=new ClassPathXmlApplicationContext("applicationContext.xml");//入门用,后期监听器加载
        service  us=(service) context.getBean("service");
        us.add();
    }
}
测试类运行结果
二 目的基于目的一进行简单属性注入
属性注入有两种形式:构造器注入和set方法注入
构造器注入:applicationContext.xml中的对应<bean>标签下<constructor-arg name="类中成员变量名" value="属性赋值"></constructor-arg>
类需要提供有参构造
简单值注入
在xml中的相应bean中配置constructor-arg时 类中有参构造中参数有几个就要配几个
可以直接value=""值 这个排序是根据类的初始化排序(有参下面this.xx=xx的顺序)
也可以通过index="0/1/2"或者type="类型" 进行手动排序
也可以 name="类成员名" value=""进行配置
引用另一个类的复杂注入
在类中 private dao dao;并在有参构造 this.dao=dao;
set注入:<property name="类成员名" value="属性赋值"></property>
只需在类中给成员变量提供set方法即可
service类
public class service {
    private String name;
    private dao dao;
    public service(String name,dao dao) {
        super();
        this.name = name;
        this.dao = dao;
    }
    public void add(){
        dao.daotest();
        System.out.println("add ...."+name);
    }
}
dao类
public class dao {
    private String name;
    public void setDao(String dao) {
        this.name = dao;
    }
    public void daotest(){
        System.out.println("复杂注入"+name);
    }
}
配置文件
<bean id="dao" class="spring_xml_aop_start.dao">
    <property name="dao" value="我是dao"></property>
</bean>
<bean id="service" class="spring_xml_aop_start.service">
    <constructor-arg name="name" value="我是service"></constructor-arg>
    <constructor-arg name="dao" ref="dao"></constructor-arg>
</bean>
测试类同上
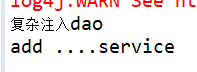
运行结果

注解
<context:component-scan base-package="基包" /> //扫描的基包
@Component:组件 ---所有类都能用 @Controller :修饰web层类 @Service :修饰业务层类 @Repository :修饰持久层类
属性注入 :
普通注入:@Value("值")
对象类型属性: @Resource(name="上面类注解的名字")可以不用谢
@Autowired 按类型注解结合@Qualifier按名称注入
@RunWith(SpringJUnit4ClassRunner.class)
@ContextConfiguration(locations="classpath:applicationContext.xml")
声明需要测试的类
@Resource
private Service service;
测试方法加@Test注解ctrl+1导包
使用注解初始化类的时候,类中千万不要有有参构造,不然会被报出累没有初始化的异常!
因为spring 在初始化bean的时候要先调用构造函数,再set其它属性.
service类
@Service("service")
public class service {
    @Value("service")
    private String name;
    @Resource(name="daoss")
    private dao dao;
    //这里之前xml配置时调用构造器进行注入属性的,注解操作时要去掉
    /*public service(String name, spring_anno_start.dao dao) {
        super();
        this.name = name;
        this.dao = dao;
    }*/
    public void add(){
        dao.daotest();
        System.out.println("add ...."+name);
    }
}
dao类
@Repository("daoss")
public class dao {
    @Value("dao")
    private String name;
    public void daotest(){
        System.out.println("复杂注入"+name);
    }
}
测试类
@RunWith(SpringJUnit4ClassRunner.class)
@ContextConfiguration(locations="classpath:applicationContext.xml")
public class test {
    @Resource
    private service service;

    @Test
    public void test1(){
        service.add();
    }
}
applicationContext.xml
<context:component-scan base-package="spring_anno_start"></context:component-scan>
运行结果