先看一张效果图
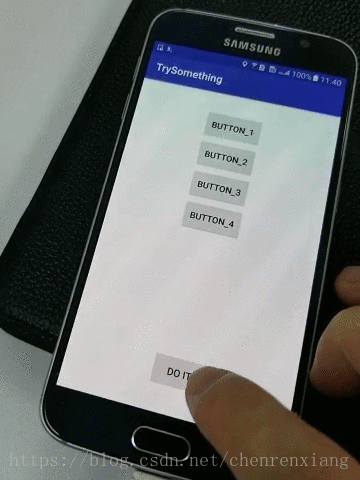
手指触碰控件后,控件在Z方向上的高度抬升了,而且控件放大了,手指离开之后,控件又恢复原状。
这只是StateListAnimator能实现的众多效果之一。通过各种动画的搭配,我们能为不同状态下的控件提供各种动画效果。
有一点需要说明,StateListAnimator是在API21之后才加入的。
接下来进入正题,讲如何使用StateListAnimator。
1. 定义StateListAnimator动画
在res文件夹下新建一个animator资源文件夹,然后在这里用xml文件定义我们需要的StateListAnimator。这里我先创建一个pressed_state_list.xml文件,里面具体内容如下:
<selector xmlns:android="http://schemas.android.com/apk/res/android">
    <item android:state_pressed="true">
        <objectAnimator android:duration="@android:integer/config_shortAnimTime"
            android:propertyName="translationZ" android:valueTo="12dp"
            android:valueType="floatType" />
    </item>
    <item android:state_pressed="false">
        <objectAnimator android:duration="@android:integer/config_shortAnimTime"
            android:propertyName="translationZ" android:valueTo="0dp"
            android:valueType="floatType" />
    </item>

</selector>
通过不同的<item>标签去匹配控件的不同状态,然后在<item>标签下定义当前状态的控件动画。控件的状态属性值非常多,比如android:state_enabled,比如android:state_selected,这里不一一讲解了。
上面的代码定义了两个状态,即被触碰,和未被触碰。在被触碰时,控件的elevation将相对原位置增加12dp,在未被触碰时,控件的elevation将回到原位置值。
上面的效果图中,控件被触碰时,不仅elevation改变了,scale值也改变了,其实只需要在<item>下加上scale动画就行了。如下:
<selector xmlns:android="http://schemas.android.com/apk/res/android">

    <item android:state_enabled="true" android:state_pressed="true">
        <set>
            <objectAnimator android:duration="@android:integer/config_shortAnimTime"
                android:propertyName="scaleX" android:valueTo="1.2"
                android:valueType="floatType" />
            <objectAnimator android:duration="@android:integer/config_shortAnimTime"
                android:propertyName="scaleY" android:valueTo="1.2"
                android:valueType="floatType" />
            <objectAnimator android:duration="@android:integer/config_shortAnimTime"
                android:propertyName="translationZ" android:valueTo="8dp"
                android:valueType="floatType"/>
        </set>
    </item>

    <item android:state_enabled="true" android:state_pressed="false">
        <set>
            <objectAnimator android:duration="@android:integer/config_shortAnimTime"
                android:propertyName="scaleX" android:valueTo="1"
                android:valueType="floatType" />
            <objectAnimator android:duration="@android:integer/config_shortAnimTime"
                android:propertyName="scaleY" android:valueTo="1"
                android:valueType="floatType" />
            <objectAnimator android:duration="@android:integer/config_shortAnimTime"
                android:propertyName="translationZ" android:valueTo="0dp"
                android:valueType="floatType"/>
        </set>
    </item>

</selector>
使用<set>标签将动画组合起来,能在一个<item>中为控件提供多种动画组合。
ps:贴下目前Android自带的 propertyName,我自己经常忘记。propertyName也是支持自定义的,这里不细说了。
- translationX : x轴偏移量
- translationY :y轴偏移量
- translationZ :z轴偏移量
- x :x轴绝对值
- y :y轴绝对值
- z :z轴绝对值
- rotation :沿z轴旋转,其实就是平面旋转
- rotationX :沿x轴旋转
- rotationY :沿y轴旋转
- alpha :透明度
2. 给控件添加StateListAnimator
StateListAnimator已经定义好,现在只差添加给控件了。按照惯例,有两种添加方法,一是在xml文件中通过控件的属性添加,另一种是在代码中调用控件的方法添加。
直接展示代码,不多bb了:
- 通过xml添加
 <Button
        android:id="@+id/btn_do"
        android:layout_width="wrap_content"
        android:layout_height="wrap_content"
        android:text="do it"
        app:layout_constraintRight_toRightOf="parent"
        app:layout_constraintLeft_toLeftOf="parent"
        app:layout_constraintBottom_toBottomOf="parent"
        android:layout_marginBottom="40dp"
        android:stateListAnimator="@animator/pressed_state_list"/>
把定义好的动画文件设置到控件的 android:stateListAnimator属性即可。
- 调用代码添加
Button goButton = findViewById(R.id.btn_do);
 StateListAnimator animator = AnimatorInflater.loadStateListAnimator(this, R.animator.pressed_state_list);
 goButton.setStateListAnimator(animator);
ps: android:stateListAnimator属性和 setStateListAnimator(StateListAnimator animator)方法是直接定义在View中的,因此所有控件都拥有这个属性和方法。
转自:https://blog.csdn.net/chenrenxiang/article/details/80461481
