目录
Spring Cloud Eureka是Spring Cloud的服务治理组件,本文演示其服务注册中心、服务提供者和服务消费者的搭建过程。注册中心是Eureka的服务端,而服务提供者和消费者则是Eureka的客户端。
Spring Cloud Ribbon是一个基于HTTP和TCP的客户端负载均衡器,它可以负载均衡地调用服务。而Spring Cloud Hystrix是容错保护的断路器。当服务因为某种原因关闭或者服务阻塞等原因而变得不能访问的情况下,该组件可以立即返回一个错误响应,避免整个系统的故障蔓延。
其中的消费者采用Spring Cloud OpenFeign来实现,因为在实际使用时,Ribbon和Hystrix几乎是同时使用的,所以OpenFeign整合了Ribbon和Hystrix。同时提供了一种声明式、注解式的服务调用,不用再像之前那样使用Ribbon需要写一个RestTemplate的封装方法,同时加上@LoadBalanced注解开启负载均衡。OpenFeign自己做了一些封装,以此来简化开发量。
笔者使用的Java版本是jdk-8u201,IDE使用的是IntelliJ IDEA 2019.2 x64,Spring Boot的版本是2.1.7.RELEASE,Spring Cloud的版本是Greenwich.SR2。
1 服务注册中心
创建一个Spring Boot项目,命名为eureka-server。
1.1 pom.xml
<?xml version="1.0" encoding="UTF-8"?>
<project xmlns="http://maven.apache.org/POM/4.0.0" xmlns:xsi="http://www.w3.org/2001/XMLSchema-instance"
         xsi:schemaLocation="http://maven.apache.org/POM/4.0.0 http://maven.apache.org/xsd/maven-4.0.0.xsd">
    <modelVersion>4.0.0</modelVersion>
    <parent>
        <groupId>org.springframework.boot</groupId>
        <artifactId>spring-boot-starter-parent</artifactId>
        <version>2.1.7.RELEASE</version>
        <relativePath/> <!-- lookup parent from repository -->
    </parent>
    <groupId>com.hys</groupId>
    <artifactId>eureka-server</artifactId>
    <version>0.0.1-SNAPSHOT</version>
    <name>eureka-server</name>
    <description>Demo project for Spring Cloud</description>

    <properties>
        <java.version>1.8</java.version>
        <spring-cloud.version>Greenwich.SR2</spring-cloud.version>
    </properties>

    <dependencies>
        <dependency>
            <groupId>org.springframework.cloud</groupId>
            <artifactId>spring-cloud-starter</artifactId>
        </dependency>
        <dependency>
            <groupId>org.springframework.cloud</groupId>
            <artifactId>spring-cloud-starter-netflix-eureka-server</artifactId>
        </dependency>
        <dependency>
            <groupId>org.springframework.boot</groupId>
            <artifactId>spring-boot-starter-test</artifactId>
            <scope>test</scope>
        </dependency>
    </dependencies>

    <dependencyManagement>
        <dependencies>
            <dependency>
                <groupId>org.springframework.cloud</groupId>
                <artifactId>spring-cloud-dependencies</artifactId>
                <version>${spring-cloud.version}</version>
                <type>pom</type>
                <scope>import</scope>
            </dependency>
        </dependencies>
    </dependencyManagement>

    <build>
        <plugins>
            <plugin>
                <groupId>org.springframework.boot</groupId>
                <artifactId>spring-boot-maven-plugin</artifactId>
            </plugin>
        </plugins>
    </build>

</project>
1.2 application.properties
注册中心的搭建过程可以是单点搭建,也可以是集群搭建。单点搭建的配置文件示例代码如下所示:
server.port=1111
eureka.instance.hostname=localhost
eureka.client.register-with-eureka=false
eureka.client.fetch-registry=false
eureka.client.service-url.defaultZone=http://localhost:1111/eureka/
注意其中eureka.client.register-with-eureka和eureka.client.fetch-registry配置项一定要配置成false,前者表示不向注册中心注册自己,后者表示不需要检索服务。
本文采用模拟三个节点的集群搭建方式来确保高可用,当一个注册中心挂了的时候,另外两个可以继续使用。分别创建三个配置文件application-peer1.properties、application-peer2.properties和application-peer3.properties:
spring.application.name=eureka-server
server.port=1111
eureka.instance.hostname=peer1
eureka.client.service-url.defaultZone=http://peer2:1112/eureka/,http://peer3:1113/eureka/
spring.application.name=eureka-server
server.port=1112
eureka.instance.hostname=peer2
eureka.client.service-url.defaultZone=http://peer1:1111/eureka/,http://peer3:1113/eureka/
spring.application.name=eureka-server
server.port=1113
eureka.instance.hostname=peer3
eureka.client.service-url.defaultZone=http://peer1:1111/eureka/,http://peer2:1112/eureka/
其中每个节点的eureka.client.service-url.defaultZone项都配置成其他两个节点的服务地址,用逗号分隔。需要注意的是,和单点的搭建方式不同,这里的eureka.client.register-with-eureka和eureka.client.fetch-registry配置项一定要配置成true,或者不写,默认值就为true。
1.3 启动类
package com.hys.eureka;

import org.springframework.boot.SpringApplication;
import org.springframework.boot.autoconfigure.SpringBootApplication;
import org.springframework.cloud.netflix.eureka.server.EnableEurekaServer;

@EnableEurekaServer
@SpringBootApplication
public class EurekaServerApplication {

    public static void main(String[] args) {
        SpringApplication.run(EurekaServerApplication.class, args);
    }

}
其中@EnableEurekaServer注解表示这是一个Eureka的服务注册中心,提供给其他应用进行对话。
1.4 host文件
接着在本地的host文件(C:\Windows\System32\drivers\etc)中加上下面的三行代码,使得serviceUrl可以正确访问:
127.0.0.1 peer1
127.0.0.1 peer2
127.0.0.1 peer3
1.5 运行及结果
然后将该项目打包成jar,通过以下的三条命令来启动:
java -jar eureka-server-0.0.1-SNAPSHOT.jar --spring.profiles.active=peer1
java -jar eureka-server-0.0.1-SNAPSHOT.jar --spring.profiles.active=peer2
java -jar eureka-server-0.0.1-SNAPSHOT.jar --spring.profiles.active=peer3
注意,一开始启动第一个jar包的时候会因为其他两个节点还没有启动而报一些错,这都是正常的,只要先后启动这三个jar包就可以了。在启动第三个jar包的时候就可以发现不会报相关错误了。
除了上述打成jar包的方式启动之外,也可以在IDE中启动并通过不同的参数来区分。当三个节点都运行起来后,分别访问http://localhost:1111/、http://localhost:1112/和http://localhost:1113/,可以看到Eureka的相关信息面板:


由上可以看到,每个节点都可以看到另外两个注册的节点,并且这些节点都在可用分片(available-replicas)之中。
2 服务提供者
创建一个Spring Boot项目,命名为hello-service。
2.1 pom.xml
<?xml version="1.0" encoding="UTF-8"?>
<project xmlns="http://maven.apache.org/POM/4.0.0" xmlns:xsi="http://www.w3.org/2001/XMLSchema-instance"
         xsi:schemaLocation="http://maven.apache.org/POM/4.0.0 http://maven.apache.org/xsd/maven-4.0.0.xsd">
    <modelVersion>4.0.0</modelVersion>
    <parent>
        <groupId>org.springframework.boot</groupId>
        <artifactId>spring-boot-starter-parent</artifactId>
        <version>2.1.7.RELEASE</version>
        <relativePath/> <!-- lookup parent from repository -->
    </parent>
    <groupId>com.hys</groupId>
    <artifactId>hello-service</artifactId>
    <version>0.0.1-SNAPSHOT</version>
    <name>hello-service</name>
    <description>Demo project for Spring Cloud</description>

    <properties>
        <java.version>1.8</java.version>
        <spring-cloud.version>Greenwich.SR2</spring-cloud.version>
    </properties>

    <dependencies>
        <dependency>
            <groupId>org.springframework.boot</groupId>
            <artifactId>spring-boot-starter-web</artifactId>
        </dependency>
        <dependency>
            <groupId>org.springframework.cloud</groupId>
            <artifactId>spring-cloud-starter</artifactId>
        </dependency>
        <dependency>
            <groupId>org.springframework.cloud</groupId>
            <artifactId>spring-cloud-starter-netflix-eureka-client</artifactId>
        </dependency>
        <dependency>
            <groupId>org.springframework.boot</groupId>
            <artifactId>spring-boot-starter-test</artifactId>
            <scope>test</scope>
        </dependency>
    </dependencies>

    <dependencyManagement>
        <dependencies>
            <dependency>
                <groupId>org.springframework.cloud</groupId>
                <artifactId>spring-cloud-dependencies</artifactId>
                <version>${spring-cloud.version}</version>
                <type>pom</type>
                <scope>import</scope>
            </dependency>
        </dependencies>
    </dependencyManagement>

    <build>
        <plugins>
            <plugin>
                <groupId>org.springframework.boot</groupId>
                <artifactId>spring-boot-maven-plugin</artifactId>
            </plugin>
        </plugins>
    </build>

</project>
2.2 application.properties
spring.application.name=hello-service
eureka.client.service-url.defaultZone=http://peer1:1111/eureka/,http://peer2:1112/eureka/,http://peer3:1113/eureka/
2.3 启动类
package com.hys.helloservice;

import org.springframework.boot.SpringApplication;
import org.springframework.boot.autoconfigure.SpringBootApplication;

@SpringBootApplication
public class HelloServiceApplication {

    public static void main(String[] args) {
        SpringApplication.run(HelloServiceApplication.class, args);
    }

}
在新版本中,不用再配置@EnableDiscoveryClient注解了。只需要引入以spring-cloud-starter-netflix为前缀的依赖库之后,服务发现就自动开启了。
2.4 Controller
package com.hys.helloservice.controller;

import com.hys.helloservice.entity.User;
import org.springframework.beans.factory.annotation.Value;
import org.springframework.web.bind.annotation.*;

import java.util.Random;

@RestController
public class HelloController {

    @Value("${server.port}")
    private String port;

    @GetMapping("/hello")
    public String index() {
        return "port:" + port;
    }

    @GetMapping("/hello2")
    public String index2() throws InterruptedException {
        Thread.sleep(new Random().nextInt(10000));
        return "port:" + port;
    }

    @GetMapping("/hello3")
    public String hello3(@RequestParam("name") String name) {
        return name;
    }

    @GetMapping("/hello4")
    public User hello4(@RequestHeader("name") String name, @RequestHeader("age") Integer age) {
        User user = new User();
        user.setName(name);
        user.setAge(age);
        return user;
    }

    @PostMapping("/hello5")
    public String hello5(@RequestBody User user) {
        return user.getName() + user.getAge();
    }
}
其中index方法是用来测试负载均衡的方法,通过刷新页面,查看端口号是否发生改变即可看出有没有实现负载均衡。
而index2方法不仅是用来测试负载均衡,更多的是用来测试断路器的效果。因为Hystrix的默认超时时间是1秒,所以通过休眠一个小于10秒的随机时间,如果当前休眠的时间小于1秒,则消费者能成功访问服务;如果当前休眠的时间大于1秒,则过了1秒后,会立即返回错误反馈,而不会等到休眠时间到了为止才响应(亦或是会一直阻塞下去)。
index3、index4和index5方法是用来模拟带参数绑定的调用效果。其中需要的User代码和下面第3.6节的User代码是一致的,在hello-service项目中再写一份同样的代码即可,也可以考虑抽取出来单独放在一个Maven中去调用。
2.5 运行及结果
和上面相似,可以将该项目打成jar包或者直接运行IDE的方式来运行,打成jar包的命令如下所示:
java -jar hello-service-0.0.1-SNAPSHOT.jar --server.port=8081
java -jar hello-service-0.0.1-SNAPSHOT.jar --server.port=8082
启动两个hello-service项目,通过端口号来区分。Eureka的信息页面可以看到相关的变化:

3 服务消费者
消费者通过OpenFeign来实现消费,创建一个Spring Boot项目,命名为feign-consumer。
3.1 pom.xml
<?xml version="1.0" encoding="UTF-8"?>
<project xmlns="http://maven.apache.org/POM/4.0.0" xmlns:xsi="http://www.w3.org/2001/XMLSchema-instance"
         xsi:schemaLocation="http://maven.apache.org/POM/4.0.0 http://maven.apache.org/xsd/maven-4.0.0.xsd">
    <modelVersion>4.0.0</modelVersion>
    <parent>
        <groupId>org.springframework.boot</groupId>
        <artifactId>spring-boot-starter-parent</artifactId>
        <version>2.1.7.RELEASE</version>
        <relativePath/> <!-- lookup parent from repository -->
    </parent>
    <groupId>com.hys</groupId>
    <artifactId>feign-consumer</artifactId>
    <version>0.0.1-SNAPSHOT</version>
    <name>feign-consumer</name>
    <description>Demo project for Spring Cloud</description>

    <properties>
        <java.version>1.8</java.version>
        <spring-cloud.version>Greenwich.SR2</spring-cloud.version>
    </properties>

    <dependencies>
        <dependency>
            <groupId>org.springframework.boot</groupId>
            <artifactId>spring-boot-starter-web</artifactId>
        </dependency>
        <dependency>
            <groupId>org.springframework.cloud</groupId>
            <artifactId>spring-cloud-starter-netflix-eureka-client</artifactId>
        </dependency>
        <dependency>
            <groupId>org.springframework.cloud</groupId>
            <artifactId>spring-cloud-starter-openfeign</artifactId>
        </dependency>
        <dependency>
            <groupId>org.springframework.boot</groupId>
            <artifactId>spring-boot-starter-test</artifactId>
            <scope>test</scope>
        </dependency>
    </dependencies>

    <dependencyManagement>
        <dependencies>
            <dependency>
                <groupId>org.springframework.cloud</groupId>
                <artifactId>spring-cloud-dependencies</artifactId>
                <version>${spring-cloud.version}</version>
                <type>pom</type>
                <scope>import</scope>
            </dependency>
        </dependencies>
    </dependencyManagement>

    <build>
        <plugins>
            <plugin>
                <groupId>org.springframework.boot</groupId>
                <artifactId>spring-boot-maven-plugin</artifactId>
            </plugin>
        </plugins>
    </build>

</project>
其中OpenFeign是在Netflix Feign的基础上扩展了对Spring MVC的注解支持,在笔者所使用版本的Spring Cloud中已经没有了对spring-cloud-starter-feign的依赖。
3.2 application.properties
spring.application.name=feign-consumer
server.port=9001
eureka.client.service-url.defaultZone=http://localhost:1111/eureka/,http://localhost:1112/eureka/,http://localhost:1113/eureka/
feign.hystrix.enabled=true
其中feign.hystrix.enabled配置项默认为false,也就是不开启Hystrix熔断器,需要设置成true才能开启该功能。
3.3 启动类
package com.hys.feignconsumer;

import org.springframework.boot.SpringApplication;
import org.springframework.boot.autoconfigure.SpringBootApplication;
import org.springframework.cloud.openfeign.EnableFeignClients;

@EnableFeignClients
@SpringBootApplication
public class FeignConsumerApplication {

    public static void main(String[] args) {
        SpringApplication.run(FeignConsumerApplication.class, args);
    }

}
其中@EnableFeignClients注解是用来开启Spring Cloud Feign的支持功能。
3.4 Controller
package com.hys.feignconsumer.controller;

import com.hys.feignconsumer.entity.User;
import com.hys.feignconsumer.service.IHelloService;
import org.springframework.beans.factory.annotation.Autowired;
import org.springframework.web.bind.annotation.GetMapping;
import org.springframework.web.bind.annotation.RestController;

@RestController
public class ConsumerController {

    @Autowired
    private IHelloService helloService;

    @GetMapping("/feign-consumer")
    public String helloConsumer() {
        return helloService.hello();
    }

    @GetMapping("/feign-consumer2")
    public String helloConsumer2() {
        return helloService.hello2();
    }

    @GetMapping("/feign-consumer3")
    public String helloConsumer3() {
        String hello3 = helloService.hello3("Tom");
        User hello4 = helloService.hello4("Robert Hou", 24);
        User user = new User();
        user.setName("Jerry");
        user.setAge(79);
        String hello5 = helloService.hello5(user);
        StringBuilder sb = new StringBuilder();
        String s = sb.append(hello3).append(" ").append(hello4).append(" ").append(hello5).append(" ").toString();
        return s;
    }
}
3.5 Service
package com.hys.feignconsumer.service;

import com.hys.feignconsumer.entity.User;
import com.hys.feignconsumer.service.impl.HelloServiceImplFallback;
import org.springframework.cloud.openfeign.FeignClient;
import org.springframework.web.bind.annotation.*;

@FeignClient(name = "hello-service", fallback = HelloServiceImplFallback.class)
public interface IHelloService {

    @GetMapping("/hello")
    String hello();

    @GetMapping("/hello2")
    String hello2();

    @GetMapping("hello3")
    String hello3(@RequestParam("name") String name);

    @GetMapping("/hello4")
    User hello4(@RequestHeader("name") String name, @RequestHeader("age") Integer age);

    @PostMapping("/hello5")
    String hello5(@RequestBody User user);
}
其中@FeignClient注解是通过指定服务名来绑定服务,不区分大小写,而fallback则是指定Hystrix的降级配置实现类,其代码如下所示:
package com.hys.feignconsumer.service.impl;

import com.hys.feignconsumer.entity.User;
import com.hys.feignconsumer.service.IHelloService;
import org.springframework.stereotype.Component;

@Component
public class HelloServiceImplFallback implements IHelloService {

    @Override
    public String hello() {
        return "访问超时,请重新再试!";
    }

    @Override
    public String hello2() {
        return "访问超时,请重新再试!";
    }

    @Override
    public String hello3(String name) {
        return "访问超时,请重新再试!";
    }

    @Override
    public User hello4(String name, Integer age) {
        User user = new User();
        user.setName("未知");
        user.setAge(-1);
        return user;
    }

    @Override
    public String hello5(User user) {
        return "访问超时,请重新再试!";
    }
}
3.6 Model
package com.hys.feignconsumer.entity;

public class User {

    private String name;
    private Integer age;

    public String getName() {
        return name;
    }

    public void setName(String name) {
        this.name = name;
    }

    public Integer getAge() {
        return age;
    }

    public void setAge(Integer age) {
        this.age = age;
    }

    @Override
    public String toString() {
        return "User{" +
                "name='" + name + '\'' +
                ", age=" + age +
                '}';
    }
}
3.7 运行及结果
运行该项目,Eureka的信息页面中可以看到该项目已经注册进去了:

同时页面访问http://localhost:9001/feign-consumer,页面结果如下所示:

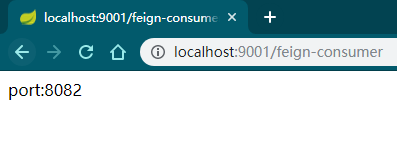
不断刷新该页面,可以看到port一直在8081和8082之间切换(因为默认的负载均衡是通过轮询的方式来实现),可以验证负载均衡是成功的。
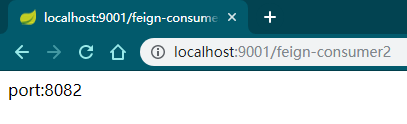
而Hystrix断路器的演示通过访问http://localhost:9001/feign-consumer2,不断刷新该页面,当随机的时间小于1秒的时候,页面访问的结果如下所示:
而如果随机的时间大于1秒的时候,页面的访问结果如下所示:

页面等了1秒左右后会出提示,由此可以看出Hystrix断路器是可以及时得到错误响应的。
页面访问http://localhost:9001/feign-consumer3,即可看到带参数调用的效果:

如果将其中的hello-service项目手工停掉,再来访问该页面,效果如下:
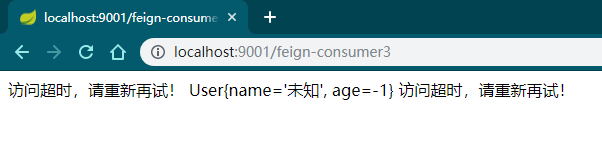
由上可见,Hystrix的降级配置在此依然起了作用,显示的是我们在HelloServiceImplFallback类中配置的降级代码。
