目录
由于Zuul 2.x的不断跳票,Spring Cloud自行研发了另外一款服务网关产品:Spring Cloud Gateway,并且在最新版本中推荐使用,所以Gateway出现的原因就是为了代替Zuul。相比Zuul,Gateway是Spring体系内的产物,和Spring融合更好。同时相比于Zuul 1.x的阻塞和多线程方式,Gateway采用了Netty异步非阻塞模型,占用资源更小,性能更有优势。同时增加了Predicate和限流等功能。
笔者使用的Java版本是jdk-8u201,IDE使用的是IntelliJ IDEA 2019.2 x64,Spring Boot的版本是2.1.7.RELEASE,Spring Cloud的版本是Greenwich.SR2。同时本文所使用的项目代码沿用笔者之前写过的文章《Spring Cloud服务治理:Eureka+OpenFeign》中的项目代码,并在此基础上进行继续开发。
1 传统路由方式
创建一个Spring Boot项目,命名为api-gateway。
1.1 pom.xml
<?xml version="1.0" encoding="UTF-8"?>
<project xmlns="http://maven.apache.org/POM/4.0.0" xmlns:xsi="http://www.w3.org/2001/XMLSchema-instance"
         xsi:schemaLocation="http://maven.apache.org/POM/4.0.0 http://maven.apache.org/xsd/maven-4.0.0.xsd">
    <modelVersion>4.0.0</modelVersion>
    <parent>
        <groupId>org.springframework.boot</groupId>
        <artifactId>spring-boot-starter-parent</artifactId>
        <version>2.1.7.RELEASE</version>
        <relativePath/> <!-- lookup parent from repository -->
    </parent>
    <groupId>com.hys</groupId>
    <artifactId>api-gateway</artifactId>
    <version>0.0.1-SNAPSHOT</version>
    <name>api-gateway</name>
    <description>Demo project for Spring Cloud</description>

    <properties>
        <java.version>1.8</java.version>
        <spring-cloud.version>Greenwich.SR2</spring-cloud.version>
    </properties>

    <dependencies>
        <dependency>
            <groupId>org.springframework.cloud</groupId>
            <artifactId>spring-cloud-starter-gateway</artifactId>
        </dependency>
        <dependency>
            <groupId>org.springframework.boot</groupId>
            <artifactId>spring-boot-starter-test</artifactId>
            <scope>test</scope>
        </dependency>
    </dependencies>

    <dependencyManagement>
        <dependencies>
            <dependency>
                <groupId>org.springframework.cloud</groupId>
                <artifactId>spring-cloud-dependencies</artifactId>
                <version>${spring-cloud.version}</version>
                <type>pom</type>
                <scope>import</scope>
            </dependency>
        </dependencies>
    </dependencyManagement>

    <build>
        <plugins>
            <plugin>
                <groupId>org.springframework.boot</groupId>
                <artifactId>spring-boot-maven-plugin</artifactId>
            </plugin>
        </plugins>
    </build>

</project>
1.2 启动类
package com.hys.apigateway;

import org.springframework.boot.SpringApplication;
import org.springframework.boot.autoconfigure.SpringBootApplication;

@SpringBootApplication
public class ApiGatewayApplication {

    public static void main(String[] args) {
        SpringApplication.run(ApiGatewayApplication.class, args);
    }

}
1.3 路由方式
Gateway的路由方式有两种,分别为编码方式和配置方式。
1.3.1 编码方式
在上面的启动类中加入下面的自定义RouteLocator的方法即可:
    @Bean
    public RouteLocator customRouteLocator(RouteLocatorBuilder builder) {
        return builder.routes()
                .route("route_a", r -> r.path("/hello")
                        .uri("http://localhost:8081/"))
                .build();
    }
1.3.2 配置方式
将上面自定义RouteLocator的方法注释掉,在application.properties文件中输入下面的内容:
spring.application.name=api-gateway
server.port=5555
spring.cloud.gateway.routes[0].id=route_a
spring.cloud.gateway.routes[0].uri=http://localhost:8081/
spring.cloud.gateway.routes[0].predicates[0]=Path=/hello
其中后三行的内容和上述编码配置的方式实现的效果是一样的。
1.4 运行及结果
这里采用配置文件的方式来运行,确保之前搭建的eureka-server、hello-service和feign-consumer项目都运行起来,启动本项目,页面输入http://localhost:5555/hello,结果如下所示:
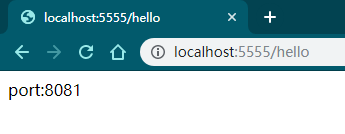
访问http://localhost:5555/hello会被自动路由到http://localhost:8081/hello,这样就验证了路由转发的成功。
2 面向服务的方式
显而易见的是,传统路由的配置方式比较繁琐,如果路由特别多的情况下,维护起来会很麻烦。为此,可以将Gateway与Eureka整合起来,这样不用再写具体的url映射,url交给Eureka的服务发现机制去自动维护。
2.1 pom.xml
pom沿用上面的配置,只需要再加入下面的Eureka依赖即可:
        <dependency>
            <groupId>org.springframework.cloud</groupId>
            <artifactId>spring-cloud-starter-netflix-eureka-client</artifactId>
        </dependency>
2.2 application.properties
spring.application.name=api-gateway
server.port=5555
spring.cloud.gateway.discovery.locator.enabled=true
spring.cloud.gateway.discovery.locator.lowerCaseServiceId=true
eureka.client.service-url.defaultZone=http://peer1:1111/eureka/,http://peer2:1112/eureka/,http://peer3:1113/eureka/
其中spring.cloud.gateway.discovery.locator.enabled设置为true表示开启通过注册中心进行路由转发的功能,spring.cloud.gateway.discovery.locator.lowerCaseServiceId设置为true表示通过小写形式来访问服务名称。
2.3 运行及结果
重启本项目,页面分别访问http://localhost:5555/feign-consumer/feign-consumer、http://localhost:5555/feign-consumer/feign-consumer2和http://localhost:5555/feign-consumer/feign-consumer3,结果如下所示:
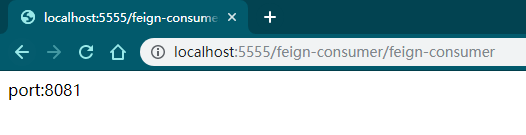
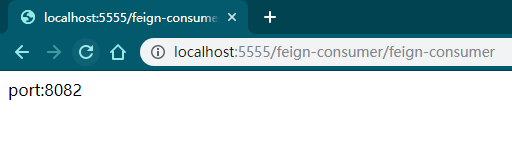


可以看到,和之前通过OpenFeign的消费者访问的结果是一样的,路由转发是成功的。
3 Predicate和Filter
Predicate和Filter是Gateway中的核心,Predicate是选择哪些请求需要处理,而Filter给选择出来的请求做一些改动,比如参数处理和安全校验等等。
3.1 Predicate
新建一个Spring Boot项目,命名为test-gateway,pom文件依赖和上述第1.1节中的pom依赖一致。这里我们用Postman来查看运行结果。
3.1.1 时间匹配
spring.application.name=gateway-test
server.port=5556
spring.cloud.gateway.routes[0].id=route_test
spring.cloud.gateway.routes[0].uri=https://www.baidu.com/
spring.cloud.gateway.routes[0].predicates[0]=After=2019-08-12T12:00:00+08:00[Asia/Shanghai]
上述After表示在2019年8月12日12点之后的请求可以被路由,而Before代表在指定时间之前可以被路由,Between则代表在指定的时间区隔之内可以被路由:
After=2019-08-12T12:00:00+08:00[Asia/Shanghai]
Before=2019-08-12T12:00:00+08:00[Asia/Shanghai]
Between=2019-08-12T12:00:00+08:00[Asia/Shanghai], 2019-08-13T12:00:00+08:00[Asia/Shanghai]
3.1.2 请求方式匹配
spring.application.name=gateway-test
server.port=5556
spring.cloud.gateway.routes[0].id=route_test
spring.cloud.gateway.routes[0].uri=https://www.baidu.com/
spring.cloud.gateway.routes[0].predicates[0]=Method=GET
上述表示只有GET请求才能被成功路由,访问Postman得到如下结果:

状态码为200,说明成功访问,这时我们改成POST请求,再来访问:

状态码为404,说明访问失败。
3.1.3 请求路径匹配
spring.application.name=gateway-test
server.port=5556
spring.cloud.gateway.routes[0].id=route_test
spring.cloud.gateway.routes[0].uri=https://www.baidu.com/
spring.cloud.gateway.routes[0].predicates[0]=Path=/foo/{segment}由上配置了匹配的请求路径,Postman访问http://localhost:5556/foo/1,访问成功:

访问http://localhost:5556/foo/1/2,访问失败:

3.1.4 请求参数匹配
spring.application.name=gateway-test
server.port=5556
spring.cloud.gateway.routes[0].id=route_test
spring.cloud.gateway.routes[0].uri=https://www.baidu.com/
spring.cloud.gateway.routes[0].predicates[0]=Query=p1上述配置了请求参数中必须含有p1参数才能路由成功,Postman访问http://localhost:5556/?p1=1,路由成功:

访问http://localhost:5556/?p2=2,路由失败:

Query的值还可以使用正则表达式来进行匹配,如下面的例子:
spring.application.name=gateway-test
server.port=5556
spring.cloud.gateway.routes[0].id=route_test
spring.cloud.gateway.routes[0].uri=https://www.baidu.com/
spring.cloud.gateway.routes[0].predicates[0]=Query=p1, 1.
上面配置了参数中的键必须含有p1,同时它所对应的值是以1开头的两个字符,Postman访问http://localhost:5556/?p1=1s,路由成功:

Postman访问http://localhost:5556/?p1=1,路由失败:

3.2 Filter
这里只演示AddRequestParameter的用法,更多的用法详见Spring官网。
AddRequestParameter是在请求的路径中添加相应的参数,我们继续使用上述的api-gateway项目。
3.2.1 hello-service
首先需要对之前的hello-service项目做些更改,在其中的HelloController中添加一个foo方法如下所示:
    @RequestMapping("/foo")
    public String foo(String foo) {
        return foo;
    }
3.2.2 feign-consumer
然后在feign-consumer项目中的ConsumerController中添加下面的方法:
    @RequestMapping("/foo")
    public String foo(String foo) {
        return helloService.foo(foo);
    }
在IHelloService中添加下面的方法:
@RequestMapping("/foo")
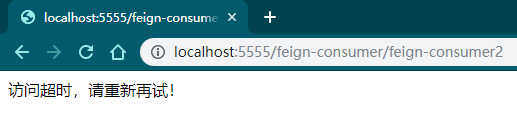
String foo(@RequestParam("foo") String foo);在相应的HelloServiceImplFallback降级类中填入下面的降级方法:
    @Override
    public String foo(String foo) {
        return "访问超时,请重新再试!";
    }
3.2.3 application.properties
api-gateway网关的配置文件需要做些修改:
spring.application.name=api-gateway
server.port=5555
spring.cloud.gateway.discovery.locator.enabled=true
spring.cloud.gateway.discovery.locator.lower-case-service-id=true
spring.cloud.gateway.routes[0].id=add_request_parameter_route
spring.cloud.gateway.routes[0].uri=lb://hello-service
spring.cloud.gateway.routes[0].predicates[0]=Method=GET
spring.cloud.gateway.routes[0].filters[0]=AddRequestParameter=foo, bar
eureka.client.service-url.defaultZone=http://peer2:1112/eureka/,http://peer3:1113/eureka/
其中,uri表示配置路由转发到hello-service的服务提供者。filters表示给匹配的请求中添加了一个foo=bar的参数。需要注意的是,filters必须和predicates联用,否则项目启动会失败。
3.2.4 运行及结果
随后分别启动eureka-server、hello-service和feign-consumer项目,然后启动api-gateway网关项目,首先页面访问http://localhost:9001/foo,以OpenFeign消费者的方式来访问服务:

由上可以看到,当没有使用网关来访问服务的时候,页面上没有结果,也就是说服务提供者没有接收到foo参数。然后我们访问http://localhost:5555/foo,以网关的方式来访问服务:
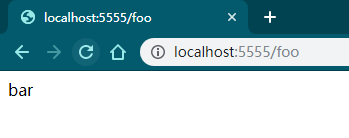
以上可知,页面上显示了bar,foo参数被成功接收,在请求中会添加一个foo=bar的参数。
