首先我们要知道 Eureka 2.0 闭源了,不过这其实影响不大,国内大部分的都还在使用Eureka 1.X 系列,所以适当的了解下Eureka的源码也是挺好的,就算之后不用,思想还是可以借鉴的。
总的来说,Eureka基本就做两件事,服务注册和服务发现,这里先学习下服务注册的源码逻辑
这里先简单介绍下用来测试源码的Eureka客户端和Eureka服务端配置
Eureka客户端配置:
server:
  #端口号
  port: 8763
eureka:
  client:
    service-url:
     #服务注册地址,这里填的是之前在Eureka Server配置的服务注册地址,只要有Eureka Client上线,就会向这个地址注册
      defaultZone: http://localhost:8761/eureka/
    fetch-registry: true
spring:
  application:
   #服务名
    name: eureka-client
Eureka服务端配置:
server:
  #端口号
  port: 8761
eureka:
  instance:
    #设置主机ip以及是否提交ip信息
    prefer-ip-address: true
    hostname: localhost
    service-url:
       #服务注册地址
       defaultZone: http://localhost:8761/eureka/
  client:
   #防止eureka-server向自己注册
    register-with-eureka: false
    fetch-registry: false
spring:
  application:
    name: eureka-server
服务注册
首先要找到相关的类,一般我们都会使用@EnableDiscoveryClient注解来做服务注册功能,让注册中心能够发现该服务。
-
先看@EnableDiscoveryClient注解源码
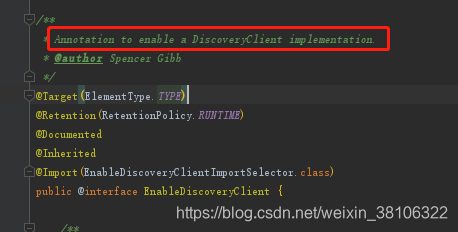
这是一个注解类,红框里是这个类的关键作用描述,意思是用于开启一个DiscoveryClient实例,进入DiscoveryClient类,先看看它的构造方法,毕竟你要搞个实例出来,构造方法还是必要的 -
DiscoveryClient类的构造方法
 DiscoveryClient(ApplicationInfoManager applicationInfoManager, EurekaClientConfig config, AbstractDiscoveryClientOptionalArgs args,
                    Provider<BackupRegistry> backupRegistryProvider, EndpointRandomizer endpointRandomizer) {
        if (args != null) {
            this.healthCheckHandlerProvider = args.healthCheckHandlerProvider;
            this.healthCheckCallbackProvider = args.healthCheckCallbackProvider;
            this.eventListeners.addAll(args.getEventListeners());
            this.preRegistrationHandler = args.preRegistrationHandler;
        } else {
            this.healthCheckCallbackProvider = null;
            this.healthCheckHandlerProvider = null;
            this.preRegistrationHandler = null;
        }
.........
        // finally, init the schedule tasks (e.g. cluster resolvers, heartbeat, instanceInfo replicator, fetch(最后,初始化调度任务(例如,集群解析器、heartbeat、instanceInfo复制器、fetch)
        initScheduledTasks();
.........
        initTimestampMs = System.currentTimeMillis();
        logger.info("Discovery Client initialized at timestamp {} with initial instances count: {}",
                initTimestampMs, this.getApplications().size());
    }
最后会进入上面的方法里,代码太长占篇幅,我做了省略哈,可以发现有个 initScheduledTasks()方法,有个初始化作用,进去看看它
- initScheduledTasks()方法源码,在这个方法里我们打上几个断点
第一个断点:
 // InstanceInfo replicator
            instanceInfoReplicator = new InstanceInfoReplicator(
                    this,
                    instanceInfo,
                    clientConfig.getInstanceInfoReplicationIntervalSeconds(),
                    2); // burstSize

可以看到里面的instanceInfo对象里的一些属性值和我们Eureka客户端配置文件里写的值是一样的
第二个断点:
instanceInfoReplicator.start(clientConfig.getInitialInstanceInfoReplicationIntervalSeconds());
这个断点用了instanceInfoReplicator.start()方法,猜测instanceInfoReplicator类要么实现了Runnable要么继承了Thread。
- 看下instanceInfoReplicator类的源码
class InstanceInfoReplicator implements Runnable {
 public void run() {
        try {
            discoveryClient.refreshInstanceInfo();

            Long dirtyTimestamp = instanceInfo.isDirtyWithTime();
            if (dirtyTimestamp != null) {
                discoveryClient.register();
                instanceInfo.unsetIsDirty(dirtyTimestamp);
            }
        } catch (Throwable t) {
            logger.warn("There was a problem with the instance info replicator", t);
        } finally {
            Future next = scheduler.schedule(this, replicationIntervalSeconds, TimeUnit.SECONDS);
            scheduledPeriodicRef.set(next);
        }
    }
 }
看到这个方法里面有个 discoveryClient.register()的方法,断点跟进register()方法

通过这个断点方法,我们可以知道com.netflix.appinfo.InstanceInfo是入参,这是Eureka客户端的实例信息,然后通过REST请求方式来向Eureka服务端请求服务注册。
