一、文件打包
tar命令
[root@localhost tar]# tar -cf etc.tar /etc/
tar: Removing leading `/' from member names
[root@localhost tar]# ls
etc.tar
-
-c:创建一个新的归档文件
-
-f:指向一个归档文件
[root@localhost tar]# tar -czf boot.tar.gz /boot/
tar: Removing leading `/' from member names
[root@localhost tar]# ls
boot.tar.gz  etc.tar
- -z:将打包文件以gzip的形式压缩
[root@localhost tar]# tar -cjf boot.tar.bz2 /tmp/
tar: Removing leading `/' from member names
tar: /tmp/tar: file changed as we read it
[root@localhost tar]# ls
boot.tar.bz2  boot.tar.gz  etc.tar
- -j:将打包文件以bzip2的形式压缩
[root@localhost tar]# tar -tf etc.tar
- -t:查看打包文件内容
[root@localhost tar]# tar --delete etc/hosts -f etc.tar
- –delete:从打包文件删除一个文件 (注意etc前边没有根)
[root@localhost tar]# tar -f etc.tar -r /root/file
tar: Removing leading `/' from member names
- -r:追加文件到打包文件中
[root@localhost tar]# tar -tvf etc.tar |grep hosts
- -v:显示正在处理的文件名
[root@localhost tar]# tar xzf boot.tar.gz
-
-x:解压
-
-xz:解压gzip压缩的归档文件
[root@localhost tar]# tar xjf boot.tar.bz2
-
-j:解压
-
-xj:解压bzip2压缩的归档文件
[root@localhost tar]# tar xjf boot.tar.bz2 -C test
- -C:指定解压路径
[root@localhost tar]# tar -xjf boot.tar.bz2 --remove-file
- –remove-files:打包的同时删除原文件
[root@localhost tar]# tar xzvf boot.tar.gz && rm -rf file2.txt.gz
- &&:前一步解压文件,后一步删除文件
-c:创建一个新的归档文件
-f:指向一个归档文件
-z:将打包文件以gzip的形式压缩
-j:将打包文件以bzip2的形式压缩
-t:查看打包文件内容
–delete:从打包文件删除一个文件 (注意etc前边没有根)
-r:追加文件到打包文件中
-v:显示正在处理的文件名
-x:解压(gzip的方式)
-xz:解压gzip压缩的归档文件
-j:解压(bzip2的方式)
-xj:解压bzip2压缩的归档文件(gzip同理)
-C:指定解压路径
–remove-files:打包的同时删除原文件
cpio命令
-t:查看归档内容
-F:指定归档内容
-o:copy-out模式(将数据copy输出到文件或设备上)
-A:向归档文件中追加新文件
-i:copy-in模式(将数据自文件或设备复制到系统当中)
-d:需要时自动创建目录
-v:显示详细信息
-p:copy-pass模式(复制)
[root@localhost cpio]# find ./ -depth |cpio -ov -F tree1.cpio
./file1
./file2
。。。
./file999
./file1000
cpio: File ./tree.cpio grew, 33792 new bytes not copied
./tree.cpio
./
133 blocks
- 把当前的文件归档到tree1.cpio(tree1.cpio里边有本身)
为什么打包的tree1.cpio文件里边有它自己?
因为cpio的工作模式是当打包完第一个文件,打包文件tree1.cpio已经生成在该目录下,所以它会将自己打包进去
[root@localhost cpio]# find ./ -depth |cpio -ov -F /tmp/tree2.cpio
-
把当前的文件归档到/tmp目录下的tree2.cpio
这个里边并不包含tree2.cpio,因为生成的tree2.cpio并不在当前目录下,而cpio并不会自己找文件,所以没有
[root@localhost cpio]# find ./ -depth -print0 |cpio --null -ov -F tree2.cpio
- –null 解析空字符
[root@localhost cpio]# cpio -tF tree1.cpio

[root@localhost cpio]# cpio -t <  tree1.cpio
- 查看归档文件
[root@localhost cpio]# ls /root/test.txt | cpio -oAF /tmp/tree2.cpio
[root@localhost cpio]# cpio -tF /tmp/tree2.cpio
file1
file2
file3
file4
file5
tree1.cpio
./
/root/test.txt
2 blocks
- 向归档文件中追加文件(先标准输出文件,在向归档文件中追加文件)
[root@localhost tmp]# ls
abc  cpio  file  tar  tree2.cpio
[root@localhost tmp]# cd abc
[root@localhost abc]# ls
root
[root@localhost abc]# ls root/
anaconda-ks.cfg  test.txt
- 复制~下的文件到/tmp/abc/root下
[root@localhost cpio]#cpio -t -F /tmp/home1.cpio /root/*--查看home1.cpio归档文件里的 /root/下的内容 (没有隐藏文件)
[root@localhost cpio]#cpio -t -F /tmp/home1.cpio /root/.*--查看home1.cpio归档文件里的 /root/下的内容 (全隐藏文件)
 [root@localhost cpio]#cpio -t -F /tmp/home1.cpio /root/{.*,*}--查看home1.cpio归档文件里的 /root/下的内容 (所有文件)
[root@localhost cpio]#ls /root/test.txt |cpio -oA -F /tmp/home1.cpio----向归档文件中追加文件
[root@localhost cpio]#find /boot -depth -print0 |cpio -oA -F /tmp/home1.cpio--添加新目录
[root@localhost cpio]#cpio -idv -F /tmp/home1.cpio--提取文件
[root@localhost cpio]#find ~ -depth -print0 | cpio --null -pvd /tmp/abc--复制~下文件到/tmp/abc/root/
什么时候用tar,什么时候用cpio呢?
-
自己创建的文件或者一些程序包,用tar归档
-
系统上的一些文件用cpio归档(可以备份特殊的系统文件)
-
tar速度比cpio慢,且不能跨越两份存储媒体
-
cpio则由于可通过管道功能,使得其打包时的文件选择、排除功能非常强,且能跨越多份媒体
-
cpio没有文件名长度的限制
-
默认情况下,cpio保留时间戳
二、国内yum源
网易163 yum源,安装方法查看:http://mirrors.163.com/.help/ (我推荐)
中科大的 yum源,安装方法查看:https://lug.ustc.edu.cn/wiki/mirrors/help
sohu的 yum源,安装方法查看: http://mirrors.sohu.com/help/
阿里云的 yum源,安装方法查看: http://mirrors.aliyun.com/repo/ (推荐)
清华大学的 yum源,安装方法查看: https://mirrors.tuna.tsinghua.edu.cn/
浙江大学的 yum源,安装方法查看: http://mirrors.zju.edu.cn/
中国科技大学yum源,安装方法查看: http://centos.ustc.edu.cn/
三、Linux程序包安装以及管理方式
yum是一种包管理器,基于RPM包管理,能够从指定服务器自动下载RPM包并且安装
1、网络yum源

一般直接使用CentOS-Base.repo作为默认的 yum源
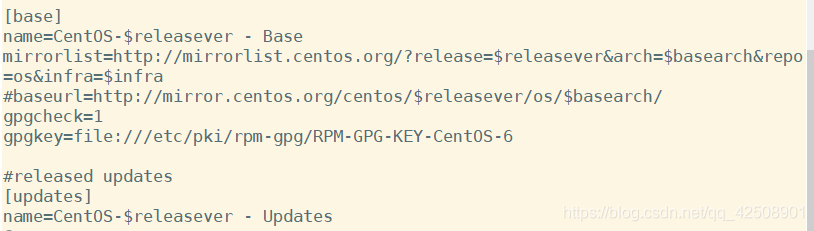
[base] : yum源名称,名称一定要在[]中
name:yum源说明
mirrorlist:镜像站点,可以不要
baseurl:yum源服务器的地址,这里默认时CentOS官方的yum源服务器,一般情况下我们使用国内站点
gpgcheck:是否要检验数字证书,1代表校验,0代表不校验
gpgkey:数字证书保存位置
2、本地yum源
- 挂载光盘
[root@node1 yum.repos.d]# mount /dev/sr0 /media/
mount: block device /dev/sr0 is write-protected, mounting read-only
- 将默认的网络yum源备份,创建目录bak
[root@node1 yum.repos.d]# mkdir bak
[root@node1 yum.repos.d]# mv Cen* bak/
- 新建光盘yum源文件
[root@node1 yum.repos.d]# vi yum.repo

- 清空历史缓存并创建新的缓存
[root@node1 yum.repos.d]# yum clean all
Loaded plugins: fastestmirror
Cleaning repos: Centos
Cleaning up Everything
[root@node1 yum.repos.d]# yum makecache
Loaded plugins: fastestmirror
Determining fastest mirrors
Centos                                                   | 4.0 kB     00:00 ...
Centos/group_gz                                          | 226 kB     00:00 ...
Centos/filelists_db                                      | 6.3 MB     00:00 ...
Centos/primary_db                                        | 4.7 MB     00:00 ...
Centos/other_db                                          | 2.8 MB     00:00 ...
Metadata Cache Created
3、yum相关命令
[root@node1 yum.repos.d]# yum list
文件后边有@符号代表已经安装,没有代表没有安装
#显示配置的仓库
[root@node1 yum.repos.d]# yum repolist
[root@node1 yum.repos.d]# yum repolist enabled--显示可用
[root@node1 yum.repos.d]# yum repolist all--显示所有
显示所有软件包
[root@node1 yum.repos.d]# yum list |grep vim

[root@node1 yum.repos.d]# yum list installed |grep vim
vim-minimal.x86_64      2:7.4.629-5.el6 @anaconda-CentOS-201605220104.x86_64/6.8----查看是否已安装该包
[root@node1 yum.repos.d]# yum list available--查看可安装的包
[root@node1 yum.repos.d]# yum list updates--显示已经更新的包
[root@node1 yum.repos.d]# yum list recent--显示最近增加的包
#安装
[root@node1 yum.repos.d]#yum install 包名
[root@node1 yum.repos.d]#yum install -y 包名
#升级
[root@node1 yum.repos.d]#yum update 包名
#卸载
[root@node1 yum.repos.d]#yum remove 包名
#创建和清理缓存
[root@node1 yum.repos.d]#yum clean all
[root@node1 yum.repos.d]#yum makecache
#搜索包
[root@node1 yum.repos.d]#yum search 包名
#显示软件包信息
[root@node1 yum.repos.d]#yum info 包名
四、RPM安装方式
首先我们将光驱挂载在/media下,切换到此目录中我们会看到有一个Package目录,在这个目录中是我们系统自带的编译好的rpm程序包
1、RPM包命名规则
软件名+版本号(主版本号.次版本号.修订号—打包次数.适用版本号.Cpu架构/noach可在任何平台安装).rpm
2、安装
[root@node1 ~]#rpm -ivh 安装包全名
-i:install安装
-v:显示安装详细信息
-h:显示进度条
–nodeps:不检测依赖
–replacepkgs:重新安装
3、升级
[root@node1 ~]#rpm -Uvh 包全名
-U:升级或安装
-F:只升级,不安装
4、卸载
[root@node1 ~]#rmp -e 包名(软件名)
-e:卸载
–nodepths:不检测依赖
5、查询rpm包是否安装
[root@node1 ~]#rpm -q 包名
-q:查询
-qa:查询所有已经安装的rpm包
6、查询详细信息
[root@node1 ~]#rpm -qi 包名
-i:查询软件信息
-p:查询未安装包的信息
7、查询软件包安装位置
[root@node1 ~]#rpm -ql  包名
[root@node1 ~]#rpm -ql vim | more
-l:列表
8、查询软件包的依赖性
[root@node1 ~]#rpm -qR 包名
-R:查找依赖性
9、校验
[root@node1 ~]#rpm -V 包名
也可以使用echo $?进行校验
结果为0,表示成功,结果非0,表示失败
五、源码安装
1、安装编译工具
2、建立检查系统环境 ./configure
3、编译,使用make编译
4、安装,使用make install 安装
例如:安装apache
1、
[root@localhost httpd]# wget http://mirrors.aliyun.com/apache/httpd/httpd-2.4.38.tar.bz2
[root@localhost httpd]# ls
httpd-2.4.38.tar.bz2  httpd-2.4.38.tar.bz2.1
[root@localhost httpd]# rm -rf httpd-2.4.38.tar.bz2.1
[root@localhost httpd]# ls
httpd-2.4.38.tar.bz2
[root@localhost httpd]# tar -zjf httpd-2.4.38.tar.bz2
tar: Conflicting compression options
Try `tar --help' or `tar --usage' for more information.
[root@localhost httpd]# tar -xjf httpd-2.4.38.tar.bz2
[root@localhost httpd]# echo $?
0
[root@localhost httpd]# ls
httpd-2.4.38  httpd-2.4.38.tar.bz2
[root@localhost httpd]# cd httpd-2.4.38
[root@localhost httpd-2.4.38]# ./configure --prefix=/tmp/httpd
checking for chosen layout... Apache
checking for working mkdir -p... yes
checking for grep that handles long lines and -e... /usr/bin/grep
checking for egrep... /usr/bin/grep -E
checking build system type... x86_64-pc-linux-gnu
checking host system type... x86_64-pc-linux-gnu
checking target system type... x86_64-pc-linux-gnu
configure:
configure: Configuring Apache Portable Runtime library...
configure:
checking for APR... no
configure: error: APR not found.  Please read the documentation.
----error: APR-util not found  类似于这样的错误,缺少依赖。安装依赖
----yum install apr-devel 提示缺少apr,但是实际是安装好的;-devel;
使用make编译
les long lines and -e… /usr/bin/grep
checking for egrep… /usr/bin/grep -E
checking build system type… x86_64-pc-linux-gnu
checking host system type… x86_64-pc-linux-gnu
checking target system type… x86_64-pc-linux-gnu
configure:
configure: Configuring Apache Portable Runtime library…
configure:
checking for APR… no
configure: error: APR not found. Please read the documentation.
----error: APR-util not found 类似于这样的错误,缺少依赖。安装依赖
----yum install apr-devel 提示缺少apr,但是实际是安装好的;-devel;
使用make编译

使用make  install 安装
