在网上查了一圈都没找到我想要的,自己折腾一番成功了,特此记录下来供大家参考。
vscode下载和安装都很简单,聪明的你一看就会。本文重点介绍如何使用vscode在同一个c++项目内自由切换使用微软msvc的cl.exe和MingW的g++.exe编译器来编译调试,以方便学习不同编译器的差别。我只用了这两款编译器,其他的编译器可能设置方法大同小异。
最终效果:
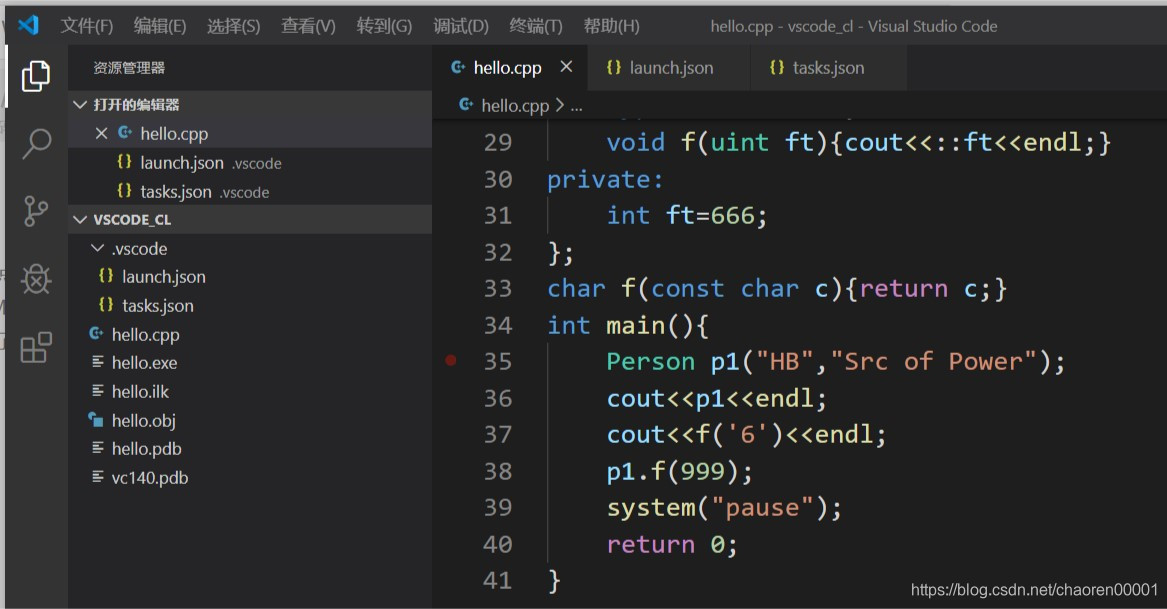 这是一个cpp源文件hello.cpp和两款编译器都编译过后的其他所有文件,hello.cpp内容不重要,是我学cpp的小练习。。。
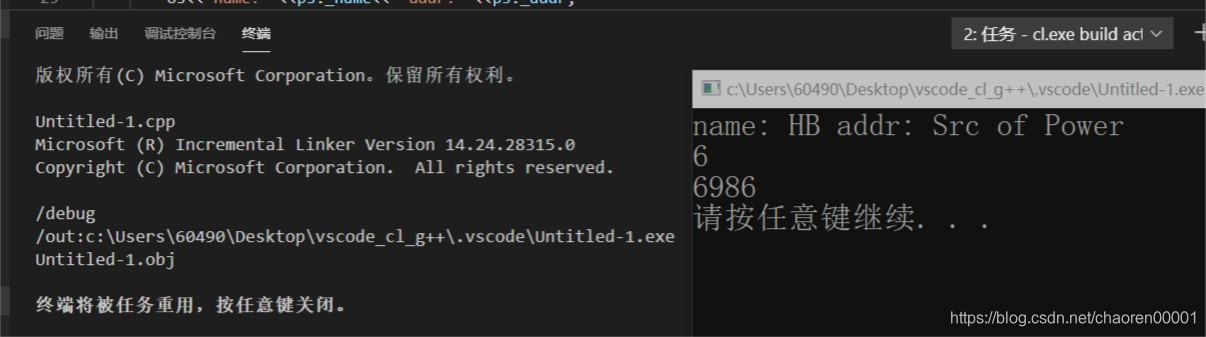 这是用cl.exe的编译效果
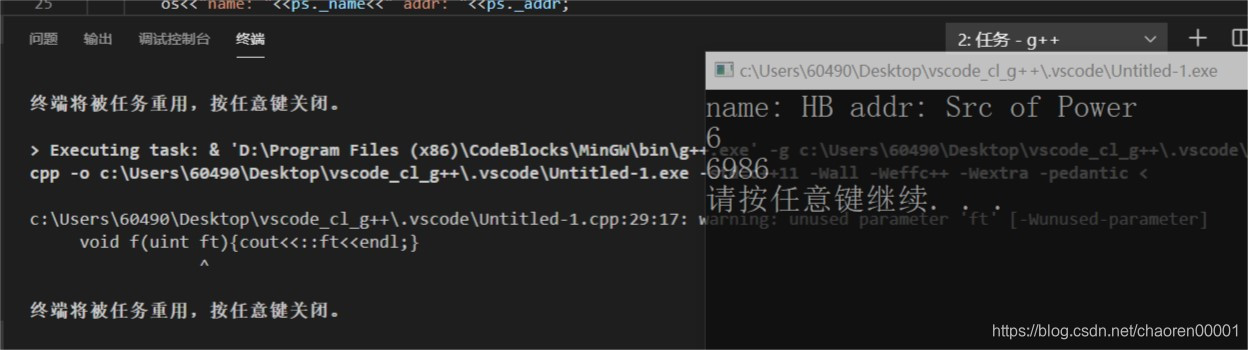 这是同一个项目用g++.exe的编译效果
操作要点:
0.基本前提是你电脑中要有cl.exe(vs2019或更早版本自带)、g++.exe(codeblocks自带、devcpp自带,或者下载MingW自行安装)。
1.由于cl的复杂特性,每次打开c++项目必须用vs的命令行编辑器用code 项目文件夹来打开vscode,如
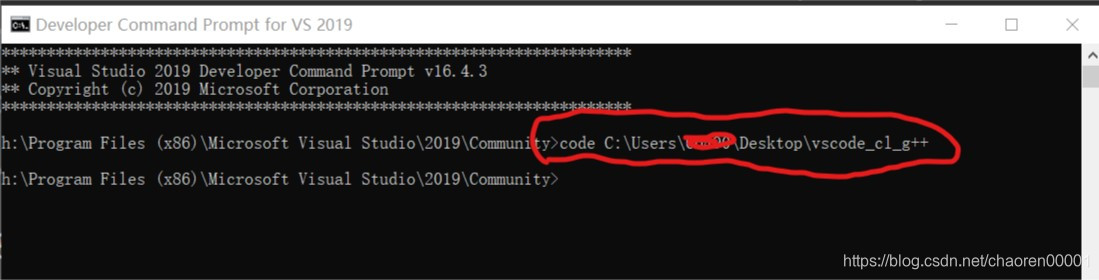 若不这么打开,可能无法使用cl编译器,g++不受此影响。
2.修改你的c++项目中的tasks.json和launch.json,分别添加相应代码:
tasks.json:
{
    "tasks": [
        {	// 对应cl.exe
            "type": "shell",
            "label": "cl.exe build active file",
            "command": "cl.exe",
            "args": [	// cl的编译选项,自行设置
                "/Zi",
                "/EHsc",
                "/Fe:",
                "${fileDirname}\\${fileBasenameNoExtension}.exe",
                "${file}"
            ],
            "group": {
                "kind": "build",
                "isDefault": true
            },
            "presentation": {
                "reveal": "always"
            },
            "problemMatcher": "$msCompile"
        },
        {	// 对应g++.exe
            "type": "shell",
            "label": "g++.exe build active file",
            "command": "D:\\Program Files (x86)\\CodeBlocks\\MinGW\\bin\\g++.exe",
            "args": [	// g++的编译选项,自行设置
                "-g",
                "${file}",
                "-o",
                "${fileDirname}\\${fileBasenameNoExtension}.exe",
                "-std=c++11",
                "-Wall",
                "-Weffc++",
                "-Wextra",
                "-pedantic"
            ],
            "options": {
                "cwd": "D:\\Program Files (x86)\\CodeBlocks\\MinGW\\bin"		// 换成你自己的相应路径
            }
        }
    ],
    "version": "2.0.0"
}
launch.json:
{
    // 使用 IntelliSense 了解相关属性。
    // 悬停以查看现有属性的描述。
    // 欲了解更多信息,请访问: https://go.microsoft.com/fwlink/?linkid=830387
    "version": "0.2.0",
    "configurations": [
        {   // 对应cl.exe
            "name": "cl.exe build and debug active file",
            "type": "cppvsdbg",
            "request": "launch",
            "program": "${fileDirname}\\${fileBasenameNoExtension}.exe",
            "args": [],
            "stopAtEntry": false,
            "cwd": "${workspaceFolder}",
            "environment": [],
            "externalConsole": true,
            "preLaunchTask": "cl.exe build active file"
        },
        {   // 对应g++.exe
            "name": "g++.exe build and debug active file",
            "type": "cppdbg",
            "request": "launch",
            "program": "${fileDirname}\\${fileBasenameNoExtension}.exe",
            "args": [],
            "stopAtEntry": false,
            "cwd": "${workspaceFolder}",
            "environment": [],
            "externalConsole": true,
            "MIMode": "gdb",
            "miDebuggerPath": "D:\\Program Files (x86)\\CodeBlocks\\MinGW\\gdb32\\bin\\gdb32.exe",	// 换成你自己的gdb32.exe的路径
            "setupCommands": [
                {
                    "description": "为 gdb 启用整齐打印",
                    "text": "-enable-pretty-printing",
                    "ignoreFailures": true
                }
            ],
            "preLaunchTask": "g++.exe build active file"
        }
    ]
}
分别保存上面两个文件后,vscode的编译调试栏会出现相应的编译配置:
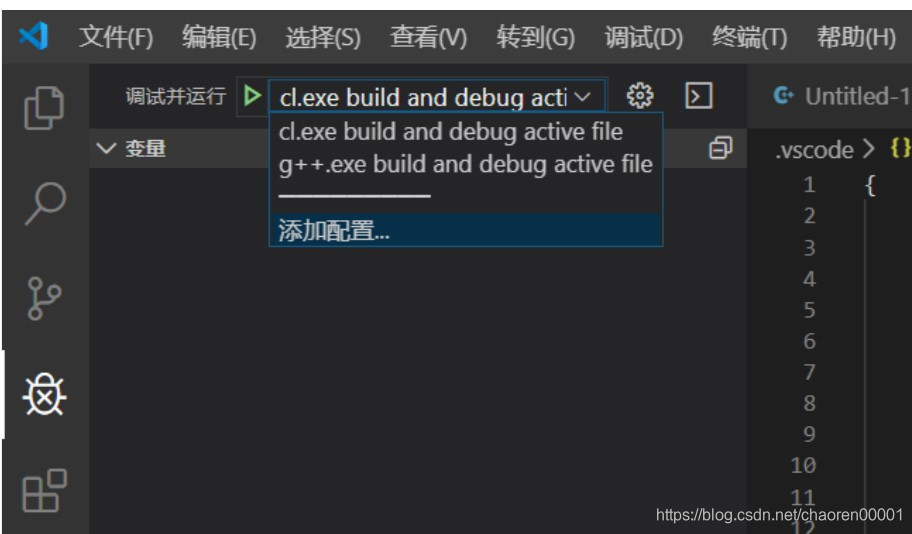
操作步骤总结:
1.按操作要点2的要求修改好tasks.json和launch.json
2.按操作要点1的要求打开vscode
3.任意切换cl或g++进行编译调试c++项目
这是我的第一篇博文,希望能够对你有所帮助
