文章目录
一、用于创建对象的
相当于<bean id="" class="">。
(1)@Component
- 作用:
把当前类对象存入Spring容器中,相当于在 xml 中配置一个 bean。 - 属性:
value:指定 bean 的 id。如果不指定 value 属性,默认 bean 的 id 是当前类的类名且首字母小写。
(2)@Controller @Service @Repository
三个注解都是针对一个的衍生注解,他们的作用及属性都是一模一样的。只不过是提供了更加明确的语义化。
- @Controller:用于表现层的注解。
- @Service:用于业务层的注解。
- @Repository:用于持久层的注解。
细节:如果注解中有且只有一个属性要赋值时,且名称是 value,value 在赋值是可以不写。
(3)使用注解创建对象
Person实体类
package com.gql.entity;
import java.util.ArrayList;
import java.util.List;
import org.springframework.stereotype.Component;
import com.gql.di.Student;

/**
 * 类说明:
 * 		实体类Person
 * @guoqianliang1998.
 */
@Component("p")
public class Person {
	private String name;
	private Integer age;
	private Student s;
	public Person() {
		super();
		// TODO Auto-generated constructor stub
	}

	public Person(String name, Integer age) {
		super();
		this.name = name;
		this.age = age;
	}

	public String getName() {
		return name;
	}

	public void setName(String name) {
		this.name = name;
	}

	public Integer getAge() {
		return age;
	}

	public void setAge(Integer age) {
		this.age = age;
	}

	public void init() {
		System.out.println("初始化对象...");

	}

	public void destroy() {
		System.out.println("销毁对象...");
	}

	public Student getS() {
		return s;
	}

	public void setS(Student s) {
		this.s = s;
	}
}
XML配置
<?xml version="1.0" encoding="UTF-8"?>
<beans xmlns="http://www.springframework.org/schema/beans"
	xmlns:xsi="http://www.w3.org/2001/XMLSchema-instance"
	xmlns:context="http://www.springframework.org/schema/context"
	xsi:schemaLocation="
		http://www.springframework.org/schema/beans
		http://www.springframework.org/schema/beans/spring-beans.xsd
		http://www.springframework.org/schema/context
		http://www.springframework.org/schema/context/spring-context.xsd">
	<!--
		打开注解
		<context:annotation-config></context:annotation-config>
	 -->
	<!-- 注解扫描 -->
	 <context:component-scan base-package="com.gql.entity"></context:component-scan>
</beans>
测试使用注解
package com.gql.annotation;
import org.junit.Test;
import org.springframework.context.ApplicationContext;
import org.springframework.context.support.ClassPathXmlApplicationContext;
import com.gql.entity.Person;
/**
 * 类说明:
 *		测试使用注解
 * @guoqianliang1998.
 */
public class Demo {
	@Test
	public void test(){
		ApplicationContext ac = new ClassPathXmlApplicationContext("applicationContext.xml");
		Person p = (Person) ac.getBean("p");
		System.out.println(p);
	}
}
成功使用注解创建出对象。

二、用于注入数据的
相当于:<property name="" ref="">,<property name="" value="">。
(1)@Value
	@Value("Tom")
	private String name;
| 作用 | 属性 |
|---|---|
注入基本数据类型和 String 类型数据 |
value:用于指定值 |
(2)@Resource
	@Resource(name="child")
	private Child child;
| 作用 | 范围 |
|---|---|
直接按照 Bean 的 id 注入,也只能注入其他 bean 类型 |
name:指定 bean 的 id。 |
(3)@Autowired
	@Autowired
	@Qualifier("iphone")
	private Usb usb;
- 作用:
自动按照数据类型注入。只要容器中有唯一的一个bean对象类型和要注入的变量类型匹配,就可以注入成功。 - 使用位置:可以是变量上,也可以是方法上(常用)。
(4)@Qualifier
| 作用 | 属性 |
|---|---|
在自动按照类型注入的基础之上,再按照 Bean 的 id 注入。必须和@Autowire 一起使用;但是给方法参数注入时,可以独立使用。 |
value:指定 bean 的 id。 |
三、用于改变作用范围的
相当于:<bean id="" class="" scope="">。
(1)@Scope
| 作用 | 属性 |
|---|---|
| 指定 bean 的作用范围。 | value:指定范围的值。(取值:singleton,prototype,request,session,globalsession) |
四、和生命周期相关
相当于:<bean id="" class="" init-method="" destroy-method="" />。
注意:对于销毁的方法只对scope="singleton"有效。
(1)@PostConstruct
- 作用:
用于指定初始化方法。
(2)@PreDestroy
- 作用:
用于指定销毁方法。
(3)单例模式下演示生命周期
Worker实体类
package com.gql.annotation;
import javax.annotation.PostConstruct;
import javax.annotation.PreDestroy;
import javax.annotation.Resource;
import org.springframework.beans.factory.annotation.Autowired;
import org.springframework.beans.factory.annotation.Qualifier;
import org.springframework.beans.factory.annotation.Value;
import org.springframework.context.annotation.Scope;
import org.springframework.stereotype.Component;
/**
* 类说明:
* Worker实体类
* @guoqianliang1998.
*/
@Component("worker")
@Scope("prototype")
public class Worker {
@Value("Tom")
private String name;
@Resource(name="child")
private Child child;
@Autowired
@Qualifier("iphone")
private Usb usb;
public Usb getUsb() {
return usb;
}
public String getName() {
return name;
}
public Child getChild() {
return child;
}
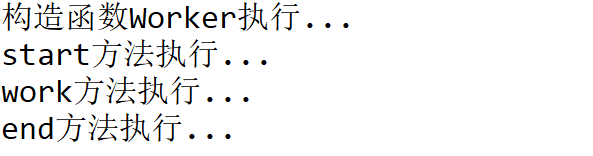
public Worker() {
System.out.println("构造函数Worker执行...");
}
public void work(){
System.out.println("work方法执行...");
}
@PostConstruct
public void start(){
System.out.println("start方法执行...");
}
@PreDestroy
public void end(){
System.out.println("end方法执行...");
}
}
package com.gql.annotation;
import org.junit.Test;
import org.springframework.context.ApplicationContext;
import org.springframework.context.support.ClassPathXmlApplicationContext;
import com.gql.entity.Person;
/**
 * 类说明:
 *		测试使用注解
 * @guoqianliang1998.
 */
public class Demo {
	@Test
	public void test(){
		ApplicationContext ac = new ClassPathXmlApplicationContext("applicationContext.xml");
		Person p = (Person) ac.getBean("p");
		System.out.println(p);
	}
	/**
	 * @Value
	 * 创建对象的
	 */
	@Test
	public void testProperties(){
		ApplicationContext ac = new ClassPathXmlApplicationContext("applicationContext.xml");
		Worker w = (Worker) ac.getBean("worker");
		System.out.println(w.getName());
	}
	/**
	 * @Resource
	 * 注入数据的
	 */
	@Test
	public void testProperties2(){
		ApplicationContext ac = new ClassPathXmlApplicationContext("applicationContext.xml");
		Worker w = (Worker) ac.getBean("worker");
		Child c = w.getChild();
		System.out.println(c);
	}

	/**
	 * @Autowired和@Qualifier
	 * 也是注入数据的
	 */
	@Test
	public void testProperties3(){
		ApplicationContext ac = new ClassPathXmlApplicationContext("applicationContext.xml");
		Worker w = (Worker) ac.getBean("worker");
		System.out.println(w.getUsb());
	}

	/**
	 * @Scope
	 * 改变作用范围的
	 */
	@Test
	public void testOther(){
		ApplicationContext ac = new ClassPathXmlApplicationContext("applicationContext.xml");
		Worker w = (Worker) ac.getBean("worker");
		w.work();
		w.end();
	}
}