Java EE 目录:https://blog.csdn.net/dkbnull/article/details/87932809
Spring Cloud 专栏:https://blog.csdn.net/dkbnull/column/info/36820
Spring Boot 专栏:https://blog.csdn.net/dkbnull/column/info/26341
在上一篇文章 Spring Cloud 自定义Eureka Ribbon负载均衡策略 中,我们使用Ribbon自定义的策略实现了负载均衡,接下来我们介绍下Spring Cloud的另一种服务调用方式Feign。
0. 开发环境
-
IDE:IntelliJ IDEA 2017.1 x64
-
jdk:1.8.0_91
-
Spring Boot:2.0.9.RELEASE
-
Spring Cloud:Finchley.RELEASE
1. Feign简介
Feign是一个声明式的伪Http Web服务客户端,它使得写Http客户端变得非常简单。使用Feign,只需创建一个接口并注解,就可实现服务间调用。它具有可插拔的注解特性,支持使用Feign注解、JAX-RS注解、Spring MVC注解。Feign默认集成了Ribbon,并结合了Eureka,默认实现了负载均衡。
2. 新建Feign服务消费者
2.1 新建Feign服务消费者
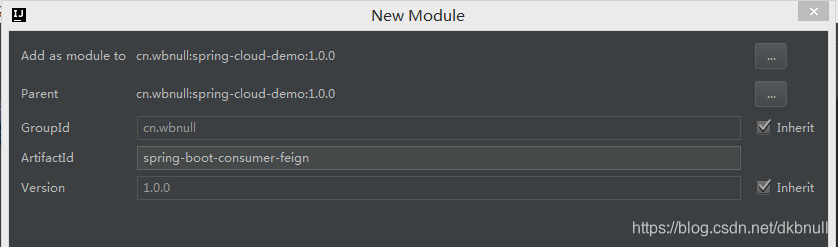
2.2 引入依赖
<?xml version="1.0" encoding="UTF-8"?>
<project xmlns="http://maven.apache.org/POM/4.0.0"
         xmlns:xsi="http://www.w3.org/2001/XMLSchema-instance"
         xsi:schemaLocation="http://maven.apache.org/POM/4.0.0 http://maven.apache.org/xsd/maven-4.0.0.xsd">
    <modelVersion>4.0.0</modelVersion>

    <artifactId>spring-boot-consumer-feign</artifactId>
    <packaging>jar</packaging>

    <parent>
        <artifactId>spring-cloud-demo</artifactId>
        <groupId>cn.wbnull</groupId>
        <version>1.0.0</version>
    </parent>

    <dependencies>
        <dependency>
            <groupId>org.springframework.boot</groupId>
            <artifactId>spring-boot-starter-web</artifactId>
        </dependency>
        <dependency>
            <groupId>org.springframework.cloud</groupId>
            <artifactId>spring-cloud-starter-netflix-eureka-client</artifactId>
        </dependency>
        <dependency>
            <groupId>org.springframework.cloud</groupId>
            <artifactId>spring-cloud-starter-openfeign</artifactId>
        </dependency>
    </dependencies>
</project>
2.3 新建application.yml
server:
  port: 8084
  servlet:
    context-path: /springbootconsumer

spring:
  application:
    name: spring-boot-consumer-feign

eureka:
  client:
    register-with-eureka: false
    fetch-registry: true
    service-url:
      defaultZone: http://localhost:8090/springcloudeureka/eureka/
2.4 新建Spring Boot启动类
这里要注意,启动类需增加类注解 @EnableFeignClients,表示此项目为Feign客户端
package cn.wbnull.springbootconsumer;

import org.springframework.boot.SpringApplication;
import org.springframework.boot.autoconfigure.SpringBootApplication;
import org.springframework.cloud.netflix.eureka.EnableEurekaClient;
import org.springframework.cloud.openfeign.EnableFeignClients;

@SpringBootApplication
@EnableEurekaClient
@EnableFeignClients
public class SpringBootConsumerFeignApplication {

    public static void main(String[] args) {
        SpringApplication.run(SpringBootConsumerFeignApplication.class, args);
    }
}
2.5 定义Feign接口
cn.wbnull.springbootconsumer包下新建feign包,再新建GatewayFeignClient接口类。
- @FeignClient(“服务id名称”),表示调用哪个服务
- @GetMapping(value = “接口地址”),表示调用哪个接口。这里要注意接口地址要保留server.servlet.context-path部分,没有则省略
package cn.wbnull.springbootconsumer.feign;

import org.springframework.cloud.openfeign.FeignClient;
import org.springframework.web.bind.annotation.GetMapping;

@FeignClient("spring-boot-provider")
public interface GatewayFeignClient {

    @GetMapping(value = "/springbootprovider/gateway")
    String gateway() throws Exception;
}
2.6 新建控制器类
cn.wbnull.springbootconsumer包下新建controller包,再新建GatewayController类。
package cn.wbnull.springbootconsumer.controller;

import cn.wbnull.springbootconsumer.feign.GatewayFeignClient;
import org.springframework.beans.factory.annotation.Autowired;
import org.springframework.context.annotation.Scope;
import org.springframework.web.bind.annotation.GetMapping;
import org.springframework.web.bind.annotation.RestController;

@RestController
@Scope("prototype")
public class GatewayController {

    @Autowired
    private GatewayFeignClient gatewayFeignClient;

    @GetMapping(value = "/gateway")
    public String gateway() throws Exception {
        return gatewayFeignClient.gateway();
    }
}
这里@Autowired GatewayFeignClient可能会有报错,是因为这个Bean是程序启动时注入的,现在编译器还无法装配,可以不用管,启动程序不会报错。但是如果看着报错不顺眼非要去掉,可以在刚才的GatewayFeignClient接口类增加@Component注解。
2.7 测试
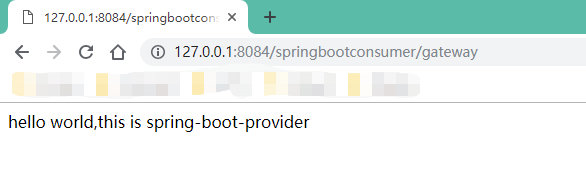
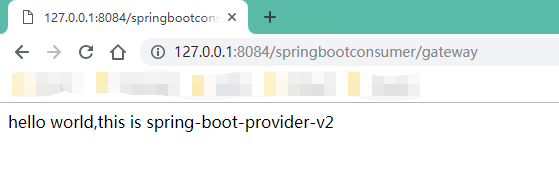
依次启动spring-cloud-eureka,spring-boot-provider,spring-boot-provider-v2,spring-boot-consumer-feign。然后浏览器访问http://127.0.0.1:8084/springbootconsumer/gateway,不断刷新,可以到到返回信息正常,且 hello world,this is spring-boot-provider 和 hello world,this is spring-boot-provider-v2 交替出现。
2.8 增加传参接口
刚才我们服务消费者调用服务提供者的接口,都是没有参数的,下面我们新建一个带参数的接口进行测试。
2.8.1 修改spring-boot-provider
spring-boot-provider服务GatewayController类增加如下代码
    @PostMapping(value = "/user")
    public String user(@RequestParam(value = "name") String name) throws Exception {
        return "hello world,this is spring-boot-provider. name is " + name;
    }
2.8.2 修改spring-boot-provider-v2
spring-boot-provider-v2服务GatewayController类增加如下代码
    @PostMapping(value = "/user")
    public String user(@RequestParam(value = "name") String name) throws Exception {
        return "hello world,this is spring-boot-provider-v2. name is " + name;
    }
2.8.3修改spring-boot-consumer-feign
1、spring-boot-consumer-feign服务GatewayFeignClient类增加如下代码
    @PostMapping(value = "/springbootprovider/user")
    String user(@RequestParam(value = "name") String name) throws Exception;
2、spring-boot-consumer-feign服务GatewayController类增加如下代码
    @PostMapping(value = "/user")
    public String user(@RequestParam(value = "name") String name) throws Exception {
        return gatewayFeignClient.user(name);
    }
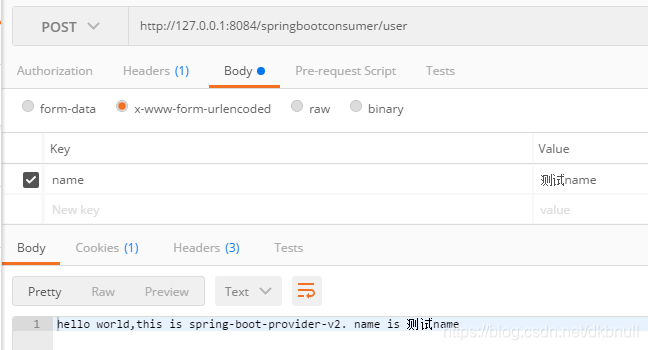
2.8.4 测试
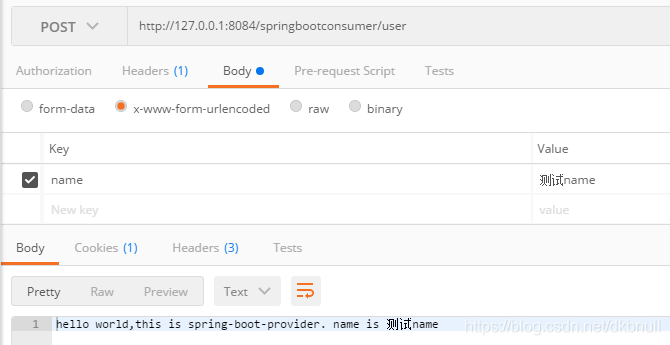
依次启动spring-cloud-eureka,spring-boot-provider,spring-boot-provider-v2,spring-boot-consumer-feign。然后打开Postman,配置如下,不断点击Send按钮,可以看到返回信息正常,且 hello world,this is spring-boot-provider. name is 测试name 和 hello world,this is spring-boot-provider-v2. name is 测试name 交替出现。
3. 自定义Feign配置
上篇我们自定义Ribbon负载均衡策略时,会出现包扫描的问题,Feign自定义配置也同样存在这个问题,这里我们不再赘述,直接使用注解 @ComponentScan 自定义扫描类。但是与上篇不同,我们这里自定义一个注解,当Java类使用了该注解时,@ComponentScan就会忽略扫描。
cn.wbnull.springbootconsumer包下新建config包,再新建ComponentScanExclude注解类
package cn.wbnull.springbootconsumer.config;

public @interface ComponentScanExclude {
}
3.1 自定义配置类
config包下新建GlobalConfiguration类
package cn.wbnull.springbootconsumer.config;

import feign.Contract;
import org.springframework.context.annotation.Bean;
import org.springframework.context.annotation.Configuration;

@Configuration
@ComponentScanExclude
public class GlobalConfiguration {

    @Bean
    public Contract GlobalContract() {
        return new Contract.Default();
    }
}
3.1.1 Contract
我们可以看到 GlobalConfiguration 类的 GlobalContract() 方法返回了一个 Contract 对象,Contract 表示契约,说白了,就是一个注解解释器。前面我们说过,Feign支持使用Feign注解、JAX-RS注解、Spring MVC注解。Contract 可以帮助我们将这些注解解释成Feign能够理解的Http请求。我们也可以通过自定义一个Contract 解释器来实现我们自己的注解,这个放到后面介绍,本篇不做赘述。
Feign一开始默认使用的契约是Spring MVC,所以我们前面测试使用的都是Spring MVC注解。但现在我们return new Contract.Default(),Contract.Default()默认使用的契约是Feign,所以我们也对应的要修改成Feign注解。
3.2 加载自定义配置
修改GatewayFeignClient类,@FeignClient 注解引入自定义配置类,并且将接口注解修改成Feign注解
package cn.wbnull.springbootconsumer.feign;

import cn.wbnull.springbootconsumer.config.GlobalConfiguration;
import feign.Param;
import feign.RequestLine;
import org.springframework.cloud.openfeign.FeignClient;
import org.springframework.stereotype.Component;

@Component
@FeignClient(value = "spring-boot-provider", configuration = GlobalConfiguration.class)
public interface GatewayFeignClient {

    @RequestLine("GET /springbootprovider/gateway")
    String gateway() throws Exception;

    @RequestLine("POST /springbootprovider/user?name={name}")
    String user(@Param("name") String name) throws Exception;
}
3.3 测试
依次启动spring-cloud-eureka,spring-boot-provider,spring-boot-provider-v2,spring-boot-consumer-feign。然后浏览器访问http://127.0.0.1:8084/springbootconsumer/gateway,不断刷新,跟刚才测试结果相同;Postman配置跟刚才一样,不断点击Send,跟刚才测试结果相同。
3.4 增加application/json方式传参接口
下面我们再新建一个application/json方式传参的接口进行测试。
3.4.1 修改spring-boot-provider
spring-boot-provider服务GatewayController类增加如下代码
    @PostMapping(value = "/users")
    public Map<String, String> users(@RequestBody Map<String, String> request) throws Exception {
        request.put("hello world", "spring-boot-provider");

        return request;
    }
3.4.2 修改spring-boot-provider-v2
spring-boot-provider-v2服务GatewayController类增加如下代码
    @PostMapping(value = "/users")
    public Map<String, String> users(@RequestBody Map<String, String> request) throws Exception {
        request.put("hello world", "spring-boot-provider-v2");

        return request;
    }
3.4.3修改spring-boot-consumer-feign
1、spring-boot-consumer-feign服务GatewayFeignClient类增加如下代码
    @RequestLine("POST /springbootprovider/users")
    @Headers("Content-Type: application/json")
    Map<String, String> users(Map<String, String> request) throws Exception;
2、spring-boot-consumer-feign服务GatewayController类增加如下代码
    @PostMapping(value = "/users")
    public Map<String, String> users(@RequestBody Map<String, String> request) throws Exception {
        return gatewayFeignClient.users(request);
    }
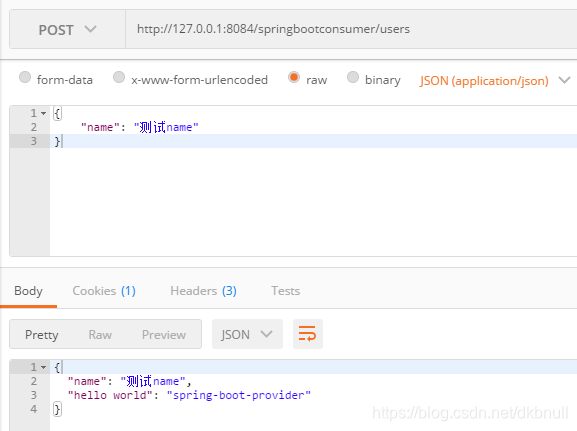
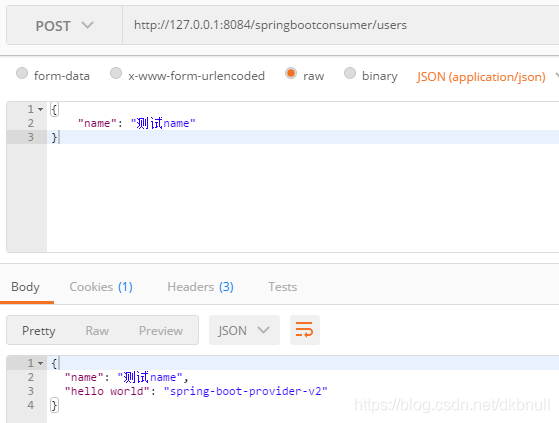
2.8.4 测试
依次启动spring-cloud-eureka,spring-boot-provider,spring-boot-provider-v2,spring-boot-consumer-feign。然后打开Postman,配置如下,不断点击Send按钮,可以看到返回信息正常,且两组返回信息交替出现。
GitHub:https://github.com/dkbnull/SpringCloudDemo
微信:https://mp.weixin.qq.com/s/RL8ZtwH3x6XZLzE-pYj6dA
微博:https://weibo.com/ttarticle/p/show?id=2309404369596210654515
知乎:https://zhuanlan.zhihu.com/p/65008318
