1、创建数据库、数据库表并插入数据
创建数据库springboot:
CREATE DATABASE springboot;
创建数据库表user:
CREATE TABLE `user` (

  `id` bigint(20) NOT NULL AUTO_INCREMENT COMMENT '用戶id',

  `user_name` varchar(100) DEFAULT NULL COMMENT '用户名',

  `password` varchar(100) DEFAULT NULL COMMENT '密码',

  `name` varchar(100) DEFAULT NULL COMMENT '姓名',

  PRIMARY KEY (`id`)

) ENGINE=InnoDB AUTO_INCREMENT=5 DEFAULT CHARSET=utf8;
插入数据:
INSERT INTO user VALUES (1, “chenmotong”, “123456”, “陈墨瞳”);

INSERT INTO user VALUES (2, “lumingfei”, “123456”, “路明非”);

INSERT INTO user VALUES (3, “chuzihang ”, “123456”, “楚子航”);

INSERT INTO user VALUES (4, “xiami”, “123456”, “夏弥”);

INSERT INTO user VALUES (5, “lijiatu”, “123456”, “李嘉图”);

INSERT INTO user VALUES (6, “huiliyi”, “123456”, “绘梨衣”);

INSERT INTO user VALUES (7, “lumingze”, “123456”, “路明泽”);
2、创建Maven项目:打包方式为JAR


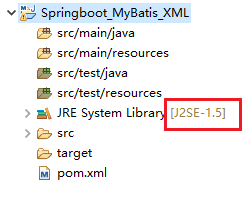
设置项目的JDK编译版本
注意:SpringBoot必须JDK 1.8以上才支持,所以如果跟我一样创建完项目jdk的编译版本不符合的,就要进行配置!
一开始为1.5
在pom.xml中进行如下配置:
    <!-- 编译环境 -->

    <build>

        <plugins>

            <!-- 设置项目的JDK编译版本 -->

            <plugin>

                <groupId>org.apache.maven.plugins</groupId>

                <artifactId>maven-compiler-plugin</artifactId>

                <configuration>

                    <source>1.8</source>

                    <target>1.8</target>

                    <encoding>UTF-8</encoding>

                </configuration>

            </plugin>

        </plugins>

    </build>
保存并Update Project:

查看结果:

至此,项目初步创建完成。
3、在pom.xml中导入依赖
<project xmlns="http://maven.apache.org/POM/4.0.0"

    xmlns:xsi="http://www.w3.org/2001/XMLSchema-instance"

    xsi:schemaLocation="http://maven.apache.org/POM/4.0.0 http://maven.apache.org/xsd/maven-4.0.0.xsd">

    <modelVersion>4.0.0</modelVersion>

    <groupId>cn.itcast</groupId>

    <artifactId>Springboot_MyBatis_XML</artifactId>

    <version>0.0.1-SNAPSHOT</version>


    <!-- 编译环境 -->

    <build>

        <plugins>

            <!-- 设置项目的JDK编译版本 -->

            <plugin>

                <groupId>org.apache.maven.plugins</groupId>

                <artifactId>maven-compiler-plugin</artifactId>

                <configuration>

                    <source>1.8</source>

                    <target>1.8</target>

                    <encoding>UTF-8</encoding>

                </configuration>

            </plugin>

        </plugins>

    </build>


    <!-- 继承springboot的父工程 -->

    <parent>

        <groupId>org.springframework.boot</groupId>

        <artifactId>spring-boot-starter-parent</artifactId>

        <version>2.1.7.RELEASE</version>

    </parent>

    <dependencies>

        <!-- 加入springboot的web组件,版本随父工程的版本而定 -->

        <dependency>

            <groupId>org.springframework.boot</groupId>

            <artifactId>spring-boot-starter-web</artifactId>

        </dependency>

        <!-- 配置springboot整合mybatis的启动器依赖 -->

        <dependency>

            <groupId>org.mybatis.spring.boot</groupId>

            <artifactId>mybatis-spring-boot-starter</artifactId>

            <version>2.1.0</version>

        </dependency>

        <!-- 配置springboot中mysql驱动的启动器依赖 -->

        <dependency>

            <groupId>mysql</groupId>

            <artifactId>mysql-connector-java</artifactId>

        </dependency>

        <!-- 配置springboot中test组件的依赖 -->

        <dependency>

            <groupId>org.springframework.boot</groupId>

            <artifactId>spring-boot-starter-test</artifactId>

        </dependency>

        <!-- 配置单元测试的依赖 -->

        <dependency>

            <groupId>junit</groupId>

            <artifactId>junit</artifactId>

        </dependency>

    </dependencies>


</project>
4、创建SpringBoot的核心配置文件:application.properties
- 在src/main/resources目录下创建SpringBoot的核心配置文件:application.properties
- 数据库的连接参数等配置信息以及mybatis框架的mapper映射文件,全局配置文件的所在路径,都可以配置在其中。
- 我在项目过程中,创建application.properties文件的时候,键盘敲得快,把文件名称打成:applicaiton.properties
- 然后后果很严重,不论怎么检查源码都看不出问题。。。一直提示没有提供访问数据库的url。。。
- 虽然简化了配置,但相对的,有一些文件的命名就需要很规范!
- XML版的mybatis配置,其他的没什么不一样,就是多了在application.properties中指定xml映射文件的所在路径而已。
- 友情提示:
- 指定mybatis的全局配置文件是:location
- 而指定mybatis的mapper映射文件是:locations
- 友情提示:
#DB Parameter Configuration

spring.datasource.driverClassName=com.mysql.cj.jdbc.Driver

spring.datasource.url=jdbc:mysql://localhost:3306/springboot?useUnicode=true&characterEncoding=utf-8&serverTimezone=UTC&allowMultiQueries=true

spring.datasource.username=root

spring.datasource.password=dearest


#MyBatis sqlMapConfig.xml and mapper.xml Configuration

mybatis.config-location=classpath:mybatis/sqlMapConfig.xml

mybatis.mapper-locations=classpath:mybatis/mapper/*.xml
5、创建SpringBoot的引导类:Application.java
- 我创建了cn.itcast的包,并在包下创建了SpringBoot的引导类:Application.java
- 由于引导类启动的时候,会自动扫描自己所在的包及其子包,因此,后面创建的所有类,基本都要在cn.itcast包或者其子包下,这点需要很小心哦!
package cn.itcast;


import org.mybatis.spring.annotation.MapperScan;

import org.springframework.boot.SpringApplication;

import org.springframework.boot.autoconfigure.SpringBootApplication;


/**

 * SpringBoot的引导类

 * @author JimRestaurant

 *

 */

@SpringBootApplication

@MapperScan(value = { "cn.itcast.mapper" })

public class Application {


    public static void main(String[] args) {

        SpringApplication.run(Application.class, args);

    }

}
6、创建实体类User
package cn.itcast.entity;


import java.io.Serializable;


/**

 * 用户的实体类

 * @author JimRestaurant

 *

 */

public class User implements Serializable {

    private Long id;

    private String username;

    private String password;

    private String name;

    public Long getId() {

        return id;

    }

    public void setId(Long id) {

        this.id = id;

    }

    public String getUsername() {

        return username;

    }

    public void setUsername(String username) {

        this.username = username;

    }

    public String getPassword() {

        return password;

    }

    public void setPassword(String password) {

        this.password = password;

    }

    public String getName() {

        return name;

    }

    public void setName(String name) {

        this.name = name;

    }

    @Override

    public String toString() {

        return "User [id=" + id + ", username=" + username + ", password=" + password + ", name=" + name + "]";

    }

}
7、创建Mapper接口
package cn.itcast.mapper;


import java.util.List;


import cn.itcast.entity.User;


/**

 * 用户的持久层接口

 * @author JimRestaurant

 *

 */

public interface UserMapper {


    List<User> findAll();


    List<User> findUserByName(String name);


    User findUserById(Long id);


    void saveUser(User user);


    void updateUser(User user);


    void deleteUser(Long id);


}
8、创建MyBatis的全局配置文件
- 由于在SpringBoot的核心配置文件中指定读取mybatis框架的全局配置文件路径为:classpath:mybatis/sqlMapConfig.xml
- 因此,我只能在src/main/resource目录下创建mybatis文件夹,再创建sqlMapConfig.xml配置文件。
<?xml version="1.0" encoding="UTF-8"?>

<!DOCTYPE configuration

PUBLIC "-//mybatis.org//DTD Config 3.0//EN"

        "http://mybatis.org/dtd/mybatis-3-config.dtd">

<configuration>


    <!-- 这里面可以做一些mybatis的全局配置。

        其实springboot整合xml版的mybatis框架

        如果不打算做任何关于mybatis的配置,例如起别名之类的,

        可以不需要创建mybatis的全局配置文件

     -->


</configuration>
9、创建Mapper接口的xml映射文件
- 由于在SpringBoot的核心配置文件中指定读取mybatis框架的mapper接口映射文件路径为:classpath:mybatis/mapper/*.xml
- 因此,我只能在src/main/resource目录下,mybatis文件夹再创建mapper文件夹,然后将映射文件放入其中。
<?xml version="1.0" encoding="UTF-8"?>

<!DOCTYPE mapper

PUBLIC "-//mybatis.org//DTD Mapper 3.0//EN"

        "http://mybatis.org/dtd/mybatis-3-mapper.dtd">

<mapper namespace="cn.itcast.mapper.UserMapper">


    <resultMap id="UserResultMap" type="cn.itcast.entity.User">

        <id column="id" property="id" />

        <result column="user_name" property="username" />

        <result column="password" property="password" />

        <result column="name" property="name" />

    </resultMap>


    <sql id="user_field">

        id, user_name, password, name

    </sql>


    <select id="findAll" resultMap="UserResultMap">

        SELECT

            <include refid="user_field" />

        FROM

            user

    </select>


    <sql id="findUserByName_user_where">

        name LIKE '%${name}%'

    </sql>


    <select id="findUserByName" parameterType="java.lang.String" resultMap="UserResultMap">

        SELECT

            <include refid="user_field" />

        FROM

            user

        <where>

            <include refid="findUserByName_user_where" />

        </where>

    </select>


    <sql id="findUserById_user_where">

        id = #{id}

    </sql>


    <select id="findUserById" parameterType="java.lang.Long" resultMap="UserResultMap">

        SELECT

            <include refid="user_field" />

        FROM

            user

        <where>

            <include refid="findUserById_user_where" />

        </where>

    </select>


    <insert id="saveUser" parameterType="cn.itcast.entity.User">

        INSERT INTO

            user

            (id, user_name, password, name)

        VALUES

            (#{id}, #{username}, #{password}, #{name})

    </insert>


    <sql id="updateUser_user_set">

        <if test="username != null and username != ''">

            user_name = #{username},

        </if>

        <if test="password != null and password != ''">

            passowrd = #{password},

        </if>

        <if test="name != null and name != ''">

            name = #{name},

        </if>

        id = #{id}

    </sql>


    <update id="updateUser" parameterType="cn.itcast.entity.User">

        UPDATE

            user

        <set>

            <include refid="updateUser_user_set" />

        </set>

        <where>

            id = #{id}

        </where>

    </update>


    <sql id="deleteUser_user_where">

        id = #{id}

    </sql>


    <delete id="deleteUser" parameterType="java.lang.Long">

        DELETE FROM

            user

        <where>

            <include refid="deleteUser_user_where" />

        </where>

    </delete>


</mapper>
10、创建Mapper接口的测试类
package cn.itcast.mapper;


import java.util.List;


import javax.annotation.Resource;


import org.junit.Test;

import org.junit.runner.RunWith;

import org.springframework.boot.test.context.SpringBootTest;

import org.springframework.test.context.junit4.SpringJUnit4ClassRunner;


import cn.itcast.Application;

import cn.itcast.entity.User;


/**

 * Mapper接口的测试类

 * @author JimRestaurant

 *

 */

@RunWith(value = SpringJUnit4ClassRunner.class)

@SpringBootTest(classes = { Application.class })

public class UserMapperTest {


    @Resource

    private UserMapper userMapper;


    /**

     * 测试查询所有用户

     */

    @Test

    public void testFindAll() {


        List<User> list = userMapper.findAll();

        for(User user : list) {

            System.out.println(user);

        }


    }


    /**

     * 测试按姓名模糊查询用户

     */

    @Test

    public void testFindUserByName() {

        List<User> list = userMapper.findUserByName("路");

        for(User user : list) {

            System.out.println(user);

        }

    }


    /**

     * 测试按id查询用户

     */

    @Test

    public void testFindUserById() {

        User user = userMapper.findUserById(1L);

        System.out.println(user);

    }


    /**

     * 测试保存用户

     */

    @Test

    public void testSaveUser() {

        User user = new User();

        user.setId(8L);

        user.setUsername("fengeer");

        user.setPassword("654321");

        user.setName("芬格尔");


        userMapper.saveUser(user);

    }


    /**

     * 测试更新用户

     */

    @Test

    public void testUpdateUser() {

        User user = userMapper.findUserById(8L);

        user.setUsername("angre");

        user.setName("昂热");


        userMapper.updateUser(user);

    }


    /**

     * 测试删除用户

     */

    @Test

    public void testDeleteUser() {

        userMapper.deleteUser(8L);

    }

}
11、结果显示
测试查询所有用户

测试按姓名模糊查询用户

至此,springBoot整合mybatis(XML版)完成!
更多学习总结,随着学习的深入,会慢慢发布!让我们一起成长!
