

第一步:新建一个maven项目


第二步:打开pom.xml文件,添加我们的依赖
  <parent>
        <groupId>org.springframework.boot</groupId>
        <artifactId>spring-boot-starter-parent</artifactId>
        <version>1.5.9.RELEASE</version>
    </parent>
<dependency>
<groupId>org.springframework.boot</groupId>
<artifactId>spring-boot-starter-web</artifactId>
</dependency>形成的简单的pom.xml如下:
<project xmlns="http://maven.apache.org/POM/4.0.0" xmlns:xsi="http://www.w3.org/2001/XMLSchema-instance"
xsi:schemaLocation="http://maven.apache.org/POM/4.0.0 http://maven.apache.org/xsd/maven-4.0.0.xsd">
<modelVersion>4.0.0</modelVersion>
<groupId>com.jack</groupId>
<artifactId>seckill</artifactId>
<version>0.0.1-SNAPSHOT</version>
<packaging>jar</packaging>
<name>seckill</name>
<url>http://maven.apache.org</url>
<parent>
<groupId>org.springframework.boot</groupId>
<artifactId>spring-boot-starter-parent</artifactId>
<version>1.5.9.RELEASE</version>
</parent>
<properties>
<project.build.sourceEncoding>UTF-8</project.build.sourceEncoding>
</properties>
<dependencies>
<dependency>
     <groupId>org.springframework.boot</groupId>
     <artifactId>spring-boot-starter-web</artifactId>
    </dependency>
<!-- 先将test删掉
<dependency>
<groupId>junit</groupId>
<artifactId>junit</artifactId>
<version>3.8.1</version>
<scope>test</scope>
</dependency> -->
</dependencies>
</project>
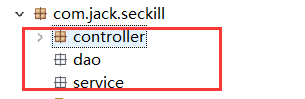
第三步:书写层级包
第四步:在controller书写DemoController
package com.jack.seckill.controller;

import org.springframework.boot.SpringApplication;
import org.springframework.boot.autoconfigure.EnableAutoConfiguration;
import org.springframework.web.bind.annotation.RequestMapping;
import org.springframework.web.bind.annotation.RestController;

@RestController
@EnableAutoConfiguration
public class DemoController {
	  @RequestMapping("/")
	    String home() {
	        return "Hello World!";
	    }

	    public static void main(String[] args) {
	        SpringApplication.run(DemoController.class, args);
	    }

}
第五步:在浏览器输入localhost:8080就会看到hello world的字样
第六步:对DemoController进行拆解,在com.jack.seckill包下创建MainApplication
package com.jack.seckill;

import org.springframework.boot.SpringApplication;
import org.springframework.boot.autoconfigure.EnableAutoConfiguration;
import org.springframework.boot.autoconfigure.SpringBootApplication;

@SpringBootApplication
public class MainApplication {

    public static void main(String[] args) {
        SpringApplication.run(MainApplication.class, args);
    }
}
package com.jack.seckill.controller;

import org.springframework.web.bind.annotation.RequestMapping;
import org.springframework.web.bind.annotation.RestController;

@RestController
public class DemoController {
	  @RequestMapping("/")
	    String home() {
	        return "Hello World!";
	    }
}
第七步:新建一个result包书写一个Result类
package com.jack.seckill.result;

public class Result<T> {
	private int code;
	private String msg;
	private T data;

	/**
	 *
	 * 成功时候的调用,让代码更优雅
	 * 成功的时候只需要将数据返回去
	 */
	public static <T> Result<T> success(T data){
		return new Result<T>(data);
	}
	/**
	 *
	 * 失败时候的调用,让代码更优雅
	 */
	public static <T> Result<T> error(CodeMsg cm){
		return new Result<T>(cm);
	}
	/**
	 *
	 * 成功时候的构造函数
	 */
	private Result(T data) {
		this.code=0;
		this.msg="success";
		this.data=data;
	}
	/**
	 *
	 * 失败时候的构造函数
	 */
	private Result(CodeMsg cm) {
		if(cm==null) {
			return;
		}
		this.code=cm.getCode();
		this.msg=cm.getMsg();
	}


	public int getCode() {
		return code;
	}
	public void setCode(int code) {
		this.code = code;
	}
	public String getMsg() {
		return msg;
	}
	public void setMsg(String msg) {
		this.msg = msg;
	}
	public T getData() {
		return data;
	}
	public void setData(T data) {
		this.data = data;
	}


}
package com.jack.seckill.result;

public class CodeMsg {
	private int code;
	private String msg;

	public static CodeMsg SUCCESS=new CodeMsg(0,"success");
	public static CodeMsg SERVER_ERROR=new CodeMsg(500100,"服务端异常");

	public CodeMsg(int code, String msg) {
		this.code=code;
		this.msg=msg;
	}
	public int getCode() {
		return code;
	}
	public void setCode(int code) {
		this.code = code;
	}
	public String getMsg() {
		return msg;
	}
	public void setMsg(String msg) {
		this.msg = msg;
	}


}
第八步:进行测试
package com.jack.seckill.controller;

import org.springframework.web.bind.annotation.RequestMapping;
import org.springframework.web.bind.annotation.ResponseBody;
import org.springframework.web.bind.annotation.RestController;

import com.jack.seckill.result.CodeMsg;
import com.jack.seckill.result.Result;

@RestController
public class DemoController {
	  @RequestMapping("/")
	    String home() {
	        return "Hello World342!";
	    }
	  //1、rest api json输出   2、页面
	  @RequestMapping("/hello")
	  @ResponseBody
	  public Result<String> hello(){
		  return Result.success("hello,one");
	  }
	  @RequestMapping("/helloError")
	  @ResponseBody
	  public Result<String> helloError(){
		  return Result.error(CodeMsg.SERVER_ERROR);
	  }

}