历程
RHEL7(Centos7)下使用shell脚本一键部署服务
RHEL7(Centos7)下使用shell脚本一键部署服务(二)
RHEL7(Centos7)下使用shell脚本一键部署服务(三)
更新内容:增加了一键部署PXE+kickstart无人值守安装服务,经测试,无任何问题。欢迎大家测试和提出意见,写作不易,还望支持。
目前可以完成的功能
1、一键配置yum源
2、配置IP地址
3、搭建NFS服务
4、搭建DHCP服务
5、搭建DNS服务
6、一键部署PXE+kickstart无人值守安装服务
脚本如下:
#author:Roya
#script name:ROne-deploy
#creation time:2020-01-23
#update time:2020-01-26
#version:0.20
#!/bin/bash
echo "------------------------------"
echo "|input 1:Configure Yum source|"
echo "------------------------------"
echo "|input 2:Configure IP address|"
echo "------------------------------"
echo "|input 3:Configure NFS server|"
echo "------------------------------"
echo "|input 4:Configure DHCP server|"
echo "------------------------------"
echo "|input 5:Configure DNS server|"
echo "-------------------------------------------------------"
echo "|input 6:Configure PXE unattended installation service|"
echo "-------------------------------------------------------"
read -p "|please input 1,2,3,4,5,6|: " a
case $a in #使用case语句判断输入
1)
echo "-------------------------------------"
echo "|Prepare to configure Yum source...|"
echo "-------------------------------------"
sleep 1  #等一秒执行下面命令
echo "|One moment...please|"
echo "---------------------"
if [ -e /media/cdrom ]
then sleep 0.7
else mkdir /media/cdrom
fi
echo "/dev/cdrom /media/cdrom iso9660 defaults 0 0" >> /etc/fstab && mount -a &> /dev/null  # 将挂载信息写入fstab
sleep 0.7
echo '[rhel]
name=rhel
baseurl=file:///media/cdrom
gpgcheck=0
enabled=1' >> /etc/yum.repos.d/rhel.repo #yum源的配置文件
sleep 2.7
yum makecache &> /dev/null
if [ $? -eq 0 ]
then
sleep 0.7
echo "----------------------------------------"
echo "|Yum source configuration successfully!|"
echo "----------------------------------"
else echo "|Yum source configuration failed!|"
echo "----------------------------------"
fi
yum repolist | grep repolist
;;
2) #配置IP地址
echo "----------------------------------------------------------------"
read -p "|please enter Please enter the network card name(Tips:ens33,eth0)|: " wlanname #请输入网卡名
if [ -e /etc/sysconfig/network-scripts/ifcfg-$wlanname ]
then
continue &> /dev/null
else echo "input error!"
exit 0
fi
sleep 0.7
echo "----------------------------------------------------------------"
read -p "|Please enter IP address(Tips:192.168.1.1/24)|: " IPad #请输入IP地址
sleep 0.7
echo "-------------------------------------------"
read -p "|Please enter GATEWAY(Tips:192.168.1.254)|: " gate #请输入网关
sleep 0.7
echo "-----------------------------------------------"
read -p "|please enter DNS server(Tips:114.114.114.114)|: " DNS #请输入网关
sleep 0.7
echo "-----------------------------------------------------------"
nmcli connection modify $wlanname ipv4.addresses $IPad
nmcli connection modify $wlanname ipv4.method manual
nmcli connection modify $wlanname ipv4.dns $DNS ipv4.gateway $gate &>/dev/null
nmcli connection modify $wlanname connection.autoconnect yes &>/dev/null
systemctl restart network
if [ $? -eq 0 ]
then
echo "|Network configuration successful!|" #网络配置成功
echo "----------------------------------"
ifconfig | awk 'NR==2'
else echo "Network configuration failed!"
fi
;;
3) #配置NFS服务
echo "-------------------------------------"
yum install -y nfs-utils &> /dev/null #安装nfs服务端
if [ $? -eq 0 ]
then echo '|NFS service installed successfully!|'  #nfs服务安装成功
echo "-------------------------------------------------------------"
read -p '|Please enter NFS directory path you want to share(Tips:/nfsdir)|: ' nfsdir #输入nfs共享的目录
echo "------------------------------------------------------------"
sleep 0.7
read -p '|Please enter the IP address of the host allowed to be shared(Tips:192.168.1.1 or 192.168.1.*)|: ' nfsIP #输入允许共享的主机IP地址或者网段
echo "---------------------------------------------------------------"
sleep 0.7
read -p '|Please enter the permission of the shared host(Tips:sync,rw,ro)|: ' nfspwr #输入允许共享的主机的权限
echo "-------------------------------"
sleep 0.7
echo "|Configuring..... Please wait.|"
echo "-------------------------------"
sleep 3
if [ -e $nfsdir ] #判断nfs共享目录是否存在
then echo '|File Exists|'
echo "------------"
sleep 0.7
else mkdir $nfsdir
chmod -Rf 777 $nfsdir
fi
echo "$nfsdir $nfsIP($nfspwr)" > /etc/exports
systemctl restart nfs-server
if [ $? -eq 0 ]
then
IP=`ifconfig | awk -F ' ' 'NR==2{print$2}'` #使用awk命令提取出IP地址
exportfs -r
showmount -e $IP
if [ $? -eq 0 ] #判断服务是否配置正确
then echo "NFS server has been configured successfully!"
else echo "NFS server has been configured failed!"
fi
fi
systemctl restart rpcbind
systemctl enable rpcbind &> /dev/null
systemctl enable nfs-server &> /dev/null #加入到开机自启动
firewall-cmd --add-service=nfs --permanent &> /dev/null
firewall-cmd --add-service=rpc-bind --permanent &> /dev/null
firewall-cmd --reload &> /dev/null
else echo 'NFS service installion failed!'
fi
;;
4) #配置DHCP服务
echo "-------------------"
echo '|one momnet...please|'
yum install -y dhcp &> /dev/null
if [ $? -eq 0 ]
then
echo "DHCP service installed successfully!"
echo "----------------------------------------------------------------------------"
read -p "|Please enter the type of DNS service dynamic update(Tips:none,interim,ad-hoc)|: " style  #请输入DNS服务动态更新的类型
case $style in
none|interim|ad-hoc)
continue
;;
*)
echo "input error!"
exit 0
;;
esac
echo "---------------------------------------------------------"
sleep 0.7
read -p "|Allow/ignore client update DNS records(Tips:allow/ignore)|: " judge #允许/忽略客户端更新DNS记录
case $judge in
allow|ignore)
continue
;;
*)
echo "input error!"
exit 0
;;
esac
echo "------------------------------------------"
sleep 0.7
read -p "|Please enter a DNS domain(Tips:roya.com)|: " domain #请输入DNS域
echo "------------------------------------------"
sleep 0.7
IP=`ifconfig | awk -F ' ' 'NR==2{print$2}'`  #IP地址
NETMASK=`ifconfig | awk -F ' ' 'NR==2{print$4}'` #子网掩码
IP0="echo "`ifconfig | awk -F ' ' 'NR==2{print$2}' | cut -d '.' -f 1,2,3`.0""  #取IP地址前三位
IP1="expr `ifconfig| awk -F ' ' 'NR==2{print$2}'  | awk -F '.' '{print$4}'` + 20" #将IP地址最后一位加20
IP2="expr `ifconfig| awk -F ' ' 'NR==2{print$2}'  | awk -F '.' '{print$4}'` + 100" #将IP地址最后一位加100
IP3="echo "`ifconfig | awk -F ' ' 'NR==2{print$2}' | cut -d '.' -f 1,2,3`.`$IP1`"" #增加之后的IP地址
IP4="echo "`ifconfig | awk -F ' ' 'NR==2{print$2}' | cut -d '.' -f 1,2,3`.`$IP2`""
cat >> /etc/dhcp/dhcpd.conf << EOF #写入配置文件
ddns-update-style $style;
$judge client-updates;
subnet `$IP0` netmask $NETMASK {
range `$IP3` `$IP4`;
option subnet-mask $NETMASK;
option routers $IP;
option domain-name "$domain";
option domain-name-servers $IP;
default-lease-time 21600;
max-lease-time 43200;
}
EOF
systemctl restart dhcpd
if [ $? -eq 0 ]
then echo "DHCP service configuration succeeded!"
systemctl enable dhcpd &> /dev/null
firewall --add-service=dhcp --permanent &> /dev/null
firewall --reload &> /dev/null
systemctl status dhcpd
else echo "DHCP service configuration failed!"
fi
else echo "DHCP service not installed successfully!"
fi
;;
5) #配置DNS服务
echo "---------------------"
echo "|one moment...please|"
yum install -y bind* &> /dev/null
if [ $? -eq 0 ]
then
sed -i "s/listen-on port 53 { 127.0.0.1; };/listen-on port 53 { any; };/g" /etc/named.conf
sed -i "s/listen-on-v6 port 53 { ::1; };/\/\/listen-on-v6 port 53 { ::1; };/g" /etc/named.conf
sed -i "s/allow-query     { localhost; };/allow-query     { any; };/g" /etc/named.conf
read -p "Please enter the website you want to analyze(Tips:runtime.com): " local1 #请输入你想解析的域名
sleep 1.7
IP_0="`ifconfig | awk -F ' ' 'NR==2{print$2}'`"
IP_1="`ifconfig | awk -F ' ' 'NR==2{print$2}' | cut -d '.' -f 1`"
IP_2="`ifconfig | awk -F ' ' 'NR==2{print$2}' | cut -d '.' -f 2`"
IP_3="`ifconfig | awk -F ' ' 'NR==2{print$2}' | cut -d '.' -f 3`"
IP_4="`ifconfig | awk -F ' ' 'NR==2{print$2}' | cut -d '.' -f 4`"
cat > /etc/named.rfc1912.zones << EOF
zone "$local1" IN {
        type master;
        file "$local1.local";
        allow-update { none; };
};
zone "$IP_3.$IP_2.$IP_1.in-addr.arpa" IN {
        type master;
        file "$local1.zone";
        allow-update { none; };
};
EOF
cp -a /var/named/named.localhost /var/named/$local1.local
cp -a /var/named/named.loopback /var/named/$local1.zone
cat > /var/named/$local1.local << EOF
\$TTL 1D
@       IN SOA  root.$local1. $local1. (
                                        0       ; serial
                                        1D      ; refresh
                                        1H      ; retry
                                        1W      ; expire
                                        3H )    ; minimum
        NS      ns.$local1.
ns      A       $IP_0
        A       $IP_0
EOF
cat > /var/named/$local1.zone << EOF
\$TTL 1D
@       IN SOA  root.$local1. $local1. (
                                        0       ; serial
                                        1D      ; refresh
                                        1H      ; retry
                                        1W      ; expire
                                        3H )    ; minimum
        NS        ns.$local1.
$IP_4   PTR       $local1.
$IP_4   PTR       ns.$local1.
EOF
systemctl restart named
if [ $? -eq 0 ]
then
echo "--------------------------------------"
echo "|DNS service configuration succeeded!|"
systemctl enable named &> /dev/null
firewall-cmd --add-service=dns --permanent &> /dev/null
firewall-cmd --reload &> /dev/null
echo "--------------------------------------"
nslookup $IP_0
echo "--------------------------------------"
else echo "|DNS service is not configured successfully!|"
fi
else echo "|DNS service not installed succesfully!|"
echo "--------------------------------------"
fi
;;
6)
echo "------------------"
echo "|Just a minute...|"
yum install -y xinetd &> /dev/null
yum install -y dhcp &> /dev/null
IP_a=`ifconfig | awk -F ' ' 'NR==2{print$2}'`
netmask=`ifconfig | awk -F ' ' 'NR==2{print$4}'`
IP_b="echo "`ifconfig | awk -F ' ' 'NR==2{print$2}' | cut -d '.' -f 1,2,3`.0""
IP_c="echo "`ifconfig | awk -F ' ' 'NR==2{print$2}' | cut -d '.' -f 1,2,3`.0""  #取IP地址前三位
IP_d="expr `ifconfig| awk -F ' ' 'NR==2{print$2}'  | awk -F '.' '{print$4}'` + 100" #将IP地址最后一位加100
IP_e="expr `ifconfig| awk -F ' ' 'NR==2{print$2}'  | awk -F '.' '{print$4}'` + 200" #将IP地址最后一位加200
IP_f="echo "`ifconfig | awk -F ' ' 'NR==2{print$2}' | cut -d '.' -f 1,2,3`.`$IP_d`"" #增加之后的IP地址
IP_g="echo "`ifconfig | awk -F ' ' 'NR==2{print$2}' | cut -d '.' -f 1,2,3`.`$IP_e`""
cat > /etc/dhcp/dhcpd.conf << EOF
allow booting;
allow bootp;
ddns-update-style interim;
ignore client-updates;
subnet `$IP_b`  netmask $netmask {
        option subnet-mask      $netmask;
        option domain-name-servers  $IP_a;
        range dynamic-bootp `$IP_f` `$IP_g`;
        default-lease-time      21600;
        max-lease-time          43200;
        next-server             $IP_a;
        filename                "pxelinux.0";
}
EOF
systemctl restart dhcpd
if [ $? -eq 0 ]
then systemctl enable dhcpd &> /dev/null
else echo " DHCP Configured error!"
exit 0
fi
yum install -y tftp-server &> /dev/null
cat > /etc/xinetd.d/tftp <<EOF
service tftp
{
        socket_type             = dgram
        protocol                = udp
        wait                    = yes
        user                    = root
        server                  = /usr/sbin/in.tftpd
        server_args             = -s /var/lib/tftpboot
        disable                 = no
        per_source              = 11
        cps                     = 100 2
        flags                   = IPv4
}
EOF
systemctl restart xinetd
systemctl restart tftp
if [ $? -eq 0 ]
then systemctl enable tftp &> /dev/null
else echo "TFTP service Configured error!"
exit 0
fi
systemctl enable xinetd &> /dev/null
firewall-cmd --permanent --add-service=tftp &> /dev/null
firewall-cmd --reload &> /dev/null
yum install -y syslinux &> /dev/null
cp /usr/share/syslinux/pxelinux.0 /var/lib/tftpboot
cp /media/cdrom/images/pxeboot/{vmlinuz,initrd.img} /var/lib/tftpboot
cp /media/cdrom/isolinux/{vesamenu.c32,boot.msg} /var/lib/tftpboot
if [ -e /var/lib/tftpboot/pxelinux.cfg ]
then echo "File Exists!"
else mkdir /var/lib/tftpboot/pxelinux.cfg &> /dev/null
fi
cp /media/cdrom/isolinux/isolinux.cfg /var/lib/tftpboot/pxelinux.cfg/default
version_0=`cat /etc/redhat-release | awk -F ' ' '{print$7}'`
cat > /var/lib/tftpboot/pxelinux.cfg/default <<EOF
default linux
timeout 600

display boot.msg

# Clear the screen when exiting the menu, instead of leaving the menu displayed.
# For vesamenu, this means the graphical background is still displayed without
# the menu itself for as long as the screen remains in graphics mode.
menu clear
menu background splash.png
menu title Red Hat Enterprise Linux $version_0
menu vshift 8
menu rows 18
menu margin 8
#menu hidden
menu helpmsgrow 15
menu tabmsgrow 13

# Border Area
menu color border * #00000000 #00000000 none

# Selected item
menu color sel 0 #ffffffff #00000000 none

# Title bar
menu color title 0 #ff7ba3d0 #00000000 none

# Press [Tab] message
menu color tabmsg 0 #ff3a6496 #00000000 none

# Unselected menu item
menu color unsel 0 #84b8ffff #00000000 none

# Selected hotkey
menu color hotsel 0 #84b8ffff #00000000 none

# Unselected hotkey
menu color hotkey 0 #ffffffff #00000000 none

# Help text
menu color help 0 #ffffffff #00000000 none

# A scrollbar of some type? Not sure.
menu color scrollbar 0 #ffffffff #ff355594 none

# Timeout msg
menu color timeout 0 #ffffffff #00000000 none
menu color timeout_msg 0 #ffffffff #00000000 none

# Command prompt text
menu color cmdmark 0 #84b8ffff #00000000 none
menu color cmdline 0 #ffffffff #00000000 none

# Do not display the actual menu unless the user presses a key. All that is displayed is a timeout message.

menu tabmsg Press Tab for full configuration options on menu items.

menu separator # insert an empty line
menu separator # insert an empty line

label linux
  menu label ^Install Red Hat Enterprise Linux $version_0
  kernel vmlinuz
  append initrd=initrd.img inst.stage2=ftp://$IP_a ks=ftp://$IP_a/pub/ks.cfg quiet

label check
  menu label Test this ^media & install Red Hat Enterprise Linux $version_0
  menu default
  kernel vmlinuz
  append initrd=initrd.img inst.stage2=hd:LABEL=RHEL-7.6\x20Server.x86_64 rd.live.check quiet

menu separator # insert an empty line

# utilities submenu
menu begin ^Troubleshooting
  menu title Troubleshooting

label vesa
  menu indent count 5
  menu label Install Red Hat Enterprise Linux $version_0 in ^basic graphics mode
  text help
	Try this option out if you're having trouble installing
	Red Hat Enterprise Linux $version_0.
  endtext
  kernel vmlinuz
  append initrd=initrd.img inst.stage2=hd:LABEL=RHEL-$version_0\x20Server.x86_64 xdriver=vesa nomodeset quiet

label rescue
  menu indent count 5
  menu label ^Rescue a Red Hat Enterprise Linux system
  text help
	If the system will not boot, this lets you access files
	and edit config files to try to get it booting again.
  endtext
  kernel vmlinuz
  append initrd=initrd.img inst.stage2=hd:LABEL=RHEL-$version_0\x20Server.x86_64 rescue quiet

label memtest
  menu label Run a ^memory test
  text help
	If your system is having issues, a problem with your
	system's memory may be the cause. Use this utility to
	see if the memory is working correctly.
  endtext
  kernel memtest

menu separator # insert an empty line

label local
  menu label Boot from ^local drive
  localboot 0xffff

menu separator # insert an empty line
menu separator # insert an empty line

label returntomain
  menu label Return to ^main menu
  menu exit

menu end
EOF
yum install -y vsftpd &> /dev/null
systemctl restart vsftpd
systemctl enable vsftpd &> /dev/null
cp -r /media/cdrom/* /var/ftp && echo "-----------------------" && echo "|Transmission complete|!"
echo "-----------------------"
firewall-cmd --add-service=ftp --permanent &> /dev/null
firewall-cmd --reload &> /dev/null
setsebool -P ftpd_connect_all_unreserved=on &> /dev/null
cp ~/anaconda-ks.cfg /var/ftp/pub/ks.cfg
chmod +r /var/ftp/pub/ks.cfg
echo "#version=RHEL$version_0
# System authorization information
auth --enableshadow --passalgo=sha512
repo --name="Server-HighAvailability" --baseurl=file:///run/install/repo/addons/HighAvailability
repo --name="Server-ResilientStorage" --baseurl=file:///run/install/repo/addons/ResilientStorage
# Use CDROM installation media
url --url=ftp://$IP_a
# Use graphical install
graphical
# Run the Setup Agent on first boot
firstboot --enable
ignoredisk --only-use=sda
# Keyboard layouts
keyboard --vckeymap=us --xlayouts='us'
# System language
lang en_US.UTF-8

# Network information
network  --bootproto=dhcp --device=ens33 --ipv6=auto --no-activate
network  --hostname=localhost.localdomain

# Root password
rootpw --iscrypted \$6\$qRAoZkxh5SHa7N4X\$w2osf.ZFey1hPtFdOJVIMgVOzc8dygUol2JphmSNQB6MHb7vPL63D6s9hIfrT9ydduKFOlq0S5/kp6.zJzYMy.
# System services
services --enabled="chronyd"
# System timezone
timezone Asia/Shanghai --isUtc
user --name=roya --password=\$6\$ZT/uZLv5GPvdSNr7\$caWMweAE4l9z93nmeRSttpiwHeJr9rjEGlAANrZBv5pRcZVkUfFzTAGQuQgNXEhKjI75sD9aVUmH.n55fUocX0 --iscrypted --gecos="roya"
# X Window System configuration information
xconfig  --startxonboot
# System bootloader configuration
bootloader --location=mbr --boot-drive=sda
# Partition clearing information
clearpart --all --initlabel
# Disk partitioning information
part swap --fstype="swap" --ondisk=sda --size=5000
part /boot --fstype="xfs" --ondisk=sda --size=2000
part / --fstype="xfs" --ondisk=sda --size=13000

%packages
@^graphical-server-environment
@base
@core
@desktop-debugging
@dial-up
@fonts
@gnome-desktop
@guest-agents
@guest-desktop-agents
@hardware-monitoring
@input-methods
@internet-browser
@multimedia
@print-client
@x11
chrony

%end
" > /var/ftp/pub/ks.cfg
if [ $? -eq 0 ]
then echo "PXE service Configuration successed!"
else echo "PXE service Configuration failed!"
fi
;;
*)
exit 0
;;
esac
与centos7系统几乎通用(只需修改几处小地方)
一键部署PXE+kickstart无人值守安装服务运行结果如下:

重新创建一台虚拟机,测试是否可用。
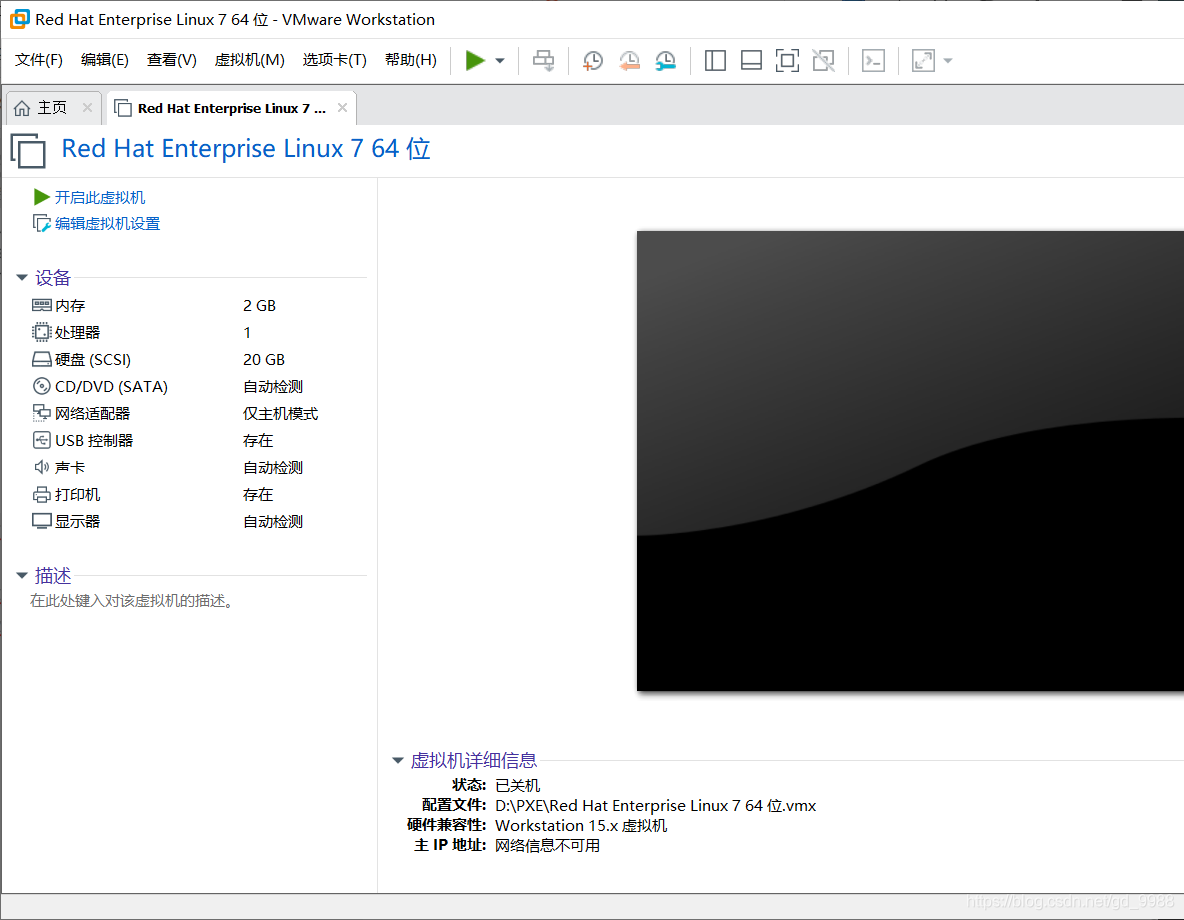
记得网卡模式调成仅主机模式
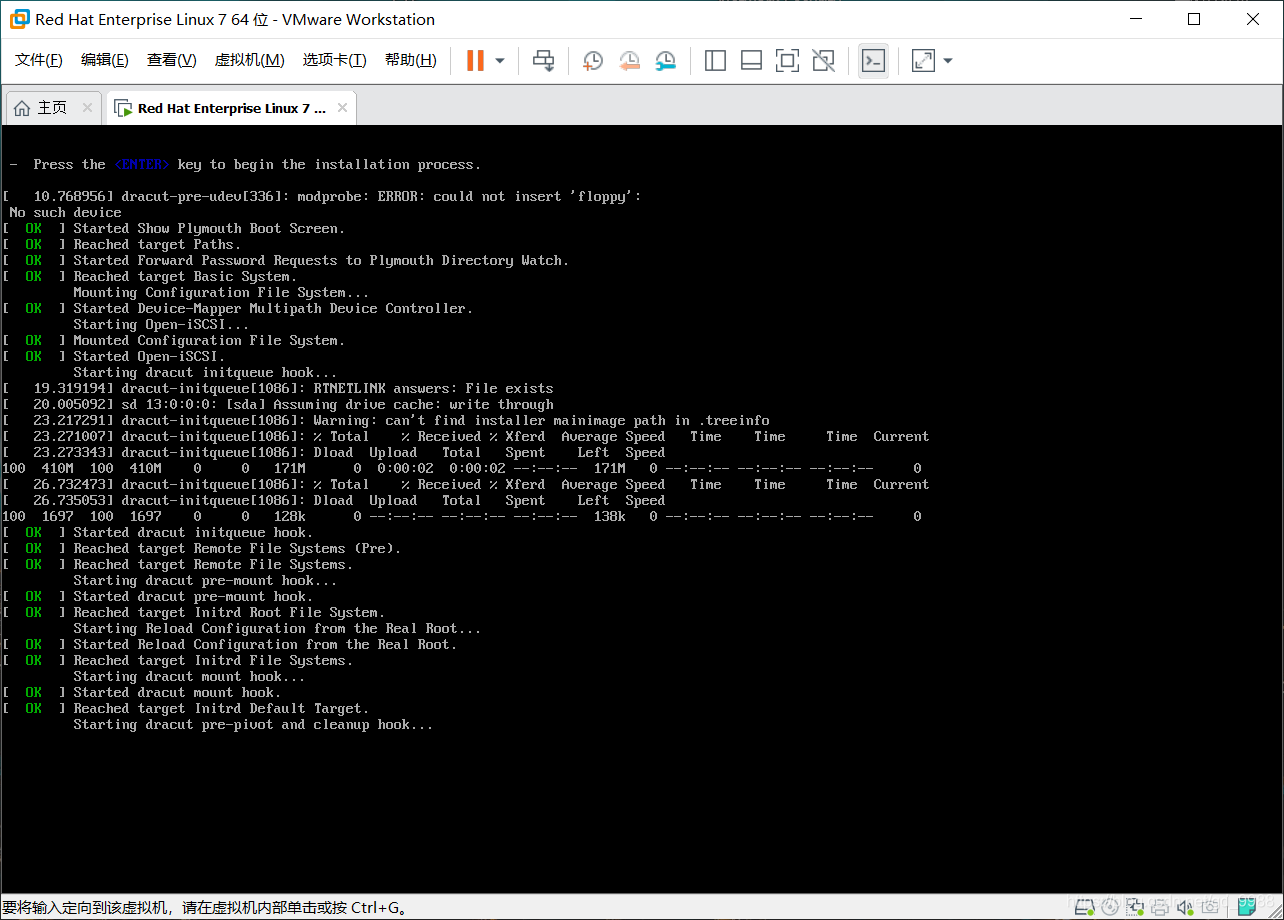
出现这个页面之后只需要就证明已经成功了,只需喝杯茶,等待一会,系统就安装成功了。
未经允许,不允许转载,后续会继续完善功能,觉得可以的话,留下你们的赞和评论哦,代码已经在Github上开源,欢迎大佬给出建议,写作不易,还望支持
