java实现activemq队列和订阅消息
注释都写好了。粘贴可用。
导入依赖
<!--消息队列连接池-->
<dependency>
    <groupId>org.apache.activemq</groupId>
    <artifactId>activemq-pool</artifactId>
    <version>5.15.0</version>
</dependency>

<dependency>
    <groupId>org.springframework.boot</groupId>
    <artifactId>spring-boot-starter-activemq</artifactId>
</dependency>
关于activemq是什么?怎么安装运行?网上很多,这里就不讲了。下面都直接上代码。
一、队列消息
1、消息生产者
package com.example.demo;

import org.apache.activemq.ActiveMQConnectionFactory;
import javax.jms.*;

public class QueueProducer {

    public static void main(String[] args) throws JMSException {
        //创建连接工厂
        ActiveMQConnectionFactory activeMQConnectionFactory=new ActiveMQConnectionFactory("tcp://localhost:61616");
        //创建连接
        Connection connection=activeMQConnectionFactory.createConnection();
        //连接
        connection.start();

        //创建会话
        Session session=connection.createSession(false, Session.AUTO_ACKNOWLEDGE);
        //创建队列
        Queue queue=session.createQueue("queue_test");
        //创建消息生产者
        MessageProducer messageProducer=session.createProducer(queue);

        //创建消息对象
        String msg = "千里之行,始于足下";
        Message message = session.createTextMessage(msg);
        //发送消息
        messageProducer.send(message);

        //关闭所有连接
        messageProducer.close();
        session.close();
        connection.close();
    }
}
2、消息消费者
package com.example.demo;

import org.apache.activemq.ActiveMQConnectionFactory;
import javax.jms.*;

public class QueueConsumer {

    public static void main(String[] args) throws JMSException {
        //创建连接工厂
        ActiveMQConnectionFactory activeMQConnectionFactory=new ActiveMQConnectionFactory("tcp://localhost:61616");
        //创建连接
        Connection connection=activeMQConnectionFactory.createConnection();
        //连接
        connection.start();

        //创建会话
        Session session=connection.createSession(false, Session.AUTO_ACKNOWLEDGE);
        //创建队列
        Queue queue=session.createQueue("queue_test");

        //创建消息消费者
        MessageConsumer messageConsumer=session.createConsumer(queue);
        //消费消息
        messageConsumer.setMessageListener(new MessageListener() {
            @Override
            public void onMessage(Message message) {
                try {
                    String text = ((TextMessage) message).getText();
                    System.err.println("收到的消息是:" + text);
                } catch (Exception e) {
                    e.printStackTrace();
                }
            }
        });
    }
}
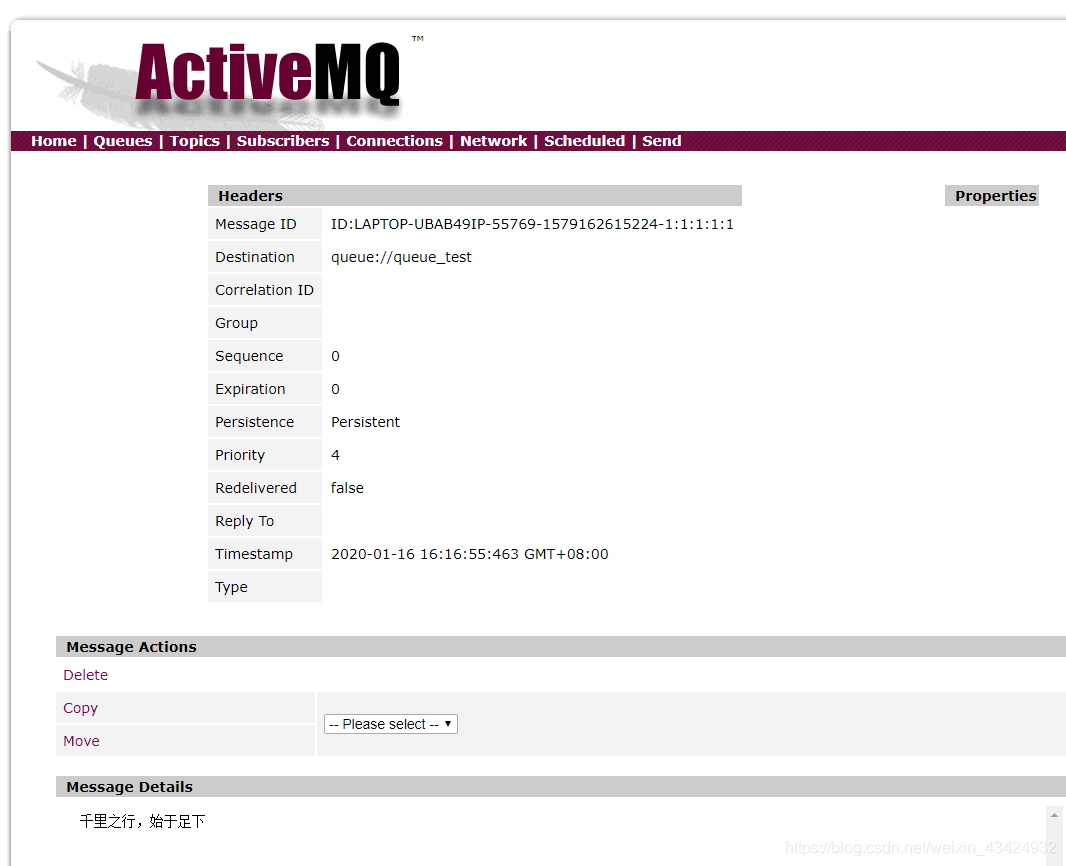
运行消息生产者,结果:
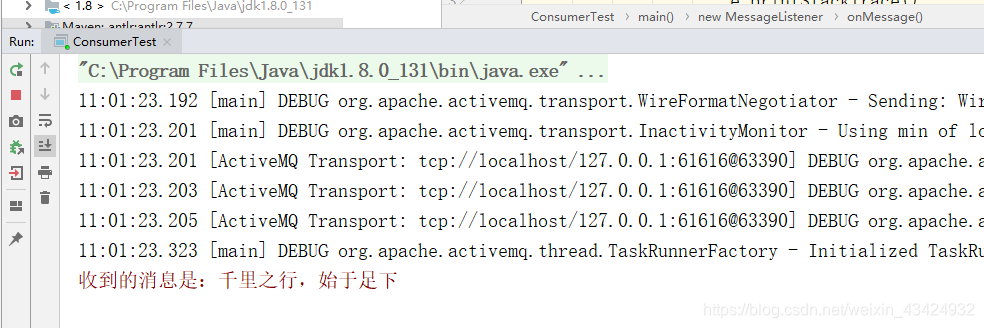
运行消息消费者,看控制台打印结果:
二、订阅消息
1、消息生产者
package com.example.demo;

import org.apache.activemq.ActiveMQConnectionFactory;
import javax.jms.*;

public class TopicProducter {

    public static void main(String[] args) throws JMSException {
        //创建连接工厂
        ActiveMQConnectionFactory activeMQConnectionFactory=new ActiveMQConnectionFactory("tcp://localhost:61616");
        //创建连接
        Connection connection=activeMQConnectionFactory.createConnection();
        //连接
        connection.start();

        //创建会话
        Session session=connection.createSession(false, Session.AUTO_ACKNOWLEDGE);

        //创建主题
        Topic topic = session.createTopic("topic_test");
        //创建消息生产者
        MessageProducer producer=session.createProducer(topic);
        //创建消息对象
        String msg = "千里之行,始于足下";
        Message message = session.createTextMessage(msg);
        //发送消息
        producer.send(message);

        //关闭所有连接
        producer.close();
        session.close();
        connection.close();
    }
}
2、消息消费者
package com.example.demo;

import org.apache.activemq.ActiveMQConnectionFactory;

import javax.jms.*;

public class TopicConsumer {
    private static final String TopicName="FirstTopicName";
    public static void main(String[] args) throws JMSException {
        //创建连接工厂
        ActiveMQConnectionFactory activeMQConnectionFactory=new ActiveMQConnectionFactory("tcp://localhost:61616");
        //创建连接
        Connection connection=activeMQConnectionFactory.createConnection();
        //连接
        connection.start();

        //创建会话
        Session session=connection.createSession(false, Session.AUTO_ACKNOWLEDGE);

        //创建主题
        Topic topic = session.createTopic("topic_test");
        //创建消息消费者
        MessageConsumer messageConsumer=session.createConsumer(topic);

        //消费消息
        messageConsumer.setMessageListener(new MessageListener() {
            @Override
            public void onMessage(Message message) {
                try {
                    String text = ((TextMessage) message).getText();
                    System.err.println("收到的消息是:" + text);
                } catch (Exception e) {
                    e.printStackTrace();
                }
            }
        });
    }
}
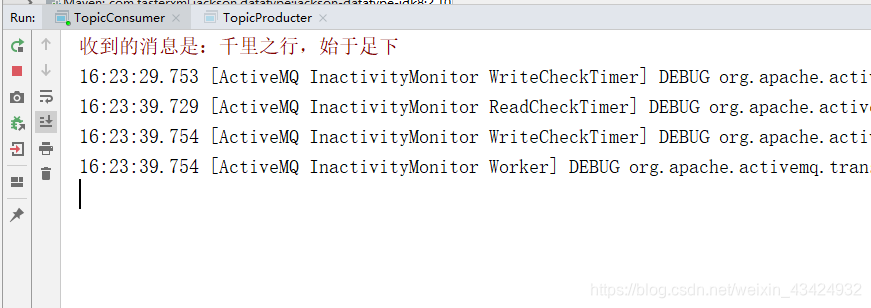
对于主题订阅消息。先启动消费者监听消息,再启动生产者生产消息。可以看到主题消息已经产生且被消费了。
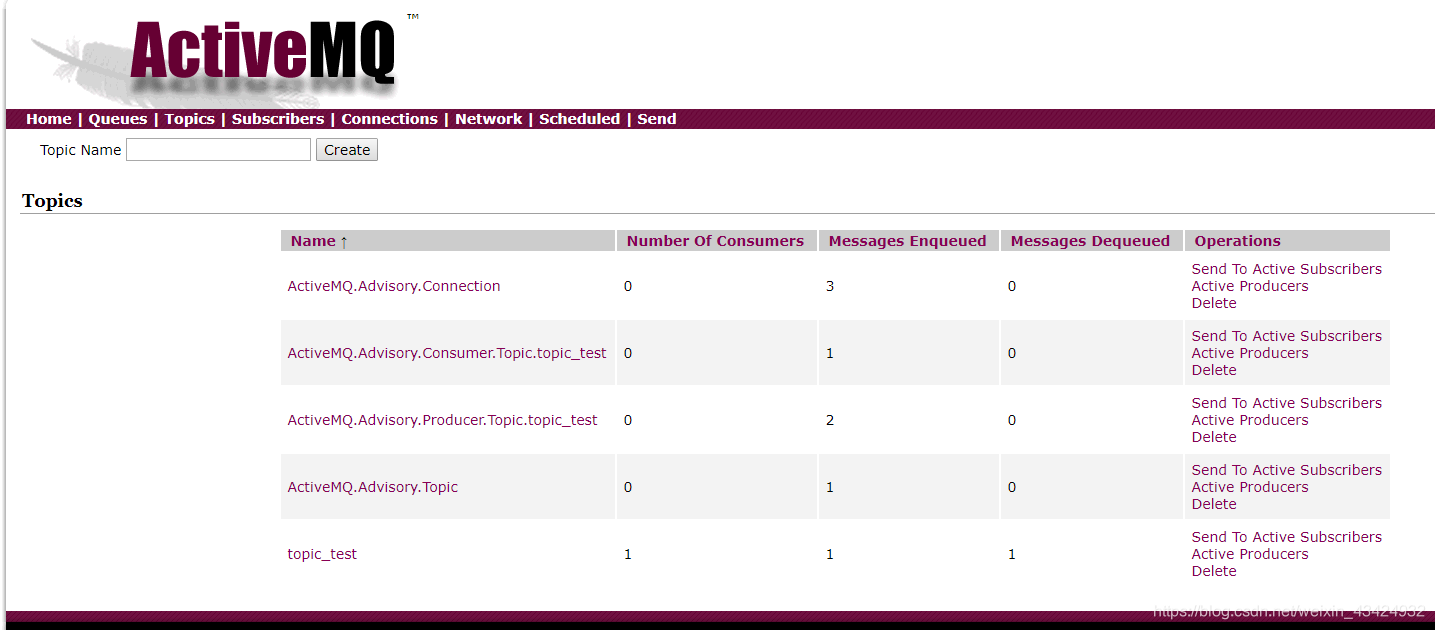
消费者控制台:
上面的东西太不实用了,下面这个才是。
三、springboot整合activemq
1、修改yml配置文件
spring:
  activemq:
    #ActiveMQ通讯地址
    broker-url: tcp://localhost:61616
    #用户名
    user: admin
    #密码
    password: admin
    #是否启用内存模式(就是不安装MQ,项目启动时同时启动一个MQ实例)
    in-memory: false
    packages:
      #信任所有的包
      trust-all: true
    pool:
      #是否替换默认的连接池,使用ActiveMQ的连接池需引入的依赖
      enabled: false
2、配置类
package com.example.demo.mq;

import org.apache.activemq.command.ActiveMQQueue;
import org.apache.activemq.command.ActiveMQTopic;
import org.springframework.context.annotation.Bean;
import org.springframework.context.annotation.Configuration;
import org.springframework.jms.annotation.EnableJms;
import org.springframework.jms.config.DefaultJmsListenerContainerFactory;
import org.springframework.jms.config.JmsListenerContainerFactory;

import javax.jms.ConnectionFactory;
import javax.jms.Queue;
import javax.jms.Topic;

@Configuration
@EnableJms
public class ActiveMQConfig {
    @Bean
    public Queue queue() {
        return new ActiveMQQueue("QueueMsg") ;
    }

    //springboot默认只配置queue类型消息,如果要使用topic类型的消息,则需要配置该bean
    @Bean(name = "jmsTopicListenerContainerFactory")
    public JmsListenerContainerFactory jmsTopicListenerContainerFactory(ConnectionFactory connectionFactory){
        DefaultJmsListenerContainerFactory factory = new DefaultJmsListenerContainerFactory();
        factory.setConnectionFactory(connectionFactory);
        //这里设置为true,false表示是queue类型
        factory.setPubSubDomain(true);
        return factory;
    }

    @Bean
    public Topic topic() {
        return new ActiveMQTopic("TopicMsg") ;
    }
}
3、消息监听器
package com.example.demo.mq;

import org.springframework.jms.annotation.JmsListener;
import org.springframework.stereotype.Component;

@Component
public class Listener {

    //接收queue类型消息
    //destination对应配置类中ActiveMQQueue("QueueMsg")设置的名字
    @JmsListener(destination="QueueMsg")
    public void ListenQueue(String msg){
        System.out.println("接收到queue消息:" + msg);
    }

    //接收topic类型消息
    //destination对应配置类中ActiveMQTopic("TopicMsg")设置的名字
    //containerFactory对应配置类中注册JmsListenerContainerFactory的bean名称
    @JmsListener(destination="TopicMsg", containerFactory = "jmsTopicListenerContainerFactory")
    public void ListenTopic(String msg){
        System.out.println("接收到topic消息:" + msg);
    }
}
4、搞个测试单元
package com.example.demo;

import org.junit.jupiter.api.Test;
import org.junit.runner.RunWith;
import org.springframework.beans.factory.annotation.Autowired;
import org.springframework.boot.test.context.SpringBootTest;
import org.springframework.jms.core.JmsMessagingTemplate;
import org.springframework.test.context.junit4.SpringRunner;

import javax.jms.Queue;
import javax.jms.Topic;

@RunWith(SpringRunner.class)
@SpringBootTest
class MqTest {

    @Autowired
    private JmsMessagingTemplate jmsTemplate;

    @Autowired
    private Queue queue;

    @Autowired
    private Topic topic;

    //发送queue类型消息
    @Test
    public void sendQueueMsg(){
        String msg="QueueMsg";
        jmsTemplate.convertAndSend(queue, msg);
    }

    //发送topic类型消息
    @Test
    public void sendTopicMsg(){
        String msg="TopicMsg";
        jmsTemplate.convertAndSend(topic, msg);
    }
}
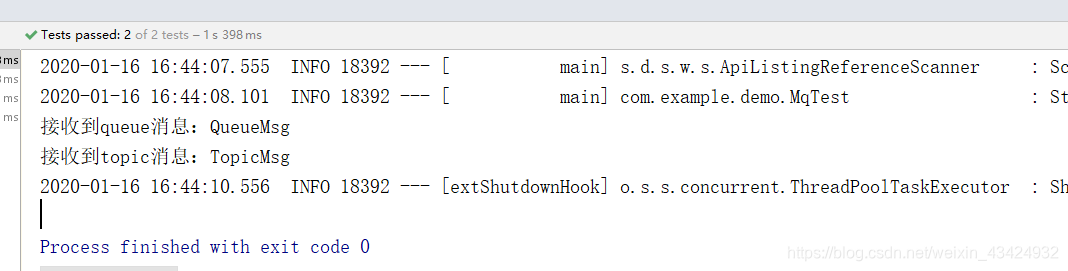
两个一起运行一波,测试结果: