一、安全证书下载
1.登录阿里云选择控制台

2.进入控制台后选择产品与服务,选择安全(云盾)中的SSL证书(应用安全)

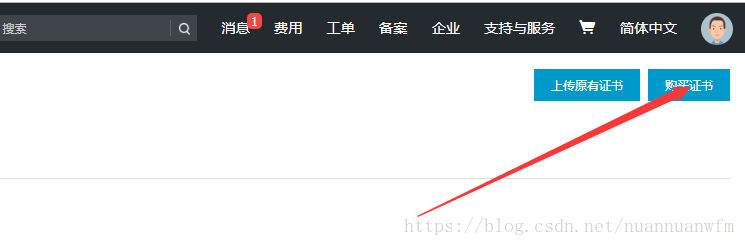
3.进入页面后,点击购买证书
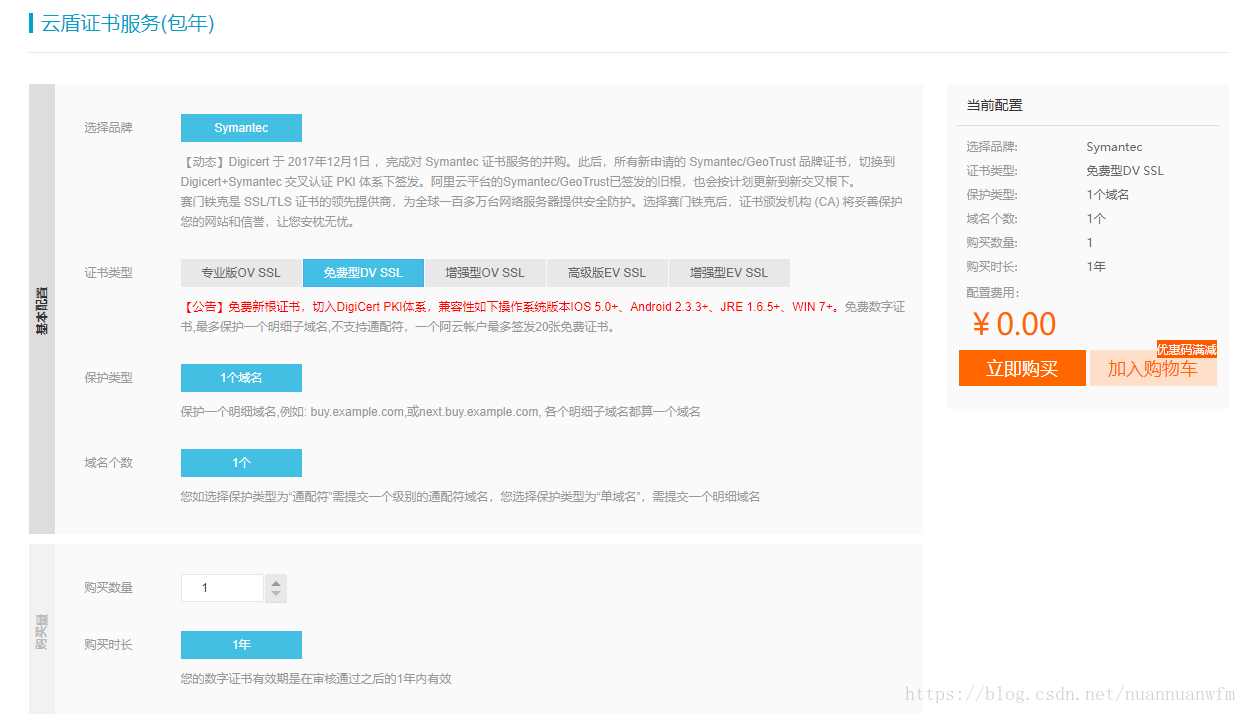
4.根据您的需要进行证书的购买,这里我使用的是免费版的
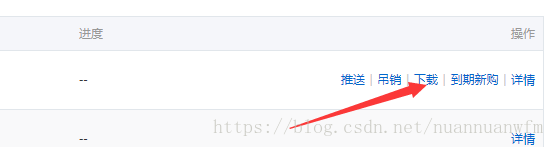
5.购买证书成功后可以在管理控制台我的订单中进行查看

6.点击下载,进入证书下载页面,下载相应的证书,这里我下载的是nginx版本

二、相关配置
1.简单介绍
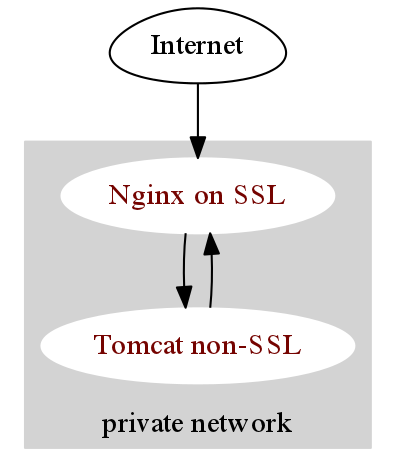
最终配置的方案是浏览器和 Nginx 之间走的 HTTPS 通讯,而 Nginx 到 Tomcat 通过 proxy_pass 走的是普通 HTTP 连接。
2.下面是详细的配置(Nginx 端口 80/443,Tomcat 的端口 8081)
(1)Nginx 相关配置
 upstream tomcat {

    server 127.0.0.1:8081;

  }

 #HTTPS server
    server {
    listen 443 ssl;
    server_name 升级域名;
    ssl on;
   # root html;
   # index index.html index.htm;
    ssl_certificate   214751828840732.pem 文件目录;
    ssl_certificate_key  214751828840732.key 文件目录;
    ssl_session_timeout 5m;
    ssl_ciphers ECDHE-RSA-AES128-GCM-SHA256:ECDHE:ECDH:AES:HIGH:!NULL:!aNULL:!MD5:!ADH:!RC4;
    ssl_protocols TLSv1 TLSv1.1 TLSv1.2;
    ssl_prefer_server_ciphers on;
    location / {
    proxy_set_header X-Forwarded-For $proxy_add_x_forwarded_for;
        proxy_set_header Host $http_host;
        proxy_set_header X-Forwarded-Proto https;
        proxy_redirect off;
        proxy_connect_timeout      240;
        proxy_send_timeout         240;
        proxy_read_timeout         240;
        # note, there is not SSL here! plain HTTP is used
        proxy_pass   http://tomcat;
        }
  }
注意:其中最为关键的就是 ssl_certificate 和 ssl_certificate_key 这两项配置,其他的按正常配置。不过多了一个 proxy_set_header X-Forwarded-Proto https; 配置
(2)tomcat 相关配置
 <Connector connectionTimeout="20000" port="8081"  executor="tomcatThreadPool"  acceptCount="600"  protocol="org.apache.coyote.http11.Http11AprProtocol"
     redirectPort="8443"
	 scheme="https"
     proxyPort="443"/>
上述的配置中没有什么特别的,但是特别特别注意的是必须有 proxyPort="443",这是整篇文章的关键
三、配置结束重启nginx和tomcat
附重启命令:
1.nginx:
(1)停止:nginx -s stop
(2)重启:nginx -c /etc/nginx/nginx.conf(使用nginx配置文件进行重启)
(3)修改配置文件重新加载:nginx -s reload
注意:重启过程中可能会遇到问题:
端口占用问题:nginx: [emerg] bind() to 0.0.0.0:443 failed (98: Address already in use)
解决:lsof -i:443(查看占用的线程)

杀死线程:/etc/init.d/httpd stop
2.tomcat
(1)停止:进入tomcat的bin目录执行:./shutdown.sh
(2)重启:进入tomcat的bin目录执行:./startup.sh
到这里就配置结束 大功告成!!!!!
