案例一
简单描述
最近在写豆瓣UI中发现有一个二次加载,简单来说,有二十个tableviewcell就是在第一次加载的时候会加载10个到了第十个的时候他会在刷新进行请求,会在加载剩下的十个,下面就来简单实现这个功能。
大体思路
我的思路
就是首先设置tableview的位置,如果他滑动到了10个的位置就进行改变返回20;
首先第一步就是对就tableview进行监测
对tableview添加观察者
如下
[self.viewAllNav.tableViewOne addObserver:self forKeyPath:NSStringFromSelector(@selector(contentOffset)) options:NSKeyValueObservingOptionNew context:nil];
然后添加事件
一开始我写的是
-
(void)observeValueForKeyPath:(NSString *)keyPath ofObject:(id)object change:(NSDictionary<NSKeyValueChangeKey,id> *)change context:(void *)context {
NSLog(@"%f",[change[NSKeyValueChangeNewKey] CGPointValue].y);if([change[NSKeyValueChangeNewKey] CGPointValue].y>968) { self.viewAllNav.a = 20; [self.viewAllNav.tableViewOne reloadData]; }];
结果发现就是如果这样写不是想象的那样,就是高度超过968他会一直刷新,而我们只需要刷新一次,所以思考一下改成如下的样子。就没有问题了
- (void)observeValueForKeyPath:(NSString *)keyPath ofObject:(id)object change:(NSDictionary<NSKeyValueChangeKey,id> *)change context:(void *)context {
    NSLog(@"%f",[change[NSKeyValueChangeNewKey] CGPointValue].y);

    if([change[NSKeyValueChangeNewKey] CGPointValue].y>968) {

    if(self.viewAllNav.a == 10)
    {
    self.viewAllNav.a = 20;
   [self.viewAllNav.tableViewOne reloadData];
        }];
最后我的做法是用一个可变数组进行数据的接收,一开始的时候数组存储十个数据,然后监测到距离为10个的时候,继续请求然后给数组继续添加即可
最终代码如下
- (void)observeValueForKeyPath:(NSString *)keyPath ofObject:(id)object change:(NSDictionary<NSKeyValueChangeKey,id> *)change context:(void *)context {
    NSLog(@"%f",[change[NSKeyValueChangeNewKey] CGPointValue].y);

    if([change[NSKeyValueChangeNewKey] CGPointValue].y>968) {

        if(self.viewAllNav.a == 10)
        {
        self.viewAllNav.a = 20;
        [[DBBookPageManager sharedManager]fetchLatestDailyDataWithSucceed:^(DBBookPageModel * _Nonnull latestDataModel) {
                DBAllHaveModel * haveModel = [[DBAllHaveModel alloc] init];
                ProductModel * productModel = [[ProductModel alloc] init];
                for (int i = 10; i<self.viewAllNav.a; i++) {
                    DBAllHaveModel * haveModel = [[DBAllHaveModel alloc] init];
                    productModel = latestDataModel.subjects[i];
                    haveModel.nameStr = productModel.title;
                    NSLog(@"%@",haveModel.nameStr);
                    haveModel.starStr = productModel.rating.average;
                    haveModel.imageStr = productModel.images.medium;
                    [self.viewAllNav.dataArray addObject:haveModel];

                }
                    dispatch_async(dispatch_get_main_queue(), ^{
                        [self.viewAllNav.tableViewOne reloadData];
                    });

            } error:^(NSError * _Nonnull error) {

            }];


        }
    }

}
案例二
想要实现如下效果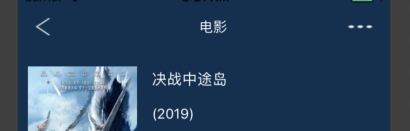
当tableview滑动一段距离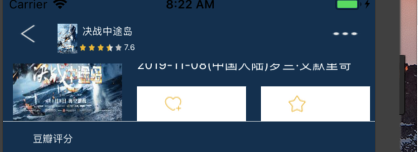
这个也用到了KVO的监听,效果的大体思路是在导航栏上加一层VIEW,然后一开始最上一层的View的透明度设置为0,然后监测tableview的滑动距离,大于一段距离后将最上一层的view的透明度设置为1,而下一层设置为0,即可。
代码如下
[self.detailView.detailTableView addObserver:self forKeyPath:NSStringFromSelector(@selector(contentOffset)) options: NSKeyValueObservingOptionNew context:nil];

-(void)observeValueForKeyPath:(NSString *)keyPath ofObject:(id)object change:(NSDictionary<NSKeyValueChangeKey,id> *)change context:(void *)context {
    if([change[NSKeyValueChangeNewKey] CGPointValue].y>100) {
        self.detailView.topView.alpha  =0;
        self.detailView.topTwoView.alpha = 1;
    }else {
        self.detailView.topView.alpha  =1;
        self.detailView.topTwoView.alpha = 0;
    }
}
- (void)dealloc {
    [self.detailView.detailTableView removeObserver:self forKeyPath:NSStringFromSelector(@selector(contentOffset))];
}
