用DOM方法设置样式十分灵活,可以动态创建标记,设置内嵌.style样式(驼峰命名)或者说直接改变一个class属性。而CSS样式丰富多彩,引入许多选择器first-child, last-child,nth-child(),nth-of-child()等等,也有伪类选择器属性 描述a:link a:visited a:hover a:active等等。那么什么时候用CSS设置样式,什么时候用DOM修改样式呢?在这个问题上没有放之四海皆准的答案。 毫无疑问,CSS用来设置网页样式,大多时候我们都用CSS设置去创建重要样式,而用DOM去对文档做一些增强。 那么什么时候去选用DOM方法修改而不是CSS呢?下面我们将从一些适应范围来分析这个问题:
1.根据元素在节点树中的位置来设置样式
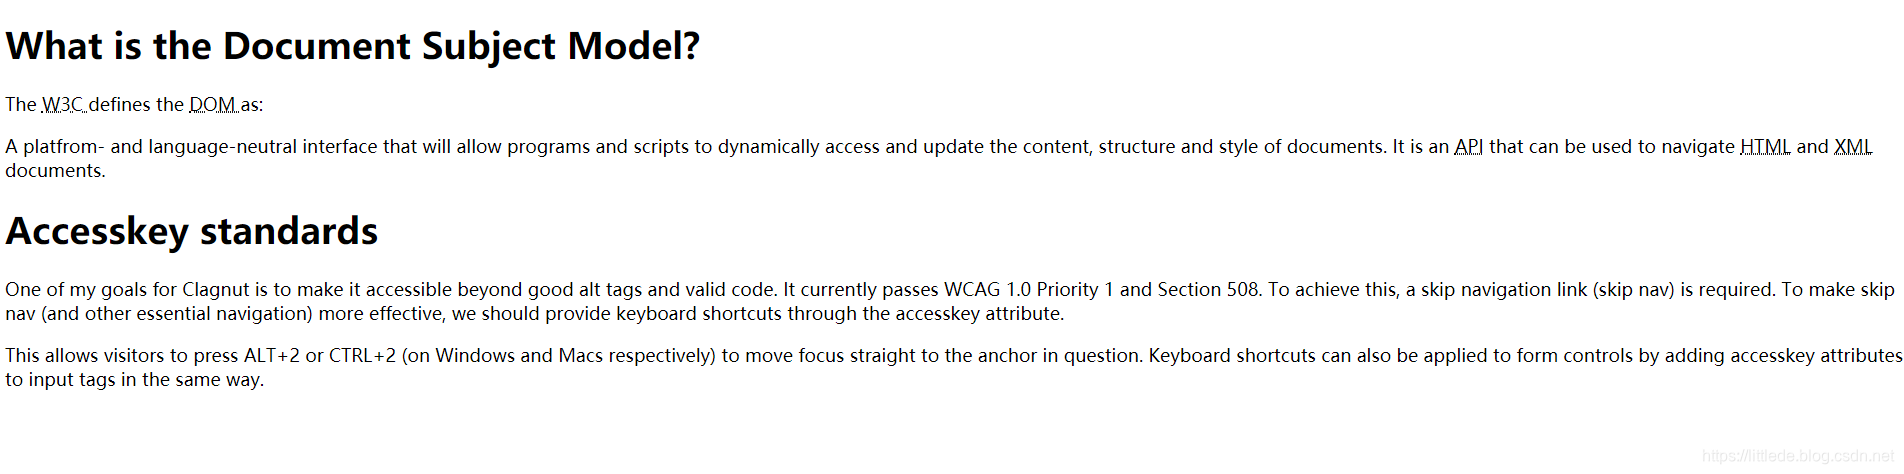
我们来看这样一组标记:
<h1>What is the Document Subject Model?</h1>
<p>
	The <abbr title="World Wide Web Consortium"> W3C </abbr> defines the <abbr title="Document Object Model"> DOM </abbr> as:
</p>

<p>
	A platfrom- and language-neutral interface that will allow programs
	and scripts to dynamically access and update the content, structure and style of documents.
	It is an <abbr title="Application Programming Interface">API</abbr>
	that can be used to navigate <abbr title="HyperText Markup language">
	HTML</abbr> and <abbr title="extensible Markup Language"> XML </abbr>documents.
</p>

<h1>Accesskey standards</h1>
<p>
One of my goals for Clagnut is to make it accessible beyond good alt tags and valid code. It currently passes WCAG 1.0 Priority 1 and Section 508. To achieve this, a skip navigation link (skip nav) is required. To make skip nav (and other essential navigation) more effective, we should provide keyboard shortcuts through the accesskey attribute.
</p>

<p>
This allows visitors to press ALT+2 or CTRL+2 (on Windows and Macs respectively) to move focus straight to the anchor in question. Keyboard shortcuts can also be applied to form controls by adding accesskey attributes to input tags in the same way.
</p>
CSS无法根据元素之间的相对位置来找出某个特定元素,对DOM来说轻而易举。例如我们可以找出所有的h1元素,并找到紧跟其后的第一个元素节点,把样式添加给它。
//下一个元素节点函数
function addLoadEvent(func)
{//为了后续添加函数,addLoadEvent()十分重要,
	var old=window.onload;
	if(typeof old!='function')
	{
		window.onload=func;
	}
	else
	{
		window.onload=function()
		{
			old();
			func();
		}
	}
}
addLoadEvent(styleHeaderSiblings);
function getNextElement(node)
{
	if(node.nodeType==1)
	{
		return node;
	}
	if(node.nextSibling)
	{
		return getNextElement(node.nextSibling);
	}
	return null;
}
function styleHeaderSiblings()
{
	if(!document.getElementsByTagName) return false;
	var headers=document.getElementsByTagName("h1");
	for(var i=0;i<headers.length;i++)
	{
		elem=getNextElement(headers[i].nextSibling);//取出下一个元素节点
		if(elem)
		{
			elem.style.fontWeight="bold";
			elem.style.fontSize="1.2em";
		}
	}
}
注意此处的getNextSibling函数,我们要得到的是下一个元素节点,如果用nextSibling函数来处理一个属性节点,那么返回的将会是下一个属性节点。这个时候我们应该返回的是null,所以我们编写了getNextSibling函数来得到下一个元素节点:
function getNextElement(node)
{
	if(node.nodeType==1)
	{
		return node;
	}
	if(node.nextSibling)
	{
		return getNextElement(node.nextSibling);
	}
	return null;
}
最后是修改结果
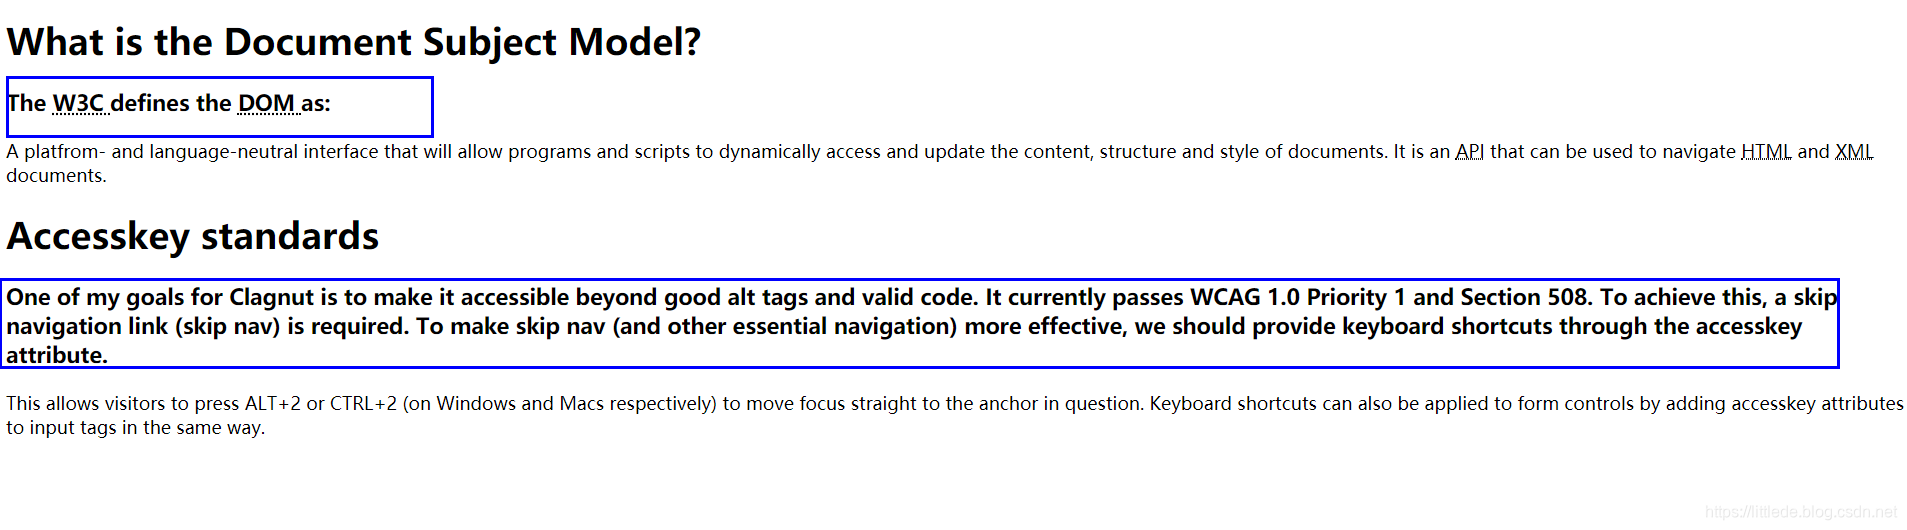
我们也许会想,用CSS也能达到同样的效果,为什么不用CSS统一设置了?理论上确实如此,这类样式应该用CSS设置,但是如果文档中的内容需要定期的编辑和刷新,添加class属性的工作将会变成一种负担。不仅如此如果文档需要通过CMS来处理,给文档添加class属性或其他样式是不允许的。
2.根据某种条件反复设置某种样式
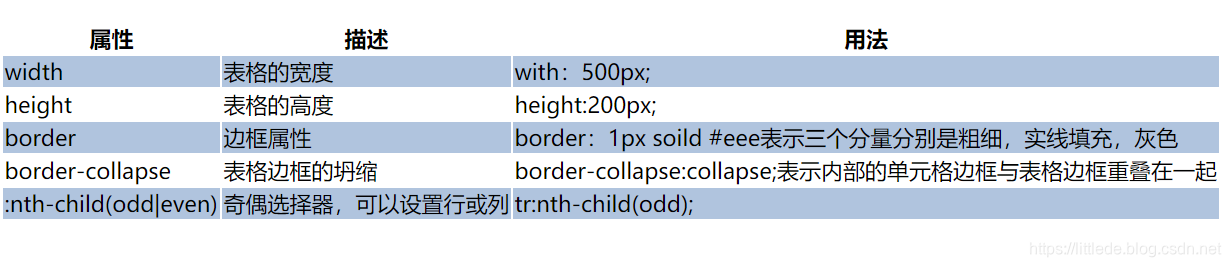
前面的举例似乎还不能体现DOM对CSS的挑战性,但是有一种应用大概是CSS永远无法与DOM竞争的,这个应用就是反复设置样式,我们用奇偶选择器这个例子来说明:
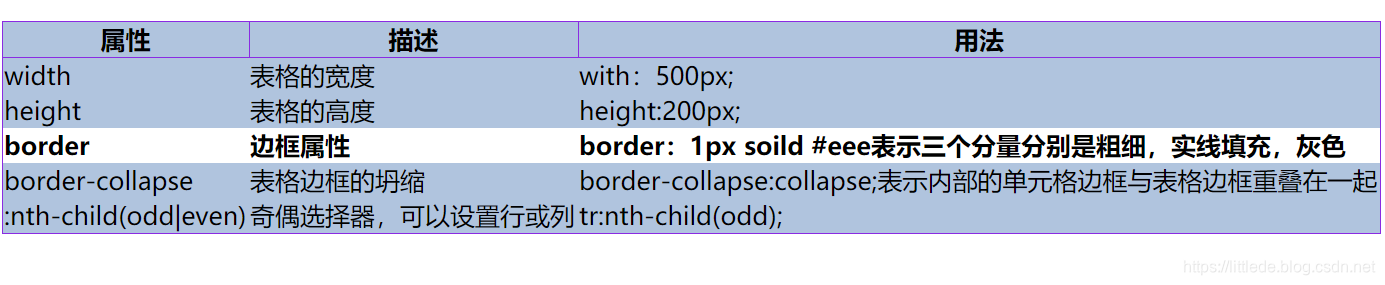
<table>
	<tr>
		<th>属性</th>
		<th>描述</th>
		<th>用法</th>
	</tr>
	<tr>
		<td>width</td>
		<td>表格的宽度</td>
		<td>with:500px;</td>
	</tr>
	<tr>
		<td>height</td>
		<td>表格的高度</td>
		<td>height:200px;</td>
	</tr>
	<tr>
		<td>border</td>
		<td>边框属性</td>
		<td>border:1px soild #eee表示三个分量分别是粗细,实线填充,灰色</td>
	</tr>
	<tr>
		<td>border-collapse</td>
		<td>表格边框的坍缩</td>
		<td>border-collapse:collapse;表示内部的单元格边框与表格边框重叠在一起</td>
	</tr>
	<tr>
		<td>:nth-child(odd|even)</td>
		<td>奇偶选择器,可以设置行或列</td>
		<td>tr:nth-child(odd);</td>
	</tr>
	</table>
对于这样的一个表格,我们可以用就选择器方便的设置奇数行偶数行的样式:
table,td,th{
	border: 1px solid 	#8A2BE2;
	border-collapse: collapse;
}
tr:nth-child(odd){
	background-color:	#B0C4DE;
}
tr:nth-child(even){
	background-color:	#fff;
}
如果你要处理大表格,从中删除或添加一行,我们就不得不修改大量的class属性,这显然是繁琐的。而JavaScript很擅长处理重复的事情:
function tripeTables()
{
	if(!document.getElementsByTagName) return false;
	var tables=document.getElementsByTagName("table");

	for(var i=0;i<tables.length;i++)
	{

		var rows=tables[i].getElementsByTagName("tr");//取得所有列
		for(var j=0;j<rows.length;j++)
		{
			if(j%2) rows[j].style.backgroundColor="#B0C4DE";
				else rows[j].style.backgroundColor="##fff";
		}
	}
}
用DOM方法达到了同样的效果:
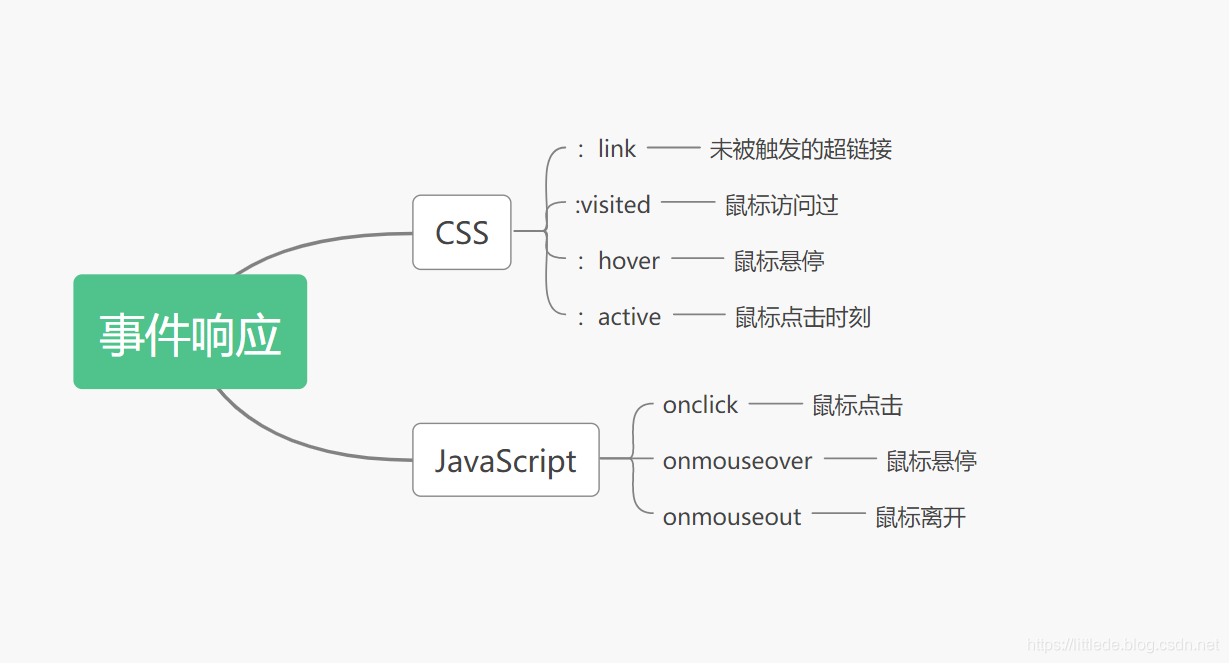
3.响应事件
对于事件的响应CSS和JavaScript都提供了很多方法
CSS提供了许多伪类选择器: :link :visited :hover :active等方法。
JavaScript中提供了: onclick onmouseover onmouseout等方法。
只要有可能,最好选用CSS方法,当该方法受阻时选用JavaScript方法。
我们仍然用上面提到的表格来说明问题:
设置CSS样式,在鼠标悬停时将字体加粗,背景颜色变为#fff
table,th{
	border: 1px solid #8A2BE2;
	background-color: #B0C4DE;
	border-collapse: collapse;
}

td:hover{
	background-color: #fff;
}
tr:hover{
	font-weight: bold;
	background-color: #fff;
}
可以看到字体确实加粗,但是使用伪类选择器有一个缺陷:不是所有的浏览器都支持伪类,所以不一定能够达到平稳退化,这样一来我们考虑用DOM方法:
function hightRows()
{
	if(!document.getElementsByTagName) return false;
	var rows=document.getElementsByTagName("tr");
	for(var i=0;i<rows.length;i++)
	{
		rows[i].onmouseover=function()
		{
			this.style.fontWeight="bold";
			this.style.backgroundColor="#fff";
		}
		rows[i].onmouseout=function()
		{
			this.style.fontWeight="normal";
			this.style.backgroundColor="#B0C4DE";
		}
	}
}
这里的悬停效果有重要的启发意义,先设置,再解除的方法值得借鉴。

选用CSS还是DOM方法?虽然没有放之四海而皆准的答案,但是我们仍然遵循最简原则:大部分重要属性用CSS,DOM用来增强文档;当CSS设置某些标记变得困难,DOM将发挥作用。
