第3章 部署单机多节点网络
在进行基础环境搭建和fabric环境部署完后,可以得到一个完全干净的空服务器状态。
3.1 生成证书文件
如果运行过e2e_cli案例,则执行如下命令即可做到环境清理(…/fabric/examples/e2e_cli/):
./network_setup.sh down
在Fabric源码目录下创建一个名为 aberic 的目录,该目录为当前即将运行的单机多节点项目目录。
cd /home/zyp/development/go/src/github.com/hyperledger/fabric/
mkdir aberic
将第2章中提到的 bin/目录下的文件同样拷贝到aberic/下
cd /home/zyp/development/go/src/github.com/hyperledger/fabric/release/linux-amd64/
cp -R bin /home/zyp/development/go/src/github.com/hyperledger/fabric/aberic/
将…/fabric/examples/e2e_cli/下的configtx.yaml及ctypto-config.yaml配置文件拷贝至aberic/目录下
cd /home/zyp/development/go/src/github.com/hyperledger/fabric/examples/e2e_cli/
cp configtx.yaml /home/zyp/development/go/src/github.com/hyperledger/fabric/aberic/
cp crypto-config.yaml /home/zyp/development/go/src/github.com/hyperledger/fabric/aberic/
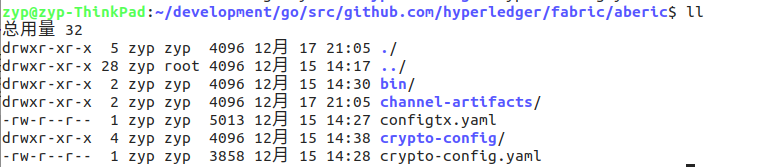
最终如下图:

接下来就可以开始生成所需证书文件了,执行相关命令需要制定执行文件的路径,所以为了方便直接进入到aberic目录下操作
./bin/cryptogen generate --config=./crypto-config.yaml
结果如下:

注意:如果提示权限不足,则需要授权,参考第2章中的解决方案即可。
(所以最方便的是直接拷贝e2e_cli实例运行后的文件,如果新下载的文件就需要授权)
完成后会在aberic目录下生成一个新的目录 ctypto-config,其中有两个目录如下:

使用configtxgen工具执行configtx.yaml文件以创建orderer Genesis block,在此之前需要为configtxgen工具指定confitx.yaml文件的路径,设置环境变量
export FABRIC_CFG_PATH=$PWD
打印查看
echo $PWD
结果如下图:

接下来,根据configtx.yaml生成创世区块及频道认证文件

./bin/configtxgen -profile TwoOrgsOrdererGenesis -outputBlock ./channel-artifacts/genesis.block
这里需要手动创建一个 channel-artifacts 文件夹,不然会出现如下错误提示:

mkdir channel-artifacts
然后再次执行上面的命令,有如下结果:

可以在channel-artifacts目录下看到创世区块genesis.block

创世区块是为了Orderer排序服务启动时用到的,Peer节点在启动后需要创建Channel的配置文件,执行如下命令生成:
./bin/configtxgen -profile TwoOrgsChannel -outputCreateChannelTx ./channel-artifacts/mychannel.tx -channelID mychnnel
结果如下:

该命令生成了一个channelID为mychannel的tx文件(该文件的名称可以根据需求自己命名),通过该文件peer可以执行channel的创建工作。
3.2 部署Orderer节点
本章先采用Solo做单机多节点部署,先从基础开始使用学习,Kafka集群部署在之后将使用。
首先需要一份docker-orderer.yaml启动文件,内容如下:
# Copyright IBM Corp. All Rights Reserved.
#
# SPDX-License-Identifier: Apache-2.0
#

version: '2'

services:

  orderer.example.com:
    container_name: orderer.example.com
    image: hyperledger/fabric-orderer
    environment:
      - CORE_VM_DOCKER_HOSTCONFIG_NETWORKMODE=aberic_default
      # - ORDERER_GENERAL_LOGLEVEL=error
      - ORDERER_GENERAL_LOGLEVEL=debug
      - ORDERER_GENERAL_LISTENADDRESS=0.0.0.0
      - ORDERER_GENERAL_LISTENPORT=7050
      #- ORDERER_GENERAL_GENESISPROFILE=AntiMothOrdererGenesis
      - ORDERER_GENERAL_GENESISMETHOD=file
      - ORDERER_GENERAL_GENESISFILE=/var/hyperledger/orderer/orderer.genesis.block
      - ORDERER_GENERAL_LOCALMSPID=OrdererMSP
      - ORDERER_GENERAL_LOCALMSPDIR=/var/hyperledger/orderer/msp
      #- ORDERER_GENERAL_LEDGERTYPE=ram
      #- ORDERER_GENERAL_LEDGERTYPE=file
      # enabled TLS
      - ORDERER_GENERAL_TLS_ENABLED=false
      - ORDERER_GENERAL_TLS_PRIVATEKEY=/var/hyperledger/orderer/tls/server.key
      - ORDERER_GENERAL_TLS_CERTIFICATE=/var/hyperledger/orderer/tls/server.crt
      - ORDERER_GENERAL_TLS_ROOTCAS=[/var/hyperledger/orderer/tls/ca.crt]
    working_dir: /opt/gopath/src/github.com/hyperledger/fabric
    command: orderer
    volumes:
    - ./channel-artifacts/genesis.block:/var/hyperledger/orderer/orderer.genesis.block
    - ./crypto-config/ordererOrganizations/example.com/orderers/orderer.example.com/msp:/var/hyperledger/orderer/msp
    - ./crypto-config/ordererOrganizations/example.com/orderers/orderer.example.com/tls/:/var/hyperledger/orderer/tls
    networks:
      default:
        aliases:
          - aberic
    ports:
      - 7050:7050
注意:这份启动文件中ORDERER_GENERAL_GENESISFILE、ORDERER_GENERAL_LOCALMSPID、ORDERER_GENERAL_LOCALMSPDIR参数需要与configtx.yaml文件中上下文一致,且指定的文件映射路径与当前配置文件中的volumes指向匹配
(仔细配置,避免后面遇到各种问题,不用问我怎么知道的)
configtx.yaml文件内容如下:
# Copyright IBM Corp. All Rights Reserved.
#
# SPDX-License-Identifier: Apache-2.0
#

---
################################################################################
#
#   Profile
#
#   - Different configuration profiles may be encoded here to be specified
#   as parameters to the configtxgen tool
#
################################################################################
Profiles:

    TwoOrgsOrdererGenesis:
        Orderer:
            <<: *OrdererDefaults
            Organizations:
                - *OrdererOrg
        Consortiums:
            SampleConsortium:
                Organizations:
                    - *Org1
                    - *Org2
    TwoOrgsChannel:
        Consortium: SampleConsortium
        Application:
            <<: *ApplicationDefaults
            Organizations:
                - *Org1
                - *Org2

################################################################################
#
#   Section: Organizations
#
#   - This section defines the different organizational identities which will
#   be referenced later in the configuration.
#
################################################################################
Organizations:

    # SampleOrg defines an MSP using the sampleconfig.  It should never be used
    # in production but may be used as a template for other definitions
    - &OrdererOrg
        # DefaultOrg defines the organization which is used in the sampleconfig
        # of the fabric.git development environment
        Name: OrdererOrg

        # ID to load the MSP definition as
        ID: OrdererMSP

        # MSPDir is the filesystem path which contains the MSP configuration
        MSPDir: crypto-config/ordererOrganizations/example.com/msp

    - &Org1
        # DefaultOrg defines the organization which is used in the sampleconfig
        # of the fabric.git development environment
        Name: Org1MSP

        # ID to load the MSP definition as
        ID: Org1MSP

        MSPDir: crypto-config/peerOrganizations/org1.example.com/msp

        AnchorPeers:
            # AnchorPeers defines the location of peers which can be used
            # for cross org gossip communication.  Note, this value is only
            # encoded in the genesis block in the Application section context
            - Host: peer0.org1.example.com
              Port: 7051

    - &Org2
        # DefaultOrg defines the organization which is used in the sampleconfig
        # of the fabric.git development environment
        Name: Org2MSP

        # ID to load the MSP definition as
        ID: Org2MSP

        MSPDir: crypto-config/peerOrganizations/org2.example.com/msp

        AnchorPeers:
            # AnchorPeers defines the location of peers which can be used
            # for cross org gossip communication.  Note, this value is only
            # encoded in the genesis block in the Application section context
            - Host: peer0.org2.example.com
              Port: 7051

################################################################################
#
#   SECTION: Orderer
#
#   - This section defines the values to encode into a config transaction or
#   genesis block for orderer related parameters
#
################################################################################
Orderer: &OrdererDefaults

    # Orderer Type: The orderer implementation to start
    # Available types are "solo" and "kafka"
    OrdererType: solo

    Addresses:
        - orderer.example.com:7050

    # Batch Timeout: The amount of time to wait before creating a batch
    BatchTimeout: 2s

    # Batch Size: Controls the number of messages batched into a block
    BatchSize:

        # Max Message Count: The maximum number of messages to permit in a batch
        MaxMessageCount: 10

        # Absolute Max Bytes: The absolute maximum number of bytes allowed for
        # the serialized messages in a batch.
        AbsoluteMaxBytes: 98 MB

        # Preferred Max Bytes: The preferred maximum number of bytes allowed for
        # the serialized messages in a batch. A message larger than the preferred
        # max bytes will result in a batch larger than preferred max bytes.
        PreferredMaxBytes: 512 KB

    Kafka:
        # Brokers: A list of Kafka brokers to which the orderer connects
        # NOTE: Use IP:port notation
        Brokers:
            - 127.0.0.1:9092

    # Organizations is the list of orgs which are defined as participants on
    # the orderer side of the network
    Organizations:

################################################################################
#
#   SECTION: Application
#
#   - This section defines the values to encode into a config transaction or
#   genesis block for application related parameters
#
################################################################################
Application: &ApplicationDefaults

    # Organizations is the list of orgs which are defined as participants on
    # the application side of the network
    Organizations:
3.3 部署peer0.org1节点
有了Orderer排序服务启动文件,还需要专门为Peer节点准备docker-peer.yaml启动文件(Orderer和Peer的启动yaml文件名称可根据实际的需求自定义)。docker-peer.yaml文件内容如下:
# Copyright IBM Corp. All Rights Reserved.
#
# SPDX-License-Identifier: Apache-2.0
#

version: '2'

services:

  couchdb:
    container_name: couchdb
    image: hyperledger/fabric-couchdb
    # Comment/Uncomment the port mapping if you want to hide/expose the CouchDB service,
    # for example map it to utilize Fauxton User Interface in dev environments.
    ports:
      - "5984:5984"

  ca:
    container_name: ca
    image: hyperledger/fabric-ca
    environment:
      - FABRIC_CA_HOME=/etc/hyperledger/fabric-ca-server
      - FABRIC_CA_SERVER_CA_NAME=ca
      - FABRIC_CA_SERVER_TLS_ENABLED=false
      - FABRIC_CA_SERVER_TLS_CERTFILE=/etc/hyperledger/fabric-ca-server-config/ca.org1.example.com-cert.pem
      - FABRIC_CA_SERVER_TLS_KEYFILE=/etc/hyperledger/fabric-ca-server-config/5fe8b74dc201d05ebebd619e304ace5b342db8f19477e95b857e0a6a0efa78d2_sk
    ports:
      - "7054:7054"
    command: sh -c 'fabric-ca-server start --ca.certfile /etc/hyperledger/fabric-ca-server-config/ca.org1.example.com-cert.pem --ca.keyfile /etc/hyperledger/fabric-ca-server-config/5fe8b74dc201d05ebebd619e304ace5b342db8f19477e95b857e0a6a0efa78d2_sk -b admin:adminpw -d'
    volumes:
      - ./crypto-config/peerOrganizations/org1.example.com/ca/:/etc/hyperledger/fabric-ca-server-config

  peer0.org1.example.com:
    container_name: peer0.org1.example.com
    image: hyperledger/fabric-peer
    environment:
      - CORE_LEDGER_STATE_STATEDATABASE=CouchDB
      - CORE_LEDGER_STATE_COUCHDBCONFIG_COUCHDBADDRESS=couchdb:5984

      - CORE_PEER_ID=peer0.org1.example.com
      - CORE_PEER_NETWORKID=aberic
      - CORE_PEER_ADDRESS=peer0.org1.example.com:7051
      - CORE_PEER_CHAINCODELISTENADDRESS=peer0.org1.example.com:7052
      - CORE_PEER_GOSSIP_EXTERNALENDPOINT=peer0.org1.example.com:7051
      - CORE_PEER_LOCALMSPID=Org1MSP

      - CORE_VM_ENDPOINT=unix:///host/var/run/docker.sock
      # the following setting starts chaincode containers on the same
      # bridge network as the peers
      # https://docs.docker.com/compose/networking/
      # - CORE_VM_DOCKER_HOSTCONFIG_NETWORKMODE=aberic
      # - CORE_LOGGING_LEVEL=ERROR
      - CORE_LOGGING_LEVEL=DEBUG
      - CORE_VM_DOCKER_HOSTCONFIG_NETWORKMODE=aberic_default
      - CORE_PEER_GOSSIP_SKIPHANDSHAKE=true
      - CORE_PEER_GOSSIP_USELEADERELECTION=true
      - CORE_PEER_GOSSIP_ORGLEADER=false
      - CORE_PEER_PROFILE_ENABLED=false
      - CORE_PEER_TLS_ENABLED=false
      - CORE_PEER_TLS_CERT_FILE=/etc/hyperledger/fabric/tls/server.crt
      - CORE_PEER_TLS_KEY_FILE=/etc/hyperledger/fabric/tls/server.key
      - CORE_PEER_TLS_ROOTCERT_FILE=/etc/hyperledger/fabric/tls/ca.crt
    volumes:
        - /var/run/:/host/var/run/
        - ./crypto-config/peerOrganizations/org1.example.com/peers/peer0.org1.example.com/msp:/etc/hyperledger/fabric/msp
        - ./crypto-config/peerOrganizations/org1.example.com/peers/peer0.org1.example.com/tls:/etc/hyperledger/fabric/tls
    working_dir: /opt/gopath/src/github.com/hyperledger/fabric/peer
    command: peer node start
    ports:
      - 7051:7051
      - 7052:7052
      - 7053:7053
    depends_on:
      - couchdb
    networks:
      default:
        aliases:
          - aberic
    extra_hosts:
     - "orderer.example.com:172.31.159.130"

  cli:
    container_name: cli
    image: hyperledger/fabric-tools
    tty: true
    environment:
      - GOPATH=/opt/gopath
      - CORE_VM_ENDPOINT=unix:///host/var/run/docker.sock
      # - CORE_LOGGING_LEVEL=ERROR
      - CORE_LOGGING_LEVEL=DEBUG
      - CORE_PEER_ID=cli
      - CORE_PEER_ADDRESS=peer0.org1.example.com:7051
      - CORE_PEER_LOCALMSPID=Org1MSP
      - CORE_PEER_TLS_ENABLED=false
      - CORE_PEER_TLS_CERT_FILE=/opt/gopath/src/github.com/hyperledger/fabric/peer/crypto/peerOrganizations/org1.example.com/peers/peer0.org1.example.com/tls/server.crt
      - CORE_PEER_TLS_KEY_FILE=/opt/gopath/src/github.com/hyperledger/fabric/peer/crypto/peerOrganizations/org1.example.com/peers/peer0.org1.example.com/tls/server.key
      - CORE_PEER_TLS_ROOTCERT_FILE=/opt/gopath/src/github.com/hyperledger/fabric/peer/crypto/peerOrganizations/org1.example.com/peers/peer0.org1.example.com/tls/ca.crt
      - CORE_PEER_MSPCONFIGPATH=/opt/gopath/src/github.com/hyperledger/fabric/peer/crypto/peerOrganizations/org1.example.com/users/Admin@org1.example.com/msp
    working_dir: /opt/gopath/src/github.com/hyperledger/fabric/peer
    volumes:
        - /var/run/:/host/var/run/
        - ./chaincode/go/:/opt/gopath/src/github.com/hyperledger/fabric/aberic/chaincode/go
        - ./crypto-config:/opt/gopath/src/github.com/hyperledger/fabric/peer/crypto/
        - ./channel-artifacts:/opt/gopath/src/github.com/hyperledger/fabric/peer/channel-artifacts
    depends_on:
      - peer0.org1.example.com
文件中需要修改两个地方的_sk文件名称,替换成自己生成的证书文件名称,用于加载CA并登录CA用户。
修改位置如下图:

自己的证书文件位置:
/home/zyp/development/go/src/github.com/hyperledger/fabric/aberic/crypto-config/peerOrganizations/org1.example.com/ca/
位置及文件参考下图:

3.4 搭建Fabric网络
将第4.2节和4.3节中创建的docker-orderer.yaml文件和docker-peer.yaml文件上传至aberic目录下。
在aberic目录下创建chaincode文件夹,并在该文件夹下创建go文件夹,将是智能合约的部署路径,并把/home/zyp/development/go/src/github.com/hyperledger/fabric/examples/chaincode/go/下的chaincode_example02示例也一并上传到go目录下,之后将以该合约作为基础进行测试。
最终结果如下图所示:
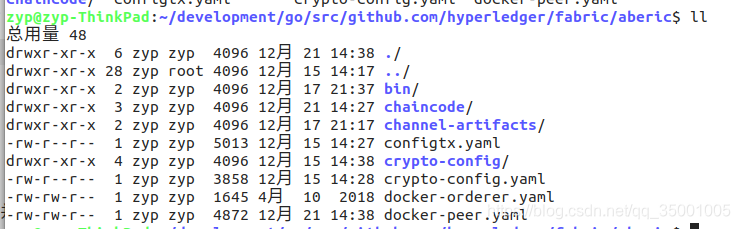
分别执行如下命令启动orderer和peer,按照顺序应该先启动排序服务。
docker-compose -f docker-orderer.yaml up -d
docker-compose -f docker-peer.yaml up -d

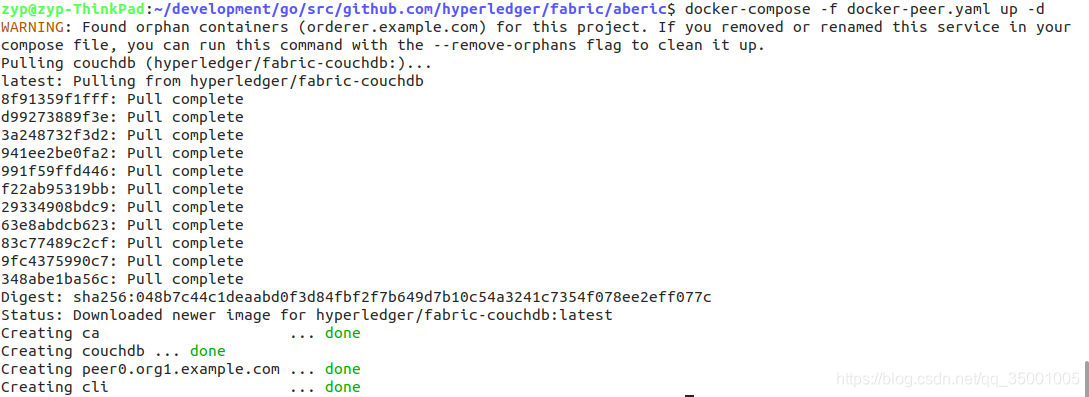
启动完成后查看容器是否均已启动
docker ps
结果如图:
 可以看到所有的容器已经启动,接下来就是对Channel和Chaincode执行操作了。
首先是Channel的创建及加盟操作。对Peer节点的操作基本都需要依赖客户端完成,现在可以用容器服务中的cli客户端,通过如下命令对Channel进行相关的操作:
docker exec -it cli bash
如下图所示:

上述的命令是对Docker容器的常规操作,cli则是YAML启动文件中定义的container_name(容器名称),通过修改修改上述命令中的 cli 为启动容器的名称,可以开启所写容器的内部服务。
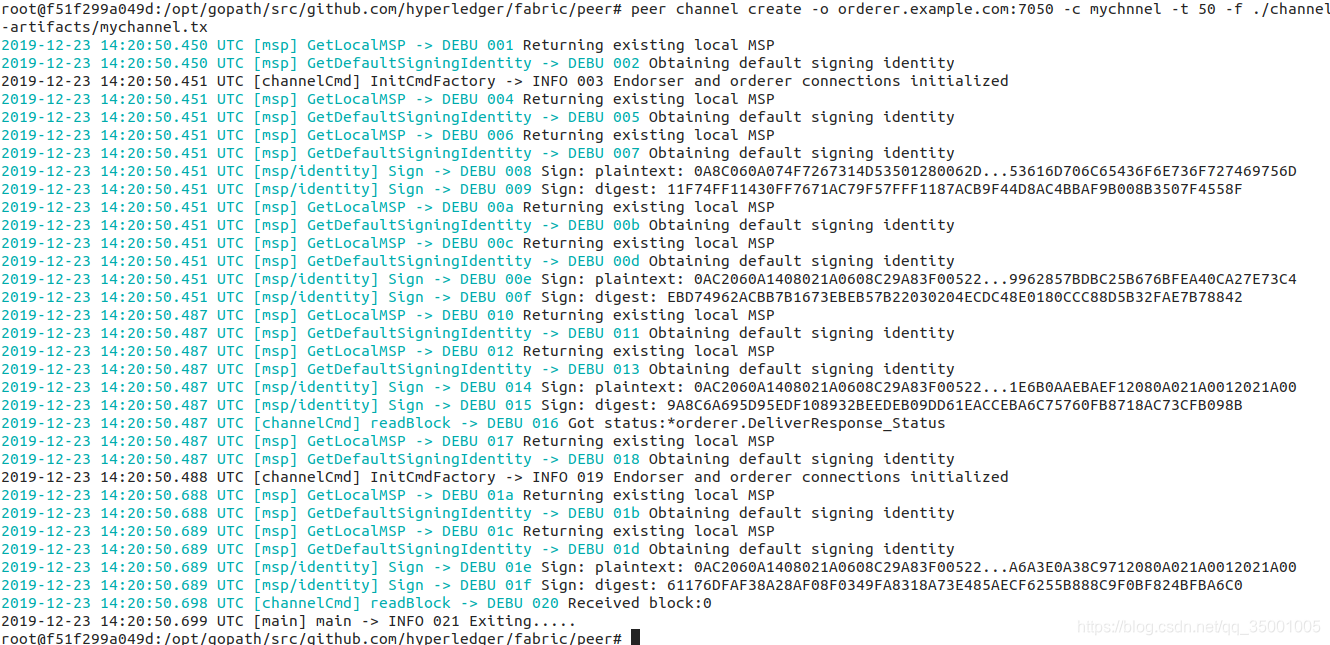
现在通过如下命令创建一个channel :
peer channel create -o orderer.example.com:7050 -c mychnnel -t 50 -f ./channel-artifacts/mychannel.tx
说明:mychnnel是我的channelID,这个单词看起来很奇怪,是因为我前面命名chaneelID的时候写错了单词…
最终的执行结果如下图:
随后查看已经创建的mychnnel.block文件

创建完channle后执行如下命令,通过mychannel.block文件加入该channel
peer channel join -b mychnnel.block
结果如下:

至此已经完成了channel的创建并加入了该channel,成功的搭建了一个最小单位的Fabric网络。
3.5 初步接触智能合约
Fabric网络搭建起来以后,就需要在上面执行合适的智能合约来实现具体的功能,从而使得现实中的项目得以落地。
接下来进行智能合约的安装部署、实例化及功能测试,之前上传了官方的demo至
/home/zyp/development/go/src/github.com/hyperledger/fabric/aberic/chaincode/go/chaincode_example02
此路径映射在docker-peer.yaml文件中的cli配置里的智能合约路径。
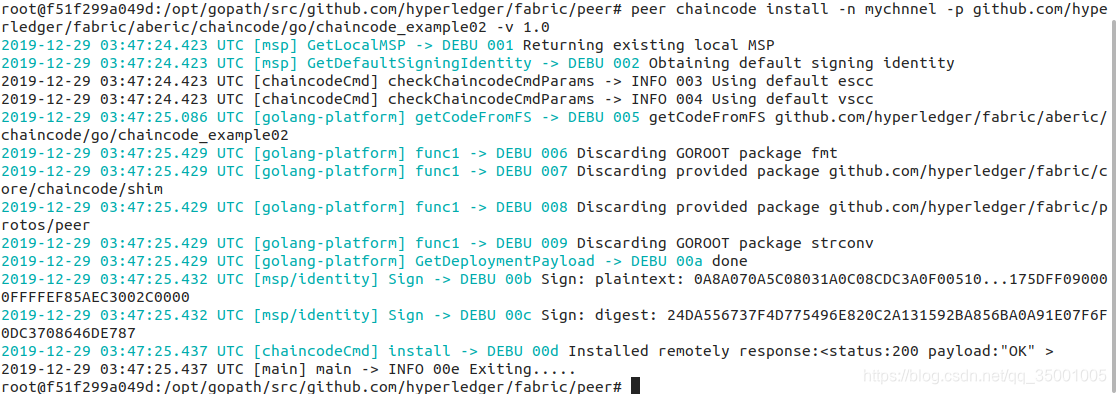
执行如下命令安装智能合约
peer chaincode install -n mychnnel -p github.com/hyperledger/fabric/aberic/chaincode/go/chaincode_example02 -v 1.0
结果日志如下图:
安装完成后需要进行实例化chaincode , 执行如下命令 :
peer chaincode instantiate -o orderer.example.com:7050 -C mychnnel -n mychnnel -c '{"Args":["init","A","10","B","10"]}' -P "OR ('Org1MSP.member')" -v 1.0
执行成功结果日志如下图:

以上命令通过 -P 加入了背书方案,其中指明了仅有Org1的成员才具有背书的能力
-c 参数指明了智能合约初始化时传入的参数内容。
此合约中的初始化 Init 方法源码如下:
func (t *SimpleChaincode) Init(stub shim.ChaincodeStubInterface) pb.Response {
	fmt.Println("ex02 Init")
	_, args := stub.GetFunctionAndParameters()
	var A, B string    // Entities
	var Aval, Bval int // Asset holdings
	var err error

	if len(args) != 4 {
		return shim.Error("Incorrect number of arguments. Expecting 4")
	}

	// Initialize the chaincode
	A = args[0]
	Aval, err = strconv.Atoi(args[1])
	if err != nil {
		return shim.Error("Expecting integer value for asset holding")
	}
	B = args[2]
	Bval, err = strconv.Atoi(args[3])
	if err != nil {
		return shim.Error("Expecting integer value for asset holding")
	}
	fmt.Printf("Aval = %d, Bval = %d\n", Aval, Bval)

	// Write the state to the ledger
	err = stub.PutState(A, []byte(strconv.Itoa(Aval)))
	if err != nil {
		return shim.Error(err.Error())
	}

	err = stub.PutState(B, []byte(strconv.Itoa(Bval)))
	if err != nil {
		return shim.Error(err.Error())
	}

	return shim.Success(nil)
}
该方法中接受四个参数,而在 -c ‘{“Args”:[“init”,“A”,“10”,“B”,“10”]}’ 中传入了五个参数,第一个参数是方法名,后四个参数是方法将要接收的参数内容。
通过阅读该初始化的方法,可以得出方法的目的是创建一个key为A的账户并给该账户一个值为10的资产,同时创建一个key为B的账户并给该账户一个值为10的资产。
该合约的query方法源码如下:
func (t *SimpleChaincode) query(stub shim.ChaincodeStubInterface, args []string) pb.Response {
	var A string // Entities
	var err error

	if len(args) != 1 {
		return shim.Error("Incorrect number of arguments. Expecting name of the person to query")
	}

	A = args[0]

	// Get the state from the ledger
	Avalbytes, err := stub.GetState(A)
	if err != nil {
		jsonResp := "{\"Error\":\"Failed to get state for " + A + "\"}"
		return shim.Error(jsonResp)
	}

	if Avalbytes == nil {
		jsonResp := "{\"Error\":\"Nil amount for " + A + "\"}"
		return shim.Error(jsonResp)
	}

	jsonResp := "{\"Name\":\"" + A + "\",\"Amount\":\"" + string(Avalbytes) + "\"}"
	fmt.Printf("Query Response:%s\n", jsonResp)
	return shim.Success(Avalbytes)
}
该方法只能接受一个参数,接受创建账户的key值,返回的是该账户下的资产。
执行如下命令对A账户进行查询:
peer chaincode query -C mychnnel -n mychnnel -c '{"Args":["query","A"]}'
同样,如果对B执行如下命令进行查询,会得到B的资产也是10
peer chaincode query -C mychnnel -n mychnnel -c '{"Args":["query","B"]}'
invoke方法源码如下:
func (t *SimpleChaincode) invoke(stub shim.ChaincodeStubInterface, args []string) pb.Response {
	var A, B string    // Entities
	var Aval, Bval int // Asset holdings
	var X int          // Transaction value
	var err error

	if len(args) != 3 {
		return shim.Error("Incorrect number of arguments. Expecting 3")
	}

	A = args[0]
	B = args[1]

	// Get the state from the ledger
	// TODO: will be nice to have a GetAllState call to ledger
	Avalbytes, err := stub.GetState(A)
	if err != nil {
		return shim.Error("Failed to get state")
	}
	if Avalbytes == nil {
		return shim.Error("Entity not found")
	}
	Aval, _ = strconv.Atoi(string(Avalbytes))

	Bvalbytes, err := stub.GetState(B)
	if err != nil {
		return shim.Error("Failed to get state")
	}
	if Bvalbytes == nil {
		return shim.Error("Entity not found")
	}
	Bval, _ = strconv.Atoi(string(Bvalbytes))

	// Perform the execution
	X, err = strconv.Atoi(args[2])
	if err != nil {
		return shim.Error("Invalid transaction amount, expecting a integer value")
	}
	Aval = Aval - X
	Bval = Bval + X
	fmt.Printf("Aval = %d, Bval = %d\n", Aval, Bval)

	// Write the state back to the ledger
	err = stub.PutState(A, []byte(strconv.Itoa(Aval)))
	if err != nil {
		return shim.Error(err.Error())
	}

	err = stub.PutState(B, []byte(strconv.Itoa(Bval)))
	if err != nil {
		return shim.Error(err.Error())
	}

	return shim.Success(nil)
}
该方法接收3个参数,方法的核心是第一个账户将自己资产中的第三个参数值的资产转移到第二个参数的账户的名下。
将A账户的5个资产转移到B账户下,执行如下的命令:
peer chaincode invode -C mychnnel -n mychnnel -c '{"Args":["invoke","A","B","5"]}'
再次查询A账户和B账户的资产,可以看到A的资产减少了5,而B的资产增加了5,结果分别是5和15
