文章目录
1、Vue概述
1.1介绍
Vue.js是一个构建数据驱动的 web 界面的渐进式框架。Vue.js 的目标是通过尽可能简单的 API 实现响应的数据绑
定和组合的视图组件。它不仅易于上手,还便于与第三方库或既有项目整合。
官网:https://cn.vuejs.org/
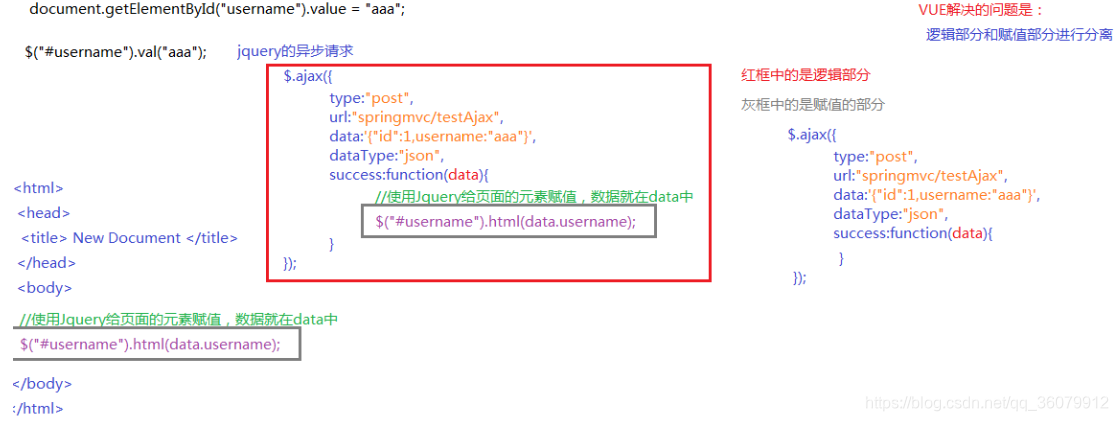
1.2 MVVM模式
MVVM是Model-View-ViewModel的简写。它本质上就是MVC 的改进版。MVVM 就是将其中的View 的状态和行为
抽象化,让我们将视图 UI 和业务逻辑分开
MVVM模式和MVC模式一样,主要目的是分离视图(View)和模型(Model)
Vue.js 是一个提供了 MVVM 风格的双向数据绑定的 Javascript 库,专注于View 层。它的核心是 MVVM 中的 VM,
也就是 ViewModel。 ViewModel负责连接 View 和 Model,保证视图和数据的一致性,这种轻量级的架构让前端
开发更加高效、便捷。
2、Vue的快速入门
Vue框架其实就是一个前端使用的工具而已,处理的只是js和html,不过他把传统的前端处理的动静分离了,后端传过来的动态数据都直接使用js来处理(经常都是使用axios这个工具,就像ajax一样的),静态数据就直接使用html页面处理,在html中嵌入js资源,就可以实现动态资源的加载。
入门程序:
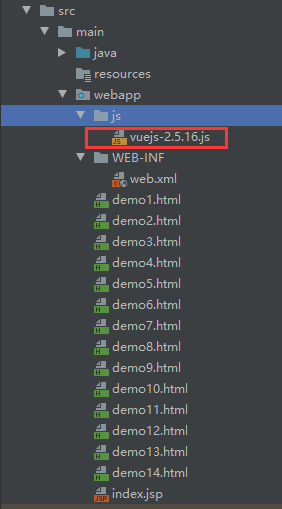
1.新建一个普通的maven工程,然后导入vue框架使用所需要的js包:
2.新建一个demo1.html页面,使用vue在页面上打印一个简单的信息:
<!DOCTYPE html>
<html>
	<head>
		<meta charset="utf-8" />
		<title>快速入门</title>
		<script src="js/vuejs-2.5.16.js"></script>
	</head>
	<body>
		<div id="app">
			{{message}}<!-- Vue的插值表达式(两个大括号),把data中的定义数据显示到此处 -->

			<!-- vue表达式支持三元运算符 -->
			{{true?"YES":"NO"}}

			<!-- vue不支持条件表达式或者定义变量 -->
<!--			{{var a1 = 100}}-->
<!--			{{if(var a >100)}}-->
			<!-- vue支持数学运算 -->
			{{number*100}}

		</div>
	</body>
	<script>
		//view model
		//创建vue对象
		new Vue({
			el:"#app",//由vue接管id为app的区域
			data:{
				message:"Hello Vue!",//注意此处不要有分号
				number:100
			}
		})
	</script>
</html>
3、Vue的语法
3.1插值表达式
数据绑定常见的形式就是使用“Mustache”语法 (双大括号) 的文本插值,Mustache 标签将会被替代为对应数据对 象上属性的值。无论何时,绑定的数据对象上属性发生了改变,插值处的内容都会更新。
Vue.js 都提供了完全的 JavaScript 表达式支持。
{{ number + 1 }}

{{ ok ? 'YES' : 'NO' }}
这些表达式会在所属 Vue 实例的数据作用域下作为 JavaScript 被解析。有个限制就是,每个绑定都只能包含单个 表达式,所以下面的例子都不会生效。
<!-- 这是语句,不是表达式 -->
 {{ var a = 1 }}
  <!-- 流控制也不会生效,请使用三元表达式 -->
  {{ if (ok) { return message } }}
3.2 事件的绑定
3.2.1 v-on
- 1)v-on:click:
<!DOCTYPE html>
<html>
	<head>
		<meta charset="utf-8" />
		<title>v-on:click</title>
		<script src="js/vuejs-2.5.16.js"></script>
	</head>
	<body>
		<div id="app">
			{{message}}
			<button v-on:click="fun1('hello vue!!!')">vue的onclick</button>
		</div>
	</body>
	<script>
		//view model
		new Vue({
			el:"#app",
			data:{
				message:"hello to vue",
			},
			methods:{
				fun1:function (msg) {
					alert("hello");
					this.message = msg;
				}
			}

		})
	</script>
</html>
-
- v-on:keydowm
<!DOCTYPE html>
<html>

	<head>
		<meta charset="utf-8" />
		<title>v-on:keydown</title>
		<script src="js/vuejs-2.5.16.js"></script>
	</head>

	<body>
		<div id="app">
			Vue:<input type="text" v-on:keydown="fun($event)">
			<br>
			传统的JS:<input type="text" onkeydown="fun1()">
		</div>
	</body>
	<script>
		//view model
		//使用vue实现
		new Vue({
			el:"#app",
			methods:{
				fun:function (event) {
					var keyCode = event.keyCode;
					if(keyCode < 48 || keyCode > 57){
						//不让键盘按键起作用
						event.preventDefault();
					}
				}
			}
		})
		//传统的js实现
		fun1 = function () {
			var keyCode = event.keyCode;
			if(keyCode < 48 || keyCode > 57){
				//不让键盘按键起作用
				event.preventDefault();
			}
			// alert(keyCode);
		}
	</script>
</html>
- 3)v-on:mouseover:
<!DOCTYPE html>
<html>

	<head>
		<meta charset="utf-8" />
		<title>v-on:mouseover</title>
		<style>
			#div {
				background-color: red;
				height: 300px;
				width: 300px;
			}
		</style>
		<script src="js/vuejs-2.5.16.js"></script>
	</head>

	<body>
		<div id="app">
			<div @mouseover="fun1" id="div">
				<textarea @mouseover="fun2($event)">这是一个文件域</textarea>
			</div>
		</div>
	</body>
	<script>
		//view model
		//@事件名称 = v-on:事件名称,即@mouseover = v-on:mouseover
		new Vue({
			el:"#app",
			methods:{
				fun1:function () {
					alert("鼠标在div上了")
				},
				fun2:function (event) {
					alert("鼠标在text域上了");
					event.stopPropagation();
				}
			}
		})

	</script>

</html>
3.3 事件修饰符
Vue.js 为 v-on 提供了事件修饰符来处理 DOM 事件细节,如:event.preventDefault() 或 event.stopPropagation()。
Vue.js通过由点(.)表示的指令后缀来调用修饰符。

<!DOCTYPE html>
<html>

	<head>
		<meta charset="utf-8" />
		<title>v-on:事件修饰符</title>
		<style>
			#div {
				background-color: red;
				height: 300px;
				width: 300px;
			}
		</style>
		<script src="js/vuejs-2.5.16.js"></script>
	</head>

	<body>
		<div id="app">
			<!-- vue中停止事件传播行为的经常使用stop或者prevent标签 -->
			<form @submit.prevent action="http://www.baidu.com" method="post">
				<input type="submit" value="提交"/>
			</form>
			<br>

			<div @mouseover="fun1" id="div">
				<!-- 演示vue的停止事件传播行为 -->
				<textarea @mouseover.stop="fun2($event)">这是一个文件域</textarea>
			</div>

<!--			<form action="www.baidu.com" method="post" onsubmit="return checkForm()">-->
<!--				<input type="submit" value="提交"/>-->
<!--			</form>-->
		</div>
	</body>
	<script>
		//view model
		new Vue({
			el:"#app",
			methods:{
				fun1:function () {
					alert("鼠标在div上了")
				},
				fun2:function (event) {
					alert("鼠标在text域上了");
					event.stopPropagation();
				}
			}
		})


		//传统的js方式阻止表单提交
		function checkForm() {
			alert(1);
			//表单验证必须返回一个明确的boolean值
			return false;
		}

	</script>

</html>
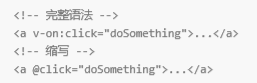
v-on简写方式:
3.4数据的显示
- v-text与v-html:
<!DOCTYPE html>
<html xmlns:v-text="http://www.w3.org/1999/xhtml">
	<head>
		<meta charset="utf-8" />
		<title>v-text与v-html</title>
		<script src="js/vuejs-2.5.16.js"></script>
	</head>
	<body>
		<div id="app">
			<div v-text="message"></div>
			<div v-html="message"></div>
<!--			<div id="d1"></div>-->
<!--			<div id="d2"></div>-->
		</div>
	</body>
	<script>
		//view model
		new Vue({
			el:"#app",
			data:{
				message:"<h1>vue的text/html使用</h1>"
			}
		})

		//传统js方式
		window.onload=function () {
			// alert(1)
			document.getElementById("d1").innerHTML = "<h1>div1中的内容(html)</h1>";
			document.getElementById("d2").innerText = "<h1>div1中的内容(text)</h1>";
		}
	</script>
</html>
- v-bind:
<!DOCTYPE html>
<html>

	<head>
		<meta charset="utf-8" />
		<title>v-bind</title>
		<script src="js/vuejs-2.5.16.js"></script>
	</head>

	<body>
		<div id="app">
			<!-- 使用v-bind标签来使用vue中定义好的变量 -->
			<font size="5" v-bind:color="ys1">测试使用颜色1</font>
			<font size="5" v-bind:color="ys2">测试使用颜色2</font>
		</div>
	</body>
	<script>
		//view model
		//插值表达式不能直接用于取值 {{}}
		//必须使用v-bind 给html标签赋值
		new Vue({
			el:"#app",
			data:{
				ys1:"red",
				ys2:"green"
			}
		})

	</script>

</html>
- 使用v-model取值:
<!DOCTYPE html>
<html>
	<head>
		<meta charset="utf-8" />
		<title>v-model</title>
		<script src="js/vuejs-2.5.16.js"></script>
	</head>
	<body>
		<div id="app">
			用户名:<input type="text" name="username" v-model="user.username"/><br>
			密码:<input type="text" name="password" v-model="user.password"/><br>
		</div>
	</body>
	<script>
		//view model
		//v-model 标签用于html标签取值使用...
		new Vue({
			el:"#app",
			data:{
				user:{
					username:"test",
					password:"123"
				}
			}
		})
	</script>
</html>
3.5逻辑判断和循环输出
1)v-for:普通数组:
<!DOCTYPE html>
<html>
	<head>
		<meta charset="utf-8" />
		<title>v-for遍历数组</title>
		<script src="js/vuejs-2.5.16.js"></script>
	</head>
	<body>
		<div id="app">
			<!-- 基本数组 -->
			<ul>
				<li v-for="(item,index) in arr">{{index}}={{item}}</li>
			</ul>
		</div>
	</body>
	<script>
		//view model
		new Vue({
			el:"#app",
			data:{
				arr:[1,2,3,4,5]
			}
		})
	</script>
</html>
2)v-for:对象数数组:
<!DOCTYPE html>
<html>
	<head>
		<meta charset="utf-8" />
		<title>v-for遍历对象</title>
		<script src="js/vuejs-2.5.16.js"></script>
	</head>
	<body>
		<div id="app">
			<ul>
				<li v-for="(key,value) in product">{{key}}====={{value}}</li>
			</ul>
		</div>
	</body>
	<script>
		//view model
		new Vue({
			el:"#app",
			data:{
				product:{
					id:8,
					name:"电视机",
					price:5000
				}
			}
		})
	</script>
</html>
3)v-for:对象集合:
<!DOCTYPE html>
<html>

	<head>
		<meta charset="utf-8" />
		<title>v-for遍历对象</title>
		<script src="js/vuejs-2.5.16.js"></script>
	</head>

	<body>
		<div id="app">
			<table border="1">
				<tr>
					<td>序号</td>
					<td>编号</td>
					<td>名称</td>
					<td>价格</td>
				</tr>

				<tr v-for="(product,index) in products">
					<td>{{index}}</td>
					<td>{{product.id}}</td>
					<td>{{product.name}}</td>
					<td>{{product.price}}</td>
				</tr>
			</table>
		</div>
	</body>
	<script>
		//view model
		new Vue({
			el:"#app",
			data:{
				products:[
					{id:8, name:"电视机", price:5000},
					{id:3, name:"电脑", price:5222},
					{id:4, name:"手机", price:1111}
				],
				product:{
					id:8,
					name:"电视机",
					price:5000
				}
			}
		})
	</script>

</html>
3.6 v-if || v-show
<!DOCTYPE html>
<html>
	<head>
		<meta charset="utf-8" />
		<title>v-if与v-show</title>
		<script src="js/vuejs-2.5.16.js"></script>
	</head>
	<body>
		<div id="app">
			<span v-if="flag">测试1</span>
			<span v-show="flag">测试22</span>
			<button @click="toggle">切换</button>
		</div>
	</body>
	<script>
		//view model
		new Vue({
			el:"#app",
			data:{
				flag:false
			},
			methods:{
				toggle:function () {
					this.flag = !this.flag;
				}
			}
		})
	</script>
</html>
4、Vue的生命周期
8个生命周期的执行点
	4个基本的
	4个特殊的
<!DOCTYPE html>
<html>

	<head>
		<meta charset="utf-8" />
		<title>vuejs生命周期</title>
		<script src="js/vuejs-2.5.16.js"></script>
	</head>

	<body>
		<div id="app">
			{{message}}
		</div>
	</body>
	<script>
		var vm = new Vue({
			el: "#app",
			data: {
				message: 'hello world'
			},
			beforeCreate: function() {
				console.log(this);
				showData('创建vue实例前', this);
			},
			created: function() {
				showData('创建vue实例后', this);
			},
			beforeMount: function() {
				showData('挂载到dom前', this);
			},
			mounted: function() {
				showData('挂载到dom后', this);
			},
			beforeUpdate: function() {
				showData('数据变化更新前', this);
			},
			updated: function() {
				showData('数据变化更新后', this);
			},
			beforeDestroy: function() {
				vm.test = "3333";
				showData('vue实例销毁前', this);
			},
			destroyed: function() {
				showData('vue实例销毁后', this);
			}
		});

		function realDom() {
			console.log('真实dom结构:' + document.getElementById('app').innerHTML);
		}

		function showData(process, obj) {
			console.log(process);
			console.log('data 数据:' + obj.message)
			console.log('挂载的对象:')
			console.log(obj.$el)
			realDom();
			console.log('------------------')
			console.log('------------------')
		}
		//vm.message = "good...";
		// vm.$destroy();
	</script>

</html>
5、axios的ajax异步请求
它和jquery的ajax比较相似,用以处理后端传过来的数据,以及发送数据给后端,将js和html分离的一个核心工具。axios可以直接在vue对象内部使用,不用servlet或者jsp专门提供服务。方便了实现动静分离。
6、综合案例
实现用户的查询列表和更新操作
	前端:Vue
	后端:ssm
步骤:
1)创建一个maven工程,在pom.xml中导入jar包支持:
<?xml version="1.0" encoding="UTF-8"?>

<project xmlns="http://maven.apache.org/POM/4.0.0" xmlns:xsi="http://www.w3.org/2001/XMLSchema-instance"
  xsi:schemaLocation="http://maven.apache.org/POM/4.0.0 http://maven.apache.org/xsd/maven-4.0.0.xsd">
  <modelVersion>4.0.0</modelVersion>

  <groupId>com.xxx</groupId>
  <artifactId>VueJsDemo2</artifactId>
  <version>1.0-SNAPSHOT</version>
  <packaging>war</packaging>

  <name>VueJsDemo2 Maven Webapp</name>
  <!-- FIXME change it to the project's website -->
  <url>http://www.example.com</url>

  <properties>
    <project.build.sourceEncoding>UTF-8</project.build.sourceEncoding>
    <maven.compiler.source>1.8</maven.compiler.source>
    <maven.compiler.target>1.8</maven.compiler.target>
    <spring.version>5.0.2.RELEASE</spring.version>
    <slf4j.version>1.6.6</slf4j.version>
    <log4j.version>1.2.12</log4j.version>
    <mybatis.version>3.4.5</mybatis.version>
  </properties>
  <dependencies> <!-- spring -->
    <dependency>
      <groupId>org.aspectj</groupId>
      <artifactId>aspectjweaver</artifactId>
      <version>1.6.8</version>
    </dependency>
    <dependency>
      <groupId>org.springframework</groupId>
      <artifactId>spring-context</artifactId>
      <version>${spring.version}</version>
    </dependency>
    <dependency>
      <groupId>org.springframework</groupId>
      <artifactId>spring-context-support</artifactId>
      <version>${spring.version}</version>
    </dependency>
    <dependency>
      <groupId>org.springframework</groupId>
      <artifactId>spring-orm</artifactId>
      <version>${spring.version}</version>
    </dependency>
    <dependency>
      <groupId>org.springframework</groupId>
      <artifactId>spring-test</artifactId>
      <version>${spring.version}</version>
    </dependency>
    <dependency>
      <groupId>org.springframework</groupId>
      <artifactId>spring-webmvc</artifactId>
      <version>${spring.version}</version>
    </dependency>
    <dependency>
      <groupId>org.springframework</groupId>
      <artifactId>spring-tx</artifactId>
      <version>${spring.version}</version>
    </dependency>
    <dependency>
      <groupId>junit</groupId>
      <artifactId>junit</artifactId>
      <version>4.12</version>
      <scope>test</scope>
    </dependency>
    <dependency>
      <groupId>javax.servlet</groupId>
      <artifactId>javax.servlet-api</artifactId>
      <version>3.1.0</version>
      <scope>provided</scope>
    </dependency>
    <dependency>
      <groupId>javax.servlet.jsp</groupId>
      <artifactId>jsp-api</artifactId>
      <version>2.0</version>
      <scope>provided</scope>
    </dependency>
    <dependency>
      <groupId>jstl</groupId>
      <artifactId>jstl</artifactId>
      <version>1.2</version>
    </dependency> <!-- log start -->
    <dependency>
      <groupId>log4j</groupId>
      <artifactId>log4j</artifactId>
      <version>${log4j.version}</version>
    </dependency>
    <dependency>
      <groupId>org.slf4j</groupId>
      <artifactId>slf4j-api</artifactId>
      <version>${slf4j.version}</version>
    </dependency>
    <dependency>
      <groupId>org.slf4j</groupId>
      <artifactId>slf4j-log4j12</artifactId>
      <version>${slf4j.version}</version>
    </dependency> <!-- log end -->
    <dependency>
      <groupId>org.mybatis</groupId>
      <artifactId>mybatis</artifactId>
      <version>${mybatis.version}</version>
    </dependency>
    <dependency>
      <groupId>org.mybatis</groupId>
      <artifactId>mybatis-spring</artifactId>
      <version>1.3.0</version>
    </dependency>
    <dependency>
      <groupId>c3p0</groupId>
      <artifactId>c3p0</artifactId>
      <version>0.9.1.2</version>
    </dependency>
    <dependency>
      <groupId>com.github.pagehelper</groupId>
      <artifactId>pagehelper</artifactId>
      <version>5.1.2</version>
    </dependency>
    <dependency>
      <groupId>mysql</groupId>
      <artifactId>mysql-connector-java</artifactId>
      <version>5.1.5</version>
    </dependency>
    <dependency>
      <groupId>com.fasterxml.jackson.core</groupId>
      <artifactId>jackson-core</artifactId>
      <version>2.9.0</version>
    </dependency>
    <dependency>
      <groupId>com.fasterxml.jackson.core</groupId>
      <artifactId>jackson-databind</artifactId>
      <version>2.9.0</version>
    </dependency>
    <dependency>
      <groupId>com.fasterxml.jackson.core</groupId>
      <artifactId>jackson-annotations</artifactId>
      <version>2.9.0</version>
    </dependency>
  </dependencies>


</project>
2)导入静态资源css,img,js,plugins,user.html,同时配置好数据库的sql数据:
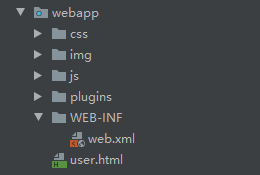
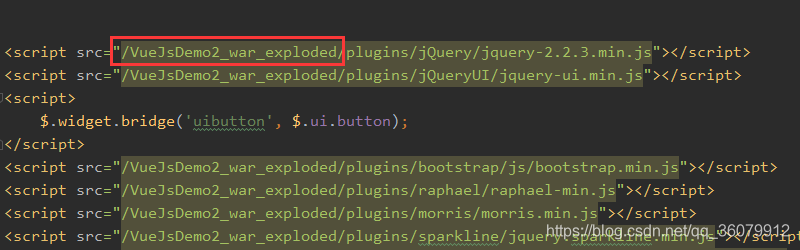
其中,user.html中的引用资源必须要注意,一定需要配置好请求路径,否则加载不了静态资源:
所有资源打包:资源跳转
3)配置applicationContext.xml,数据库连接信息:
<?xml version="1.0" encoding="UTF-8"?>
<beans xmlns="http://www.springframework.org/schema/beans"
       xmlns:xsi="http://www.w3.org/2001/XMLSchema-instance"
       xmlns:aop="http://www.springframework.org/schema/aop"
       xmlns:tx="http://www.springframework.org/schema/tx"
       xmlns:context="http://www.springframework.org/schema/context"
       xsi:schemaLocation="http://www.springframework.org/schema/beans http://www.springframework.org/schema/beans/spring-beans.xsd
                            http://www.springframework.org/schema/tx http://www.springframework.org/schema/tx/spring-tx.xsd
                            http://www.springframework.org/schema/aop http://www.springframework.org/schema/aop/spring-aop.xsd
                            http://www.springframework.org/schema/context http://www.springframework.org/schema/context/spring-context.xsd">
    <!-- 配置 spring 创建容器时要扫描的包 -->
    <context:component-scan base-package="com.xxx">
        <!--制定扫包规则,不扫描@Controller 注解的 JAVA 类,其他的还是要扫描 -->
        <context:exclude-filter type="annotation"
                                expression="org.springframework.stereotype.Controller"/>
    </context:component-scan>
    <!-- 加载配置文件 -->
    <context:property-placeholder location="classpath:db.properties"/>
    <!-- 配置 MyBatis 的 Session 工厂 -->
    <bean id="sqlSessionFactory" class="org.mybatis.spring.SqlSessionFactoryBean">
        <!-- 数据库连接池 -->
        <property name="dataSource" ref="dataSource"/>
    </bean>
    <!-- 配置数据源 -->
    <bean id="dataSource" class="com.mchange.v2.c3p0.ComboPooledDataSource">
        <property name="driverClass" value="${jdbc.driver}"></property>
        <property name="jdbcUrl" value="${jdbc.url}"></property>
        <property name="user" value="${jdbc.username}"></property>
        <property name="password" value="${jdbc.password}"></property>
    </bean>
    <!-- 配置 Mapper 扫描器 -->
    <bean class="org.mybatis.spring.mapper.MapperScannerConfigurer">
        <property name="basePackage" value="com.xxx.dao"/>
    </bean>
    <!-- 配置事务管理器 -->
    <bean id="transactionManager" class="org.springframework.jdbc.datasource.DataSourceTransactionManager">
        <property name="dataSource" ref="dataSource"/>
    </bean>
    <!-- 配置事务的通知 -->
    <tx:advice id="txAdvice" transaction-manager="transactionManager">
    	<tx:attributes>
    		<tx:method name="*" propagation="REQUIRED" read-only="false"/>
    		<tx:method name="find*" propagation="SUPPORTS" read-only="true"/>
    	</tx:attributes>
    </tx:advice>
    <!-- 配置aop -->
    <aop:config>
    	<aop:pointcut expression="execution(* com.xxx.service.impl.*.*(..))" id="pt1"/>
    	<aop:advisor advice-ref="txAdvice" pointcut-ref="pt1"/>
    </aop:config>
</beans>
db.properties:
jdbc.driver=com.mysql.jdbc.Driver
jdbc.url=jdbc:mysql://localhost:3306/test
jdbc.username=root
jdbc.password=root
4)编写dao,service代码:
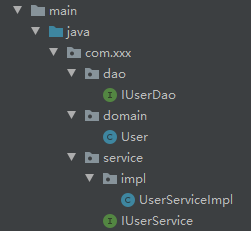
User.java:
public class User implements Serializable {

    private Integer id;
    private String username;
    private String password;
    private Integer age;
    private String sex;
    private String email;

//省略了get,set方法和toString方法
}
IUserDao.java:
public interface IUserDao {

    @Select("select * from user")
    List<User> findAll();

    @Select("select * from user where id = #{userId}")
    User findById(Integer id);

    @Update("update user set username=#{username},password=#{password},age=#{age},sex=#{sex},email=#{email} where id = #{id} ")
    void updateByUser(User user);
}
IUserService.java:
public interface IUserService {
    /**
     * 查询所有的用户
     * @return
     */
     List<User> findAll();
    /**
     * 根据id查询
     * @param id
     * @return
     */
     User findById(Integer id);
    /**
     * 更新用户
     * @param user
     */
     void updateByUser(User user);
}
UserServiceImpl:
public interface IUserService {

    /**
     * 查询所有的用户
     * @return
     */
     List<User> findAll();

    /**
     * 根据id查询
     * @param id
     * @return
     */
     User findById(Integer id);

    /**
     * 更新用户
     * @param user
     */
     void updateByUser(User user);

}
5) 编写一个测试方法测试数据库的连接,以及后端代码是否正常:
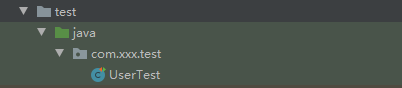
UserTest:
@RunWith(SpringJUnit4ClassRunner.class)
@ContextConfiguration(locations = "classpath:applicationContext.xml")
public class UserTest {

    @Autowired
    private IUserService userService;


    @Test
    public void testFindAll(){
        List<User> users = userService.findAll();
        System.out.println(users);
    }

    @Test
    public void testFindOne(){
        User user = userService.findById(1);
        System.out.println(user);
    }
}
6)测试正常之后继续编写web层的代码,在此工作之前,先配置好SpringMvc:
SpringMVC.xml:
<?xml version="1.0" encoding="UTF-8"?>
<beans xmlns="http://www.springframework.org/schema/beans"
       xmlns:mvc="http://www.springframework.org/schema/mvc"
       xmlns:context="http://www.springframework.org/schema/context"
       xmlns:xsi="http://www.w3.org/2001/XMLSchema-instance"
       xsi:schemaLocation="http://www.springframework.org/schema/beans
http://www.springframework.org/schema/beans/spring-beans.xsd
http://www.springframework.org/schema/mvc
http://www.springframework.org/schema/mvc/spring-mvc.xsd
http://www.springframework.org/schema/context
http://www.springframework.org/schema/context/spring-context.xsd">
    <!-- 配置创建 spring 容器要扫描的包 -->
    <context:component-scan base-package="com.xxx.web"></context:component-scan>
    <mvc:annotation-driven></mvc:annotation-driven>
</beans>
配置web.xml,SpringMVC的核心控制器:
<?xml version="1.0" encoding="UTF-8"?>
<web-app xmlns:xsi="http://www.w3.org/2001/XMLSchema-instance" xmlns="http://java.sun.com/xml/ns/javaee" xsi:schemaLocation="http://java.sun.com/xml/ns/javaee http://java.sun.com/xml/ns/javaee/web-app_2_5.xsd" version="2.5">
  <display-name></display-name>

  <!-- 手动指定 spring 配置文件位置 -->
  <context-param>
    <param-name>contextConfigLocation</param-name>
    <param-value>classpath:applicationContext.xml</param-value>
  </context-param>
  <!-- 配置 spring 提供的监听器,用于启动服务时加载容器 。该间监听器只能加载 WEB-INF 目录中名称为 applicationContext.xml 的配置文件 -->
  <listener>
    <listener-class>
      org.springframework.web.context.ContextLoaderListener
    </listener-class>
  </listener>
  <!-- 配置 spring mvc 的核心控制器 -->
  <servlet>
    <servlet-name>springmvcDispatcherServlet</servlet-name>
    <servlet-class>org.springframework.web.servlet.DispatcherServlet</servlet-class>
    <!-- 配置初始化参数,用于读取 springmvc 的配置文件 -->
    <init-param>
      <param-name>contextConfigLocation</param-name>
      <param-value>classpath:springmvc.xml</param-value>
    </init-param>
    <!-- 配置 servlet 的对象的创建时间点:应用加载时创建。取值只能是非 0 正整数,表示启动顺 序 -->
    <load-on-startup>1</load-on-startup>
  </servlet>
  <servlet-mapping>
    <servlet-name>springmvcDispatcherServlet</servlet-name>
    <url-pattern>*.do</url-pattern>
  </servlet-mapping>
  <!-- 配置 springMVC 编码过滤器 -->
  <filter>
    <filter-name>CharacterEncodingFilter</filter-name>
    <filter-class>org.springframework.web.filter.CharacterEncodingFilter</filter-class>
    <!-- 设置过滤器中的属性值 -->
    <init-param>
      <param-name>encoding</param-name>
      <param-value>UTF-8</param-value>
    </init-param>
    <!-- 启动过滤器 -->
    <init-param>
      <param-name>forceEncoding</param-name>
      <param-value>true</param-value>
    </init-param>
  </filter>
  <!-- 过滤所有请求 -->
  <filter-mapping>
    <filter-name>CharacterEncodingFilter</filter-name>
    <url-pattern>/*</url-pattern>
  </filter-mapping>

  <welcome-file-list>
    <welcome-file>index.html</welcome-file>
    <welcome-file>index.htm</welcome-file>
    <welcome-file>index.jsp</welcome-file>
    <welcome-file>default.html</welcome-file>
    <welcome-file>default.htm</welcome-file>
    <welcome-file>default.jsp</welcome-file>
  </welcome-file-list>
</web-app>
7)编写web层代码:
UserController.java:
@Controller
@RequestMapping("/user")
@ResponseBody
public class UserController {

    @Autowired
    IUserService userService;

    @RequestMapping("/findAll")
    public List<User> findAll(){
        System.out.println("test");
        return userService.findAll();
    }

    @RequestMapping("/findById")
    public User findById(Integer id){
        return userService.findById(id);
    }

    @RequestMapping("/updateByUser")
    public void updateByUser(@RequestBody User user){
        userService.updateByUser(user);
    }
}
8)编写vue代码,响应或请求后端数据:
user.js:
new Vue({
    el:"#app",
    data:{
        user:{
            id:"",
            username:"",
            password:"",
            age:"",
            sex:"",
            email:""
        },
        userList:[]
    },
    methods:{
        findAll:function(){
            //在当前方法中定义一个变量,表明是vue对象
            var _this = this;
            //一定要注意请求路径的编写
            axios.get('/VueJsDemo2_war_exploded/user/findAll.do')
                .then(function (response) {
                    _this.userList = response.data;//响应数据给userList赋值
                    console.log(response);
                })
                .catch(function (error) {
                    console.log(error);
                })
        },
        findById:function (userid) {
            //在当前方法中定义一个变量,表明是vue对象
            var _this = this;
            axios.get('/VueJsDemo2_war_exploded/user/findById.do',{params:{id:userid}})
                .then(function (response) {
                    _this.user = response.data;//响应数据给userList赋值
                    $("#myModal").modal("show");
                })
                .catch(function (error) {
                    console.log(error);
                })
        },
        update:function (user) {//post请求
            //在当前方法中定义一个变量,表明是vue对象
            var _this = this;
            axios.post('/VueJsDemo2_war_exploded/user/updateByUser.do', _this.user)
                .then(function (response) {
                    _this.findAll();
                })
                .catch(function (error) {
                    console.log(error);
                });
        }
    },
    created:function() {//当我们页面加载的时候触发请求,查询所有
        this.findAll();
    }
});
注意:axios中的请求路径一定不要写错了:

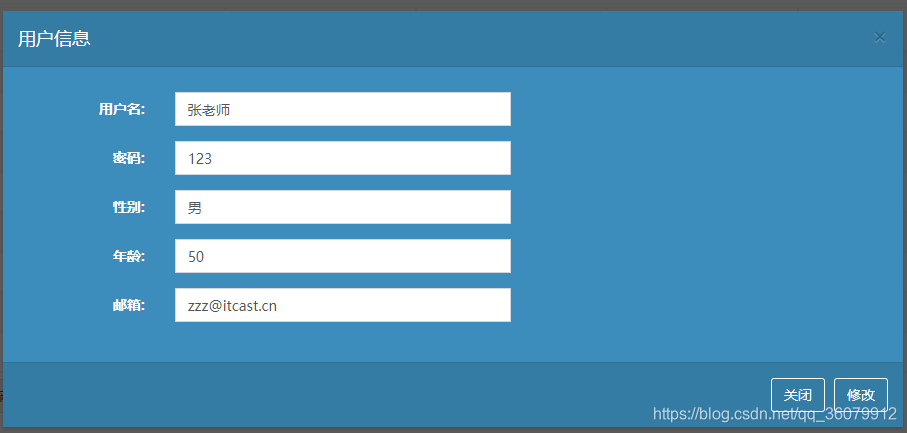
9).效果
至此,整个案例完成,效果如图:

修改数据: