最近的版本有这样一个需求:
有 3 个要素:
中国地图
高亮省区
中心显示数字
面对这样一个需求,该如何实现呢?
高德地图
因为项目是基于高德地图来做的,所以很自然而然的想到了高德。但是当查阅高德地图相关 Api 后,发现并没有能够实现这样需求的方法,所以只能另寻他法了。
图片叠加
让设计师出图,实现第一个要素开发成本极低。至于高亮省区,也是继续让设计师出图,与全国地图分辨率保持一致,为每个省区设计一张高亮的图,其他地方透明,这样算下来设计师得出 35 张图。若不考虑性能,将图片无脑叠加倒也可以实现。但是作为 Android 开发都知道,这样的一张不算小的图片加载到手机里,占用的内存怕是个庞然大物,更别谈极端情况下要叠加 35 张这样的大图了。
SVG Path
其实网上有很多文章也是有类似的需求,简单搜一下就发现了 SVG 这个解决方案了。看了一眼,便决定就是它了!
元素是 SVG 基本形状中最强大的一个,它不仅能创建其他基本形状,还能创建更多其他形状。
SVG Path 用 Android 绘制
这里先贴一下我找的北京市的 Path 数据:
1
2
3
<svg height="475 " width="565 "> <path id="Beijing" d="M421.139,189 .75 L420.782 ,186 .894L419 .95 ,184 .989L425 .045,182 .863L425 .426,181 .18 L424.23699999999997 ,176 .413H422 .56899999999996 L415.90299999999996 ,172 .964L412 .21299999999997 ,176 .654C412 .21299999999997 ,176.654 ,411 .08799999999997 ,183.239,411 .381,181 .534C411 .66999999999996 ,179 .82999999999998 ,407.688 ,185.822 ,407.688 ,185 .822L407 .094,190 .108L407 .926,192 .371L412 .807,191 .537L416 .5 ,192 .608L418 .284,190 .941L421 .139,189 .75 Z"/> </svg>
这里要注意一点:SVG Path 里的数据都是在一个固定宽高的矩形里的坐标集合,所以当 Android View 与 SVG 的宽高不一致时,需要进行缩放。 注意下面代码中的 scale 属性:
1 2 3 4 5 6 7 8 9 10 11 12 13 14 15 16 17 18 19 20 21 22 23 24 25 26 27 28 29 30 private fun () val hljRF = RectF() xPaths[HEILONGJIANG_CODE]?.computeBounds(hljRF, true ) val hnRF = RectF() xPaths[HAINAN_CODE]?.computeBounds(hnRF, true ) mapWidth = hljRF.right mapHeight = hnRF.bottom } override fun onMeasure (widthMeasureSpec: Int , heightMeasureSpec: Int ) super .onMeasure(widthMeasureSpec, heightMeasureSpec) val speSize = View.MeasureSpec.getSize(widthMeasureSpec) scale = speSize / mapWidth setMeasuredDimension(speSize, (speSize * mapHeight / mapWidth).toInt()) } override fun onDraw (canvas: Canvas ) super .onDraw(canvas) canvas.scale(scale, scale) ... }
再来看到 Path 里有一些 M、L、Z 等字符,这些都是 Path 元素里的指令,后面紧跟的数字即是坐标。
扫描二维码关注公众号,回复:
8762028 查看本文章
M x,y 移动指令,映射 Path 中的 moveTo
注意小写指令为使用相对坐标 ,下面 2 行 Path 得到的结果是一样的:
1
2
M421 .139 ,189.75L420 .782 ,186.894 M421 .139 ,189.75l-0 .357 ,-2 .856
基于 Android Path 实现不了小写指令的那种效果,所以只能使用大写指令。这里贴一下一个将 SVG Path 转成 Android Path 的工具类:
1 2 3 4 5 6 7 8 9 10 11 12 13 14 15 16 17 18 19 20 21 22 23 24 25 26 27 28 29 30 31 32 33 34 35 36 37 38 39 40 41 42 43 44 45 46 47 48 49 50 51 52 53 54 55 56 57 58 59 60 61 62 63 64 65 66 67 68 69 70 71 72 73 74 75 76 77 78 79 80 81 82 83 84 85 86 87 88 89 90 91 92 93 94 95 96 大专栏 Android 绘制中国地图 "line">97 98 99 100 101 102 103 104 105 public class SvgPathToAndroidPath private int svgPathLenght = 0 ; private String svgPath = null ; private int mIndex; private List<Integer> cmdPositions = new ArrayList <>(); public Path parser(String svgPath) { this .svgPath = svgPath; svgPathLenght = svgPath.length(); mIndex = 0 ; Path lPath = new Path (); lPath.setFillType(Path.FillType.WINDING); PointF lastPoint = new PointF (); findCommand(); for (int i = 0 ; i < cmdPositions.size(); i++) { Integer index = cmdPositions.get (i); switch (svgPath.charAt(index)) { case 'M' : String ps[] = findPoints(i); lastPoint.set (Float .parseFloat(ps[0 ]), Float .parseFloat(ps[1 ])); lPath.moveTo(lastPoint.x, lastPoint.y); } break ; case 'L' : String ps[] = findPoints(i); lastPoint.set (Float .parseFloat(ps[0 ]), Float .parseFloat(ps[1 ])); lPath.lineTo(lastPoint.x, lastPoint.y); } break ; case 'H' : String ps[] = findPoints(i); lastPoint.set (Float .parseFloat(ps[0 ]), lastPoint.y); lPath.lineTo(lastPoint.x, lastPoint.y); } break ; case 'V' : String ps[] = findPoints(i); lastPoint.set (lastPoint.x, Float .parseFloat(ps[0 ])); lPath.lineTo(lastPoint.x, lastPoint.y); } break ; case 'C' : String ps[] = findPoints(i); lastPoint.set (Float .parseFloat(ps[4 ]), Float .parseFloat(ps[5 ])); lPath.cubicTo(Float .parseFloat(ps[0 ]), Float .parseFloat(ps[1 ]), Float .parseFloat(ps[2 ]), Float .parseFloat(ps[3 ]), Float .parseFloat(ps[4 ]), Float .parseFloat(ps[5 ])); } break ; case 'S' : String ps[] = findPoints(i); lPath.cubicTo(lastPoint.x,lastPoint.y,Float .parseFloat(ps[0 ]), Float .parseFloat(ps[1 ]), Float .parseFloat(ps[2 ]), Float .parseFloat(ps[3 ])); lastPoint.set (Float .parseFloat(ps[2 ]), Float .parseFloat(ps[3 ])); } break ; case 'Q' : String ps[] = findPoints(i); lastPoint.set (Float .parseFloat(ps[2 ]), Float .parseFloat(ps[3 ])); lPath.quadTo(Float .parseFloat(ps[0 ]), Float .parseFloat(ps[1 ]), Float .parseFloat(ps[2 ]), Float .parseFloat(ps[3 ])); } break ; case 'T' : String ps[] = findPoints(i); lPath.quadTo(lastPoint.x,lastPoint.y,Float .parseFloat(ps[0 ]), Float .parseFloat(ps[1 ])); lastPoint.set (Float .parseFloat(ps[0 ]), Float .parseFloat(ps[1 ])); } break ; break ; case 'Z' : lPath.close(); } break ; } } return lPath; } private String [] findPoints(int cmdIndexInPosition) { int cmdIndex = cmdPositions.get (cmdIndexInPosition); String pointString = svgPath.substring(cmdIndex + 1 , cmdPositions.get (cmdIndexInPosition + 1 )); return pointString.split("," ); } private void findCommand() { cmdPositions.clear(); while (mIndex < svgPathLenght) { char c = svgPath.charAt(mIndex); if ('A' <= c && c <= 'Z' ) { cmdPositions.add(mIndex); } ++mIndex; } } }
实现
利用工具类获取每个省区的 Android Path,全部绘制一遍,即可绘制出全国地图(优化:高亮的省区这一步不绘制,避免绘制两次)。
针对高亮省区,调整画笔颜色再绘制一遍即可。
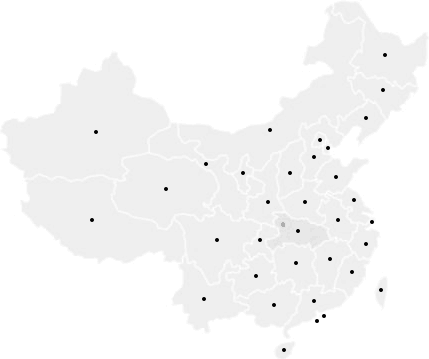
显示数量:这个目前没想到什么好方法,只能让设计师参照地图宽高比 标出每个中心点的位置,就像这样:
参考
Android 上绘制中国省份地图 SVG