目录
接下来的几个博客中会分别介绍tensorflow的基本概念:tensor,operation,session和graph。我们想弄明白的是,tensor应该如何定义?tensor有哪些操作operation?什么是计算流图,如何构建? tensor如何在计算流图中流动,实现模型的训练和预测?
tensor:张量
tensorflow的最基本数据结构就是张量,tensor。首先我们来看看如何定义tensor。tensor本质上是多维的数组,tf.Tensor与numpy的ndarray类似,也需要定义数据类型和维度。但是tf.Tensor定义的张量操作可以在GPU中加速(如果是tensorflow-gpu版本的话).
Numpy的多维数组ndarray和tensorflow的张量tensor之间可以自由转换,例如:
tensor = tf.convert_to_tensor([2,3,4], dtype=tf.float64)
tensor
Out[74]: <tf.Tensor: id=251, shape=(3,), dtype=float64, numpy=array([2., 3., 4.])>
numpy_array = tensor.numpy()
numpy_array
Out[76]: array([2., 3., 4.])
tensor有三个基本属性:标签label,维度dimension和数据类型data type。
张量的数据类型
tf.dtypes 模块(module)定义了与数据类型相关的类和函数。Python Module(模块),是一个文件,包含了Python对象定义和Python语句(definitions and statements)。文件名就是模块名加上后缀.py,在模块内部,模块名存储在全局变量__name__中,是一个string,可以直接在module中通过__name__引用到module name。
module是为了重复使用一些对象,比如类,函数,而将这些对象定义放在一个.py文件中,或是将一个较大的工程裁缝为多个.py文件而易于维护,每一个.py文件都是一个module。
tf.dtypes模块的说明文档:https://tensorflow.google.cn/api_docs/python/tf/dtypes
Dtype类
tf.dtypes中包括了一个类: Dtype, 定义了张量可以支持的数据类型,如下图所示:
函数
tf.as_type() :定义Dtype类型对象
使用方法:
tf.dtypes.as_dtype(type_value)
type_value可以是tf.Dtype定义的数据类型,也可以是由tf.Dtype类型组成的枚举。
x = tf.constant([1.8, 2.2], dtype=tf.float32)
xint = tf.dtypes.as_type(tf.int32) # xint是tf.int32类型的Dtype对象
得到xint这个tf.int32类型的Dtype对象。
tf.dtypes.cast( ): 将张量映射/投射为新的类型
该操作支持Dtype定义的tensorflow基本数据类型。在将复数类型(complex64、complex128)转换为实类型时,只返回x的实部份。在将实类型转换为复杂类型(complex64、complex128)时,返回值的虚部设置为0。这里对复杂类型的处理与numpy的行为相匹配。与tf.cast()函数功能相同。
tf.dtypes.cast(x, dtype, name=None)
接上面的例子:
xx = tf.dtypes.cast(x, tf.int32)
 xxx = tf.cast(x,tf.int32)
输出
xxx
Out[67]: <tf.Tensor: id=248, shape=(2,), dtype=int32, numpy=array([1, 2], dtype=int32)>

xx
Out[68]: <tf.Tensor: id=242, shape=(2,), dtype=int32, numpy=array([1, 2], dtype=int32)>
tf.dtypes.complex( ):将两个实数转换为复数
给定一个张量实数表示复数的实数部分,一个张量imag表示复数的虚数部分,这个操作返回形式的复数元素,其中a表示实数部分,b表示imag部分。输入张量实数和imag必须具有相同的形状。与tf.cast( ) 函数功能相同。
rx = tf.constant([2.25, 3.25])
ix = tf.constant([4.75, 5.75])
cx = tf.complex(rx, ix)  # [[2.25 + 4.75j], [3.25 + 5.75j]]
cxx = tf.dtypes.complex(rx,ix)
得到的cx与cxx一样:
cxx
Out[61]: <tf.Tensor: id=246, shape=(2,), dtype=complex64, numpy=array([2.25+4.75j, 3.25+5.75j], dtype=complex64)>

cx
Out[62]: <tf.Tensor: id=245, shape=(2,), dtype=complex64, numpy=array([2.25+4.75j, 3.25+5.75j], dtype=complex64)>
tf.dtypes.saturate_cast():将值安全饱和转换为dtype
将输入值投射到指定的数据类型,如果投射时发生数据溢出,将适当地进行夹紧(clamping)操作,保证数据正确转换。
tf.dtypes.saturate_cast(value,dtype,name=None)
张量的四种类型
张量主要有四种类型,tf.constant, tf.Variable, tf.placeholder, tf.sparse.SparseTensor 。如果在创建tensor的时候没有指定tensor的dtype和name, tf会自动根据value的数据类型自动匹配。
常量型:tf.constant( )
tf.constant()函数的基本调用方法是:
tf.constant(value, type, name='')
例如:
const1 = tf.constant(1, tf.int16, name='tensor1')
print('const1:')
print(const1)

const2 = tf.constant(np.pi, tf.float32, name='tensor2')
print('const2:')
print(const2)

const3 = tf.constant('tensorflow-2.0', tf.string, name='tensor3')
print('const3:')
print(const3)

const4 = tf.constant([[10,12],[23,45],[45,6]])
print('const4')
print(const4)
print('shape of const4: '+str(const4.shape))# 查看tensor的维度
得到:
const1:
tf.Tensor(1, shape=(), dtype=int16)
const2:
tf.Tensor(3.1415927, shape=(), dtype=float32)
const3:
tf.Tensor(b'tensorflow-2.0', shape=(), dtype=string)
const4
tf.Tensor(
[[10 12]
 [23 45]
 [45  6]], shape=(3, 2), dtype=int32)
shape of const4: (3, 2)
变量型: tf.Variable( )
Variable 是tensorflow的一个类,里面封装了很多operations,简称ops,所以首字母大写的。tensorflow的op是首字母都是小写的,例如constant是一个operation,简写为op,所以constant是首字母小写。
创建变量类型的tensor很简单,例如:
w = tf.Variable(<initial-value>, name=<optional-name>)
注意,在tf2.0中,变量在创建的时候就应该直接赋予初值,而不是再使用initializer了。tf.Variable类型的变量在创建后,需要初始化,并且在session会话中执行。
# Launch the graph in a session.
with tf.compat.v1.Session() as sess:
    # Run the variable initializer.
    sess.run(w.initializer)
    # ...you now can run ops that use the value of 'w'...
在tf 1.x中,使用tf.compat.v1.get_variable()函数来创建
tf.compat.v1.get_variable(name='',values,dtype,initializer)
values 是张量的维度,initializer是该变量型张量的初始化方法,例如zeros_initializer.
var1 = tf.compat.v1.get_variable('var1', [1,2], dtype=tf.int32, initializer=tf.zeros_initializer)
print(var1)

var2 = tf.Variable([1,2],name='var2')
print(var2)
得到
<tf.Variable 'var1:0' shape=(1, 2) dtype=int32, numpy=array([[0, 0]], dtype=int32)>
 <tf.Variable 'var2:0' shape=(2,) dtype=int32, numpy=array([1, 2], dtype=int32)>
占位符型:tf.placeholder()
在tf 1.x中,创建占位符型的tensor需要用到tf.placeholder()函数。现在,这个函数的调用方式被修改为tf.compat.v1.placeholder()。
tf.compat.v1.placeholder(
    dtype,
    shape=None,
    name=None
)
占位符型张量主要用来创建“喂到”模型的数据和标签,这种类型的张量可以视为是预先定义的空变量,在创建计算图的时候对于输入的数据和标签用占位符这种数据结构进行定义,之后在启动会话,装入真正的数据。
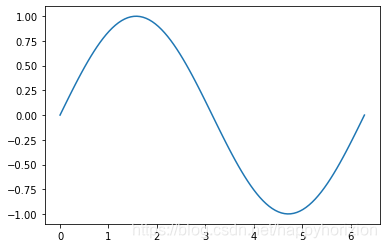
举个简单的例子,用tensorflow画个正弦曲线吧。
import numpy as np
import matplotlib.pyplot as plt

x_data = np.array([np.linspace(0,2*np.pi,100)]).transpose()

with tf.Graph().as_default():
    x = tf.compat.v1.placeholder(tf.float32, shape=(100,1))
    y = tf.sin(x)
    with tf.compat.v1.Session() as sess:
        sin_x = sess.run(y, feed_dict={x:x_data})

plt.plot(x_data,sin_x)
得到
稀疏张量:tf.sparse.SparseTensor()
稀疏张量,顾名思义就是张量中大多数数据都是0,只有零星位置上的数据不为0. 为了节省存储空间,对只要保存不为零的数据的位置和数据本身就可以了。因此稀疏型张量可以用下面方法创建:
s_tensor = tf.sparse.SparseTensor(indices=[[0, 0], [1, 2]], values=[1, 2], dense_shape=[3, 4])
with tf.compat.v1.Session() as sess:
    print(sess.run(s_tensor))
输出:
SparseTensorValue(indices=array([[0, 0],
       [1, 2]]), values=array([1, 2], dtype=int32), dense_shape=array([3, 4]))
