第三方模块
第三方模块是对nginx 的功能扩展,第三方模块需要在编译安装Nginx 的时候使用参数–add-module=PATH指定路径添加,nginx支持第三方模块,需要从源码重新编译支持
[root@U8: ~]# /apps/nginx/sbin/nginx -s stop
[root@U8: ~]# vim /apps/nginx/conf/conf.d/pc.conf
server {
  listen 80;
  server_name dushansao.com;
  location /main {
      index index.html;
      default_type text/html;
      echo "Hello,this is dushansao.";
      echo_reset_timer;
      echo_location /sub1;
      echo_location /sub2;
      echo "took $echo_timer_elapsed sec for total.";
  }
  location /sub1 {
      echo_sleep 1;
      echo sub1;
  }
  location /sub2 {
      echo_sleep 1;
      echo sub2;
  }
}

#重启nginx时出现报错
[root@U8: ~]# /apps/nginx/sbin/nginx -t
nginx: [emerg] unknown directive “echo” in /apps/nginx/conf/conf.d/pc.conf:7
nginx: configuration file /apps/nginx/conf/nginx.conf test failed
#修复报错
[root@U8: ~]# nginx -V
nginx version: nginx/1.16.1
built by gcc 7.4.0 (Ubuntu 7.4.0-1ubuntu1~18.04.1)
built with OpenSSL 1.1.1  11 Sep 2018
TLS SNI support enabled
configure arguments: --prefix=/apps/nginx --user=nginx --group=nginx --with-http_ssl_module --with-http_v2_module --with-http_realip_module --with-http_stub_status_module --with-http_gzip_static_module --with-pcre --with-stream --with-stream_ssl_module --with-stream_realip_module
[root@U8: ~]# cd /usr/local/src/
[root@U8: /usr/local/src]# git clone https://github.com/openresty/echo-nginx-module.git
Cloning into 'echo-nginx-module'...
remote: Enumerating objects: 18, done.
remote: Counting objects: 100% (18/18), done.
remote: Compressing objects: 100% (13/13), done.
remote: Total 3015 (delta 8), reused 11 (delta 5), pack-reused 2997
Receiving objects: 100% (3015/3015), 1.15 MiB | 110.00 KiB/s, done.
Resolving deltas: 100% (1619/1619), done.
[root@U8: /usr/local/src]# ll
total 1020K
drwxr-xr-x 6 root root 4.0K Jan 8 20:35 echo-nginx-module/
drwxr-xr-x 9 1001 1001 4.0K Dec 30 20:33 nginx-1.16.1/
-rw-r–r-- 1 root root 1009K Dec 30 18:49 nginx-1.16.1.tar.gz
[root@U8: /usr/local/src]# cd nginx-1.16.1/
#重新编译安装nginx
[root@U8: /usr/local/src/nginx-1.16.1]# ./configure --prefix=/apps/nginx --user=nginx --group=nginx --with-http_ssl_module --with-http_v2_module --with-http_realip_module --with-http_stub_status_module --with-http_gzip_static_module --with-pcre --with-stream --with-stream_ssl_module --with-stream_realip_module --add-module=/usr/local/src/echo-nginx-module
[root@U8: /usr/local/src/nginx-1.16.1]# make -j 4 && make install
#检查重启nginx服务
[root@U8: /usr/local/src/nginx-1.16.1]# /apps/nginx/sbin/nginx -t
nginx: the configuration file /apps/nginx/conf/nginx.conf syntax is ok
nginx: configuration file /apps/nginx/conf/nginx.conf test is successful
#这里又出现pid报错
[root@U8: /usr/local/src/nginx-1.16.1]# /apps/nginx/sbin/nginx -s reload
nginx: [error] invalid PID number “” in “/apps/nginx/logs/nginx.pid”
#修复报错
[root@U8: /usr/local/src/nginx-1.16.1]# /apps/nginx/sbin/nginx -c /apps/nginx/conf/nginx.conf
#再次重启nginx服务
[root@U8: /usr/local/src/nginx-1.16.1]# /apps/nginx/sbin/nginx -s reload
#访问网站
[root@U8: /usr/local/src/nginx-1.16.1]# curl http://dushansao.com/main
Hello,this is dushansao.
sub1
sub2
took 2.003 sec for total.
Nginx 变量使用
nginx的变量可以在配置文件中引用,作为功能判断或者日志等场景使用
变量可以分为内置变量和自定义变量
内置变量是由nginx模块自带,通过变量可以获取到众多的与客户端访问相关的值
内置变量:
$remote_addr;
#存放了客户端的地址,注意是客户端的公网IP,也就是一家人访问一个网站,则会显示为路由器的公网IP。
$args;
#变量中存放了URL中的指令,例如http://www.magedu.net/main/index.do?
id=20190221&partner=search中的id=20190221&partner=search
$document_root;
#保存了针对当前资源的请求的系统根目录,如/apps/nginx/html。
$document_uri;
#保存了当前请求中不包含指令的URI,注意是不包含请求的指令,比如
http://www.magedu.net/main/index.do?id=20190221&partner=search会被定义为/main/index.do 。
$host;
#存放了请求的host名称。
$http_user_agent;
#客户端浏览器的详细信息
$http_cookie;
#客户端的cookie信息。
limit_rate 10240;
echo $limit_rate;
#如果nginx服务器使用limit_rate配置了显示网络速率,则会显示,如果没有设置, 则显示0。
$remote_port;
#客户端请求Nginx服务器时随机打开的端口,这是每个客户端自己的端口。
$remote_user;
#已经经过Auth Basic Module验证的用户名。
$request_body_file;
#做反向代理时发给后端服务器的本地资源的名称。
$request_method;
#请求资源的方式,GET/PUT/DELETE等
$request_filename;
#当前请求的资源文件的路径名称,由root或alias指令与URI请求生成的文件绝对路径,
如/apps/nginx/html/main/index.html
$request_uri;
#包含请求参数的原始URI,不包含主机名,如:/main/index.do?id=20190221&partner=search 。
$scheme;
#请求的协议,如ftp,https,http等。
$server_protocol;
#保存了客户端请求资源使用的协议的版本,如HTTP/1.0,HTTP/1.1,HTTP/2.0等。
$server_addr;
#保存了服务器的IP地址。
$server_name;
#请求的服务器的主机名。
$server_port;
#请求的服务器的端口号。
自定义变量:
若需要自定义变量名称和值,使用指令set $variable value;
操作如下
Syntax: set $variable value; Default: — Context: server, location, if
set $name magedu;
echo $name;
set $my_port $server_port;
echo $my_port;
echo “$server_name:$server_port”;
Nginx 压缩功能
Nginx支持对指定类型的文件进行压缩然后再传输给客户端,而且压缩还可以设置压缩比例,压缩后的文件大小将比源文件显著变小,这样有助于降低出口带宽的利用率,降低企业的IT支出,不过会占用相应的CPU资源。
Nginx对文件的压缩功能依赖于模块ngx_http_gzip_module;
官方文档: https://nginx.org/en/docs/http/ngx_http_gzip_module.html
#启用或禁用gzip压缩,默认关闭
gzip on | off;
#压缩比由低到高从1到9,默认为1
gzip_comp_level level;
#禁用IE6 gzip功能
gzip_disable “MSIE [1-6].”;
#gzip压缩的最小文件,小于设置值的文件将不会压缩
gzip_min_length 1k;
#启用压缩功能时,协议的最小版本,默认HTTP/1.1
gzip_http_version 1.0 | 1.1;
#指定Nginx服务需要向服务器申请的缓存空间的个数*大小,默认32 4k|16 8k;
gzip_buffers number size;
#指明仅对哪些类型的资源执行压缩操作;默认为gzip_types text/html,不用显示指定,否则出错
gzip_types mime-type …;
#如果启用压缩,是否在响应报文首部插入“Vary: Accept-Encoding”
gzip_vary on | off;
#重启nginx并进行访问测试压缩功能
[root@s2 pc]# cp /apps/nginx/logs/access.log /data/nginx/html/pc/test.html
[root@U8: ~]# vim /apps/nginx/conf/conf.d/pc.conf
server {
  listen 80;
  server_name dushansao.com;
  location / {
    root /data/nginx/html/pc;
    gzip on;
    gzip_comp_level 5;
    gzip_min_length 1k;
    gzip_types text/plain application/javascript application/x-javascript
    text/cssapplication/xml text/javascript application/x-httpd-php image/jpeg image/gif image/png;
    gzip_vary on;
  }
}

#小于1k的文件不会被压缩
[root@U8: ~]# ll /data/nginx/html/pc/
total 20K
drwxr-xr-x 2 root root 4.0K Jan 7 17:04 about/
-rw-r–r-- 1 nginx nginx 17 Dec 31 08:41 index.html
-rw-r–r-- 1 root root 8.8K Jan 8 21:26 text.html
[root@U8: ~]# curl --head --compressed http://dushansao.com/index.html
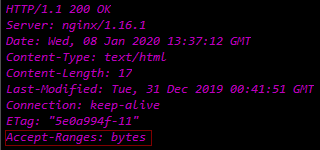
[root@U8: ~]# curl --head --compressed http://dushansao.com/text.html
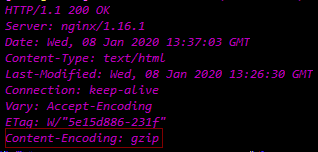
#访问查看文件压缩前后大小差异


https 功能
Web网站的登录页面都是使用https加密传输的,加密数据以保障数据的安全,HTTPS能够加密信息,以免敏感信息被第三方获取,所以很多银行网站或电子邮箱等等安全级别较高的服务都会采用HTTPS协议,HTTPS其实是有两部分组成:HTTP + SSL / TLS,也就是在HTTP上又加了一层处理加密信息的模块。服务端和客户端的信息传输都会通过TLS进行加密,所以传输的数据都是加密后的数据。

#https 实现过程如下:
1.客户端发起HTTPS请求:
客户端访问某个web端的https地址,一般都是443端口
2.服务端的配置:
采用https协议的服务器必须要有一套证书,可以通过一些组织申请,也可以自己制作,目前国内很多网站都自己做的
当访问一个网站的时候提示证书不可信任就表示证书是自己做的,证书就是一个公钥和私钥匙,就像一把锁和钥匙,正常情况下只有你的钥匙可以打开你的锁,你可以把这个送给别人让他锁住一个箱子,里面放满了钱或秘密,别人不知道里面放了什么而且别人也打不开,只有你的钥匙是可以打开的
3.传送证书:
服务端给客户端传递的证书,就是公钥,里面包含了很多信息,如证书得到颁发机构、过期时间等
4.客户端解析证书:
这部分工作是有客户端完成的,首先回验证公钥的有效性,如颁发机构、过期时间等,如果发现异常则会弹出一个警告框提示证书可能存在问题,若证书没有问题就生成一个随机值,然后用证书对该随机值进行加密,就像2步骤所说把随机值锁起来,不让别人看到
5.传送4步骤的加密数据:
就是将用证书加密后的随机值传递给服务器,目的为了让服务器得到这个随机值,以后客户端和服务端的通信就可以通过这个随机值进行加密解密
6.服务端解密信息:
服务端用私钥解密5步骤加密后的随机值后,得到了客户端传过来的随机值(私钥),然后把内容通过该值进行对称加密,对称加密是将信息和私钥通过算法混合在一起,这样除非你知道私钥,不然是无法获取其内部的内容,而客户端和服务端都知道这个私钥,所以只要机密算法够复杂就可以保证数据的安全性
7.传输加密后的信息:
服务端将用私钥加密后的数据传递给客户端,在客户端可以被还原出原数据内容
8.客户端解密信息:
客户端用之前生成的私钥获解密服务端传递过来的数据,由于数据一直是加密的,即使第三方获取到数据也无法知道其详细内容
ssl 配置参数:
nginx 的https 功能基于模块ngx_http_ssl_module实现
若是编译安装的nginx要使用参数ngx_http_ssl_module开启ssl功能,但是作为nginx的核心功能,yum安装的nginx默认就是开启的,编译安装的nginx需要指定编译参数–with-http_ssl_module开启
官方文档
配置参数如下:
ssl on | off;
#为指定的虚拟主机配置是否启用ssl功能,此功能在1.15.0废弃,使用listen [ssl]替代。
ssl_certificate /path/to/file;
#当前虚拟主机使用使用的公钥文件,一般是crt文件
ssl_certificate_key /path/to/file;
#当前虚拟主机使用的私钥文件,一般是key文件
ssl_protocols [SSLv2] [SSLv3] [TLSv1] [TLSv1.1] [TLSv1.2];
#支持ssl协议版本,早期为ssl,现在是TSL,默认为后三个
ssl_session_cache off | none | [builtin[:size]] [shared:name:size];
#配置ssl缓存
off: 关闭缓存
none: 通知客户端支持ssl session cache,但实际不支持
builtin[:size]:使用OpenSSL内建缓存,为每worker进程私有
[shared:name:size]:在各worker之间使用一个共享的缓存,需要定义一个缓存名称和缓存空间大小,一兆可以存储4000个会话信息,多个虚拟主机可以使用相同的缓存名称。
ssl_session_timeout time;#客户端连接可以复用ssl session cache中缓存的有效时长,默认5m
自签名证书
#自签名CA证书
[root@U8: ~]# mkdir /apps/nginx/certs
[root@U8: ~]# cd /apps/nginx/certs
[root@U8: /apps/nginx/certs]# openssl req -newkey rsa:4096 -nodes -sha256 -keyout ca.key -x509 -days 3650 -out ca.crt
#填写内容依次:
国家代码(CN)》省份》城市》公司》部门》姓名》邮箱
[root@U8: /apps/nginx/certs]# ll
total 8.0K
-rw-r–r-- 1 root root 2.1K Jan 9 10:59 ca.crt
-rw------- 1 root root 3.2K Jan 9 10:55 ca.key
#自制key和csr文件
[root@U8: /apps/nginx/certs]# openssl req -newkey rsa:4096 -nodes -sha256 -keyout dushansao.com.key -out dushansao.com.csr
#填写内容与之前相同但最后两项不写
A challenge password []:
An optional company name []:
[root@U8: /apps/nginx/certs]# ll
total 16K
-rw-r–r-- 1 root root 2.1K Jan 9 10:59 ca.crt
-rw------- 1 root root 3.2K Jan 9 10:55 ca.key
-rw-r–r-- 1 root root 1.8K Jan 9 11:10 dushansao.com.csr
-rw------- 1 root root 3.2K Jan 9 11:08 dushansao.com.key
#签发证书
[root@U8: /apps/nginx/certs]# openssl x509 -req -days 3650 -in dushansao.com.csr -CA ca.crt -CAkey ca.key -CAcreateserial -out dushansao.com.crt
Signature ok
subject=C = CN, ST = BeiJing, L = BeiJing, O = dushansao.com, OU = dushansao.com, CN = dushansao.com, emailAddress = [email protected]
Getting CA Private Key
#验证证书内容
[root@U8: /apps/nginx/certs]# openssl x509 -in dushansao.com.crt -noout -text
#Nginx证书配置:
[root@U8: ~]# vim /apps/nginx/conf/conf.d/pc.conf
server {
  listen 80;
  listen 443 ssl;
  server_name dushansao.com;
  ssl_certificate /apps/nginx/certs/dushansao.com.crt;
  ssl_certificate_key /apps/nginx/certs/dushansao.com.key;
  ssl_session_cache shared:sslcache:20m;
  ssl_session_timeout 10m;
}
#重启服务
[root@U8: ~]# /apps/nginx/sbin/nginx -t
nginx: the configuration file /apps/nginx/conf/nginx.conf syntax is ok
nginx: configuration file /apps/nginx/conf/nginx.conf test is successful
[root@U8: ~]# /apps/nginx/sbin/nginx -s reload


实现多域名HTTPS
Nginx支持基于单个IP实现多域名的功能,并且还支持单IP多域名的基础之上实现HTTPS,其实是基于Nginx的SNI(Server Name Indication)功能实现,SNI是为了解决一个Nginx服务器内使用一个IP绑定多个域名和证书的功能,其具体功能是客户端在连接到服务器建立SSL链接之前先发送要访问站点的域名(Hostname),这样服务器再根据这个域名返回给客户端一个合适的证书。
#制作key和csr文件
[root@U8: ~]# cd /apps/nginx/certs/
[root@U8: /apps/nginx/certs]# openssl req -newkey rsa:4096 -nodes -sha256 -keyout nihaosao.com.key -out nihaosao.com.csr
#签名证书
[root@U8: /apps/nginx/certs]# openssl x509 -req -days 3650 -in nihaosao.com.csr -CA ca.crt -CAkey ca.key -CAcreateserial -out nihaosao.com.crt
Signature ok
subject=C = CN, ST = BeiJing, L = BeiJing, O = dushansao, OU = dushansao, CN = nihaosao.com, emailAddress = [email protected]
Getting CA Private Key
#验证证书内容
[root@U8: /apps/nginx/certs]# openssl x509 -in nihaosao.com.crt -noout -text
[root@U8: ~]# vim /apps/nginx/conf/conf.d/mobile.conf
server {
  listen 80;
  listen 443 ssl;
  server_name nihaosao.com;
  ssl_certificate /apps/nginx/certs/nihaosao.com.crt;
  ssl_certificate_key /apps/nginx/certs/nihaosao.com.key;
  ssl_session_cache shared:sslcache:20m;
  ssl_session_timeout 10m;
  location / {
    root /data/nginx/mobile/html;
    index index.html index.htm;
  }
}
#重启服务
[root@U8: ~]# /apps/nginx/sbin/nginx -t
nginx: the configuration file /apps/nginx/conf/nginx.conf syntax is ok
nginx: configuration file /apps/nginx/conf/nginx.conf test is successful
[root@U8: ~]# /apps/nginx/sbin/nginx -s reload
favicon.ico
favicon.ico 文件是浏览器收藏网址时显示的图标
当客户端使用浏览器问页面时,浏览器会自己主动发起请求获取页面的favicon.ico文件,但是当浏览器请求的favicon.ico文件不存在时,服务器会记录404日志,而且浏览器也会
显示404报错。
#解决方案
一:服务器不记录访问日志:
location = /favicon.ico {
log_not_found off;
access_log off;
}
二:将图标保存到指定目录访问:
#location ~ ^/favicon.ico$ {
location = /favicon.ico {
root /data/nginx/html/pc/images;
expires 90d; #设置文件过期时间
}
隐藏Nginx版本号
#查看当前nginx版本信息
[root@U8: /usr/local/src/nginx-1.16.1]# curl --head dushansao.com
HTTP/1.1 200 OK
Server: nginx/1.16.1
Date: Thu, 09 Jan 2020 12:53:10 GMT
Content-Type: text/html
Content-Length: 17
Last-Modified: Tue, 31 Dec 2019 00:41:51 GMT
Connection: keep-alive
ETag: “5e0a994f-11”
Accept-Ranges: bytes
#搜索模块
[root@U8: ~]# find / -name ‘ngx_http_header_filter_module.c’
/usr/local/src/nginx-1.16.1/src/http/ngx_http_header_filter_module.c
[root@U8: ~]# vim /usr/local/src/nginx-1.16.1/src/http/ngx_http_header_filter_module.c

#重新编译安装nginx
[root@U8: ~]# cd /usr/local/src/nginx-1.16.1/
[root@U8: /usr/local/src/nginx-1.16.1]# ./configure --prefix=/apps/nginx --user=nginx --group=nginx --with-http_ssl_module --with-http_v2_module --with-http_realip_module --with-http_stub_status_module --with-http_gzip_static_module --with-pcre --with-stream --with-stream_ssl_module --with-stream_realip_module --add-module=/usr/local/src/echo-nginx-module
[root@U8: /usr/local/src/nginx-1.16.1]# make -j 4 && make install
OpenSSL版本升级
心脏出血(Heartbleed):出现在加密程序库OpenSSL的安全漏洞,该程序库广泛用于实现互联网的传输层安全(TLS)协议。于2012年被引入了软件中,2014年4月首次向公众披露。只要使用的是存在缺陷的OpenSSL实例,无论是服务器还是客户端,都可能受到攻击。问题的原因是在实现TLS的心跳扩展时没有对输入进行适当验证(缺少边界检查),因此漏洞的名称来源于“心跳”(heartbeat)。该程序错误属于缓冲区过读,即可以读取的数据比应该允许读取的还多
#获取openssl-1.1.1d
[root@U8: ~]# cd /usr/local/src/
[root@U8: /usr/local/src]# wget https://www.openssl.org/source/openssl-1.1.1d.tar.gz
#或:

#解压
[root@U8: /usr/local/src]# tar xvf openssl-1.1.1d.tar.gz
[root@U8: /usr/local/src]# ll
total 9.5M
drwxr-xr-x 6 root root 4.0K Jan 8 20:35 echo-nginx-module/
drwxr-xr-x 9 1001 1001 4.0K Jan 9 21:05 nginx-1.16.1/
-rw-r–r-- 1 root root 1009K Dec 30 18:49 nginx-1.16.1.tar.gz
drwxrwxr-x 18 root root 4.0K Sep 10 21:13 openssl-1.1.1d/
-rw-r–r-- 1 root root 8.5M Sep 10 21:53 openssl-1.1.1d.tar.gz
[root@U8: /usr/local/src]# cd nginx-1.16.1/
#重新编译安装nginx
[root@U8: /usr/local/src/nginx-1.16.1]# ./configure --prefix=/apps/nginx --user=nginx --group=nginx --with-http_ssl_module --with-http_v2_module --with-http_realip_module --with-http_stub_status_module --with-http_gzip_static_module --with-pcre --with-stream --with-stream_ssl_module --with-stream_realip_module --add-module=/usr/local/src/echo-nginx-module --with-openssl=/usr/local/src/openssl-1.1.1d
[root@U8: /usr/local/src/nginx-1.16.1]# make -j 4 && make install
[root@U8: /usr/local/src/nginx-1.16.1]# /apps/nginx/sbin/nginx -t
nginx: the configuration file /apps/nginx/conf/nginx.conf syntax is ok
nginx: configuration file /apps/nginx/conf/nginx.conf test is successful
[root@U8: /usr/local/src/nginx-1.16.1]# /apps/nginx/sbin/nginx -s reload
#查看openssl现版本
[root@U8: /usr/local/src/nginx-1.16.1]# apt show openssl
Package: openssl
Version: 1.1.1-1ubuntu2.1~18.04.5
