Spring Cloud Hoxton 版本 gateway网关路由
前言
在上一篇文章博主已经讲解了项目如何创建,不会的话可以前往学习,传送门:Spring Cloud Hoxton 版本微服务项目搭建eureka注册中心 以及 Spring Cloud Hoxton 版本微服务项目搭建 admin 监控管理中心 以及 Spring Cloud Hoxton 版本微服务项目搭建 config 配置中心客户端。
本篇用来讲解–Spring Cloud Hoxton 版本 gateway网关路由!
摘要
Spring Cloud Gateway 为 SpringBoot 应用提供了API网关支持,具有强大的智能路由与过滤器功能,本文将对其用法进行详细介绍。
SpringCloudGateway是SpringCloud新推出的网关框架,比较于上一代Zuul,功能和性能有很大的提升。Zuul1.x采用的是阻塞多线程方式,也就是一个线程处理一个连接请求,高并发情况下性能较差,即使是Zuul2.x虽然做到了非阻塞,但是面对连续跳票,看起来Zuul要被抛弃了。取而代之的是SpringCloudGateway,SpringCloudGateway是基于Webflux,是一个非阻塞异步的框架,性能上有很大提升,而且包含了Zuul的所有功能,可以从Zuul无缝切换到SpringCloudGateway
Gateway 简介
Gateway是在Spring生态系统之上构建的API网关服务,基于Spring 5,Spring Boot 2和 Project Reactor等技术。Gateway旨在提供一种简单而有效的方式来对API进行路由,以及提供一些强大的过滤器功能, 例如:熔断、限流、重试等。
Spring Cloud Gateway 具有如下特性:
- 基于Spring Framework 5, Project Reactor 和 Spring Boot 2.0 进行构建;
- 动态路由:能够匹配任何请求属性;
- 可以对路由指定 Predicate(断言)和 Filter(过滤器);
- 集成Hystrix的断路器功能;
- 集成 Spring Cloud 服务发现功能;
- 易于编写的 Predicate(断言)和 Filter(过滤器);
- 请求限流功能;
- 支持路径重写。
相关概念
- Route(路由):路由是构建网关的基本模块,它由ID,目标URI,一系列的断言和过滤器组成,如果断言为true则匹配该路由;
- Predicate(断言):指的是Java 8 的 Function Predicate。 输入类型是Spring框架中的ServerWebExchange。 这使开发人员可以匹配HTTP请求中的所有内容,例如请求头或请求参数。如果请求与断言相匹配,则进行路由;
- Filter(过滤器):指的是Spring框架中GatewayFilter的实例,使用过滤器,可以在请求被路由前后对请求进行修改。
创建 gateway-center 模块
这里我们创建一个 gateway-center 模块来演示Gateway的常用功能。
在pom.xml中添加相关依赖(引入SpringCloudGateway需要的POM,记得引入actuator组件,否则服务发现中心会认为服务不在线,导致网关无法路由到服务,并且加入熔断组件Hystrix)
<dependency>
    <groupId>org.springframework.cloud</groupId>
    <artifactId>spring-cloud-starter-gateway</artifactId>
</dependency>
这里是我用到的依赖
<?xml version="1.0" encoding="UTF-8"?>
<project xmlns="http://maven.apache.org/POM/4.0.0" xmlns:xsi="http://www.w3.org/2001/XMLSchema-instance"
         xsi:schemaLocation="http://maven.apache.org/POM/4.0.0 https://maven.apache.org/xsd/maven-4.0.0.xsd">
    <modelVersion>4.0.0</modelVersion>
    <parent>
        <groupId>com.cyj</groupId>
        <artifactId>Family</artifactId>
        <version>1.0-SNAPSHOT</version>
    </parent>
    <groupId>com.cyj</groupId>
    <artifactId>gateway-center</artifactId>
    <version>0.0.1-SNAPSHOT</version>
    <packaging>jar</packaging>
    <name>gateway-center</name>
    <description>CYJ:Spring Cloud GateWay 网关路由服务中心</description>

    <dependencies>

        <dependency>
            <groupId>org.springframework.cloud</groupId>
            <artifactId>spring-cloud-starter-netflix-eureka-client</artifactId>
        </dependency>

        <!-- SpringCloud Hystrix 微服务容错监控组件:断路器,依赖隔离,服务降级,服务监控 依赖 -->
        <dependency>
            <groupId>org.springframework.cloud</groupId>
            <artifactId>spring-cloud-starter-netflix-hystrix</artifactId>
        </dependency>

        <!-- 健康检查 -->
        <dependency>
            <groupId>org.springframework.boot</groupId>
            <artifactId>spring-boot-starter-actuator</artifactId>
        </dependency>

        <!-- SpringCloud Zuul 网关治理 -->
        <dependency>
            <groupId>org.springframework.cloud</groupId>
            <artifactId>spring-cloud-starter-gateway</artifactId>
        </dependency>

        <dependency>
            <groupId>org.springframework.boot</groupId>
            <artifactId>spring-boot-starter-webflux</artifactId>
        </dependency>

        <dependency>
            <groupId>org.springframework.boot</groupId>
            <artifactId>spring-boot-starter-data-redis-reactive</artifactId>
        </dependency>

        <!-- 权限控制Spring-Oauth2.0的认证模式依赖暂时不用,由于一些注解和API从spring security5.0中移除,所以需要导入下面的依赖包 -->
        <!-- spring-cloud-starter-oauth2 -->
        <dependency>
            <groupId>org.springframework.cloud</groupId>
            <artifactId>spring-cloud-starter-oauth2</artifactId>
        </dependency>

    </dependencies>

    <!-- SpringCloud 所有子项目 版本集中管理.MS:统一所有SpringCloud依赖项目的版本 依赖 -->
    <dependencyManagement>
        <dependencies>
            <dependency>
                <groupId>org.springframework.cloud</groupId>
                <artifactId>spring-cloud-dependencies</artifactId>
                <!-- SpringBoot 2.2.x 以上版本这样配置 -->
                <version>${spring-cloud.version}</version>
                <type>pom</type>
                <scope>import</scope>
            </dependency>
        </dependencies>
    </dependencyManagement>

    <build>
        <plugins>
            <!-- SpringBoot 项目打jar包的Maven插件 -->
            <plugin>
                <groupId>org.springframework.boot</groupId>
                <artifactId>spring-boot-maven-plugin</artifactId>
            </plugin>
        </plugins>
        <!-- SpringBoot项目打包jar名称 -->
        <finalName>gateway-center</finalName>
    </build>

    <!-- SpringCloud 官方远程仓库.MS:部分本地仓库和镜像仓库没有SpringCloud子项目依赖。 -->
    <repositories>
        <repository>
            <id>spring-milestones</id>
            <name>Spring Milestones</name>
            <url>https://repo.spring.io/milestone</url>
            <snapshots>
                <enabled>false</enabled>
            </snapshots>
        </repository>
    </repositories>

</project>
启动类如下:
package com.cyj.gatewaycenter;

import lombok.extern.slf4j.Slf4j;
import org.springframework.boot.SpringApplication;
import org.springframework.boot.autoconfigure.SpringBootApplication;
import org.springframework.cloud.netflix.eureka.EnableEurekaClient;

/**
 * 启动类
 *
 * @author Chenyongjia
 * @Description: GatewayCenterApplication
 * @ClassName: Application.java
 * @Date 2020年01月02日 晚上20:29:06
 * @Email [email protected]
 */
@Slf4j
@EnableEurekaClient
@SpringBootApplication
public class GatewayCenterApplication {

    public static void main(String[] args) {
        log.info("=======》启动 gateway-center 网关路由项目ing......");
        SpringApplication.run(GatewayCenterApplication.class, args);
        log.info("=======》启动 gateway-center 网关路由项目ing......");
    }

}
两种不同的配置路由方式

Gateway 提供了两种不同的方式用于配置路由,一种是通过yml文件来配置,另一种是通过Java Bean来配置,这里就介绍yml的配置。
spring:
  application:
    #服务名称,随便写
    name: gateway-center
  cloud:
    gateway:
      discovery:
        locator:
          #开启从注册中心动态创建路由的功能
          enabled: true
          #使用小写服务名,默认是大写
          lower-case-service-id: true
      routes:
        # 路由的ID
        - id: path_route
          # uri 代表路由的目标地址。注意:uri地址后面不要加 " / "
          # 消息必须使用http进行转发,lb代表从注册中心获取服务
          uri: lb://gateway-center # 可以直接跳转到具体的地址,如果要跳转到其他服务,则填写lb://<服务id>
          predicates:
            - Path=/gateway/** # 路由规则
          filters:
            - StripPrefix=1 # 不填则无法路由到其他服务
            - AddRequestHeader=X-Request-Foo, Bar
            - name: Hystrix # 添加熔断
              args:
                name: fallbackcmd
                fallbackUri: forward:/fallback # 熔断跳转地址
完整配置如下:
eureka:
  instance:
    # 每隔5s发送一次心跳
    lease-renewal-interval-in-seconds: 5
    # 告知服务端10秒还未收到心跳的话,就将该服务移除列表
    lease-expiration-duration-in-seconds: 10
    # 健康检查路径
    health-check-url-path: /actuator/health
  client:
    registry-fetch-interval-seconds: 5 # 默认为30秒
    serviceUrl:
      #eureka注册中心地址
      defaultZone: http://localhost:8888/eureka/
      #defaultZone: http://localhost:8888/eureka/,http://localhost:8889/eureka/,http://localhost:8890/eureka/

# Admin 管理配置
management:
  endpoints:
    web:
      exposure:
        include: '*'
  endpoint:
    health:
      show-details: always

server:
  #项目端口号
  port: 5010
  tomcat:
    max-connections: 200
    max-threads: 300
    min-spare-threads: 0
    uri-encoding: UTF-8

spring:
  application:
    #服务名称,随便写
    name: gateway-center
  cloud:
    gateway:
      discovery:
        locator:
          #开启从注册中心动态创建路由的功能
          enabled: true
          #使用小写服务名,默认是大写
          lower-case-service-id: true
      routes:
        # 路由的ID
        - id: path_route
          # uri 代表路由的目标地址。注意:uri地址后面不要加 " / "
          # 消息必须使用http进行转发,lb代表从注册中心获取服务
          uri: lb://gateway-center # 可以直接跳转到具体的地址,如果要跳转到其他服务,则填写lb://<服务id>
          predicates:
            - Path=/gateway/** # 路由规则
          filters:
            - StripPrefix=1 # 不填则无法路由到其他服务
            - AddRequestHeader=X-Request-Foo, Bar
            - name: Hystrix # 添加熔断
              args:
                name: fallbackcmd
                fallbackUri: forward:/fallback # 熔断跳转地址

hystrix:
  metrics:
    enabled: true
    polling-interval-ms: 3000


logging:
  pattern:
    console: "%d - %msg%n"
  #path: D:\Logback-Test\             #日志输出到指定文件夹下默认名为spring.log
  file: D:\Logback-Test\wordimg.log  #日志输出到指定文件
  #level: debug   #指定级别
  level:         #指定输出某个类的日志
    com.cnooc.wordimg.LoggerTest2: debug

#security:
#  oauth2:
#    resource:
#      ####从认证授权中心上验证token
#      tokenInfoUri: http://localhost:3010/serve-oauth/oauth/check_token
#      preferTokenInfo: true
#    client:
#      accessTokenUri: http://localhost:3010/serve-oauth/oauth/token
#      userAuthorizationUri: http://localhost:3010/serve-oauth/oauth/authorize
#      clientId: client_1
#      clientSecret: 123456
上面我们配置了熔断的配置,一旦发生熔断就会跳转到/fallback这个地址,下面我们实现一下这个接口,这里简单的返回了error,我们可以自定义处理熔断的逻辑,并且编写一个HTTP接口,来测试网关的调用,为了检测熔断的效果,这里通过参数来控制接口的响应时间
package com.cyj.gatewaycenter.controller;

import org.springframework.beans.factory.annotation.Value;
import org.springframework.http.HttpStatus;
import org.springframework.http.MediaType;
import org.springframework.http.ResponseEntity;
import org.springframework.web.bind.annotation.*;

/**
 * @Description: 测试路由--控制器
 * @BelongsProject: Family
 * @BelongsPackage: com.cyj.gatewaycenter.controller
 * @Author: ChenYongJia
 * @CreateTime: 2020-01-02 15:52
 * @Email: [email protected]
 * @Version: 1.0
 */
@RestController
public class TestController {

    @Value("${server.port}")
    private String port;

    /**
     * 测试调用请求
     * @param time
     * @return
     */
    @RequestMapping(value = "/get/{time}", method = RequestMethod.GET, produces = MediaType.APPLICATION_JSON_VALUE)
    @ResponseBody
    public ResponseEntity<String> get(@PathVariable("time") long time) {
        try {
            Thread.sleep(time);
        } catch (InterruptedException e) {
            e.printStackTrace();
        }
        return new ResponseEntity<>(port + " get ok.", HttpStatus.OK);
    }

    /**
     * 发生熔断调用的请求
     * @return
     */
    @RequestMapping(value = "/fallback", method = RequestMethod.GET, produces = MediaType.APPLICATION_JSON_VALUE)
    @ResponseBody
    public ResponseEntity<String> fallback() {
        return new ResponseEntity<>("error.", HttpStatus.OK);
    }

}
网关配置好后,再启动一个其他的服务模块,记得添加引入actuator,否则无法被路由到,前面已经提到了我再提一次哈哈哈哈。
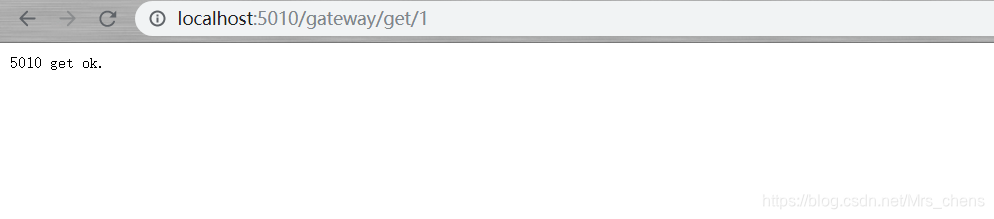
在同一注册中心下启动网关和服务,根据我们配置的路由规则 /gateway/** ,我们可以这样调用
http://localhost:5010/gateway/get/1
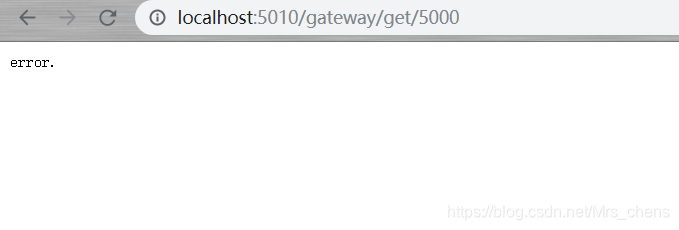
我们将响应时间改成5秒 http://localhost:5010/gateway/get/5000,超高熔断的检测时间,可以发现接口熔断,并且跳转到了指定的链接
高级特性—断言
- 以上我们实现了SpringCloudGateway的基本使用办法,可以应付大部分应用场景了,我们同时可以细粒度的去改造路由,就使用到了断言Predict,如果不满足我们设置的断言条件,则无法被路由
- 设置断言,我们只需要在predicates下面加入配置即可,要注意如果设置了多个断言,则请求必须满足所有断言才可以被正确路由到
spring:
  application:
    #服务名称,随便写
    name: gateway-center
  cloud:
    gateway:
      discovery:
        locator:
          #开启从注册中心动态创建路由的功能
          enabled: true
          #使用小写服务名,默认是大写
          lower-case-service-id: true
      routes:
        # 路由的ID
        - id: path_route
          # uri 代表路由的目标地址。注意:uri地址后面不要加 " / "
          # 消息必须使用http进行转发,lb代表从注册中心获取服务
          uri: lb://gateway-center # 可以直接跳转到具体的地址,如果要跳转到其他服务,则填写lb://<服务id>
          predicates: # 加入断言
            - Path=/gateway/** # 路由规则
- 常用的一些断言,还有很多其他断言就不一一列举了,当然最常用的可能是Path断言,我们需要通过路径来指定路由
(1)- Header=, (必须有指定的HTTP Header才能路由)
(2)- Cookie=, (必须有指定的Cookie才能路由)
(3)- Host=aaa.bbb.com(请求域名必须是aaa.bbb.com才能路由)
(4)- Method=GET(请求方式必须是Get请求才能路由)
高级特性—过滤器
- 通过设置网关的过滤器,我们可以在用户访问的入口增加一些处理,比如鉴权、接口监控等,下面介绍一些常用的过滤器
- 常用的过滤器
(1)- AddRequestHeader=, (增加自定义HTTP请求头)
(2)- SetStatus=401(设置响应的HTTP错误码)
(3)- RedirectTo=302, http://acme.org(重定向到指定链接) - 自定义过滤器,可以通过代码定制更加灵活的过滤器,下面实现一个简单的接口耗时统计的过滤器,思路:设置两个过滤器,一个前置过滤器用来收集接口开始调用的时间,一个后置过滤器来将结束时间减去开始时间得到接口的耗时时间,并打印出来
(1)前置过滤器工厂,将开始时间写到attributes里面
public class PreGatewayFilterFactory extends AbstractGatewayFilterFactory<PreGatewayFilterFactory.Config> {

    public PreGatewayFilterFactory() {
        super(Config.class);
    }

    @Override
    public GatewayFilter apply(Config config) {
        return (exchange, chain) -> {
            exchange.getAttributes().put("requestTime", System.currentTimeMillis());
            return chain.filter(exchange);
        };
    }

    public static class Config {

    }

}
(2)后置过滤器工厂,获取attribute里面的开始时间,并用当前时间减去,得到耗时时间,打印
public class PostGatewayFilterFactory extends AbstractGatewayFilterFactory<PostGatewayFilterFactory.Config>
{
    public PostGatewayFilterFactory() {
        super(Config.class);
    }

    @Override
    public GatewayFilter apply(Config config) {
        return (exchange, chain) -> {
            return chain.filter(exchange).then(Mono.fromRunnable(() -> {
                Long startTime = exchange.getAttribute("requestTime");
                long time = System.currentTimeMillis() - startTime;
                System.out.println("接口耗时时间(ms):"+time);
            }));
        };
    }

    public static class Config {

    }

}
(3)接下来将两个过滤器注入到Spring里面
@Configuration
public class FilterConfig
{
    @Bean
    public PreGatewayFilterFactory preGatewayFilterFactory() {
        return new PreGatewayFilterFactory();
    }

    @Bean
    public PostGatewayFilterFactory postGatewayFilterFactory() {
        return new PostGatewayFilterFactory();
    }
}
(4)前往application.yml进行过滤器的配置,在filter属性下配置上我们的自定义过滤器,根据框架的约定引用过滤器:比如我们的过滤器名称是PreGatewayFilterFactory,那我们引用的名称就是去掉GatewayFilterFactory这个后缀,也就是Pre,具体配置如下
spring:
  application:
    #服务名称,随便写
    name: gateway-center
  cloud:
    gateway:
      discovery:
        locator:
          #开启从注册中心动态创建路由的功能
          enabled: true
          #使用小写服务名,默认是大写
          lower-case-service-id: true
      routes:
        # 路由的ID
        - id: path_route
          # uri 代表路由的目标地址。注意:uri地址后面不要加 " / "
          # 消息必须使用http进行转发,lb代表从注册中心获取服务
          uri: lb://gateway-center # 可以直接跳转到具体的地址,如果要跳转到其他服务,则填写lb://<服务id>
          predicates:
            - Path=/gateway/** # 路由规则
          filters:
            - StripPrefix=1 # 不填则无法路由到其他服务
            - Pre # 自定义过滤器
            - Post # 自定义过滤器
(5)接下来我们调用接口,可以看到耗时时间打在公屏上
其更多操作自己尝试一下!下一篇讲解gateway网关路由的限流。
最后
-
更多参考精彩博文请看这里:《陈永佳的博客》
-
喜欢博主的小伙伴可以加个关注、点个赞哦,持续更新嘿嘿!
