相对于Activity而言,Service就显得神秘了很多。因为Service一般都是在后台默默运行的。今天就来看看Service的启动流程。
Service的启动方式
我们知道Service有两种启动方式。
- startService
- bindService
不同启动方式Service的生命周期方法也存在不同:
1、startService方式启动生命周期:
onCreate -> onStartCommand -> onDestroy
多次启动会重复执行onStartCommand 方法
2、bindService方式启动生命周期:
onCreate -> onBind -> onUnbind -> onDestroy
重复绑定不会走生命周期方法
3、同时执行startService 和 bindService方法时。
onCreate 和 onDestroy 只会执行一次。stopService 和 unbindService 都执行才会触发 onDestroy 方法。只执行一个不会触发onDestroy 方法。
一、startService
首先来看通过 startService启动的方法。
Intent intent = new Intent(this, MyService.class);
startService(intent);
startService() 方法源码如下:
1、 ContextWrapper & startService
    Context mBase;
    @Override
    public ComponentName startService(Intent service) {
        return mBase.startService(service);
    }
可以看到startService 方法又会执行 Context的startService()方法。
我们知道Context是一个抽象类,所以startService肯定是在它的实现类中进行的。在上一篇文章 Activity的启动流程 五、启动Activity中,会创建Context对象并调用Activity的attach()方法。我们创建一个ContextImpl 的Context对象。所以下面查看ContextImpl 的startService 方法
2、ContextImpl & startService()
    @Override
    public ComponentName startService(Intent service) {
        warnIfCallingFromSystemProcess();
        return startServiceCommon(service, mUser);
    }
继续执行startServiceCommon()
startServiceCommon()
    private ComponentName startServiceCommon(Intent service, UserHandle user) {
        try {
        	//校验是否使用隐士启动,Android5.0以后隐士启动会抛出IllegalArgumentException
            validateServiceIntent(service);
            service.prepareToLeaveProcess(this);
            ComponentName cn = ActivityManagerNative.getDefault().startService(
                mMainThread.getApplicationThread(), service, service.resolveTypeIfNeeded(
                            getContentResolver()), getOpPackageName(), user.getIdentifier());
            ...
            return cn;
        } catch (RemoteException e) {
            throw e.rethrowFromSystemServer();
        }
    }
在 Activity的启动流程 中我们已经知道了 ActivityManagerNative 是一个Binder类,getDefault()返回的是一个ActivityManagerProxy代理,通过Binder机制,将消息发送到ActivityManagerService,所以查看ActivityManagerService的startService()
3、ActivityManagerService & startService()
 	final ActiveServices mServices;

    @Override
    public ComponentName startService(IApplicationThread caller, Intent service,
            String resolvedType, String callingPackage, int userId)
            throws TransactionTooLargeException {
      	...
        synchronized(this) {
            final int callingPid = Binder.getCallingPid();
            final int callingUid = Binder.getCallingUid();
            final long origId = Binder.clearCallingIdentity();
            ComponentName res = mServices.startServiceLocked(caller, service,
                    resolvedType, callingPid, callingUid, callingPackage, userId);
            Binder.restoreCallingIdentity(origId);
            return res;
        }
    }
在该方法中首先会校验包名和Service所在进程是否存在,以及一些权限检测。
然后会执行 ActiveServices 的 startServiceLocked()。 Service 的生命周期大部分实现都在ActiveServices 中,是Service的一个管理类
4、ActiveServices & startServiceLocked()
    ComponentName startServiceLocked(IApplicationThread caller, Intent service, String resolvedType,
            int callingPid, int callingUid, String callingPackage, final int userId)
            throws TransactionTooLargeException {
        if (DEBUG_DELAYED_STARTS) Slog.v(TAG_SERVICE, "startService: " + service
                + " type=" + resolvedType + " args=" + service.getExtras());

        final boolean callerFg;
        if (caller != null) {
            final ProcessRecord callerApp = mAm.getRecordForAppLocked(caller);
            if (callerApp == null) {
                throw new SecurityException(
                        "Unable to find app for caller " + caller
                        + " (pid=" + Binder.getCallingPid()
                        + ") when starting service " + service);
            }
            callerFg = callerApp.setSchedGroup != ProcessList.SCHED_GROUP_BACKGROUND;
        } else {
            callerFg = true;
        }
		...
        ServiceLookupResult res =
            retrieveServiceLocked(service, resolvedType, callingPackage,
                    callingPid, callingUid, userId, true, callerFg, false);
        if (res == null) {
            return null;
        }
        if (res.record == null) {
            return new ComponentName("!", res.permission != null
                    ? res.permission : "private to package");
        }

        ServiceRecord r = res.record;

        if (!mAm.mUserController.exists(r.userId)) {
            Slog.w(TAG, "Trying to start service with non-existent user! " + r.userId);
            return null;
        }
        // If permissions need a review before any of the app components can run,
        // we do not start the service and launch a review activity if the calling app
        // is in the foreground passing it a pending intent to start the service when
        // review is completed.
		...
        return startServiceInnerLocked(smap, service, r, callerFg, addToStarting);
    }
在该方法中会做一些校验和检查,初始化ServiceRecord等必要的参数。然后执行startServiceInnerLocked方法,startServiceInnerLocked方法中又会执行bringUpServiceLocked()方法。
ActiveServices & bringUpServiceLocked()
1、在bringUpServiceLocked()中同样会判断这个Service是否创建,如果创建则执行sendServiceArgsLocked(),并返回空。
在ssendServiceArgsLocked()方法会执行r.app.thread.scheduleServiceArgs(r, si.taskRemoved, si.id, flags, si.intent);。然后执行onStartCommand()生命周期方法。
如果没有创建则继续执行
2、执行 realStartServiceLocked(r, app, execInFg);真正启动Service的地方。
ActiveServices & realStartServiceLocked()
		...
        try {
            ...
            synchronized (r.stats.getBatteryStats()) {
                r.stats.startLaunchedLocked();
            }
            mAm.notifyPackageUse(r.serviceInfo.packageName,
                                 PackageManager.NOTIFY_PACKAGE_USE_SERVICE);
            app.forceProcessStateUpTo(ActivityManager.PROCESS_STATE_SERVICE);
            app.thread.scheduleCreateService(r, r.serviceInfo,
                    mAm.compatibilityInfoForPackageLocked(r.serviceInfo.applicationInfo),
                    app.repProcState);
            r.postNotification();
            created = true;
        } catch (DeadObjectException e) {
            Slog.w(TAG, "Application dead when creating service " + r);
            mAm.appDiedLocked(app);
            throw e;
        } finally {
           ...
        }

	...
 	sendServiceArgsLocked(r, execInFg, true);
	...
在realStartServiceLocked()中,主要调用app.thread.scheduleCreateService()方法,这里的 app.thread 是一个IApplicationThread ,继承IInterface,其实也是一个Binder。它的具体实现是ApplicationThread 和 ApplicationThreadNative。因此这里会执行ApplicationThread 的scheduleCreateService方法。
而ApplicationThread 中的scheduleCreateService方法会通过Handler机制,执行handleCreateService。
ApplicationThread 是ActivityThread的一个内部类
5、执行Service的onCreate()
    private void handleCreateService(CreateServiceData data) {
        // If we are getting ready to gc after going to the background, well
        // we are back active so skip it.
        unscheduleGcIdler();

        LoadedApk packageInfo = getPackageInfoNoCheck(
                data.info.applicationInfo, data.compatInfo);
        Service service = null;
        try {
            java.lang.ClassLoader cl = packageInfo.getClassLoader();
            service = (Service) cl.loadClass(data.info.name).newInstance();
        } catch (Exception e) {
            if (!mInstrumentation.onException(service, e)) {
                throw new RuntimeException(
                    "Unable to instantiate service " + data.info.name
                    + ": " + e.toString(), e);
            }
        }

        try {
            if (localLOGV) Slog.v(TAG, "Creating service " + data.info.name);

            ContextImpl context = ContextImpl.createAppContext(this, packageInfo);
            context.setOuterContext(service);

            Application app = packageInfo.makeApplication(false, mInstrumentation);
            service.attach(context, this, data.info.name, data.token, app,
                    ActivityManagerNative.getDefault());
            service.onCreate();
            mServices.put(data.token, service);
            try {
                ActivityManagerNative.getDefault().serviceDoneExecuting(
                        data.token, SERVICE_DONE_EXECUTING_ANON, 0, 0);
            } catch (RemoteException e) {
                throw e.rethrowFromSystemServer();
            }
        } catch (Exception e) {
            if (!mInstrumentation.onException(service, e)) {
                throw new RuntimeException(
                    "Unable to create service " + data.info.name
                    + ": " + e.toString(), e);
            }
        }
    }
1、通过类加载器创建Service实例。
2、创建ContextImpl 对象
3、创建Application对象,已存在则直接获取
4、调用service.attach()和 service.onCreate();
5、将Service存储到mServices中
6、执行Service的onStartCommand()
在realStartServiceLocked方法中 还会执行sendServiceArgsLocked(r, execInFg, true);
在sendServiceArgsLocked中会执行
r.app.thread.scheduleServiceArgs(r, si.taskRemoved, si.id, flags, si.intent);
和上面一样的通过Binder机制调用scheduleServiceArgs最终会执行ActivityThread的scheduleServiceArgs,然后通过Handler机制执行handleServiceArgs
    private void handleServiceArgs(ServiceArgsData data) {
        Service s = mServices.get(data.token);
        if (s != null) {
            try {
            	...
                int res;
                if (!data.taskRemoved) {
                    res = s.onStartCommand(data.args, data.flags, data.startId);
                } else {
                    s.onTaskRemoved(data.args);
                    res = Service.START_TASK_REMOVED_COMPLETE;
                }
 				...
    }
从mServices中取出Service,执行onStartCommand()
二、bindService()
和startService启动一样,bindService也会调用ContextImpl的bindService方法
1、ContextImpl & bindService
    @Override
    public boolean bindService(Intent service, ServiceConnection conn,
            int flags) {
        warnIfCallingFromSystemProcess();
        return bindServiceCommon(service, conn, flags, mMainThread.getHandler(),
                Process.myUserHandle());
    }

 	final LoadedApk mPackageInfo;

    private boolean bindServiceCommon(Intent service, ServiceConnection conn, int flags, Handler
            handler, UserHandle user) {
        IServiceConnection sd;
        if (conn == null) {
            throw new IllegalArgumentException("connection is null");
        }
        if (mPackageInfo != null) {
            sd = mPackageInfo.getServiceDispatcher(conn, getOuterContext(), handler, flags);
        } else {
            throw new RuntimeException("Not supported in system context");
        }
        //校验启动方式,5.0以后服务必须显示启动,否则抛出IllegalArgumentException异常
        validateServiceIntent(service);
        try {
            IBinder token = getActivityToken();
			...
            service.prepareToLeaveProcess(this);
            int res = ActivityManagerNative.getDefault().bindService(
                mMainThread.getApplicationThread(), getActivityToken(), service,
                service.resolveTypeIfNeeded(getContentResolver()),
                sd, flags, getOpPackageName(), user.getIdentifier());

            return res != 0;
        } catch (RemoteException e) {
            throw e.rethrowFromSystemServer();
        }
    }
ContextImpl的bindService方法会调用bindServiceCommon。
如果我们绑定的Service是跨进程的服务,那么ServiceConnection 就收不到回调了。所以这里使用ServiceDispatcher.InnerConnection来实现跨进程回调方案,InnerConnection继承IServiceConnection.Stub是Binder机制的服务端。
mPackageInfo.getServiceDispatcher源码如下,mPackageInfo是LoadedApk 对象,在ContextImpl构造方法初始化。
LoadedApk & getServiceDispatcher
    public final IServiceConnection getServiceDispatcher(ServiceConnection c,
            Context context, Handler handler, int flags) {
        synchronized (mServices) {
            LoadedApk.ServiceDispatcher sd = null;
            ArrayMap<ServiceConnection, LoadedApk.ServiceDispatcher> map = mServices.get(context);
            if (map != null) {
                sd = map.get(c);
            }
            if (sd == null) {
                sd = new ServiceDispatcher(c, context, handler, flags);
                if (map == null) {
                    map = new ArrayMap<ServiceConnection, LoadedApk.ServiceDispatcher>();
                    mServices.put(context, map);
                }
                map.put(c, sd);
            } else {
                sd.validate(context, handler);
            }
            return sd.getIServiceConnection();
        }
    }
上面方法,会构造一个LoadedApk.ServiceDispatcher类,通过ServiceDispatcher将ServiceConnection 和 InnerConnection连接起来了。再来看一下InnerConnection的实现:
        private static class InnerConnection extends IServiceConnection.Stub {
            final WeakReference<LoadedApk.ServiceDispatcher> mDispatcher;

            InnerConnection(LoadedApk.ServiceDispatcher sd) {
                mDispatcher = new WeakReference<LoadedApk.ServiceDispatcher>(sd);
            }

            public void connected(ComponentName name, IBinder service) throws RemoteException {
                LoadedApk.ServiceDispatcher sd = mDispatcher.get();
                if (sd != null) {
                    sd.connected(name, service);
                }
            }
        }
当通过Binder机制触发InnerConnection 的connected时候,会调用ServiceDispatcher的connected方法,然后在ServiceDispatcher的connected方法中会根据条件触发ServiceConnection中的方法onServiceConnected()或onServiceDisconnected()。
在第一步bindServiceCommon方法中,将ServiceConnection包裹完成后,会执行ActivityManagerNative.getDefault().bindService通过Binder机制在ActivityManagerService(AMS)收到消息执行AMS 的bindService方法。
2、ActivityManagerService & bindService
    public int bindService(IApplicationThread caller, IBinder token, Intent service,
            String resolvedType, IServiceConnection connection, int flags, String callingPackage,
            int userId) throws TransactionTooLargeException {
        enforceNotIsolatedCaller("bindService");

        // Refuse possible leaked file descriptors
        if (service != null && service.hasFileDescriptors() == true) {
            throw new IllegalArgumentException("File descriptors passed in Intent");
        }

        if (callingPackage == null) {
            throw new IllegalArgumentException("callingPackage cannot be null");
        }

        synchronized(this) {
            return mServices.bindServiceLocked(caller, token, service,
                    resolvedType, connection, flags, callingPackage, userId);
        }
    }
执行mServices.bindServiceLocked方法
3、ActiveServices & bindServiceLocked
这个方法比较长。1、会判断要绑定的Service所在的进程是否存在,即Service是否注册。2、判断绑定页面的Activity是否存在。3、权限校验
最后会执行bringUpServiceLocked方法。
在bringUpServiceLocked方法中,如果Service没有被创建,则会执行realStartServiceLocked方法。 和startService一样,在realStartServiceLocked方法中也会通过app.thread.scheduleCreateService最终在ActivityThread中执行scheduleCreateService。然后通过Handler机制,执行ActivityThread的handleCreateService方法
4、ActivityThread & handleCreateService
在handleCreateService中方法和startService一样,通过类加载机制创建Service对象,创建ContextImpl对象,调用Service的attach()和 onCreate()。将创建的service存储起来。下次使用就可以直接获取。
5、ActiveServices & requestServiceBindingLocked
在ActiveServices的bindServiceLocked方法中,除了执行realStartServiceLocked启动服务外,最后还会执行requestServiceBindingLocked方法来绑定服务。
    private final boolean requestServiceBindingLocked(ServiceRecord r, IntentBindRecord i,
            boolean execInFg, boolean rebind) throws TransactionTooLargeException {
        if (r.app == null || r.app.thread == null) {
            // If service is not currently running, can't yet bind.
            return false;
        }
        if ((!i.requested || rebind) && i.apps.size() > 0) {
            try {
                bumpServiceExecutingLocked(r, execInFg, "bind");
                r.app.forceProcessStateUpTo(ActivityManager.PROCESS_STATE_SERVICE);
                r.app.thread.scheduleBindService(r, i.intent.getIntent(), rebind,
                        r.app.repProcState);
                if (!rebind) {
                    i.requested = true;
                }
                i.hasBound = true;
                i.doRebind = false;
            } catch (TransactionTooLargeException e) {
                // Keep the executeNesting count accurate.
                if (DEBUG_SERVICE) Slog.v(TAG_SERVICE, "Crashed while binding " + r, e);
                final boolean inDestroying = mDestroyingServices.contains(r);
                serviceDoneExecutingLocked(r, inDestroying, inDestroying);
                throw e;
            } catch (RemoteException e) {
                if (DEBUG_SERVICE) Slog.v(TAG_SERVICE, "Crashed while binding " + r);
                // Keep the executeNesting count accurate.
                final boolean inDestroying = mDestroyingServices.contains(r);
                serviceDoneExecutingLocked(r, inDestroying, inDestroying);
                return false;
            }
        }
        return true;
    }
如果Service已经创建后,会执行ActivityThread的scheduleBindService,通过handler在主线程中执行handleBindService。
6、ActivityThread & handleBindService
    private void handleBindService(BindServiceData data) {
        Service s = mServices.get(data.token);
        if (DEBUG_SERVICE)
            Slog.v(TAG, "handleBindService s=" + s + " rebind=" + data.rebind);
        if (s != null) {
            try {
                data.intent.setExtrasClassLoader(s.getClassLoader());
                data.intent.prepareToEnterProcess();
                try {
                    if (!data.rebind) {
                        IBinder binder = s.onBind(data.intent);
                        ActivityManagerNative.getDefault().publishService(
                                data.token, data.intent, binder);
                    } else {
                        s.onRebind(data.intent);
                        ActivityManagerNative.getDefault().serviceDoneExecuting(
                                data.token, SERVICE_DONE_EXECUTING_ANON, 0, 0);
                    }
                    ensureJitEnabled();
                } catch (RemoteException ex) {
                    throw ex.rethrowFromSystemServer();
                }
            } catch (Exception e) {
                if (!mInstrumentation.onException(s, e)) {
                    throw new RuntimeException(
                            "Unable to bind to service " + s
                            + " with " + data.intent + ": " + e.toString(), e);
                }
            }
        }
    }
在之前我们已经创建Service对象,并将Service存储到了mServices中,存储的key是一个Binder对象,其实就是InnerConnection。
在此方法中首先调用Service的 onBind() 生命周期方法
IBinder binder = s.onBind(data.intent);
然后调用AMS的publishService方法。
    public void publishService(IBinder token, Intent intent, IBinder service) {
        // Refuse possible leaked file descriptors
        if (intent != null && intent.hasFileDescriptors() == true) {
            throw new IllegalArgumentException("File descriptors passed in Intent");
        }

        synchronized(this) {
            if (!(token instanceof ServiceRecord)) {
                throw new IllegalArgumentException("Invalid service token");
            }
            mServices.publishServiceLocked((ServiceRecord)token, intent, service);
        }
    }
publishService方法又会调用ActiveServices 的publishServiceLocked方法。
ActiveServices & publishServiceLocked
 void publishServiceLocked(ServiceRecord r, Intent intent, IBinder service) {

	...
		ConnectionRecord c = clist.get(i);
		c.conn.connected(r.name, service);
	...
}
该方法会执行c.conn.connected(),下面是ConnectionRecord 的描述和conn

可以看到conn是一个IServiceConnection对象,其实也就是我们在第一步通过LoadedApk.ServiceDispatcher类返回的InnerConnection对象。
下面是ContextImpl类中bindServiceCommon方法片段。也就是我们的第一步


所以这个c.conn.connected()最终会触发InnerConnection的connected()方法,然后执行ServiceDispatcher的connected()方法。在第一步时调用ContextImpl的bindService方法时我们就提到了ServiceDispatcher负责连接InnerConnection和ServiceConnection 的类。下面我们看它是如何连接调度的:
ServiceDispatcher & connected
        public void connected(ComponentName name, IBinder service) {
            if (mActivityThread != null) {
                mActivityThread.post(new RunConnection(name, service, 0));
            } else {
                doConnected(name, service);
            }
        }
mActivityThread 不为null,执行RunConnection里面的方法。
        private final class RunConnection implements Runnable {
            RunConnection(ComponentName name, IBinder service, int command) {
                mName = name;
                mService = service;
                mCommand = command;
            }

            public void run() {
                if (mCommand == 0) {
                    doConnected(mName, mService);
                } else if (mCommand == 1) {
                    doDeath(mName, mService);
                }
            }

            final ComponentName mName;
            final IBinder mService;
            final int mCommand;
        }
command == 0 成立,继续执行doConnected()方法
        public void doConnected(ComponentName name, IBinder service) {
            ServiceDispatcher.ConnectionInfo old;
            ServiceDispatcher.ConnectionInfo info;

            synchronized (this) {
                if (mForgotten) {
                    // We unbound before receiving the connection; ignore
                    // any connection received.
                    return;
                }
                old = mActiveConnections.get(name);
                if (old != null && old.binder == service) {
                    // Huh, already have this one.  Oh well!
                    return;
                }

                if (service != null) {
                    // A new service is being connected... set it all up.
                    info = new ConnectionInfo();
                    info.binder = service;
                    info.deathMonitor = new DeathMonitor(name, service);
                    try {
                        service.linkToDeath(info.deathMonitor, 0);
                        mActiveConnections.put(name, info);
                    } catch (RemoteException e) {
                        // This service was dead before we got it...  just
                        // don't do anything with it.
                        mActiveConnections.remove(name);
                        return;
                    }

                } else {
                    // The named service is being disconnected... clean up.
                    mActiveConnections.remove(name);
                }

                if (old != null) {
                    old.binder.unlinkToDeath(old.deathMonitor, 0);
                }
            }

            // If there was an old service, it is now disconnected.
            if (old != null) {
                mConnection.onServiceDisconnected(name);
            }
            // If there is a new service, it is now connected.
            if (service != null) {
                mConnection.onServiceConnected(name, service);
            }
        }
在doConnected方法中首先会根据ComponentName在mActiveConnections取出ConnectionInfo对象。
ComponentName存储了Service的包名和类名

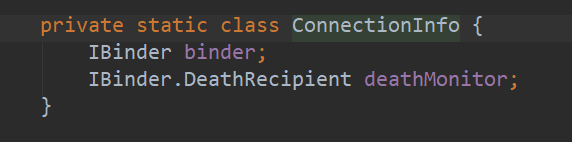
ConnectionInfo存储了binder类和死亡代理
ConnectionInfo如果为空,说明还没有连接,则创建一个ConnectionInfo对象并设置死亡代理,然后将ConnectionInfo对象存储到mActiveConnections中。
最后执行mConnection.onServiceConnected(name, service);
到这里就是一个完整的bindService流程了。
总结
相对于Activity的启动流程,Service就不会显得那么绕了。并且阅读Service的启动流程之前,要是能够知道Activity的启动流程读的会更流畅些。Binder机制在Android中真的很重要。
其它三大组件工作流程:
参考:开发艺术探索
