1. PHPMailer => https://github.com/PHPMailer/PHPMailer/ ,下载文件放入tp5目录 extend下面, 如图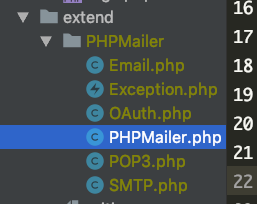
这里的 Email.php 是我们自己添加的. 后面会说到.
2. 修改命名空间, 原始的命名空间是 , 这里是根据tp5的目录来, 所以需要修改.
//原来
namespace PHPMailer\PHPMailer;
//修改为
namespace PHPMailer;
此外, 用QQ邮箱需要先开启 SMTP服务! 授权码就是我们下面要用到的密码!

3. 在PHPMailer文件夹下面添加 第一步中的 Email.php, 来定义一个类, 实现发送邮件. 示例代码在 github 文件夹下的 README.md中可以查看到. (PS: 原示例代码中, 第一步实例化是没有, 需要自己添加 $mail = new PHPMailer(true) 还需要引入PHPMailer类 );
<?php
namespace PHPMailer;
use PHPMailer\PHPMailer;
class Email
{
public function sendEmail($to, $title, $content)
{
try {
$mail = new PHPMailer(true);
//Server settings
//$mail->SMTPDebug = SMTP::DEBUG_SERVER; // Enable verbose debug output
$mail->isSMTP(); // Send using SMTP
$mail->Host = 'smtp.qq.com'; // Set the SMTP server to send through
$mail->SMTPAuth = true; // Enable SMTP authentication
$mail->Username = '[email protected]'; // SMTP username
$mail->Password = 'qq邮箱中的16位授权码'; // SMTP password
$mail->SMTPSecure = PHPMailer::ENCRYPTION_STARTTLS; // Enable TLS encryption; `PHPMailer::ENCRYPTION_SMTPS` also accepted
$mail->Port = 587; // TCP port to connect to
//Recipients
$mail->setFrom('[email protected]', '易惠装派件工单: '.date('Y-m-d H:i'));
//$mail->addAddress('[email protected]', 'Joe User'); // Add a recipient
$mail->addAddress($to); // Name is optional
$mail->addReplyTo('[email protected]', 'Information');
//$mail->addCC('[email protected]');
//$mail->addBCC('[email protected]');
// Attachments
//$mail->addAttachment('/var/tmp/file.tar.gz'); // Add attachments
//$mail->addAttachment('/tmp/image.jpg', 'new.jpg'); // Optional name
// Content
$mail->isHTML(true); // Set email format to HTML
$mail->Subject = $title;
$mail->Body = $content;
//$mail->AltBody = 'This is the body in plain text for non-HTML mail clients';
$mail->send();
echo 'Message has been sent';
} catch (Exception $e) {
echo "Message could not be sent. Mailer Error: {$mail->ErrorInfo}";
}
}
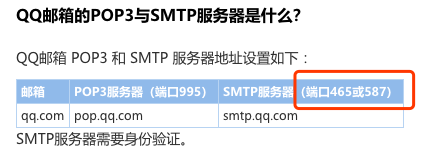
}4. qq邮箱的端口: https://service.mail.qq.com/cgi-bin/help?subtype=1&&id=28&&no=167 (PS: 注意端口号 465或587)
5. 在控制器中, 引入, 并使用
    //测试邮件
    public function sendMail()
    {
        $email = new \PHPMailer\Email;
        $email->sendEmail('[email protected]', '新的用户刚刚提交,请注意查收!', '内容内容内容内容内容内容内容内容内容内容内容');
    }
6. 成功会返回 Message has been sent 表示发送成功.
