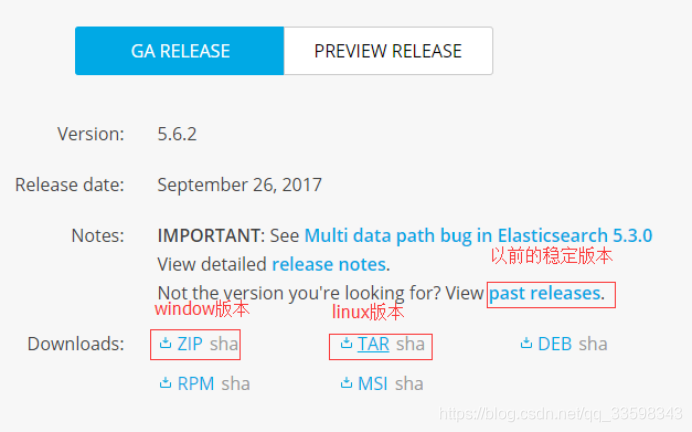
Elasticsearch官网: https://www.elastic.co/products/elasticsearch
单节点安装
es操作需要在非root下进行
1.解压,启动
bin/elasticsearch
2.验证:
REST API

curl -XGET 'localhost:9200/_cat/health?v&pretty'

epoch      timestamp cluster       status node.total node.data shards pri relo init unassign pending_tasks max_task_wait_time active_shards_percent
1550960314 06:18:34  elasticsearch green           1         1      0   0    0    0        0             0                  -                100.0%
看到status是 green,证明启动成功。
- Green - 一切运行正常(集群功能齐全)
- Yellow - 所有数据是可以获取的,但是一些复制品还没有被分配(集群功能齐全)
- Red - 一些数据因为一些原因获取不到(集群部分功能不可用)
3.在 elasticsearch-6.1.1路径下创建 data 和 logs 文件夹:
mkdir data
mkdir logs
4.修改配置文件config/elasticsearch.yml
# ---------------------------------- Cluster -------------------------------------
cluster.name: my-application
# ------------------------------------ Node --------------------------------------
node.name: node-102
# ----------------------------------- Paths ---------------------------------------
path.data: /opt/module/elasticsearch-5.6.1/data
path.logs: /opt/module/elasticsearch-5.6.1/logs
# ----------------------------------- Memory -----------------------------------
bootstrap.memory_lock: false
bootstrap.system_call_filter: false
# ---------------------------------- Network ------------------------------------
network.host: 192.168.1.102
# --------------------------------- Discovery ------------------------------------
discovery.zen.ping.unicast.hosts: ["hadoop102"]
(1)cluster.name
如果要配置集群需要两个节点上的elasticsearch配置的cluster.name相同,都启动可以自动组成集群,这里如果不改cluster.name则默认是cluster.name=my-application,
(2)nodename随意取但是集群内的各节点不能相同
(3)修改后的每行前面不能有空格,修改后的“:”后面必须有一个空格

启动es,报错:

[1]: max file descriptors [4096] for elasticsearch process is too low, increase to at least [65536]
[2]: max number of threads [1024] for user [hduser] is too low, increase to at least [4096]
[3]: max virtual memory areas vm.max_map_count [65530] is too low, increase to at least [262144]
[4]: system call filters failed to install; check the logs and fix your configuration or disable system
5)配置linux系统环境(参考:http://blog.csdn.net/satiling/article/details/59697916)
	(1)编辑limits.conf 添加类似如下内容
[itstar@hadoop102 elasticsearch-5.6.1]$ sudo vi /etc/security/limits.conf
添加如下内容:
* soft nofile 65536
* hard nofile 131072
* soft nproc 4096
* hard nproc 4096
	(2)进入limits.d目录下修改配置文件。
[itstar@hadoop102 elasticsearch-5.6.1]$ sudo vi /etc/security/limits.d/90-nproc.conf
修改如下内容:
* soft nproc 1024
#修改为
* soft nproc 4096
	(3)修改配置sysctl.conf
[itstar@hadoop102 elasticsearch-5.6.1]$ sudo vi /etc/sysctl.conf
添加下面配置:
vm.max_map_count=655360
并执行命令:
[itstar@hadoop102 elasticsearch-5.6.1]$ sudo sysctl -p
然后,重新启动elasticsearch,即可启动成功。
集群安装
1)分发Elasticsearch安装包至hadoop103和hadoop104
2)修改hadoop102配置信息
vi elasticsearch.yml
添加如下信息:
node.master: true
node.data: true
3)修改hadoop103配置信息
(1)修改Elasticsearch配置信息
vi elasticsearch.yml
node.name: node-103
node.master: false
node.data: true
network.host: 192.168.1.103
(2)修改Linux相关配置信息(同hadoop102)
4)修改hadoop104配置信息
(1)修改Elasticsearch配置信息
vi elasticsearch.yml
node.name: node-104
node.master: false
node.data: true
network.host: 192.168.1.104
(2)修改Linux相关配置信息(同hadoop102)
5)分别启动三台节点的Elasticsearch
6)使用插件查看集群状态
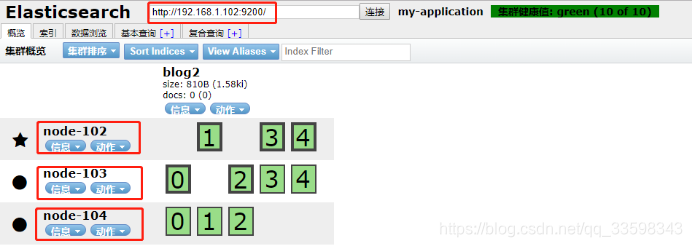
Elasticsearch head插件安装
谷歌扩展插件
下载插件:https://github.com/mobz/elasticsearch-head
直接使用
虚拟机启动插件
nodejs官网下载安装包:https://nodejs.org/dist/
node-v6.9.2-linux-x64.tar.xz

拷贝


安装nodejs:

解压


配置环境变量:

export NODE_HOME=/usr/local/node-v6.9.2-linux-x64
export PATH=$PATH:$NODE_HOME/bin


查看node和npm版本:

node -v

npm -v


解压head插件到/opt/module目录下:

unzip elasticsearch-head-master.zip


查看当前head插件目录下有无node_modules/grunt目录:

没有:执行命令创建:npm install grunt --save --registry=https://registry.npm.taobao.org


安装head插件:

npm install -g cnpm --registry=https://registry.npm.taobao.org


安装grunt:

npm install -g grunt-cli --registry=https://registry.npm.taobao.org


编辑Gruntfile.js

vim Gruntfile.js

文件93行添加

hostname:'0.0.0.0'


检查head根目录下是否存在base文件夹

没有:将 _site下的base文件夹及其内容复制到head根目录下

mkdir base

 cp base/* ../base/


启动grunt server:

grunt server -d


如果提示grunt的模块没有安装:

Local Npm module “grunt-contrib-clean” not found. Is it installed?

Local Npm module “grunt-contrib-concat” not found. Is it installed?

Local Npm module “grunt-contrib-watch” not found. Is it installed?

Local Npm module “grunt-contrib-connect” not found. Is it installed?

Local Npm module “grunt-contrib-copy” not found. Is it installed?

Local Npm module “grunt-contrib-jasmine” not found. Is it installed?


执行以下命令:

npm install grunt-contrib-clean -registry=[https://registry.npm.taobao.org](https://registry.npm.taobao.org/)

npm install grunt-contrib-concat -registry=[https://registry.npm.taobao.org](https://registry.npm.taobao.org/)

npm install grunt-contrib-watch -registry=[https://registry.npm.taobao.org](https://registry.npm.taobao.org/)

npm install grunt-contrib-connect -registry=[https://registry.npm.taobao.org](https://registry.npm.taobao.org/)

npm install grunt-contrib-copy -registry=[https://registry.npm.taobao.org](https://registry.npm.taobao.org/)

npm install grunt-contrib-jasmine -registry=[https://registry.npm.taobao.org](https://registry.npm.taobao.org/)

最后一个模块可能安装不成功,但是不影响使用。


浏览器访问head插件:

http://192.168.109.133:9100
