实现QQ登录步骤
1.到QQ互联注册开发者资格地址为:https://connect.qq.com/
2.然后到管理中心创建移动应用获取APPid

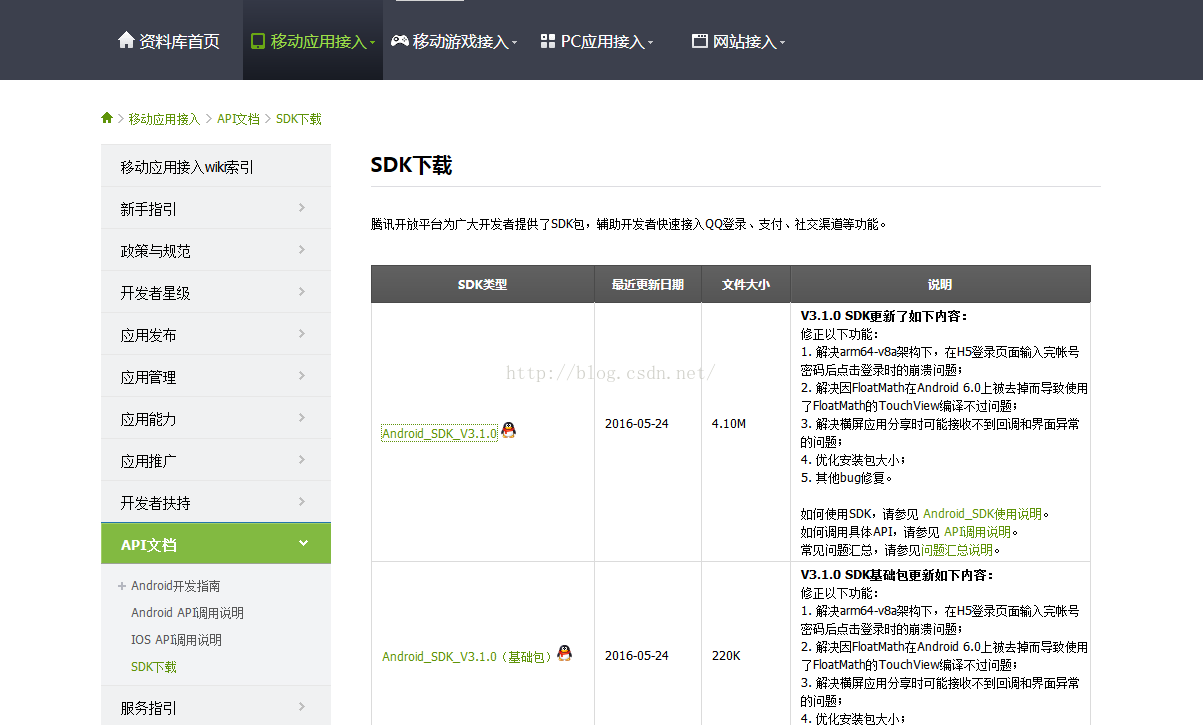
3.下载SDKJar包地址为:http://wiki.open.qq.com/wiki/mobile/SDK%E4%B8%8B%E8%BD%BD
下面开始我们的项目Eclipse为例
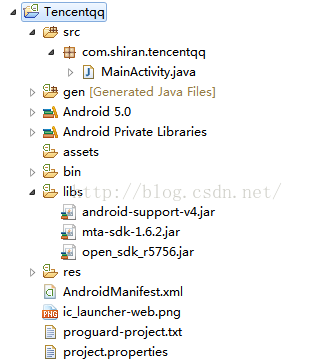
创建一个新的Project然后我们把刚才下载的SDKJar文件放到libs中
打开Android配置文件加入以下访问权限
<uses-permission android:name="android.permission.INTERNET" />
<uses-permission android:name="android.permission.ACCESS_NETWORK_STATE" />
接着添加以下Activity
<activity
android:name="com.tencent.tauth.AuthActivity"
android:launchMode="singleTask"
android:noHistory="true" >
<intent-filter>
<action android:name="android.intent.action.VIEW" />
<category android:name="android.intent.category.DEFAULT" />
<category android:name="android.intent.category.BROWSABLE" />
<data android:scheme="tencent1105602574" /> <!-- 这里是在开放平台创建应用获得的APPID -->
</intent-filter>
</activity>
<activity android:name="com.tencent.connect.common.AssistActivity"
android:theme="@android:style/Theme.Translucent.NoTitleBar"
android:screenOrientation="portrait"/>
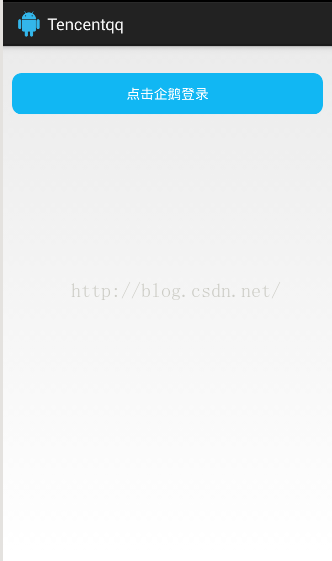
</application>已经配置完成接下来我们在布局中写一个控件点击登录时用
<LinearLayout xmlns:android="http://schemas.android.com/apk/res/android"
    xmlns:tools="http://schemas.android.com/tools"
    android:layout_width="match_parent"
    android:layout_height="match_parent"
    android:orientation="vertical"
    tools:context=".MainActivity" >

    <Button
        android:id="@+id/login"
        android:layout_width="fill_parent"
        android:layout_height="45dp"
        android:layout_marginLeft="10dp"
        android:layout_marginRight="10dp"
        android:layout_marginTop="30dp"
        android:text="@string/login_qq"
        android:textSize="15sp"
        android:textColor="#FFFFFF"
        android:background="@drawable/shape_btn"/>

     <ImageView
        android:id="@+id/iv_logo"
        android:layout_width="wrap_content"
        android:layout_height="wrap_content"  />

    <TextView
        android:id="@+id/tv_name"
        android:layout_width="wrap_content"
        android:layout_height="wrap_content"
        android:textColor="#80505050"
        android:textSize="18sp"   />

    <TextView
        android:id="@+id/tv_openid"
        android:layout_width="wrap_content"
        android:layout_height="wrap_content"    />

</LinearLayout>
布局代码写好了下面我们创建一个类名为AppConstants用来存放APPID
package com.shiran.tencentqq;

/**
 *
 * <一句话简述本类作用>
 *这个类用来存放APPID的
 */
public class AppConstants {
	//申请的ID也可以用腾讯提供的测试ID222222
	public static String APP_ID = "1105602574";

}
再创建一个类名为Util用来获取网络图片
package com.shiran.tencentqq;

import java.io.IOException;
import java.io.InputStream;
import java.net.HttpURLConnection;
import java.net.URL;

import android.graphics.Bitmap;
import android.graphics.BitmapFactory;
import android.util.Log;

/**
 *
 * <一句话简述本类作用>
 *这个类是根据路径从网上获取图片的处理类
 *
 */
public class Util {

	public static String TAG="UTIL";
    public static Bitmap getbitmap(String imageUri) {
        Log.v(TAG, "getbitmap:" + imageUri);
        // 显示网络上的图片
        Bitmap bitmap = null;
        try {
            URL myFileUrl = new URL(imageUri);
            HttpURLConnection conn = (HttpURLConnection) myFileUrl
                    .openConnection();
            conn.setDoInput(true);
            conn.connect();
            InputStream is = conn.getInputStream();
            bitmap = BitmapFactory.decodeStream(is);
            is.close();

            Log.v(TAG, "image download finished." + imageUri);
        } catch (IOException e) {
            e.printStackTrace();
            Log.v(TAG, "getbitmap bmp fail---");
            return null;
        }
        return bitmap;
    }
}
最后就是我们的MainActivity了
package com.shiran.tencentqq;

import org.json.JSONException;
import org.json.JSONObject;

import com.tencent.connect.UserInfo;
import com.tencent.connect.auth.QQAuth;
import com.tencent.connect.auth.QQToken;
import com.tencent.tauth.IUiListener;
import com.tencent.tauth.Tencent;
import com.tencent.tauth.UiError;

import android.os.Bundle;
import android.os.Handler;
import android.os.Message;
import android.util.Log;
import android.view.View;
import android.view.View.OnClickListener;
import android.widget.Button;
import android.widget.ImageView;
import android.widget.TextView;
import android.widget.Toast;
import android.app.Activity;
import android.graphics.Bitmap;

public class MainActivity extends Activity implements OnClickListener{

	private TextView mTvopenid = null;
    private TextView mTvname = null;
    private Button mLogin = null;
    private ImageView mIvuserlogo;
    private Tencent mTencent;
    public static QQAuth mQQAuth;
    public static String mAppid;
    public static String openidString;
    public static String nicknameString;
    public static String TAG="MainActivity";
    Bitmap bitmap = null;

    @Override
    public void onCreate(Bundle savedInstanceState) {
        super.onCreate(savedInstanceState);
        setContentView(R.layout.activity_main);
        //用来登录的Button
        mLogin=(Button)findViewById(R.id.login);
        //绑定监听器
        mLogin.setOnClickListener(this);
        //用来显示OpenID的TextView
        mTvopenid=(TextView)findViewById(R.id.tv_openid);
        //用来显示昵称的Textview
        mTvname=(TextView)findViewById(R.id.tv_name);
       //用来显示头像的Imageview
        mIvuserlogo=(ImageView)findViewById(R.id.iv_logo);

    }
    public void onClick(View v) {
        // TODO Auto-generated method stub
        switch (v.getId()) {
        case R.id.login:  //设置onclick方法
            LoginQQ();
            break;
        default:
            break;
        }
    }
    //这里是调用QQ登录的关键代码
    public void LoginQQ() {
        //这里的APP_ID请换成你应用申请的APP_ID,我这里使用的是DEMO中官方提供的测试APP_ID 222222
    	mAppid = AppConstants.APP_ID;
        //第一个参数就是上面所说的申请的APPID,第二个是全局的Context上下文,这句话实现了调用QQ登录
        mTencent = Tencent.createInstance(mAppid,getApplicationContext());
        /**通过这句代码,SDK实现了QQ的登录,这个方法有三个参数,第一个参数是context上下文,第二个参数SCOPO 是一个String类型的字符串,表示一些权限
        官方文档中的说明:应用需要获得哪些API的权限,由“,”分隔。例如:SCOPE = “get_user_info,add_t”;所有权限用“all”
        第三个参数,是一个事件监听器,IUiListener接口的实例,这里用的是该接口的实现类 */
        mTencent.login(MainActivity.this,"all", new BaseUiListener());

    }
    /**当自定义的监听器实现IUiListener接口后,必须要实现接口的三个方法,
     * onComplete  onCancel onError
     *分别表示第三方登录成功,取消 ,错误。*/
    private class BaseUiListener implements IUiListener {

        public void onCancel() {
            // TODO Auto-generated method stub

        }
        public void onComplete(Object response) {
            // TODO Auto-generated method stub
            Toast.makeText(getApplicationContext(), "登录成功", 0).show();
            try {
                //获得的数据是JSON格式的,获得你想获得的内容
                //如果你不知道你能获得什么,看一下下面的LOG
                Log.e(TAG, "-------------"+response.toString());
                openidString = ((JSONObject) response).getString("openid");
                mTvopenid.setText(openidString);
                Log.e(TAG, "-------------"+openidString);
                //access_token= ((JSONObject) response).getString("access_token");              //expires_in = ((JSONObject) response).getString("expires_in");
            } catch (JSONException e) {
                // TODO Auto-generated catch block
                e.printStackTrace();
            }
            /**到此已经获得OpneID以及其他你想获得的内容了
            QQ登录成功了,我们还想获取一些QQ的基本信息,比如昵称,头像什么的,这个时候怎么办?
            sdk给我们提供了一个类UserInfo,这个类中封装了QQ用户的一些信息,我么可以通过这个类拿到这些信息
            如何得到这个UserInfo类呢?  */
            QQToken qqToken = mTencent.getQQToken();
            UserInfo info = new UserInfo(getApplicationContext(), qqToken);
            //这样我们就拿到这个类了,之后的操作就跟上面的一样了,同样是解析JSON

            info.getUserInfo(new IUiListener() {

                public void onComplete(final Object response) {
                    // TODO Auto-generated method stub
                    Log.e(TAG, "---------------111111");
                    Message msg = new Message();
                    msg.obj = response;
                    msg.what = 0;
                    mHandler.sendMessage(msg);
                    Log.e(TAG, "-----111---"+response.toString());
                    /**由于图片需要下载所以这里使用了线程,如果是想获得其他文字信息直接
                     * 在mHandler里进行操作
                     *
                     */
                    new Thread(){

                        @Override
                        public void run() {
                            // TODO Auto-generated method stub
                            JSONObject json = (JSONObject)response;
                            try {
                                bitmap = Util.getbitmap(json.getString("figureurl_qq_2"));
                            } catch (JSONException e) {
                                // TODO Auto-generated catch block
                                e.printStackTrace();
                            }
                            Message msg = new Message();
                            msg.obj = bitmap;
                            msg.what = 1;
                            mHandler.sendMessage(msg);
                        }
                    }.start();
                }
                public void onCancel() {
                    Log.e(TAG, "--------------111112");
                    // TODO Auto-generated method stub
                }
                public void onError(UiError arg0) {
                    // TODO Auto-generated method stub
                    Log.e(TAG, "-111113"+":"+arg0);
                }

            });

        }

        public void onError(UiError arg0) {
            // TODO Auto-generated method stub

        }

    }
    Handler mHandler = new Handler() {

        @Override
        public void handleMessage(Message msg) {
            if (msg.what == 0) {
                JSONObject response = (JSONObject) msg.obj;
                if (response.has("nickname")) {
                    try {
                        nicknameString=response.getString("nickname");

                        mTvname.setText(nicknameString);
                        Log.e(TAG, "--"+nicknameString);
                    } catch (JSONException e) {
                        // TODO Auto-generated catch block
                        e.printStackTrace();
                    }
                }
            }else if(msg.what == 1){
                Bitmap bitmap = (Bitmap)msg.obj;
                mIvuserlogo.setImageBitmap(bitmap);

            }
        }

    };


}
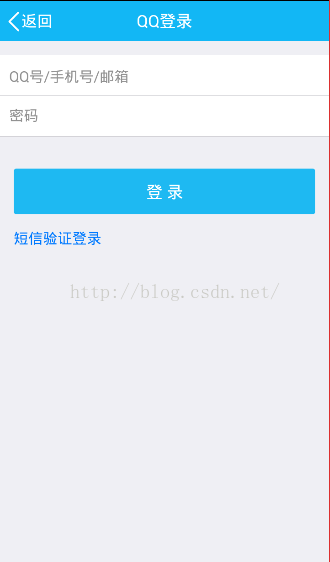
运行程序如下