6.7 样式的设置
在 Android 中,应用程序所呈现的样子不完全由布局文件和源代码决定。通过在 AndroidManifest.xml 中设置样式,也可以控制活动的外观,所设置的样式可以基于预定的样式,也可以自定义样式。
6.7.1.预定样式对话框
在 Android 中,定义了一些具体的样式,它们可以在应用程序中被使用。本示例介绍如何使用 Android 中的预定义样式。
参考示例程序:DialogActivity(ApiDemo=>App=>Activity=>Dialog)
源代码:com/example/android/apis/app/DialogActivity.java
布局文件:custom_dialog_activity.xml
AndroidManifest.xml 中的定义如下所示:
<activity android:name=".app.DialogActivity"
	 android:label="@string/activity_dialog"
	 android:theme="@android:style/Theme. Dialog" >
	 <intent-filter>
	 <action android:name="android.intent.action.MAIN" />
	 <category android:name="android.intent.category.SAMPLE_CODE" />
	 </intent-filter>
</activity>
DialogActivity 程序的运行结果如图所示:
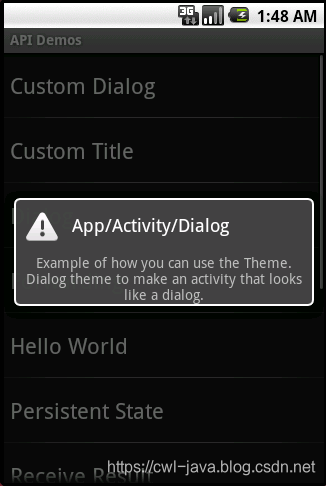
这个程序本质上是一个活动,但是显示的结果类似于一个小对话框,而且背景是透明的。这个程序的布局文件和源代码都并无特别的地方,效果是通过在AndroidManifest.xml 中设置其样式(android:theme)为 Theme.Dialog 来实现的,Theme.Dialog 是 Android 中的预定义样式。
6.7.2.自定义样式对话框
除了使用 Android 系统中已有的样式,还可是使用自定义的样式。本示例介绍如何使用自定义样式。
参考示例程序CustomDialogActivity(ApiDemo=>App=>Activity=>CustomDialog)
源代码:com/example/android/apis/app/CustomDialogActivity.java
布局文件:dialog_activity.xml
样式文件:values/styles.xml
AndroidManifest.xml 中的定义如下所示:
<activity android:name=".app.CustomDialogActivity"
	 android:label="@string/activity_custom_dialog"
	 android:theme="@style/Theme.CustomDialog“ >
	 <intent-filter>
	 <action android:name="android.intent.action.MAIN" />
	 <category android:name="android.intent.category.SAMPLE_CODE" />
	 </intent-filter>
</activity>
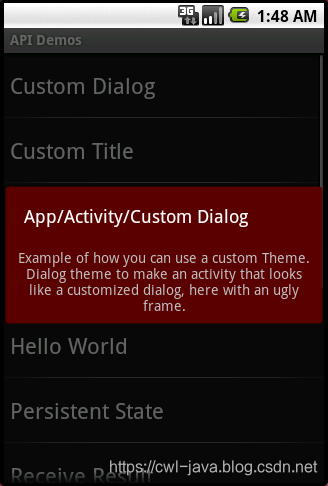
这个程序和上一个程序基本相同,区别在于样式被设置成了 CustomDialog,CustomDialog 是一个自定义样式,在 styles.xml 中进行定义,如下所示:
<style name="Theme.CustomDialog" parent="android:style/Theme.Dialog">
 <item name="android:windowBackground">@drawable/filled_box</item>
</style>
CustomDialog 本身是“扩展”了预定的 Dialog 样式,重新定义了窗口的背景为 drawable 中的 filled_box,这里引用了 filled_box.xml 文件,这个文件在 res/drawable 中,其中定义了相关内容。
<shape xmlns:android="http://schemas.android.com/apk/res/android">
	 <solid android:color="#f0600000"/>
	 <stroke android:width="3dp" color="#ffff8080"/>
	 <corners android:radius="3dp" />
	 <padding android:left="10dp" android:top="10dp"
	 android:right="10dp" android:bottom="10dp" />
</shape>
在定义的样式中,通过设置更多的值来获得不同的窗口效果。通过定义样式文件可以获得复用效果。
6.7.3.窗口透明样式示例
在 Android 程序中,当某一个活动启动之后可能需要使用背景透明的效果,本例用于描述背景透明的应用。
参考示例程序:TranslucentActivity(ApiDemo=>App=>Activity=>Translucent)
TranslucentBlurActivity(App=>Activity=>TranslucentBlur)
源代码:com/example/android/apis/app/TranslucentActivity.java
com/example/android/apis/app/TranslucentBlurActivity.java
样式文件:values/styles.xml
AndroidManifest.xml 中的定义如下所示:
<activity android:name=".app.TranslucentActivity"
	 android:label="@string/activity_translucent"
	 android:theme="@style/Theme.Translucent“ >
	 <intent-filter>
		 <action android:name="android.intent.action.MAIN" />
		 <category android:name="android.intent.category.SAMPLE_CODE" />
	 </intent-filter>
</activity>
	<activity android:name=".app.TranslucentBlurActivity"
	 android:label="@string/activity_translucent_blur"
	 android:theme="@style/Theme.Transparent“ >
	 <intent-filter>
		 <action android:name="android.intent.action.MAIN" />
		 <category android:name="android.intent.category.SAMPLE_CODE" />
	 </intent-filter>
</activity>
TranslucentActivity 和 TranslucentBlurActivity 程序的运行结果如图所示:
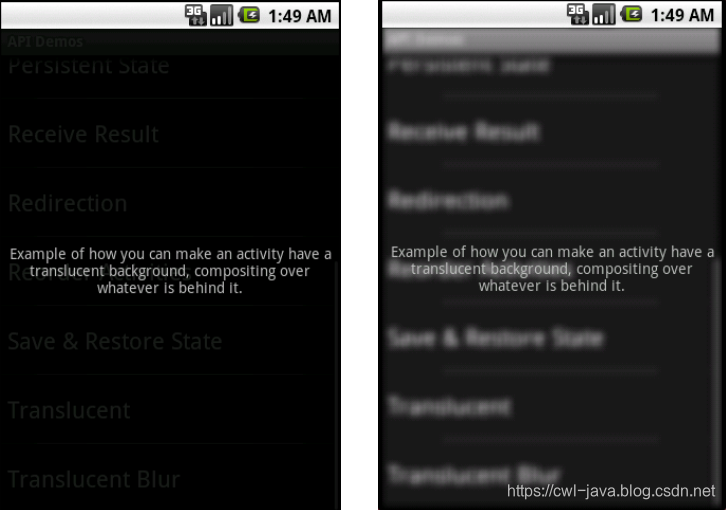
这两个程序使用的都是窗口透明的效果, TranslucentActivity 获得的效果是背景普通的透明,TranslucentBlurActivity 获得的效果是背景模糊的透明。它们的样式被设置成了 Translucent,这是一个用于描述背景透明的自定义样式,在 styles.xml 中定义。
<style name="Theme.Translucent" parent="android:style/Theme.Translucent">
	 <item name="android:windowBackground">
	 @drawable/translucent_background
	 </item>
	 <item name="android:windowNoTitle">true</item>
	 <item name="android:colorForeground">#fff</item>
</style>
translucent_background 值用于设置窗口的背景为透明,同时设置了windowNoTitle 表示窗口不包含标题栏。
TranslucentBlurActivity 之所以能够获得背景模糊的效果,是因为在源代码中进行了进一步的设置,如下所示:
public class TranslucentBlurActivity extends Activity {
    protected void onCreate(Bundle icicle) {
        super.onCreate(icicle);
        getWindow().
                setFlags(WindowManager.LayoutParams.FLAG_BLUR_BEHIND,
                        WindowManager.LayoutParams.FLAG_BLUR_BEHIND);
        setContentView(R.layout.translucent_background);
    }
}
设置模糊效果是通过窗口管理器(WindowManager)设置参数来完成的,这种设置只有在背景设置为透明后才能显示效果。
