SSH整合:Spring5.2.2+Struts2.5.22+Hibernate5.8
一、环境搭建
数据库:MySQL8
JDK:13
jar包
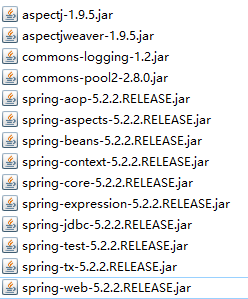
- Spring
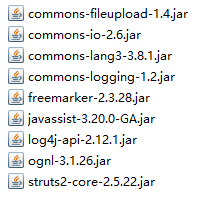
- Struts
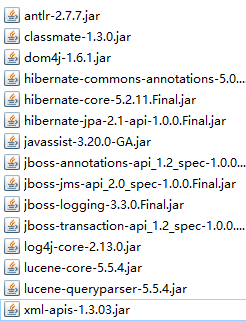
- Hibernate
- Spring整合Hibernate

- Struts整合Spring

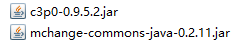
- -C3p0
- 连接数据库

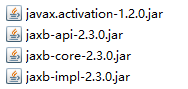
- 在JDK8以上使用Hibernate需导入
二、Spring整合Hibernate,带有hibernate.cfg.xml的案例编写
1. 建表,创建映射类,配置映射类配置文件文件
<?xml version="1.0" encoding="utf-8"?>
<!DOCTYPE hibernate-mapping PUBLIC
        "-//Hibernate/Hibernate Mapping DTD 3.0//EN"
        "http://www.hibernate.org/dtd/hibernate-mapping-3.0.dtd">
<hibernate-mapping>
	<!--当表名和类名一致时,table可以省略,当属性名和字段名一致时column可以省略-->
    <class name="映射类的带包的全类名" table="与类对应的数据库中表的名字">
        <id name="id" column="字段名">
            <generator class="native"></generator>
        </id>
        <property name="普通属性" column="字段名"></property>
    </class>
</hibernate-mapping>
2. dao层
public class UserDaoImpl implements UserDao {
	//使用HibernateTemplate模板
    private HibernateTemplate hibernateTemplate;
    public void setHibernateTemplate(HibernateTemplate hibernateTemplate) {
        this.hibernateTemplate = hibernateTemplate;
    }
    @Override
    public void save(User user) {
        this.hibernateTemplate.save(user);
    }
}
3.Service层
public class UserServiceImpl implements UserService {
    private UserDao userDao;
    public void setUserDao(UserDao userDao) {
        this.userDao = userDao;
    }
    @Override
    public void save(User user) {
        userDao.save(user);
    }
}
4.Hibernate配置文件hibernate.cfg.xml
<?xml version="1.0" encoding="utf-8"?>
<!DOCTYPE hibernate-configuration PUBLIC
        "-//Hibernate/Hibernate Configuration DTD 3.0//EN"
        "http://www.hibernate.org/dtd/hibernate-configuration-3.0.dtd">
<hibernate-configuration>
    <session-factory>
        <!--配置数据库方言-->
        <property name="hibernate.dialect">org.hibernate.dialect.MySQLDialect</property>
        <!--配置打印SQL语句-->
        <property name="hibernate.show_sql">true</property>
        <property name="hibernate.format_sql">true</property>
        <!--加载映射类的配置文件-->
        <mapping resource="spring_hibernate/User.hbm.xml"></mapping>
    </session-factory>
</hibernate-configuration>
5.Spring配置文件applicationContext.xml
<?xml version="1.0" encoding="utf-8"?>
<beans xmlns="http://www.springframework.org/schema/beans"
xmlns:xsi="http://www.w3.org/2001/XMLSchema-instance"
xmlns:tx="http://www.springframework.org/schema/tx"
xmlns:aop="http://www.springframework.org/schema/aop"
xsi:schemaLocation="http://www.springframework.org/schema/beans
http://www.springframework.org/schema/beans/spring-beans.xsd
http://www.springframework.org/schema/tx
http://www.springframework.org/schema/tx/spring-tx.xsd
http://www.springframework.org/schema/aop
http://www.springframework.org/schema/aop/spring-aop.xsd">
<!--配置C3P0数据库连接池-->
<bean id="dataSource" class="com.mchange.v2.c3p0.ComboPooledDataSource">
<property name="driverClass" value="com.mysql.cj.jdbc.Driver"></property>
<property name="jdbcUrl" value="jdbc:mysql://localhost:3306/demo?useSSL=false&serverTimezone=UTC"></property>
<property name="user" value="root"></property>
<property name="password" value="123"></property>
</bean>
<!--HibernateTemplate底层使用Hibernate Session,Hibernate Session是从SessionFactory中获取的,
而SessionFactory是数据库已经从hibernate.cfg.xml的配置文件中获得的-->
<bean id="sessionFactory" class="org.springframework.orm.hibernate5.LocalSessionFactoryBean">
<property name="dataSource" ref="dataSource"></property>
<property name="configLocation" value="classpath:spring_hibernate/hibernate.cfg.xml"></property>
</bean>
<bean id="hibernateTemplate" class="org.springframework.orm.hibernate5.HibernateTemplate">
<property name="sessionFactory" ref="sessionFactory"></property>
</bean>
<!--配置UserDaoImpl的bean-->
<bean id="userDao" class="spring_hibernate.dao.impl.UserDaoImpl">
<property name="hibernateTemplate" ref="hibernateTemplate"></property>
</bean>
<!--配置UserDaoService的bean-->
<bean id="userService" class="spring_hibernate.service.impl.UserServiceImpl">
<property name="userDao" ref="userDao"></property>
</bean>
<!--配置事务管理器HibernateTransactionManager-->
<bean id="txManager" class="org.springframework.orm.hibernate5.HibernateTransactionManager">
<!--事务管理器需要事务,事务从连接中获取-->
<property name="sessionFactory" ref="sessionFactory"></property>
</bean>
<!--配置事务通知,事务通知需要事务管理器-->
<tx:advice id="txAdvice" transaction-manager="txManager">
<!--配置事务通知详情-->
<tx:attributes>
<tx:method name="save"/>
</tx:attributes>
</tx:advice>
<!--配置切入点-->
<aop:config>
<aop:advisor advice-ref="txAdvice" pointcut="execution(* spring_hibernate.service..*.*(..))"></aop:advisor>
</aop:config>
</beans>
6.测试类
//Spring整合JUnit
@RunWith(SpringJUnit4ClassRunner.class)
//加载applicationContext.xml
@ContextConfiguration(locations = "classpath:spring_hibernate/applicationContext.xml")
public class testApp {
    @Autowired
    private UserService userService;
    @Test
    public void test(){
        User user = new User();
        user.setUsername("Jack");
        user.setPassword("123");
        user.setAge(12);
        userService.save(user);
    }
}
三、Spring整合Hibernate,不带有hibernate.cfg.xml以及dao层继承HibernateDaoSupport的案例编写
1.修改dao层
public class UserDaoImpl extends HibernateDaoSupport implements UserDao {
    @Override
    public void save(User user) {
        //从父类HibernateDaoSupport中获取HibernateTemplate
        this.getHibernateTemplate().save(user);
    }
}
2.删除hibernate.cfg.xml,将hibernate的一些配置配置到applicationContext.xml中
<?xml version="1.0" encoding="utf-8"?>
<beans xmlns="http://www.springframework.org/schema/beans"
xmlns:xsi="http://www.w3.org/2001/XMLSchema-instance"
xmlns:tx="http://www.springframework.org/schema/tx"
xmlns:aop="http://www.springframework.org/schema/aop"
xsi:schemaLocation="http://www.springframework.org/schema/beans
http://www.springframework.org/schema/beans/spring-beans.xsd
http://www.springframework.org/schema/tx
http://www.springframework.org/schema/tx/spring-tx.xsd
http://www.springframework.org/schema/aop
http://www.springframework.org/schema/aop/spring-aop.xsd">
<!--配置c3p0数据库连接池-->
<bean id="dataSource" class="com.mchange.v2.c3p0.ComboPooledDataSource">
<property name="driverClass" value="com.mysql.cj.jdbc.Driver"></property>
<property name="jdbcUrl" value="jdbc:mysql://localhost:3306/demo?useSSL=false&serverTimezone=UTC"></property>
<property name="user" value="root"></property>
<property name="password" value="123"></property>
</bean>
<!--sessionFactory用来创建Hibernate Session对象-->
<bean id="sessionFactory" class="org.springframework.orm.hibernate5.LocalSessionFactoryBean">
<!--需要数据库连接-->
<property name="dataSource" ref="dataSource"></property>
<!--配置以往hibernate.cfg.xml中的一些其他属性-->
<property name="hibernateProperties">
<props>
<prop key="hibernate.dialect">org.hibernate.dialect.MySQLDialect</prop>
<prop key="hibernate.show_sql">true</prop>
<prop key="hibernate.format_sql">true</prop>
</props>
</property>
<!--配置映射类配置文件的位置,mappingLocation支持通配符*-->
<property name="mappingLocations" value="classpath:spring_hibernate/*/User.hbm.xml"></property>
</bean>
<!--配置UserDaoImpl的bean-->
<!--因为UserDaoImpl继承了HibernateDaoSupport,底层需要sessionFactory-->
<bean id="userDao" class="spring_hibernate.dao.impl.UserDaoImpl">
<property name="sessionFactory" ref="sessionFactory"></property>
</bean>
<!--配置UserDaoService的bean-->
<bean id="userService" class="spring_hibernate.service.impl.UserServiceImpl">
<property name="userDao" ref="userDao"></property>
</bean>
<!--配置事务管理器HibernateTransactionManager-->
<bean id="txManager" class="org.springframework.orm.hibernate5.HibernateTransactionManager">
<!--事务管理器需要事务,事务从连接中获取-->
<!--<property name="dataSource" ref="dataSource"></property>-->
<property name="sessionFactory" ref="sessionFactory"></property>
</bean>
<!--配置事务通知,事务通知需要事务管理器-->
<tx:advice id="txAdvice" transaction-manager="txManager">
<!--配置事务通知详情-->
<tx:attributes>
<tx:method name="save"/>
</tx:attributes>
</tx:advice>
<!--配置切入点-->
<aop:config>
<aop:advisor advice-ref="txAdvice" pointcut="execution(* spring_hibernate.service..*.*(..))"></aop:advisor>
</aop:config>
</beans>
四、Struts整合Spring
1.创建Action
public class UserAction extends ActionSupport implements ModelDriven<User> {
	//模型驱动封装数据
    User user = new User();
    @Override
    public User getModel() {
        return user;
    }
	//Spring动态注入userService
    private UserService userService;
    public void setUserService(UserService userService) {
        this.userService = userService;
    }

    public String save(){
        userService.save(user);
        return "success";
    }
}
2.在applicationContext中配置Action的bean
<bean id="userAction" class="spring_hibernate.action.UserAction">
        <property name="userService" ref="userService"></property>
</bean>
3.配置struts.xml
<?xml version="1.0" encoding="utf-8"?>
<!DOCTYPE struts PUBLIC "-//Apache Software Foundation//DTD Struts Configuration 2.5//EN"
        "http://struts.apache.org/dtds/struts-2.5.dtd">
<struts>
    <!--<constant name="struts.enable.DynamicMethodInvocation" value="true"></constant>-->
    <package name="default" namespace="/" extends="struts-default">
       	<!--struts2.5使用通配符访问action必须要配置这个属性-->
        <global-allowed-methods>regex:.*</global-allowed-methods>
        <!--因为在applicationContext.xml中配置Action的bean所以class直接引用就行-->
        <action name="userAction_*" class="userAction" method="{1}">
            <result>/success.jsp</result>
        </action>
    </package>
</struts>
注意:如果applicationContext.xml中的userService的id和Action中Userservice的属性同名的话,第2步可以省略,将第3步中action的class改为全限定类名即可

 因此修改struts.xml

4.编写index.jsp
<form action="${pageContext.request.contextPath}/userAction_save.action" method="post">
      姓名:<input type="text" name="username"/>
      密码:<input type="password" name="password"/>
      年龄:<input type="text" name="age"/>
      <input type="submit" value="提交"/>
</form>
