网站更换皮肤,有如下三种思路供参考:
-
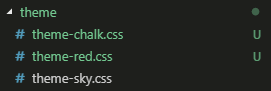
预定义几套已经写好的样式文件,如下。然后动态切换选中的主题对应的css文件。
-
在根元素上定义一个用来设置主题的class,然后动态更换该class,以达到切换主题的目的。
-
以上两种方式都可以轻易达到切换主题的目的,但是有一个限制,就是我们只能有定义好的这几种主题可以切换。
今天我们来介绍一种新的更换主题的方式:
优点: 该方式能够通过拾色器选择自己喜欢的主题色,并根据这个选择的主题色自由生成我们想要的主题。
思路: 根据拾色器选择的颜色,配合一定的算法,动态生成一套主题样式,并将生成的样式插入到DOM中,作为全局样式。
步骤:
1. 新建主题定义组件theme-picker.vue, 代码如下:
注意:
- 设计中将主题样式文件写入在**<script type=‘text/template’ id=“themeColorInfo”>**中,目的有两点:
- 可以像在style标签中写样式一样,结构清晰且便于维护。
- 可以完美与{{theme}}数据模板结合使用。
- 不会再Dom中显示,且可以很容易获取其中的样式内容。
- 由于是动态获取<script type=‘text/template’ id=“themeColorInfo”>中的样式,而vue中的DOM更新是异步的,所以获取最终生成的主题样式的calTheme函数需要在nextTick中执行才有效。
- 主题颜色存入本地,进行持久化。主题色优先获取本地已选择的主题色,默认主题色次之。
<template>
  <div>
    <input type="color" id='selectTheme' v-model="theme">
    <script type='text/template' id="themeColorInfo">
      .theme-color {
        color: {{theme}}
      }
      .theme-bg {
        background-color: {{theme}}
      }
      a {
        color: {{theme}};
        text-decoration: none;
      }
      a:hover {
        color: white;
        background-color: {{theme}}
      }
    </script>
  </div>
</template>

<script>
export default {
  data () {
    return {
      theme: ''
    }
  },
  props: {
    themeColor: { // 默认主题颜色
      type: String,
      default: '#000000'
    }
  },
  created () {
    // 优先获取本地已选择的主题色,默认主题色次之。
    let themeColor = localStorage.getItem('themeColor')
    this.theme = themeColor || this.themeColor
  },
  mounted () {
    this.$nextTick(() => {
      this.calTheme()
    })
  },
  watch: {
    theme (val, oldVal) {
      // 已选择的主题颜色存入本地,持久化。
      localStorage.setItem('themeColor', this.theme)
      this.$nextTick(() => {
        this.calTheme()
      })
    }
  },
  methods: {
    /**
     * 因为calTheme函数需要根据theme的值,动态获取<script type='text/template' id="themeColorInfo">中的样式文件
     *而vue中的DOM更新是异步的,所以calTheme函数需要在nextTick中执行才有效
    */
    calTheme () {
      let colorStr = document.getElementById('themeColorInfo').innerHTML
      let colorPickerStyle = document.getElementById('color-picker-style')
      // 判断是否存在主题样式的style标签
      // 如果存在则替换最新的样式信息,否则新建一个style标签并插入新的主题样式信息
      if (colorPickerStyle) {
        colorPickerStyle.innerHTML = colorStr
      } else {
        let oStyle = document.createElement('style')
        oStyle.id = 'color-picker-style'
        oStyle.innerHTML = colorStr
        document.body.appendChild(oStyle)
      }
    }
  }
}
</script>
2. 在网站中任意一个组件引入theme-picker.vue, 切换主题即可看到效果。
<template>
<div class="page-wrap theme-color">
<header class="theme-bg">
<h2>页面头部</h2>
<themePicker></themePicker>
</header>
<section class="page-content">
<div><a href="#">样式一</a></div>
<div><a href="#">样式二</a></div>
<div><a href="#">样式三</a></div>
<div><a href="#">样式四</a></div>
</section>
</div>
</template>
<script>
import themePicker from './theme-picker/themePicker.vue'
export default {
name: 'HelloWorld',
data () {
return {
msg: 'Welcome to Your Vue.js App'
}
},
components: {
themePicker
}
}
</script>
<!-- Add "scoped" attribute to limit CSS to this component only -->
<style lang="less" scoped>
.page-wrap{
padding-top: 60px;
header {
position: fixed;
left: 0;
top: 0;
width: 100%;
height: 60px;
color: white;
}
.page-content {
display: flex;
flex-direction: row;
justify-content: center;
div {
width: 200px;
height: 240px;
margin: 10px;
border: 1px solid #eee;
position: relative;
a{
position: absolute;
bottom: 0;
left: 0;
width: 100%;
height: 32px;
line-height: 32px;
}
}
}
}
</style>
效果:

这只是换皮肤的一种实现思路,实现的方式当然不止一种,如果有更好的实现方式,欢迎大家分享和指正。
文中这只是一个简单的例子,旨在分享一种实现方式。具体实现时,我们也可以配合一定的算法,根据所选择的颜色,生成一套多色或者更复杂更贴合具体业务的主题样式。
