使用Flask和Vue制作一个基本的CRUD单页面应用,其中后台用到了RESTful API
参考原版的教程https://testdriven.io/blog/developing-a-single-page-app-with-flask-and-vuejs/ 步骤清晰,动作规范.
下面开始我的实际操练步骤记录
最终效果
环境准备
系统 : Windows10 1903
IDE : VSCode
Python : 3.7.5
Node.js : 10.16.3
# 安装pyton-venv
pip install virtualenv
创建venv环境&安装Flask
C:\Users\lpwm\Desktop>cd flask-vue-crud
C:\Users\lpwm\Desktop\flask-vue-crud>mkdir server
C:\Users\lpwm\Desktop\flask-vue-crud>cd server
C:\Users\lpwm\Desktop\flask-vue-crud\server>python -m venv env
C:\Users\lpwm\Desktop\flask-vue-crud\server>env\Scripts\activate.bat
(env) C:\Users\lpwm\Desktop\flask-vue-crud\server>pip install flask flask-cors
测试Flask功能
打开Visual Studio Code并连接到WSL,在server文件夹中创建app.py文件
"""
测试Flask
"""
from flask import Flask, jsonify
from flask_cors import CORS

# 配置参数,开启debug模式,json转换中文不使用unicode
DEBUG = True
JSON_AS_ASCII = False

# 实例化Flask
app = Flask(__name__)
app.config.from_object(__name__)

# 开启CORS,解决跨域调用问题
CORS(app, resources={r'/*': {'origins': '*'}})
# 也可以简单直接写CORS(app)

# 配置路由
@app.route('/ping', methods=['GET'])
def ping_pong():
    return jsonify('pong!中文!')


if __name__ == "__main__":
    app.run()
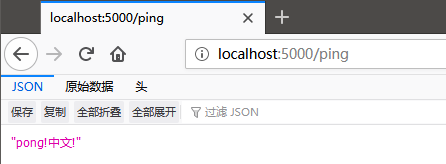
运行app.py后打开浏览器访问http://127.0.0.1:5000/ping可以看到返回"pong!中文!",Flask工作正常.
安装Vue
# 退出venv环境
(env) C:\Users\lpwm\Desktop\flask-vue-crud\server>env\Scripts\deactivate.bat
# 配置使用淘宝的npm镜像站
npm config set registry https://registry.npm.taobao.org
# 安装vue/cli
npm install -g @vue/cli
下面开始使用vue的cli命令行创建项目,在flask-vue-crud位置执行:
C:\Users\lpwm\Desktop\flask-vue-crud>vue create client

Vue CLI v4.0.4
? Please pick a preset:
  default (babel, eslint)
❯ Manually select features
? Check the features needed for your project: (Press <space> to select, <a> to toggle all, <i> to invert selection)
 ◉ Babel
 ◯ TypeScript
 ◯ Progressive Web App (PWA) Support
❯◉ Router
 ◯ Vuex
 ◯ CSS Pre-processors
 ◯ Linter / Formatter		# 被Linter折腾了一天,最终决定放弃了,代码样式自己写的爽就行了
 ◯ Unit Testing
 ◯ E2E Testing
? Use history mode for router? (Requires proper server setup for index fallback in production) Yes
? Where do you prefer placing config for Babel, PostCSS, ESLint, etc.?
  In dedicated config files
❯ In package.json
? Save this as a preset for future projects? (y/N) No

# 安装速度还可以,差不多2分钟吧
?  Successfully created project client.
?  Get started with the following commands:

 $ cd client
 $ npm run serve
# 参照上面命令跑一下试试

棒棒哒~下面开始解释vue命令创建的client/src文件夹中主要文件的作用
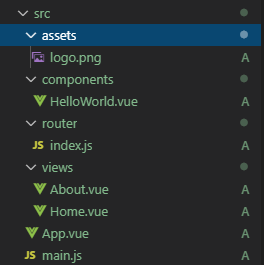
| 文件名 | 作用 |
|---|---|
| main.js | 应用的主入口,用来加载和初始化Vue的root根模块 |
| App.vue | root根模块,用来加载渲染需要用到的其他模块 |
| components文件夹 | UI中用到的模块都放在这里 |
| router/index.js | 模块和URL映射 |
| views文件夹 | 模板 |
| assets文件夹 | 用来存放静态css,js,字体等文件 |
其中重点说一下client/src/components/HelloWorld.vue这个文件,这是一个单模块文件,包含下面三部分内容:
<template></template>:静态HTML模板<script></script>:使用js脚本与模块进行交互<style></style>:CSS样式表
HBuilderX配置
插件安装
- eslint-plugin-vue
- js-beautify
- NPM
修改format插件的jsbeatufyrc.js文件options将换行符改为LF以兼容Linux

"eol": "\n", //行结束符 Win:\r\n Linux:\n
测试Vue
开始改造上面flask输出的ping路径.
删除views文件夹,同时删除components下的HelloWorld.vue,并在components文件夹中创建一个新的Ping.vue文件:
<template>
  <div>
    <p>{{ msg }}</p>
  </div>
</template>

<script>
export default {
  name: 'Ping',
  data() {
    return {
      msg: 'Hello!',
    };
  },
};
</script>
修改client/src/router/index.js映射URL的/ping路径到Ping.vue模块:
import Vue from 'vue';
import VueRouter from 'vue-router';
import Ping from '../component/Ping.vue';

Vue.use(VueRouter);

const routes = [
  {
    path: '/ping',
    name: 'Ping',
    component: Ping,
  },
];

const router = new VueRouter({
  mode: 'history',
  base: process.env.BASE_URL,
  routes,
});

export default router;
修改App.vue
<template>
  <div id="app">
    <router-view/>
  </div>
</template>
再打开浏览器访问http://127.0.0.1:8080/ping

接下来使用axios库来连接Vue前端和Flask后端使用AJAX请求进行通信,axios详细API文档参考这里Axios中文说明
PS C:\Users\lpwm\Desktop\flask-vue-crud\client> npm install axios
更新一下Ping.vue文件中的<scipt>标签内容:
<script>
import axios from 'axios';

export default {
  name: 'Ping',
  data() {
    return {
      msg: ''
    };
  },
  methods: {
    getMessage() {
      const path = 'http://localhost:5000/ping';
      axios
        .get(path)
        .then(res => {
          this.msg = res.data;
        })
        .catch(error => {
          console.error(error);
        });
    }
  },
  created() {
    this.getMessage();
  }
};
</script>
这里使用了ES6语法中的箭头函数(Arrow Function),援引一下MDN中的相关解释MDN完整原文
var elements = [
  'Hydrogen',
  'Helium',
  'Lithium',
  'Beryllium'
];

elements.map(function(element) {
  return element.length;
}); // 返回数组:[8, 6, 7, 9]

// 上面的普通函数可以改写成如下的箭头函数
elements.map((element) => {
  return element.length;
}); // [8, 6, 7, 9]

// 当箭头函数只有一个参数时,可以省略参数的圆括号
elements.map(element => {
 return element.length;
}); // [8, 6, 7, 9]

// 当箭头函数的函数体只有一个 `return` 语句时,可以省略 `return` 关键字和方法体的花括号
elements.map(element => element.length); // [8, 6, 7, 9]

// 在这个例子中,因为我们只需要 `length` 属性,所以可以使用参数解构
// 需要注意的是字符串 `"length"` 是我们想要获得的属性的名称,而 `lengthFooBArX` 则只是个变量名,
// 可以替换成任意合法的变量名
elements.map(({ "length": lengthFooBArX }) => lengthFooBArX); // [8, 6, 7, 9]
现在分别在两个VSCode中运行起来Flask应用和使用npm run serve跑起来vue应用

打开浏览器访问http://localhost:8080/ping可以看到收到后台Flask返回的pong数据
安装Bootstrap
npm install @bootstrap --save
安装结束后警告缺少jquery依赖,这个不用管它,使用Vue就不用jQuery了,避免产生语法冲突.
在client/src/main.js中引入Bootstrap
import 'bootstrap/dist/css/bootstrap.css';
import Vue from 'vue';
import App from './App.vue';
import router from './router';

Vue.config.productionTip = false;

new Vue({
  router,
  render: h => h(App),
}).$mount('#app');
更新client/src/App.vue为app所在的DIV添加个margin-top的样式
<template>
  <div id="app">
    <router-view />
  </div>
</template>

<style>
#app {
  margin-top: 60px;
}
</style>
更新client/src/components/Ping.vue添加个Bootstrap按钮控件试试效果
<template>
  <div class='container'>
    <p>{{ msg }}</p>
    <div class='btn btn-primary'>{{msg}}</div>
  </div>
</template>

<script>
import axios from 'axios';

export default {
  name: 'Ping',
  data() {
    return {
      msg: ''
    };
  },
  methods: {
    getMessage() {
      const path = 'http://localhost:5000/ping';
      axios
        .get(path)
        .then(res => {
          this.msg = res.data;
        })
        .catch(error => {
          console.error(error);
        });
    }
  },
  created() {
    this.getMessage();
  }
};
</script>
重新跑一下vue应用
npm run serve

接下来,在components中添加一个新的模块Books.vue
<template>
  <div class="container">
    <p>books</p>
  </div>
</template>
更新一下路由router/index.js将首页/路由指向Books模块
import Vue from "vue";
import VueRouter from "vue-router";
import Books from "../components/Books.vue";
import Ping from "../components/Ping.vue";

Vue.use(VueRouter);

const routes = [
  {
    path: "/",
    name: "books",
    component: Books
  },
  {
    path: "/ping",
    name: "Ping",
    component: Ping
  }
];

const router = new VueRouter({
  mode: "history",
  base: process.env.BASE_URL,
  routes
});

export default router;
分别测试一下访问http://localhost:8080和http://localhost:8080/ping可以看到路由工作正常
最后,修改一下Books模块中的<template></template>模板部分代码,写一个快速的Bootstrap风格表格
<template>
  <div class="container">
    <div class="row">
      <div class="col-sm-10">
        <h1>Books</h1>
        <hr><br><br>
        <button type="button" class="btn btn-success btn-sm">Add Book</button>
        <br><br>
        <table class="table table-hover">
          <thead>
            <tr>
              <th scope="col">Title</th>
              <th scope="col">Author</th>
              <th scope="col">Read?</th>
              <th></th>
            </tr>
          </thead>
          <tbody>
            <tr>
              <td>foo</td>
              <td>bar</td>
              <td>foobar</td>
              <td>
                <div class="btn-group" role="group">
                  <button type="button" class="btn btn-warning btn-sm">Update</button>
                  <button type="button" class="btn btn-danger btn-sm ml-2">Delete</button>
                </div>
              </td>
            </tr>
          </tbody>
        </table>
      </div>
    </div>
  </div>
</template>
预览效果:

接下来就是要开始搞CRUD部分的功能实现了
要实现的目标:
使用Python和Flask怼一个RESTfu API规范的后端服务,使用HTTP中的GET,POST,PUT,DELETE方法进行通信.
使用VUE.js怼单页面风格的前端界面和后端的API进行交互
GET路由
Server端(Flask)
给server/app.py中添加一个存放图书的数组变量模拟数据
BOOKS = [
    {
        'title': 'On the Road',
        'author': 'Jack Kerouac',
        'read': True
    },
    {
        'title': 'Harry Potter and the Philosopher\'s Stone',
        'author': 'J. K. Rowling',
        'read': False
    },
    {
        'title': 'Green Eggs and Ham',
        'author': 'Dr. Seuss',
        'read': True
    }
]
修改Flask主文件app.py的路由
@app.route('/books', methods=['GET'])
def all_books():
    return jsonify({
        'status': 'success',
        'books': BOOKS
    })
现在测试一下访问http://localhost:5000/books可以拿到flask返回的json数据

Client端(VUE)
更新一下components/Books.vue模块
<template>
  <div class="container">
    <div class="row">
      <div class="col-sm-10">
        <h1>Books</h1>
        <hr />
        <br />
        <br />
        <button type="button" class="btn btn-success btn-sm">Add Book</button>
        <br />
        <br />
        <table class="table table-hover">
          <thead>
            <tr>
              <th scope="col">Title</th>
              <th scope="col">Author</th>
              <th scope="col">Read?</th>
              <th></th>
            </tr>
          </thead>
          <tbody>
            <tr v-for="(book, index) in books" :key="index">
              <td>{{ book.title }}</td>
              <td>{{ book.author }}</td>
              <td>
                <span v-if="book.read">Yes</span>
                <span v-else>No</span>
              </td>
              <td>
                <div class="btn-group" role="group">
                  <button type="button" class="btn btn-warning btn-sm">Update</button>
                  <button type="button" class="btn btn-danger btn-sm ml-2">Delete</button>
                </div>
              </td>
            </tr>
          </tbody>
        </table>
      </div>
    </div>
  </div>
</template>

<script>
import axios from "axios";

export default {
  data() {
    return {
      books: []
    };
  },
  methods: {
    getBooks() {
      const path = "http://localhost:5000/books";
      axios
        .get(path)
        .then(res => {
          this.books = res.data.books;
        })
        .catch(error => {
          // eslint-disable-next-line
          console.error(error);
        });
    }
  },
  created() {
    this.getBooks();
  }
};
</script>
当Books.vue模块created()完成的时候,调用getBooks()函数从后台获取图书数据
模板部分使用了v-for标签,在table中循环输出行,将循环过程中的index作为了key主键(该主键设置是VUE规范推荐的,据说可以提高渲染效率). 使用v-if标签来判断渲染read是否的值.

Bootstrap Vue
接下来使用Bootstrap中的模态框控件来实现添加新书的界面,需要使用npm安装bootstrap-vue包,注意这个包和之前已经装好的bootstrap包是不一样的,由于原生的bootstrap中模态框是基于jQuery实现的,而VUE和jQuery同时使用会产生语法上的冲突,所以这里要引入这个专门为vue改良的bootstrap包,后面的html语法也会有些不同,现在先按下不表.
安装一下:
npm install @bootstrap-vue --save
修改client/src/main.js启用bootstrap-vue
import 'bootstrap/dist/css/bootstrap.css';
import BootstrapVue from 'bootstrap-vue';
import Vue from 'vue';
import App from './App.vue';
import router from './router';

Vue.use(BootstrapVue);

Vue.config.productionTip = false;

new Vue({
  router,
  render: h => h(App),
}).$mount('#app');
POST路由
Server端
更新app.py处理添加新书时POST请求的路由,修改之前添加过的/books路由, methods增加POST类型,然后通过判断request.method来确定接下来要进行的操作
@app.route('/books', methods=['GET', 'POST'])
def all_books():
    response_object = {'status': 'success'}
    if request.method == 'POST':
        post_data = request.get_json()
        BOOKS.append({
            'title': post_data.get('title'),
            'author': post_data.get('author'),
            'read': post_data.get('read')
        })
        response_object['message'] = 'Book added!'
    else:
        response_object['books'] = BOOKS
    return jsonify(response_object)
别忘了更新一下import部分的引入:
from flask import Flask, jsonify, request
可以使用WSL中的curl命令测试发送POST数据
$ curl -X POST http://localhost:5000/books -d \
  '{"title": "1Q84", "author": "Haruki Murakami", "read": "true"}' \
  -H 'Content-Type: application/json'

使用浏览器访问http://localhost:5000/books默认的GET请求可以正常获取到图书的json数据

Client端
在主<div>里面添加一个模态框来实现增加新图书的界面
<b-modal ref="addBookModal"
         id="book-modal"
         title="Add a new book"
         hide-footer>
  <b-form @submit="onSubmit" @reset="onReset" class="w-100">
  <b-form-group id="form-title-group"
                label="Title:"
                label-for="form-title-input">
      <b-form-input id="form-title-input"
                    type="text"
                    v-model="addBookForm.title"
                    required
                    placeholder="Enter title">
      </b-form-input>
    </b-form-group>
    <b-form-group id="form-author-group"
                  label="Author:"
                  label-for="form-author-input">
        <b-form-input id="form-author-input"
                      type="text"
                      v-model="addBookForm.author"
                      required
                      placeholder="Enter author">
        </b-form-input>
      </b-form-group>
    <b-form-group id="form-read-group">
      <b-form-checkbox-group v-model="addBookForm.read" id="form-checks">
        <b-form-checkbox value="true">Read?</b-form-checkbox>
      </b-form-checkbox-group>
    </b-form-group>
    <b-button type="submit" variant="primary">Submit</b-button>
    <b-button type="reset" variant="danger">Reset</b-button>
  </b-form>
</b-modal>
这里使用了v-model标签来绑定input输入框中的值和VUE中data数据对象中的addBookForm变量(这个变量在下面代码中声明)
更新下script部分的代码:
<script>
import axios from 'axios';

export default {
  data() {
    return {
      books: [],
      addBookForm: {
        title: '',
        author: '',
        read: [],
      },
    };
  },
  methods: {
    getBooks() {
      const path = 'http://localhost:5000/books';
      axios.get(path)
        .then((res) => {
          this.books = res.data.books;
        })
        .catch((error) => {
          // eslint-disable-next-line
          console.error(error);
        });
    },
    addBook(payload) {
      const path = 'http://localhost:5000/books';
      axios.post(path, payload)
        .then(() => {
          this.getBooks();
        })
        .catch((error) => {
          // eslint-disable-next-line
          console.log(error);
          this.getBooks();
        });
    },
    initForm() {
      this.addBookForm.title = '';
      this.addBookForm.author = '';
      this.addBookForm.read = [];
    },
    onSubmit(evt) {
      evt.preventDefault();
      this.$refs.addBookModal.hide();
      let read = false;
      if (this.addBookForm.read[0]) read = true;
      const payload = {
        title: this.addBookForm.title,
        author: this.addBookForm.author,
        read, // property shorthand
      };
      this.addBook(payload);
      this.initForm();
    },
    onReset(evt) {
      evt.preventDefault();
      this.$refs.addBookModal.hide();
      this.initForm();
    },
  },
  created() {
    this.getBooks();
  },
};
</script>
代码解释一下:
data中新创建了一个addBookForm对象,用来和表单中的input控件使用v-model标签进行数据双向绑定(这正是VUE的魅力所在)onSubmit()函数和<b-form>中的submit属性进行了绑定,用户在提交表单的时候会调用.其中evt.preventDefault()是用来屏蔽浏览器默认的提交表单操作,this.$refs.addBookModal.hide()用来关闭模态框,随后调用addBook()提交数据给后台添加新图书,最后通过initForm()重置表单数据addBook()函数发送POST请求给后台的/books路径用来添加新图书
最后更新一下模板中"Add Book"按钮以触发模态框显示
<button type="button" class="btn btn-success btn-sm" v-b-modal.book-modal>Add Book</button>
现在Books.vue模块的完整代码应该是这样:
<template>
  <div class="container">
    <div class="row">
      <div class="col-sm-10">
        <h1>Books</h1>
        <hr />
        <br />
        <br />
        <button type="button" class="btn btn-success btn-sm" v-b-modal.book-modal>Add Book</button>
        <br />
        <br />
        <table class="table table-hover">
          <thead>
            <tr>
              <th scope="col">Title</th>
              <th scope="col">Author</th>
              <th scope="col">Read?</th>
              <th></th>
            </tr>
          </thead>
          <tbody>
            <tr v-for="(book, index) in books" :key="index">
              <td>{{ book.title }}</td>
              <td>{{ book.author }}</td>
              <td>
                <span v-if="book.read">Yes</span>
                <span v-else>No</span>
              </td>
              <td>
                <div class="btn-group" role="group">
                  <button type="button" class="btn btn-warning btn-sm">Update</button>
                  <button type="button" class="btn btn-danger btn-sm ml-2">Delete</button>
                </div>
              </td>
            </tr>
          </tbody>
        </table>
      </div>
    </div>
    <b-modal ref="addBookModal" id="book-modal" title="Add a new book" hide-footer>
      <b-form @submit="onSubmit" @reset="onReset" class="w-100">
        <b-form-group id="form-title-group" label="Title:" label-for="form-title-input">
          <b-form-input
            id="form-title-input"
            type="text"
            v-model="addBookForm.title"
            required
            placeholder="Enter title"
          ></b-form-input>
        </b-form-group>
        <b-form-group id="form-author-group" label="Author:" label-for="form-author-input">
          <b-form-input
            id="form-author-input"
            type="text"
            v-model="addBookForm.author"
            required
            placeholder="Enter author"
          ></b-form-input>
        </b-form-group>
        <b-form-group id="form-read-group">
          <b-form-checkbox-group v-model="addBookForm.read" id="form-checks">
            <b-form-checkbox value="true">Read?</b-form-checkbox>
          </b-form-checkbox-group>
        </b-form-group>
        <b-button-group>
          <b-button type="submit" variant="primary">Submit</b-button>
          <b-button type="reset" variant="danger">Reset</b-button>
        </b-button-group>
      </b-form>
    </b-modal>
  </div>
</template>

<script>
import axios from "axios";

export default {
  data() {
    return {
      books: [],
      addBookForm: {
        title: "",
        author: "",
        read: []
      }
    };
  },
  methods: {
    getBooks() {
      const path = "http://localhost:5000/books";
      axios
        .get(path)
        .then(res => {
          this.books = res.data.books;
        })
        .catch(error => {
          // eslint-disable-next-line
          console.error(error);
        });
    },
    addBook(payload) {
      const path = "http://localhost:5000/books";
      axios
        .post(path, payload)
        .then(() => {
          this.getBooks();
        })
        .catch(error => {
          // eslint-disable-next-line
          console.log(error);
          this.getBooks();
        });
    },
    initForm() {
      this.addBookForm.title = "";
      this.addBookForm.author = "";
      this.addBookForm.read = [];
    },
    onSubmit(evt) {
      evt.preventDefault();
      this.$refs.addBookModal.hide();
      let read = false;
      if (this.addBookForm.read[0]) read = true;
      const payload = {
        title: this.addBookForm.title,
        author: this.addBookForm.author,
        read // property shorthand
      };
      this.addBook(payload);
      this.initForm();
    },
    onReset(evt) {
      evt.preventDefault();
      this.$refs.addBookModal.hide();
      this.initForm();
    }
  },
  created() {
    this.getBooks();
  }
};
</script>
Alert提醒模块
接下来添加一个用来反馈提醒用户操作结果的模块client/src/components/Alert.vue
<template>
  <p>It works!</p>
</template>
在client/src/components/Books.vue模块中修改script部分代码注册上面添加的Alert.vue模块
<script>
import axios from 'axios';
import Alert from './Alert.vue';

//中间省略...

export default {
  data() {
    return {
      books: [],
      addBookForm: {
        title: '',
        author: '',
        read: [],
      },
    };
  },
  components: {
    alert: Alert,
  },

//中间省略...

};
</script>
现在可以在Books.vue模块的template区域中引用Alert.vue模块了
<template>
  <b-container>
    <b-row>
      <b-col col sm="10">
        <h1>Books</h1>
        <hr><br><br>
        <alert></alert>
        <button type="button" class="btn btn-success btn-sm" v-b-modal.book-modal>Add Book</button>

        ...

      </b-col>
    </b-row>
  </b-container>
</template>
刷新一下浏览器,可以看到Alert模块引用并显示成功

下面我们对Alert模块使用b-alert标签进行Bootstrap样式改造
<template>
  <div>
    <b-alert variant="success" show>{{ message }}</b-alert>
    <br>
  </div>
</template>

<script>
export default {
  props: ['message'],
};
</script>
b-alert标签中使用了variant来定义颜色样式, show定义了显示时候使用渐变动画
这里注意一下在script中使用了props来定义声明模块中所包含的属性变量,这样我们自定义的这个模块就可以在被调用的时候,message会作为<alert></alert>标签中的一个属性来接收参数.
回到Books模块中,可以带参数形式的调用Alert模块了,例如这样:
<alert message="hi"></alert>

为了让alert模块中的message变量实现动态化,使用:变量名=语法进行数据双向绑定
<alert :message="message"></alert>
在VUE的data变量中声明message变量:
data() {
  return {
    books: [],
    addBookForm: {
      title: '',
      author: '',
      read: [],
    },
    message: '',
  };
},
接着改造一下addBook()函数,加入对message变量的操作
addBook(payload) {
  const path = 'http://localhost:5000/books';
  axios.post(path, payload)
    .then(() => {
      this.getBooks();
      this.message = 'Book added!';
    })
    .catch((error) => {
      // eslint-disable-next-line
      console.log(error);
      this.getBooks();
    });
},
最后,还是使用v-if标签,实现只有showMessage变量为真的时候才显示Alert模块
<alert :message=message v-if="showMessage"></alert>
当然同上面的操作一样,需要在data中声明这个showMessage变量,并且修改addBook()函数,加入对showMessage的操作
data() {
  return {
    books: [],
    addBookForm: {
      title: '',
      author: '',
      read: [],
    },
    message: '',
    showMessage: false,
  };
},
addBook(payload) {
  const path = 'http://localhost:5000/books';
  axios.post(path, payload)
    .then(() => {
      this.getBooks();
      this.message = 'Book added!';
      this.showMessage = true;
    })
    .catch((error) => {
      // eslint-disable-next-line
      console.log(error);
      this.getBooks();
    });
},
PUT路由
Server端
更新已有的数据需要添加唯一的id标识,可以使用Python标准库中的uuid来生成
修改server/app.py中BOOKS数组变量,别忘了引入uuid库
import uuid
BOOKS = [
    {
        'id': uuid.uuid4().hex,
        'title': 'On the Road',
        'author': 'Jack Kerouac',
        'read': True
    },
    {
        'id': uuid.uuid4().hex,
        'title': 'Harry Potter and the Philosopher\'s Stone',
        'author': 'J. K. Rowling',
        'read': False
    },
    {
        'id': uuid.uuid4().hex,
        'title': 'Green Eggs and Ham',
        'author': 'Dr. Seuss',
        'read': True
    }
]
修改/books路由中的all_books()函数,为新增加的书添加随机的唯一id
@app.route('/books', methods=['GET', 'POST'])
def all_books():
    response_object = {'status': 'success'}
    if request.method == 'POST':
        post_data = request.get_json()
        BOOKS.append({
            'id': uuid.uuid4().hex,
            'title': post_data.get('title'),
            'author': post_data.get('author'),
            'read': post_data.get('read')
        })
        response_object['message'] = 'Book added!'
    else:
        response_object['books'] = BOOKS
    return jsonify(response_object)
增加一条新的路由,用来根据id查看单个书信息
@app.route('/books/<book_id>', methods=['PUT'])
def single_book(book_id):
    response_object = {'status': 'success'}
    if request.method == 'PUT':
        post_data = request.get_json()
        remove_book(book_id)
        BOOKS.append({
            'id': uuid.uuid4().hex,
            'title': post_data.get('title'),
            'author': post_data.get('author'),
            'read': post_data.get('read')
        })
        response_object['message'] = 'Book updated!'
    return jsonify(response_object)
再添加个删除书操作的函数(内部调用的,不用关联路由)
def remove_book(book_id):
    for book in BOOKS:
        if book['id'] == book_id:
            BOOKS.remove(book)
            return True
    return False
Client端
实现修改书籍操作功能的待办事项:
- 添加一个模态框表单
- 处理Update按钮的点击事件
- 通过AJAX发送请求
- 通知用户操作结果处理取消按钮的点击事件
1.添加模态框表单
在Books.vue模块的template区域之前写好的模态框后面再写个模态框:
<b-modal ref="editBookModal"
         id="book-update-modal"
         title="Update"
         hide-footer>
  <b-form @submit="onSubmitUpdate" @reset="onResetUpdate" class="w-100">
  <b-form-group id="form-title-edit-group"
                label="Title:"
                label-for="form-title-edit-input">
      <b-form-input id="form-title-edit-input"
                    type="text"
                    v-model="editForm.title"
                    required
                    placeholder="Enter title">
      </b-form-input>
    </b-form-group>
    <b-form-group id="form-author-edit-group"
                  label="Author:"
                  label-for="form-author-edit-input">
        <b-form-input id="form-author-edit-input"
                      type="text"
                      v-model="editForm.author"
                      required
                      placeholder="Enter author">
        </b-form-input>
      </b-form-group>
    <b-form-group id="form-read-edit-group">
      <b-form-checkbox-group v-model="editForm.read" id="form-checks">
        <b-form-checkbox value="true">Read?</b-form-checkbox>
      </b-form-checkbox-group>
    </b-form-group>
    <b-button-group>
      <b-button type="submit" variant="primary">Update</b-button>
      <b-button type="reset" variant="danger">Cancel</b-button>
    </b-button-group>
  </b-form>
</b-modal>
在script区域给export的data对象中添加新的模态框关联数据:
data() {
    return {
      books: [],
      addBookForm: {
        title: "",
        author: "",
        read: []
      },
      editForm: {
        id: "",
        title: "",
        author: "",
        read: []
      },
      message: "",
      showMessage: false
    };
  },
说明:由于read对应的是checkbox控件,取到的值必须以数组形式保存.
2.处理update按钮的点击事件
修改一下表格中update按钮:
<button
        type="button"
        class="btn btn-warning btn-sm"
        v-b-modal.book-update-modal
        @click="editBook(book)">
    Update
</button>
这里使用了v-b-modal.模态框id来关联按钮点击后触发模态框.
更新内容:使用v-b-modal.book-update-modal来设置按钮触发模态框存在一个诡异的问题,就是单击按钮并不会触发模态框显示,需要再点一次才能打开模态框,百思不得其解~于是删掉这个属性,在下面的editBook函数里写this.$refs.editBookModal.show();实现模态框显示.
接着在script区域methods中添加一个新的函数,用来更新editForm中的数据:
editBook(book) {
  this.editForm = book;
},
再添加个函数用来提交修改后的表单:
onSubmitUpdate(evt) {
  evt.preventDefault();
  this.$refs.editBookModal.hide();
  let read = false;
  if (this.editForm.read[0]) read = true;
  const payload = {
    title: this.editForm.title,
    author: this.editForm.author,
    read,
  };
  this.updateBook(payload, this.editForm.id);
},
3.通过AJAX发送请求
updateBook(payload, bookID) {
  const path = `http://localhost:5000/books/${bookID}`;
  axios.put(path, payload)
    .then(() => {
      this.getBooks();
    })
    .catch((error) => {
      // eslint-disable-next-line
      console.error(error);
      this.getBooks();
    });
},
注意这里定义常量path的时候使用了反引号模板字符串的语法,详细用法参考MDN
4.通知用户
修改updateBook函数:
updateBook(payload, bookID) {
  const path = `http://localhost:5000/books/${bookID}`;
  axios.put(path, payload)
    .then(() => {
      this.getBooks();
      this.message = 'Book updated!';
      this.showMessage = true;
    })
    .catch((error) => {
      // eslint-disable-next-line
      console.error(error);
      this.getBooks();
    });
},
5.处理取消按钮点击事件(重置表单)
添加函数:
onResetUpdate(evt) {
  evt.preventDefault();
  this.$refs.editBookModal.hide();
  this.initForm();
  this.getBooks(); // 由于上面initForm清空了表单中的数据,同时双向绑定的效果也将当前的book对象数据给清空了,因此需要重新再get一次
},
更新initForm()函数:
initForm() {
  this.addBookForm.title = '';
  this.addBookForm.author = '';
  this.addBookForm.read = [];
  this.editForm.id = '';
  this.editForm.title = '';
  this.editForm.author = '';
  this.editForm.read = [];
},
删除操作的路由
Server端
修改/books/<book_id>路由对应的函数:
@app.route('/books/<book_id>', methods=['PUT', 'DELETE'])
def single_book(book_id):
    response_object = {'status': 'success'}
    if request.method == 'PUT':
        post_data = request.get_json()
        remove_book(book_id)
        BOOKS.append({
            'id': uuid.uuid4().hex,
            'title': post_data.get('title'),
            'author': post_data.get('author'),
            'read': post_data.get('read')
        })
        response_object['message'] = 'Book updated!'
    if request.method == 'DELETE':
        remove_book(book_id)
        response_object['message'] = 'Book removed!'
    return jsonify(response_object)
Client端
更新Delete按钮
<button
        type="button"
        class="btn btn-danger btn-sm"
        @click="onDeleteBook(book)">
    Delete
</button>
添加删除按钮点击是对应的操作
removeBook(bookID) {
  const path = `http://localhost:5000/books/${bookID}`;
  axios.delete(path)
    .then(() => {
      this.getBooks();
      this.message = 'Book removed!';
      this.showMessage = true;
    })
    .catch((error) => {
      // eslint-disable-next-line
      console.error(error);
      this.getBooks();
    });
},
onDeleteBook(book) {
  this.removeBook(book.id);
},
