简单的redis缓存
需要具备一体化LNMP一台,在此基础上进行操作
phpredis-master.zip 点此下载 提取码:3fdh
1)LNMP上打redis模块
171 unzip phpredis-master.zip
172 cd phpredis-master
173 ls
174 phpize
175 ln -s /usr/local/php/bin/* /usr/local/bin/
176 ln -s /usr/local/php/sbin/* /usr/local/sbin/
177 phpize
178 ./configure --with-php-config=/usr/local/php/bin/php-config
179 make
180 make install
181 ls /usr/local/php/lib/php/extensions/no-debug-non-zts-20090626/
182 vim /usr/local/php/php.ini 末行添加内容,如下:
extension=redis.so
183 /etc/init.d/php-fpm restart
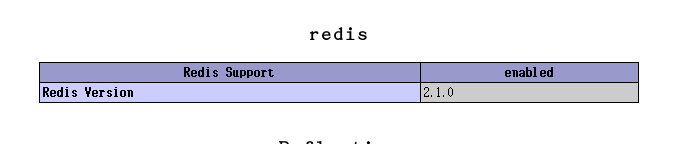
184 firefox 127.0.0.1
打完模块后,可以在php页面看到redis模块,如下图
2)本机安装redis并修改配置文件
安装过程
  202  tar -zxf redis-4.0.2.tar.gz
  203  cd redis-4.0.2
  204  make
  205  make install
  206  cd ..
  207  mv redis-4.0.2 /usr/local/redis
  208  ln -s /usr/local/redis/src/* /usr/bin/
  209  redis-server
  210  echo 511 > /proc/sys/net/core/somaxconn
  211  echo 'vm.overcommit_memory = 1' >> /etc/sysctl.conf
  212  sysctl vm.overcommit_memory=1
  213  echo never > /sys/kernel/mm/transparent_hugepage/enabled
  214  redis-server

修改配置文件
 [root@localhost ~]# vim /usr/local/redis/redis.conf
 136 daemonize yes

启动redis
[root@localhost ~]# redis-server /usr/local/redis/redis.conf

查看启动情况
[root@localhost ~]# ss -pln | grep redis
LISTEN     0      511               127.0.0.1:6379                     *:*      users:(("redis-server",7324,6))
3)mysql创库建表备用
[root@localhost ~]# mysql -uroot -p123456

mysql> create database testredis;
Query OK, 1 row affected (0.01 sec)

mysql> use testredis
Database changed
mysql> create table test(
    -> id int not null auto_increment,
    -> name varchar(25) default null,
    -> primary key(id)
    -> )engine=InnoDB AUTO_INCREMENT=10 DEFAULT CHARSET=utf8;
Query OK, 0 rows affected (0.02 sec)

mysql> insert into test values(1,'tom'),(2,'tim'),(3,'timi'),(4,'jack'),(5,'maria'),(6,'mary'),(7,'sary'),(8,'robert'),(9,'brad');
Query OK, 9 rows affected (0.12 sec)
Records: 9  Duplicates: 0  Warnings: 0

mysql> select * from test;
+----+--------+
| id | name   |
+----+--------+
|  1 | tom    |
|  2 | tim    |
|  3 | timi   |
|  4 | jack   |
|  5 | maria  |
|  6 | mary   |
|  7 | sary   |
|  8 | robert |
|  9 | brad   |
+----+--------+
9 rows in set (0.01 sec)
4)编辑php页面
[root@localhost ~]# cd /usr/local/nginx/html/
[root@localhost html]# ls
50x.html  index1.php  index2.php  index.html  index.php
[root@localhost html]# mv index.php index0.php
[root@localhost html]# vim index.php
<?
$redis = new Redis();
$redis->connect('127.0.0.1',6379) or die("Could not connect redis server");
$query = "select * from testredis.test limit 8";
for ($key = 1;$key < 9;$key++){
if(!$redis->get($key)) {
$connect = mysql_connect('127.0.0.1','root','123456');
mysql_select_db(testredis);
$result = mysql_query($query);
while ($row =mysql_fetch_assoc($result)) {
$redis->set($row['id'],$row['name']);}
$myserver = "mysql";break;}
else {
$myserver = "redis";
$data[$key] = $redis->get($key);
}}
echo $myserver;
echo "<br>";
for ($key = 1;$key < 9;$key++) {
echo "number is <b><font color=#FF0000>$key</font></b>";
echo "<br>";
echo "name is <b><font color=#FF0000>$data[$key]</font></b>";
echo "<br>";
}
?>
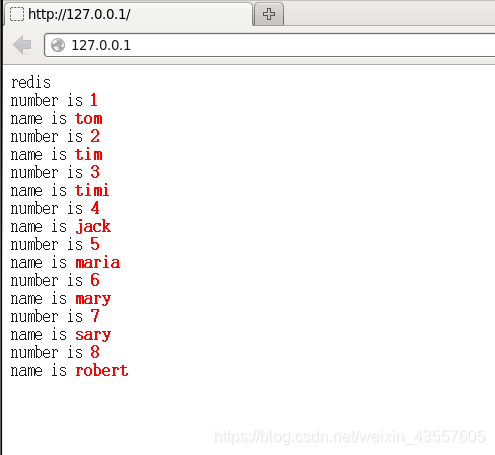
5)测试redis是否形成缓存
·[root@localhost html]# firefox 127.0.0.1
第一次结果如下,没有显示出来

刷新页面,结果如下图: