Eureka是Netflix开源的服务发现组件,本身是一个基于REST的服务。它包含Server和Client两部分。Spring Cloud将它集成在子项目Spring Cloud Netflix中,从而实现微服务的注册与发现。
Eureka特性如下:
1.Eureka包含两个组件:Eureka Server和Eureka Client;
2.Eureka Server提供服务发现的能力,各个微服务启动时,会向Eureka Server注册自己的信息,Eureka Server会存储这些信息;
3.Eureka Client是一个Java客户端,用于简化与Eureka Server的交互;
下面演示Eureka在实际工作中的常见场景。
一.编写Eureka Server
下面编写一个Eureka Server组件
1.新建一个SpringBoot工程,命名为zz-eureka
2.导入maven依赖
        <dependency>
            <groupId>org.springframework.cloud</groupId>
            <artifactId>spring-cloud-starter-netflix-eureka-client</artifactId>
        </dependency>
3.编写启动类
import org.springframework.boot.SpringApplication;
import org.springframework.boot.autoconfigure.SpringBootApplication;
import org.springframework.cloud.netflix.eureka.server.EnableEurekaServer;

@SpringBootApplication
@EnableEurekaServer
public class EurekaApplication {
    public static void main(String[] args) {
        SpringApplication.run(EurekaApplication.class, args);
    }
}
4.在配置文件application.yml中添加如下内容
server:
  port: 8761
eureka:
  client:
    register-with-eureka: false
    fetch-registry: false
    serviceUrl:
      defaultZone: http://localhost:8761/eureka/
5.启动验证
访问http://localhost:8761,展示界面如下,证明启动成功
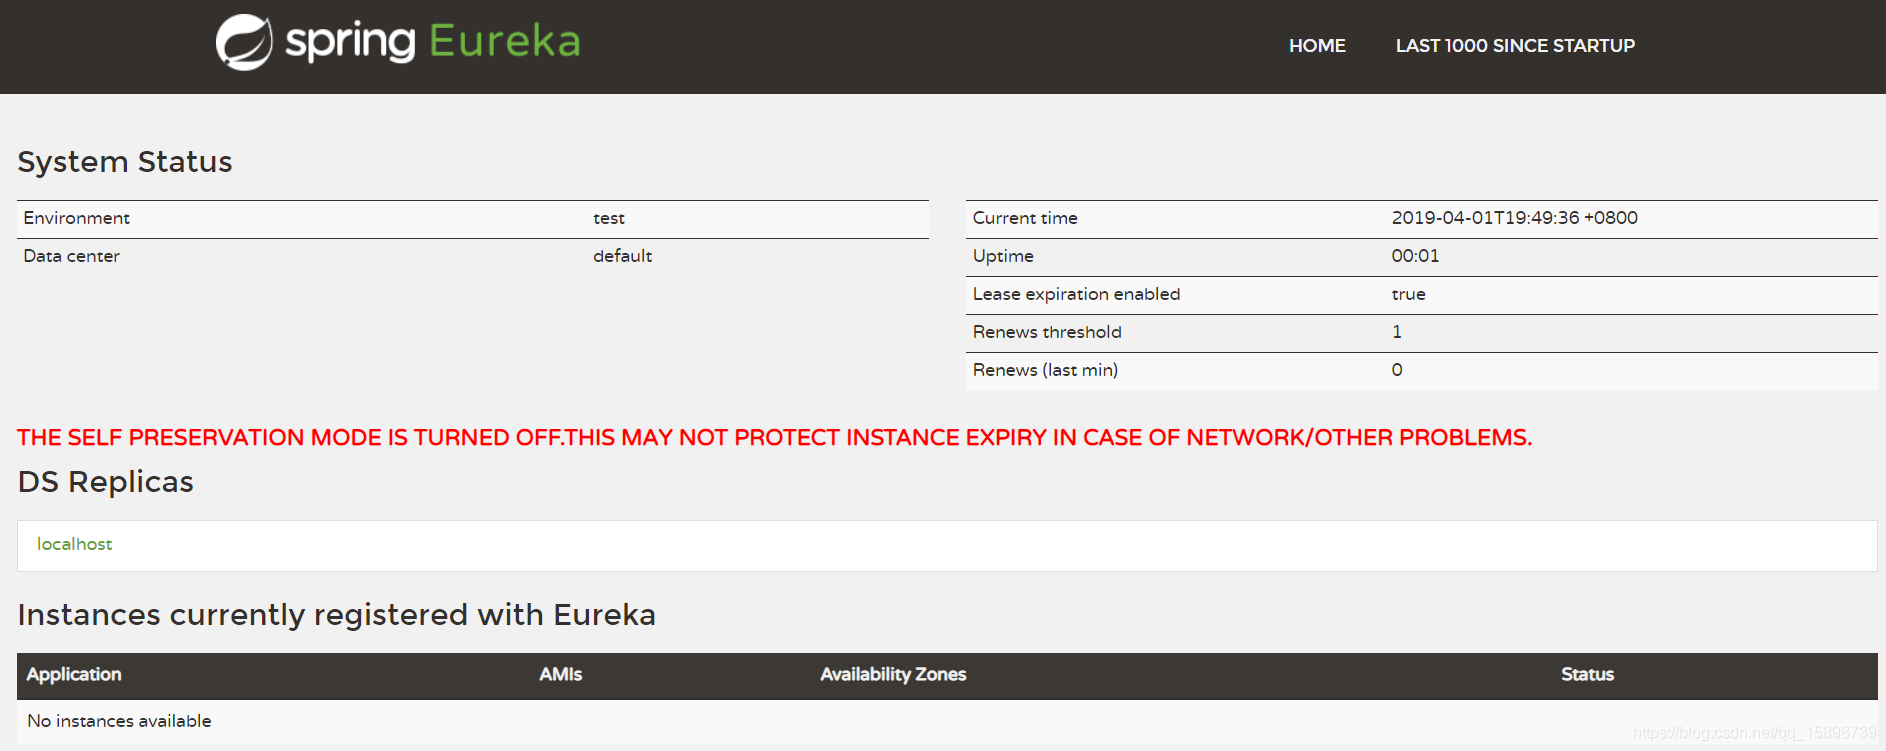
由图可知,Eureka Server的首页展示了很多信息,包括当前实例的系统状态,注册到Eureka Server上的服务实例,常用信息,实例信息
二.编写Eureka Client
下面编写一个Eureka Client,并注册到上面所实现的Eureka Server中
1.新建一个SpringBoot工程,命名为zz-provider-user
2.导入maven依赖
        <dependency>
            <groupId>org.springframework.cloud</groupId>
            <artifactId>spring-cloud-starter-netflix-eureka-client</artifactId>
        </dependency>
3.编写启动类
import org.springframework.boot.SpringApplication;
import org.springframework.boot.autoconfigure.SpringBootApplication;
import org.springframework.cloud.client.discovery.EnableDiscoveryClient;

@EnableDiscoveryClient
@SpringBootApplication
public class SimpleProviderUserApplication {
	public static void main(String[] args) {
		SpringApplication.run(SimpleProviderUserApplication.class, args);
	}
}
备注:@EnableDiscoveryClient声明这是一个Eureka Client,也可以使用@EnableEurekaClient注解替代@EnableDiscoveryClient
两者的区别:
@EnableEurekaClient表明是Eureka的Client,该注解是spring-cloud-netflix项目中的注解,只能和Eureka一起工作
@EnableDiscoveryClient为各种服务组件包括Zookeeper,Consul等提供了支持,该注解是spring-cloud-commons项目中的注解
4.在配置文件application.yml中添加如下内容
spring:
  application:
    name: zz-provider-user
eureka:
  client:
    serviceUrl:
      defaultZone: http://localhost:8761/eureka/
  instance:
    prefer-ip-address: true
5.启动验证
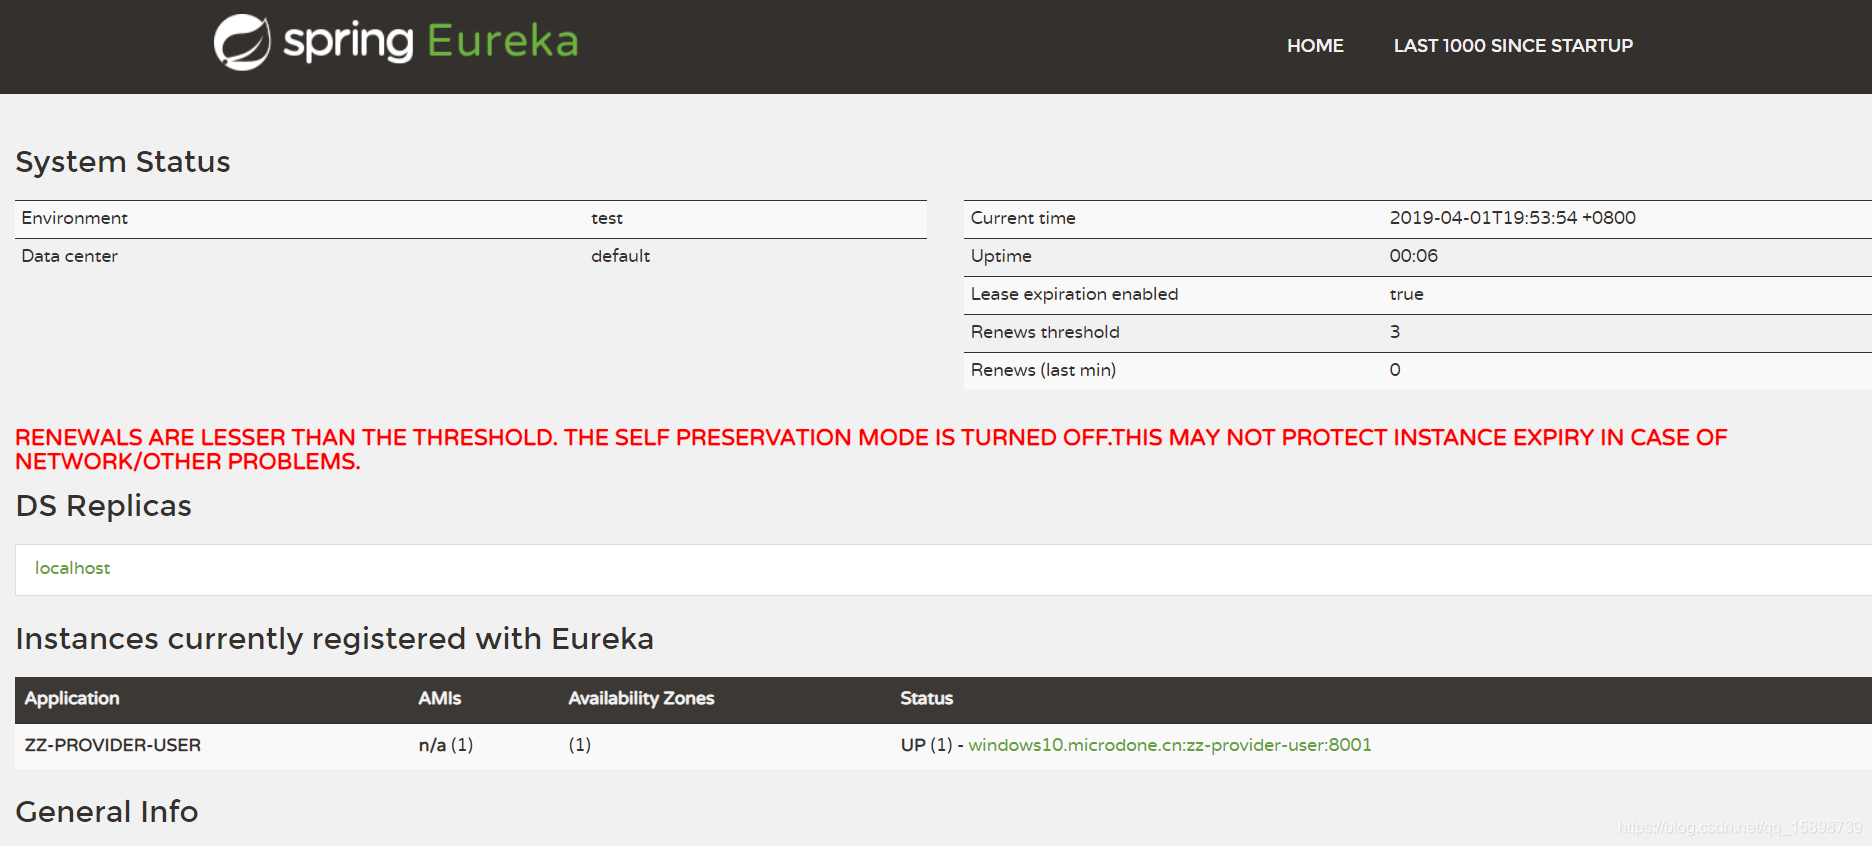
再次访问http://localhost:8761,展示界面如下,证明注册成功。此时Eureka Client已经成功地注册到Eureka Server上
三.Eureka Server的高可用部署
单节点Eureka Server并不适合线上生产环境。Eureka Client会定时连接Eureka Server获取注册表中的消息并缓存,微服务和远程消费时总是使用本地的缓存数据,所以一般来说Eureka Server宕机也不会影响服务之间的调用。但是如果Eureka Server宕机后,某些微服务也宕机,Eureka Client的缓存若不被更新,就可能影响微服务的调用,甚至影响整个集群的高可用性。因此需要一个部署一个高可用的Eureka集群。下面编写一个高可用的Eureka Server
1.配置host文件,新增一行
127.0.0.1 peer1 peer2
2.修改application.yml
spring:
  application:
    name: zz-eureka
---
spring:
  profiles: peer1                                 # 指定profile=peer1
server:
  port: 8761
eureka:
  instance:
    hostname: peer1                               # 指定当profile=peer1时,主机名是peer1
  client:
    serviceUrl:
      defaultZone: http://peer2:8762/eureka/      # 将自己注册到peer2这个Eureka上面去
---
spring:
  profiles: peer2
server:
  port: 8762
eureka:
  instance:
    hostname: peer2
  client:
    serviceUrl:
      defaultZone: http://peer1:8761/eureka/
3.启动Eureka集群
将Eureka服务打成jar包,以命令方式启动
java -jar zz-eureka-1.0-SNAPSHOT.jar --spring.profiles.active=peer1
java -jar zz-eureka-1.0-SNAPSHOT.jar --spring.profiles.active=peer2
4.将刚才的Eureka-Client注册到Eureka集群上
修改Eureka-Client的配置为:
eureka:
  client:
    serviceUrl:
      defaultZone: http://peer1:8761/eureka/,http://peer2:8761/eureka/
重启Eureka-Client即可
四.Eureka Server的用户认证
默认情况下,Eureka Server是允许匿名访问的,因此为了安全性考虑,可以为Eureka Server配置用户认证,下面进行实践。
1.导入maven依赖
        <dependency>
            <groupId>org.springframework.boot</groupId>
            <artifactId>spring-boot-starter-security</artifactId>
        </dependency>
2.配置application.yml
security:
  basic:
    enabled: true               # 开启基于HTTP basic的认证
  user:
    name: admin                  # 配置登录的账号是admin
    password: 123456       # 配置登录的密码是123456
spring:
  application:
    name: zz-eureka
---
spring:
  profiles: peer1                                 # 指定profile=peer1
server:
  port: 8761
eureka:
  instance:
    hostname: peer1                               # 指定当profile=peer1时,主机名是peer1
  client:
    serviceUrl:
      defaultZone: http://admin:123456@peer2:8762/eureka/      # 将自己注册到peer2这个Eureka上面去
---
spring:
  profiles: peer2
server:
  port: 8762
eureka:
  instance:
    hostname: peer2
  client:
    serviceUrl:
      defaultZone: http://admin:123456@peer1:8761/eureka/
3.启动Eureka Server集群
启动方式同上,打包后用java -jar命令启动
4.将Eureka-Client注册到需要认证的Eureka Server
只需要将eureka.instance.client.defaultZone配置为
http://user:password@EUREKA_HOST:EUREKA_PORT/eureka
配置后启动,既可将Eureka-Client注册到Eureka Server集群上
五.Eureka的自我保护模式
默认情况下,如果Eureka Server在一定时间内没有接收到某个微服务实例的心跳,Eureka Server将会注销该实例(默认90秒)。但是当网络分区故障发生时,微服务与Eureka Server之间无法正常通信,这就可能变得非常危险了----因为微服务本身是健康的,此时本不应该注销这个微服务。
Eureka Server通过“自我保护模式”来解决这个问题----当Eureka Server节点在短时间内丢失过多客户端时(可能发生了网络分区故障),那么这个节点就会进入自我保护模式。一旦进入该模式,Eureka Server就会保护服务注册表中的信息,不再删除服务注册表中的数据(也就是不会注销任何微服务)。当网络故障恢复后,该Eureka Server节点会自动退出自我保护模式。
自我保护模式默认情况下开启。可以通过下列配置禁用
eureka:
  server:
    enable-self-preservation: false
六.Eureka的健康检查
Eureka Server与Eureka Client之间使用心跳机制来确定Eureka Client的状态,默认情况下,只要服务器端与客户端的心跳保持正常,应用程序就会始终保持"up"的状态。但是,以上机制并不能完全反映应用程序的状态。例如微服务与Eureka Server之间的心跳正常,Eureka Server认为该微服务"up",然而该微服务的数据源发生了问题(例如因为网络抖动,连不上数据源),根本无法工作。Spring Boot Actuator 提供了/health端点,该端点可展示应用程序的健康信息,因此如果可以将该端点的健康状态传播到Eureka Server即可
要实现这一点,只需要启动Eureka的健康检查。这样,应用程序就会将自己的健康状态传播到Eureka Server。通过下列配置开启健康检查
eureka:
  client:
    healthcheck:
      enabled: true
