本文在上一篇SpringBoot整合多数据源jpa+mybatis(三)基础上使用thymeleaf实现用户的登录注册。
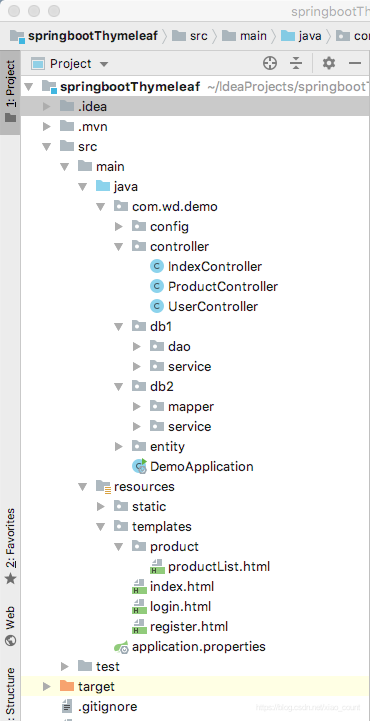
项目结构图如下:
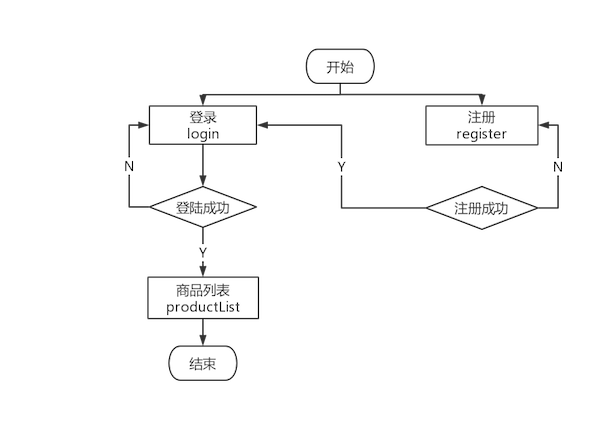
流程图如下:
user采用JPA,product采用mybatis,html采用thymeleaf模板。
数据源配置不变,实体类也不变。
1.为项目增加依赖
我们只需再加入thymeleaf即可
<!--thymeleaf-->
<dependency>
      <groupId>org.springframework.boot</groupId>
      <artifactId>spring-boot-starter-thymeleaf</artifactId>
</dependency>
2.修改application.properties,配置相关信息
添加如下配置
#关闭thymeleaf缓存,开发时使用,否则没有实时画面
spring.thymeleaf.cache=false
3.修改功能实现
3.1修改User---->jpa
为User的DAO层增加自定义查询方法
IUserDao.java
//Jpa提供了增删改查的功能
public interface IUserDao extends JpaRepository<User, Integer> {  //第一个泛型为实体类,第二个为实体类的主键类型

    /**
     * 查找是否有这样的用户名和密码用户存在
     * @param name
     * @param password
     * @return
     */
    User findUserByUserNameAndUserPassword(String name, String password);

    /**
     * 查找是否有这样的用户存在
     * @param name
     * @return
     */
    List<User> findUserByUserName(String name);
}
为User的Service层增加自定义查询方法
IUserService.java
	public interface IUserService {

    /**
     * 添加新用户
     * @param user
     */
    void saveUser(User user);

    /**
     * 查找是否有这样的用户名和密码用户存在
     * @param name
     * @param password
     * @return
     */
    User findByNameAndPassword(String name, String password);

    /**
     * 查找是否有这样的用户存在
     * @param name
     * @return
     */
    List<User> findByName(String name);
}
UserServiceImpl.java
@Service
public class UserServiceImpl implements IUserService {

    @Autowired
    private IUserDao userDao;

    /**
     * 添加新用户
     * @param user
     */
    @Override
    public void saveUser(User user) {
        userDao.save(user);
    }

    /**
     * 查找是否有这样的用户名和密码用户存在
     * @param name
     * @param password
     * @return
     */
    @Override
    public User findByNameAndPassword(String name, String password){
        return userDao.findUserByUserNameAndUserPassword(name, password);
    }

    /**
     * 查找是否有这样的用户存在
     * @param name
     * @return
     */
    @Override
    public List<User> findByName(String name){
        return userDao.findUserByUserName(name);
    }
}
3.1修改Product---->mybatis
为Product的mapper增加自定义查询方法
ProductMapper.java
@Qualifier("db2SqlSessionFactory")
@Mapper
@Component
public interface ProductMapper {

    /**
     * 添加一个商品
     * @param name
     * @param price
     */
    @Insert("insert into product(productName, productPrice) values(#{productName}, #{productPrice})")
    void addProduct(@Param("productName") String name, @Param("productPrice") Double price);

    /**
     * 查询所有的商品
     * @return
     */
    @Select("select * from product")
    List<Product> findAll();
}
为Product的Service层增加自定义查询方法
IProductService.java
@Service
public class ProductServiceImpl implements IProductService
{
    @Autowired
    private ProductMapper productMapper;

    /**
     * 添加一个商品
     * @param product
     */
    @Override
   // @Transactional(transactionManager = "db2TransactionManager")
    public void saveProduct(Product product) {
        productMapper.addProduct(product.getProductName(), product.getProductPrice());
    }

    /**
     * 查询所有的商品
     * @return
     */
    @Override
    public List<Product> findAllProducts() {
        return productMapper.findAll();
    }
}
5.修改Controller
IndexController.java
@Controller
public class IndexController {

    /**
     * 初始界面,选择登录或者注册
     * @return
     */
    @RequestMapping("/")
    public String index(){
        return "index";
    }
}
UserController.java
@Controller
public class UserController {

    @Autowired
    IUserService userService;


    /**
     * 登录界面
     * @return
     */
    @RequestMapping("/login")
    public String login(){
        return "login";
    }

    /**
     * 判断能否成功登录
     * @param request
     * @return
     */
    @RequestMapping("/dologin")
    public String login(HttpServletRequest request){
        String name = request.getParameter("username");
        String password = request.getParameter("password");
        User user = userService.findByNameAndPassword(name, password);
        if(user != null){
            return "redirect:/productList";
        }else{
            return "login";
        }
    }

    /**
     * 注册界面
     * @return
     */
    @RequestMapping("/register")
    public String register(){
        return "register";
    }

    /**
     * 判断是否成功注册
     * @param request
     * @return
     */
    @RequestMapping("/doregister")
    public String register(HttpServletRequest request){
        String name = request.getParameter("username");
        String password = request.getParameter("password");
        String password2 = request.getParameter("password2");
        List<User> userList =  userService.findByName(name);
        if(userList.size() == 0 && password.equals(password2)){
            User user = new User();
            user.setUserName(name);
            user.setUserPassword(password);
            userService.saveUser(user);
            return "login";
        }else{
            return "register";
        }
    }
}
ProductController.java
@Controller
public class ProductController {

    @Autowired
    IProductService productService;

    /**
     * 商品列表
     * @param model
     * @return
     */
    @RequestMapping("/productList")
    public String productList(Model model){
        List<Product> products = productService.findAllProducts();
        model.addAttribute("products", products);
        return "product/productList";
    }
}
6.使用Thymeleaf写HTML页面
1.在Resource—>templates下新建
index.html
<!DOCTYPE html>
<html lang="en">
<head>
    <meta charset="UTF-8">
    <title>Welcome</title>
</head>
<body>

<a href="/login">登录</a><br>
<a href="/register">注册</a>

</body>
</html>
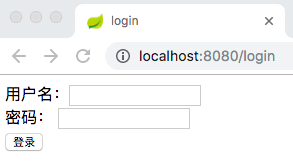
login.html
<!DOCTYPE html>
<html lang="en" xmlns:th="http://www.w3.org/1999/xhtml">
<head>
    <meta charset="UTF-8">
    <title>login</title>
</head>
<body>

<form action="/dologin" method="post">
    用户名:<input type="text" name="username"><br>
    密码: <input type="password" name="password"><br>
    <input type="submit" value="登录">
</form>

</body>
</html>
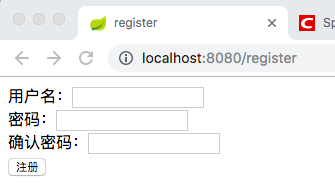
register.html
<!DOCTYPE html>
<html lang="en">
<head>
    <meta charset="UTF-8">
    <title>register</title>
</head>
<body>

<form action="/doregister" method="post">
    用户名:<input type="text" name="username"><br>
    密码:<input type="password" name="password"><br>
    确认密码:<input type="password" name="password2"><br>
    <input type="submit" value="注册">
</form>

</body>
</html>
2.在Resource—>templates—>product下新建
productList.html
<!DOCTYPE html>
<html lang="en" xmlns:th="http://www.thymeleaf.org">
<head>
    <meta charset="UTF-8"/>
    <title>productList</title>
</head>
<body>
<br/>
<h1>商品列表</h1>
<br/><br/>
<div class="with:80%">
    <table>
        <thead>
        <tr>
            <th>#</th>
            <th>productName</th>
            <th>productPrice</th>
        </tr>
        </thead>
        <tbody>
        <!--each来进行for循环求值-->
        <tr  th:each="product : ${products}">
            <th scope="row" th:text="${product.productId}"></th>
            <td th:text="${product.productName}"></td>
            <td th:text="${product.productPrice}"></td>
        </tr>
        </tbody>
    </table>
</div>
</body>
</html>
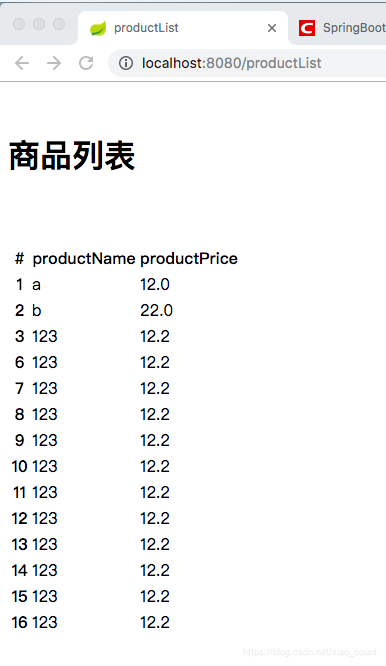
7.页面展示
index初始界面
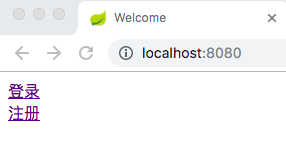
登录界面
注册界面
商品列表界面