前言
通过本文你将了解到SpringBoot 2 中发送邮件使用教程,具体详细内容如下:
- 发送普通的邮件
- 发送html格式邮件
- 发送html 中带图片的邮件
- 发送带附件的邮件
阅读前需要你必须了解如何搭建 SpringBoot 项目,
简单介绍
Spring 提供了JavaMailSender 接口帮我们来实现邮件的发送。在SpringBoot 更是提供了邮件的发送的 starter 依赖来简化邮件发送代码的开发 。
实战操作演示
邮件功能开发前准备
第一步:先引入mail 的 starter依赖在pom.xm中,具体代码如下:
<dependency>
	<groupId>org.springframework.boot</groupId>
	<artifactId>spring-boot-starter-mail</artifactId>
</dependency>
第二步:添加的配置信息 我们这里是通过yml 方式进行配置
spring:
  mail:
    host: smtp.126.com
    username: 邮箱用户名
    password: 邮箱密码
    properties:
      mail:
        smtp:
          auth: true  # 需要验证登录名和密码
        starttls:
          enable: true  # 需要TLS认证 保证发送邮件安全验证
          required: true
发送普通的邮件
开发步骤:
第一步:通过 SimpleMailMessage 设置发送邮件信息,具体信息如下:
- 发送人(From)
- 被发送人(To)
- 主题(Subject)
- 内容(Text)
第二步:通过JavaMailSender send(SimpleMailMessage simpleMailMessage) 方法发送邮件。
具体代码如下:
package cn.lijunkui.mail;

import org.slf4j.Logger;
import org.slf4j.LoggerFactory;
import org.springframework.beans.factory.annotation.Autowired;
import org.springframework.beans.factory.annotation.Value;
import org.springframework.mail.SimpleMailMessage;
import org.springframework.mail.javamail.JavaMailSender;
import org.springframework.stereotype.Service;

@Service
public class MailService {

	private final Logger logger = LoggerFactory.getLogger(this.getClass());

    @Autowired
    private JavaMailSender sender;

    @Value("${spring.mail.username}")
    private String formMail;

    public void sendSimpleMail(String toMail,String subject,String content) {
    	 SimpleMailMessage simpleMailMessage = new SimpleMailMessage();
    	 simpleMailMessage.setFrom(formMail);
         simpleMailMessage.setTo(toMail);
         simpleMailMessage.setSubject(subject);
         simpleMailMessage.setText(content);
         try {
             sender.send(simpleMailMessage);
             logger.info("发送给"+toMail+"简单邮件已经发送。 subject:"+subject);
         }catch (Exception e){
             logger.info("发送给"+toMail+"send mail error subject:"+subject);
             e.printStackTrace();
         }
    }
}
发送 html 格式邮件
开发步骤:
第一步:通过JavaMailSender 的 createMimeMessage() 创建 MimeMessage 对象实例
第二步:将 MimeMessage 放入到MimeMessageHelper 构造函数中,并通过MimeMessageHelper 设置发送邮件信息。(发送人, 被发送人,主题,内容)
第三步:通过JavaMailSender send(MimeMessage mimeMessage)发送邮件。
具体代码如下:
public void sendHtmlMail(String toMail,String subject,String content) {
    	 MimeMessage mimeMessage = sender.createMimeMessage();
    	 try {
			MimeMessageHelper mimeMessageHelper = new MimeMessageHelper(mimeMessage,true);
			mimeMessageHelper.setTo(toMail);
			mimeMessageHelper.setFrom(formMail);
			mimeMessageHelper.setText(content,true);
			mimeMessageHelper.setSubject(subject);
			sender.send(mimeMessage);
			 logger.info("发送给"+toMail+"html邮件已经发送。 subject:"+subject);
		} catch (MessagingException e) {
			 logger.info("发送给"+toMail+"html send mail error subject:"+subject);
			e.printStackTrace();
		}
    }
发送 html 中带图片的邮件
发送 html 中带图片的邮件和发送 html邮件操作基本一致,不同的是需要额外在通过MimeMessageHelper addInline 的方法去设置图片信息。
开发步骤:
- 定义html 嵌入的 image标签中 src 属性 id 例如 <img src=“cid:image1”/>
- 设置MimeMessageHelper通过addInline 将cid 和文件资源进行指定即可
具体代码如下:
package cn.lijunkui.mail;

public class InlineResource {
	private String cid;
	private String path;
	public String getCid() {
		return cid;
	}
	public void setCid(String cid) {
		this.cid = cid;
	}
	public String getPath() {
		return path;
	}
	public void setPath(String path) {
		this.path = path;
	}
	public InlineResource(String cid, String path) {
		super();
		this.cid = cid;
		this.path = path;
	}
}
    /**
     * 发送静态资源(一般是图片)的邮件
     * @param to
     * @param subject
     * @param content 邮件内容,需要包括一个静态资源的id,比如:<img src=\"cid:image\" >
     * @param resourceist 静态资源list
     */
    public void sendInlineResourceMail(String to, String subject, String content,List<InlineResource> resourceist){
        MimeMessage message = sender.createMimeMessage();

        try {
            //true表示需要创建一个multipart message
            MimeMessageHelper helper = new MimeMessageHelper(message, true);
            helper.setFrom(formMail);
            helper.setTo(to);
            helper.setSubject(subject);
            helper.setText(content, true);
            for (InlineResource inlineResource : resourceist) {
            	FileSystemResource res = new FileSystemResource(new File(inlineResource.getPath()));
            	  helper.addInline(inlineResource.getCid(),res);
			}
            sender.send(message);
            logger.info("嵌入静态资源的邮件已经发送。");
        } catch (MessagingException e) {
            logger.error("发送嵌入静态资源的邮件时发生异常!", e);
        }
    }
发送带附件的邮件
发送带附件的邮件和发送html 操作基本一致,通过MimeMessageHelper设置邮件信息的时候,将附件通过FileSystemResource 进行包装,然后再通过 MimeMessageHelper addAttachment 设置到发送邮件信息中即可。
具体代码如下:
 public void sendAttachmentsMail(String toMail,String subject,String content,String filePath) {
    	 MimeMessage message = sender.createMimeMessage();
         try {
             MimeMessageHelper helper = new MimeMessageHelper(message, true);
             helper.setFrom(formMail);
             helper.setTo(toMail);
             helper.setSubject(subject);
             helper.setText(content, true);
             FileSystemResource file = new FileSystemResource(new File(filePath));
             String fileName = filePath.substring(filePath.lastIndexOf("/"));
             helper.addAttachment(fileName, file);
             sender.send(message);
             logger.info("发送给"+toMail+"带附件的邮件已经发送。");
         } catch (MessagingException e) {
             e.printStackTrace();
             logger.error("发送给"+toMail+"带附件的邮件时发生异常!", e);
         }
     }
测试
发送普通的邮件测试
在开发中建议大家将每个编写完的小功能进行测试 养成良好的开发习惯。
测试用例:
package cn.lijunkui.mail;
import org.junit.Test;
import org.junit.runner.RunWith;
import org.springframework.beans.factory.annotation.Autowired;
import org.springframework.boot.test.context.SpringBootTest;
import org.springframework.test.context.junit4.SpringRunner;
@SpringBootTest
@RunWith(SpringRunner.class)
public class MailServiceTest {
@Autowired
private MailService mailService;
@Test
public void sendSimpleMail() {
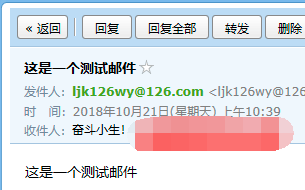
mailService.sendSimpleMail("[email protected]", "这是一个测试邮件", "这是一个测试邮件");
}
}
测试结果:
发送 html 格式邮件测试
@Test
	public void snedHtmlMail() {
		String html= "<!DOCTYPE html>\r\n" +
				"<html>\r\n" +
				"<head>\r\n" +
				"<meta charset=\"UTF-8\">\r\n" +
				"<title>Insert title here</title>\r\n" +
				"</head>\r\n" +
				"<body>\r\n" +
				"	<font color=\"red\">发送html</font>\r\n" +
				"</body>\r\n" +
				"</html>";
		mailService.sendHtmlMail("[email protected]", "这是一个测试邮件", html);
	}
发送 html 中带图片的邮件测试
测试用例:
@Test
public void sendInlineResourceMail() {
String html= "<!DOCTYPE html>\r\n" +
"<html>\r\n" +
"<head>\r\n" +
"<meta charset=\"UTF-8\">\r\n" +
"<title>Insert title here</title>\r\n" +
"</head>\r\n" +
"<body>\r\n" +
"<img src=\"cid:image1\"/> "+
"<img src=\"cid:image2\"/> "+
" <font color=\"red\">发送html</font>\r\n" +
"</body>\r\n" +
"</html>";
List<InlineResource> list = new ArrayList<InlineResource>();
String path = MailServiceTest.class.getClassLoader().getResource("image.jpg").getPath();
InlineResource resource = new InlineResource("image1",path);
InlineResource resource2 = new InlineResource("image2",path);
list.add(resource2);
list.add(resource);
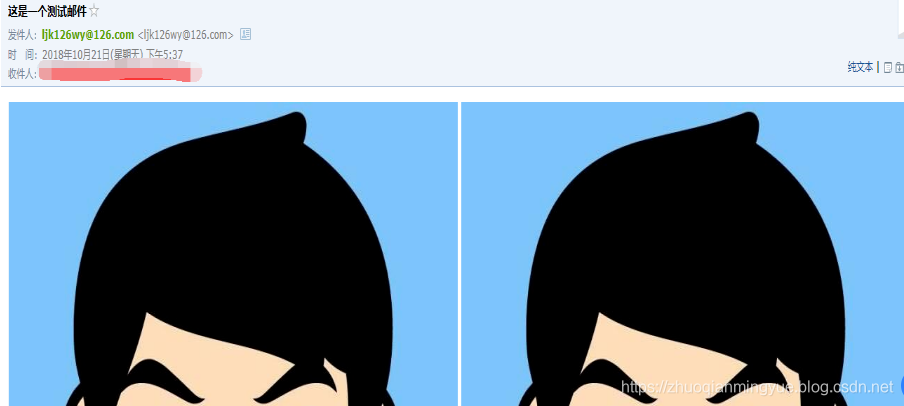
mailService.sendInlineResourceMail("[email protected]", "这是一个测试邮件", html,list);
}
测试结果:
发送带附件的邮件测试
测试用例:
	@Test
	public void sendAttachmentsMail() {
		String html= "<!DOCTYPE html>\r\n" +
				"<html>\r\n" +
				"<head>\r\n" +
				"<meta charset=\"UTF-8\">\r\n" +
				"<title>Insert title here</title>\r\n" +
				"</head>\r\n" +
				"<body>\r\n" +
				"	<font color=\"red\">发送html</font>\r\n" +
				"</body>\r\n" +
				"</html>";
		String path = MailServiceTest.class.getClassLoader().getResource("image.jpg").getPath();
		mailService.sendAttachmentsMail("[email protected]", "这是一个测试邮件", html, path);
	}
测试结果:

小结
发送普通邮件通过 SimpleMailMessage 封装发送邮件的消息,发送 html 格式和附件邮件通过MimeMessageHelper 封装发送邮件的消息,最后通过 JavaMailSender 的send方法进行发送即可。如果你还没有操作过,还等什么赶紧操作一遍吧。
代码示例
我本地环境如下:
- SpringBoot Version: 2.1.0.RELEASE
- Apache Maven Version: 3.6.0
- Java Version: 1.8.0_144
- IDEA:Spring Tools Suite (STS)
整合过程如出现问题可以在我的GitHub 仓库 springbootexamples 中模块名为 spring-boot-2.x_mail 项目中进行对比查看
GitHub:https://github.com/zhuoqianmingyue/springbootexamples
参考文献
https://docs.spring.io/spring/docs/5.0.10.RELEASE/spring-framework-reference/integration.html#mail

