一、Selector&Channel
1.1:各种channel
写这个模型需要提前了解Selector以及Channel,之前记录过FileChannel,除此之外还有以下几种Channel:
ServerSocketChannel:用于监听新的TCP连接的通道,负责读取&响应,通常用于服务端的实现。
SocketChannel:用于发起TCP连接,读写网络中的数据,通常用于客户端的实现。
DatagramChannel:上述两个通道基于TCP传输协议,而这个通道则基于UDP,用于读写网络中的数据。
FileChannel:从文件读取数据。
本篇重点放在ServerSocketChannel和SocketChannel上,大部分客户端/服务端为了保证数据准确性,都是基于TCP传输协议实现的,由于使用Selector注册必须要求被注册的Channel是非阻塞模式的,因此FileChannel由于没有非阻塞模式(无法设置configureBlocking(false)),没办法和注册到selector。
1.2:selector
Selector是个通道注册器(用法会在程序里标注),是实现Reactor模型的关键,多个通道均可以注册到Selector,Selector负责监听每个Channel的几个事件:连接就绪、写就绪、读就绪,当某个channel注册感兴趣就绪事件到selector时,若发生兴趣事件就绪,则Selector.select()方法不再阻塞,返回兴趣事件集合(可能包含多个channel的),然后按照事件不同进行分发处理。
Selector返回对应的就绪事件,封装为SelectionKey,每个Channel对应一个SelectionKey,这个对象还可以通过attach方法附着处理类(Handler、Acceptor等)。
1.3:一个简单的例子
先来看个简单使用Selector做处理的服务端实现,可以简单对Selector和SelectionKey的用法做个了解:
public static void main(String[] args) throws IOException { Selector selector = Selector.open(); //打开选择器 ServerSocketChannel serverSocketChannel = ServerSocketChannel.open(); //打开通道 serverSocketChannel.configureBlocking(false); //设置通道为非阻塞模式 serverSocketChannel.bind(new InetSocketAddress(2333)); //绑定端口 serverSocketChannel.register(selector, SelectionKey.OP_ACCEPT); //注册channel到选择器,指定监听该Channel的哪些事件,初始化都是对连接事件监听(因为是入口) while (selector.select() > 0) { // 若收到就绪事件select返回“感兴趣”事件集合,否则阻塞当前线程 Set keys = selector.selectedKeys(); //获取本次拿到的事件集合 Iterator iterator = keys.iterator(); while (iterator.hasNext()) { SelectionKey key = iterator.next(); iterator.remove(); if (key.isAcceptable()) { //当前就绪事件为连接事件 ServerSocketChannel skc = (ServerSocketChannel) key.channel(); //连接就绪触发,说明已经有客户端通道连了过来,这里需要拿服务端通道去获取客户端通道 SocketChannel socketChannel = skc.accept(); //获取客户端通道(连接就绪,说明客户端接下来可能还有别的动作,比如读和写) socketChannel.configureBlocking(false); //同样的需要设置非阻塞模式 System.out.println(String.format("收到来自 %s 的连接", socketChannel.getRemoteAddress())); socketChannel.register(selector, SelectionKey.OP_READ); //将该客户端注册到选择器,感兴趣事件设置为读(客户端连接完毕,很肯能会往服务端写数据,因此这里要注册读事件用以接收这些数据) } else if (key.isReadable()) { //当前事件为读就绪 SocketChannel socketChannel = (SocketChannel) key.channel(); //能触发读就绪,说明客户端已经开始往服务端写数据,通过SelectionKey拿到当前客户端通道 ByteBuffer buffer = ByteBuffer.allocate(1024); int count = socketChannel.read(buffer); //从通道读入数据 if (count < 0) { //若本次读就绪拿到-1,则认为客户端主动断开了连接 socketChannel.close(); //服务端关闭客户端通道 key.cancel(); //断连后就将该事件从选择器的SelectionKey集合中移除(这里说一下,这里不是真正意义上的移除,这里是取消,会将该key放入取消队列里,在下次select函数调用时才负责清空) System.out.println("连接关闭"); continue; } System.out.println(String.format("收到来自 %s 的消息: %s", socketChannel.getRemoteAddress(), new String(buffer.array()))); } keys.remove(key); } } } 上面是一个简单的例子,接下来,就利用选择器、通道来实现Reactor单线程模型。
二、单Reactor单线程模型的服务端实现
实现服务端,服务端负责接收客户端的连接,接收客户端的请求数据以及响应客户端。
把上一篇的结构图再拿过来展示下,看看需要做的有哪些模块:

图1
通过上图,我们需要实现的模块有Reactor、Acceptor、Handler,下面来逐个编写:
2.1:Reactor核心模块
该模块内部包含两个核心方法,select和dispatch,该模块负责监听就绪事件和对事件的分发处理:
public class Reactor implements Runnable { private final Selector selector; private final ServerSocketChannel serverSocketChannel; public Reactor(int port) throws IOException { //Reactor初始化 selector = Selector.open(); //打开一个Selector serverSocketChannel = ServerSocketChannel.open(); //建立一个Server端通道 serverSocketChannel.socket().bind(new InetSocketAddress(port)); //绑定服务端口 serverSocketChannel.configureBlocking(false); //selector模式下,所有通道必须是非阻塞的 //Reactor是入口,最初给一个channel注册上去的事件都是accept SelectionKey sk = serverSocketChannel.register(selector, SelectionKey.OP_ACCEPT); //attach callback object, Acceptor sk.attach(new Acceptor(serverSocketChannel, selector)); } @Override public void run() { try { while (!Thread.interrupted()) { selector.select(); //就绪事件到达之前,阻塞 Set selected = selector.selectedKeys(); //拿到本次select获取的就绪事件 Iterator it = selected.iterator(); while (it.hasNext()) { //这里进行任务分发 dispatch((SelectionKey) (it.next())); } selected.clear(); } } catch (IOException e) { e.printStackTrace(); } } void dispatch(SelectionKey k) { Runnable r = (Runnable) (k.attachment()); //这里很关键,拿到每次selectKey里面附带的处理对象,然后调用其run,这个对象在具体的Handler里会进行创建,初始化的附带对象为Acceptor(看上面构造器) //调用之前注册的callback对象 if (r != null) { r.run(); } } } 细节已标注。
2.2:实现Acceptor模块
这个模块只负责处理连接就绪事件,有了这个事件就可以拿到客户单的SocketChannel,就可以继续完成接下来的读写任务了:
public class Acceptor implements Runnable { private final Selector selector; private final ServerSocketChannel serverSocketChannel; Acceptor(ServerSocketChannel serverSocketChannel, Selector selector) { this.serverSocketChannel = serverSocketChannel; this.selector = selector; } @Override public void run() { SocketChannel socketChannel; try { socketChannel = serverSocketChannel.accept(); if (socketChannel != null) { System.out.println(String.format("收到来自 %s 的连接", socketChannel.getRemoteAddress())); new Handler(socketChannel, selector); //这里把客户端通道传给Handler,Handler负责接下来的事件处理(除了连接事件以外的事件均可) } } catch (IOException e) { e.printStackTrace(); } } } 细节已标注。
2.3:Handler模块的实现
这个模块负责接下来的读写操作:
public class Handler implements Runnable { private final SelectionKey selectionKey; private final SocketChannel socketChannel; private ByteBuffer readBuffer = ByteBuffer.allocate(1024); private ByteBuffer sendBuffer = ByteBuffer.allocate(2048); private final static int READ = 0; private final static int SEND = 1; private int status = READ; Handler(SocketChannel socketChannel, Selector selector) throws IOException { this.socketChannel = socketChannel; //接收客户端连接 this.socketChannel.configureBlocking(false); //置为非阻塞模式(selector仅允非阻塞模式) selectionKey = socketChannel.register(selector, 0); //将该客户端注册到selector,得到一个SelectionKey,以后的select到的就绪动作全都是由该对象进行封装 selectionKey.attach(this); //附加处理对象,当前是Handler对象,run是对象处理业务的方法 selectionKey.interestOps(SelectionKey.OP_READ); //走到这里,说明之前Acceptor里的建连已完成,那么接下来就是读取动作,因此这里首先将读事件标记为“感兴趣”事件 selector.wakeup(); //唤起select阻塞 } @Override public void run() { try { switch (status) { case READ: read(); break; case SEND: send(); break; default: } } catch (IOException e) { //这里的异常处理是做了汇总,常出的异常就是server端还有未读/写完的客户端消息,客户端就主动断开连接,这种情况下是不会触发返回-1的,这样下面read和write方法里的cancel和close就都无法触发,这样会导致死循环异常(read/write处理失败,事件又未被cancel,因此会不断的被select到,不断的报异常) System.err.println("read或send时发生异常!异常信息:" + e.getMessage()); selectionKey.cancel(); try { socketChannel.close(); } catch (IOException e2) { System.err.println("关闭通道时发生异常!异常信息:" + e2.getMessage()); e2.printStackTrace(); } } } private void read() throws IOException { if (selectionKey.isValid()) { readBuffer.clear(); int count = socketChannel.read(readBuffer); //read方法结束,意味着本次"读就绪"变为"读完毕",标记着一次就绪事件的结束 if (count > 0) { System.out.println(String.format("收到来自 %s 的消息: %s", socketChannel.getRemoteAddress(), new String(readBuffer.array()))); status = SEND; selectionKey.interestOps(SelectionKey.OP_WRITE); //注册写方法 } else { //读模式下拿到的值是-1,说明客户端已经断开连接,那么将对应的selectKey从selector里清除,否则下次还会select到,因为断开连接意味着读就绪不会变成读完毕,也不cancel,下次select会不停收到该事件 //所以在这种场景下,(服务器程序)你需要关闭socketChannel并且取消key,最好是退出当前函数。注意,这个时候服务端要是继续使用该socketChannel进行读操作的话,就会抛出“远程主机强迫关闭一个现有的连接”的IO异常。 selectionKey.cancel(); socketChannel.close(); System.out.println("read时-------连接关闭"); } } } void send() throws IOException { if (selectionKey.isValid()) { sendBuffer.clear(); sendBuffer.put(String.format("我收到来自%s的信息辣:%s, 200ok;", socketChannel.getRemoteAddress(), new String(readBuffer.array())).getBytes()); sendBuffer.flip(); int count = socketChannel.write(sendBuffer); //write方法结束,意味着本次写就绪变为写完毕,标记着一次事件的结束 if (count < 0) { //同上,write场景下,取到-1,也意味着客户端断开连接 selectionKey.cancel(); socketChannel.close(); System.out.println("send时-------连接关闭"); } //没断开连接,则再次切换到读 status = READ; selectionKey.interestOps(SelectionKey.OP_READ); } } } 细节已标注。
关键模块已实现,下面来启动服务端:
new Thread(new Reactor(2333)).start();三、客户端的编写
接下来同样利用selector编写客户端,客户端需要做的事情就是发送消息到服务端,等待服务端响应,然后再次发送消息,发够10条消息断开连接:
3.1:Client入口模块
public class NIOClient implements Runnable { private Selector selector; private SocketChannel socketChannel; NIOClient(String ip, int port) { try { selector = Selector.open(); //打开一个Selector socketChannel = SocketChannel.open(); socketChannel.configureBlocking(false); //设置为非阻塞模式 socketChannel.connect(new InetSocketAddress(ip, port)); //连接服务 //入口,最初给一个客户端channel注册上去的事件都是连接事件 SelectionKey sk = socketChannel.register(selector, SelectionKey.OP_CONNECT); //附加处理类,第一次初始化放的是连接就绪处理类 sk.attach(new Connector(socketChannel, selector)); } catch (IOException e) { e.printStackTrace(); } } @Override public void run() { try { while (!Thread.interrupted()) { selector.select(); //就绪事件到达之前,阻塞 Set selected = selector.selectedKeys(); //拿到本次select获取的就绪事件 Iterator it = selected.iterator(); while (it.hasNext()) { //这里进行任务分发 dispatch((SelectionKey) (it.next())); } selected.clear(); } } catch (IOException e) { e.printStackTrace(); } } void dispatch(SelectionKey k) { Runnable r = (Runnable) (k.attachment()); //这里很关键,拿到每次selectKey里面附带的处理对象,然后调用其run,这个对象在具体的Handler里会进行创建,初始化的附带对象为Connector(看上面构造器) //调用之前注册的callback对象 if (r != null) { r.run(); } } } 细节已标注。
3.2:Connector模块(建连)
public class Connector implements Runnable { private final Selector selector; private final SocketChannel socketChannel; Connector(SocketChannel socketChannel, Selector selector) { this.socketChannel = socketChannel; this.selector = selector; } @Override public void run() { try { if (socketChannel.finishConnect()) { //这里连接完成(与服务端的三次握手完成) System.out.println(String.format("已完成 %s 的连接", socketChannel.getRemoteAddress())); new Handler(socketChannel, selector); //连接建立完成后,接下来的动作交给Handler去处理(读写等) } } catch (IOException e) { e.printStackTrace(); } } } 细节已标注。
3.3:客户端Handler模块实现
public class Handler implements Runnable { private final SelectionKey selectionKey; private final SocketChannel socketChannel; private ByteBuffer readBuffer = ByteBuffer.allocate(2048); private ByteBuffer sendBuffer = ByteBuffer.allocate(1024); private final static int READ = 0; private final static int SEND = 1; private int status = SEND; //与服务端不同,默认最开始是发送数据 private AtomicInteger counter = new AtomicInteger(); Handler(SocketChannel socketChannel, Selector selector) throws IOException { this.socketChannel = socketChannel; //接收客户端连接 this.socketChannel.configureBlocking(false); //置为非阻塞模式(selector仅允非阻塞模式) selectionKey = socketChannel.register(selector, 0); //将该客户端注册到selector,得到一个SelectionKey,以后的select到的就绪动作全都是由该对象进行封装 selectionKey.attach(this); //附加处理对象,当前是Handler对象,run是对象处理业务的方法 selectionKey.interestOps(SelectionKey.OP_WRITE); //走到这里,说明之前Connect已完成,那么接下来就是发送数据,因此这里首先将写事件标记为“感兴趣”事件 selector.wakeup(); //唤起select阻塞 } @Override public void run() { try { switch (status) { case SEND: send(); break; case READ: read(); break; default: } } catch (IOException e) { //这里的异常处理是做了汇总,同样的,客户端也面临着正在与服务端进行写/读数据时,突然因为网络等原因,服务端直接断掉连接,这个时候客户端需要关闭自己并退出程序 System.err.println("send或read时发生异常!异常信息:" + e.getMessage()); selectionKey.cancel(); try { socketChannel.close(); } catch (IOException e2) { System.err.println("关闭通道时发生异常!异常信息:" + e2.getMessage()); e2.printStackTrace(); } } } void send() throws IOException { if (selectionKey.isValid()) { sendBuffer.clear(); int count = counter.incrementAndGet(); if (count <= 10) { sendBuffer.put(String.format("客户端发送的第%s条消息", count).getBytes()); sendBuffer.flip(); //切换到读模式,用于让通道读到buffer里的数据 socketChannel.write(sendBuffer); //则再次切换到读,用以接收服务端的响应 status = READ; selectionKey.interestOps(SelectionKey.OP_READ); } else { selectionKey.cancel(); socketChannel.close(); } } } private void read() throws IOException { if (selectionKey.isValid()) { readBuffer.clear(); //切换成buffer的写模式,用于让通道将自己的内容写入到buffer里 socketChannel.read(readBuffer); System.out.println(String.format("收到来自服务端的消息: %s", new String(readBuffer.array()))); //收到服务端的响应后,再继续往服务端发送数据 status = SEND; selectionKey.interestOps(SelectionKey.OP_WRITE); //注册写事件 } } } 细节已标注。
下面启动客户端去连接之前的服务端:
new Thread(new NIOClient("127.0.0.1", 2333)).start();
new Thread(new NIOClient("127.0.0.1", 2333)).start();
上面模拟了两个客户端同时连到服务端,运行结果如下:
服务端运行结果:

图2
客户端运行结果如下:
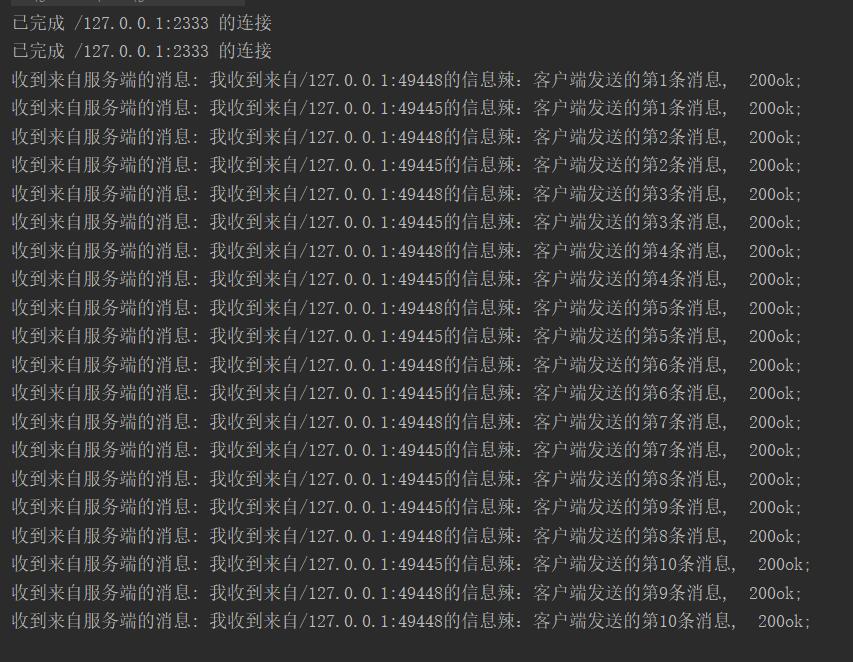
图3
单线程Reactor模型有个致命的缺点,通过上述例子可以看出,整个执行流程都是线性的,客户端请求→服务端读取→服务端响应→客户端收到响应→客户端再次发送请求,那么在这个链路中,如果handler中某个位置存在性能瓶颈,比如我们可以改造下服务端的send方法:
try {
   Thread.sleep(2000L); //响应2s
} catch (InterruptedException e) {
   e.printStackTrace();
}

int count = socketChannel.write(sendBuffer);
在响应客户端之前睡眠2s,当做是性能瓶颈点,同样的再次开两个客户端同时访问服务端,每个客户端发送10条消息,会发现,程序直接运行了40s,这是大多数情况下不愿意看到的,因此,就有了多线程Reactor模式,跟BIO为了提高性能将读操作放到一个独立线程处理一样,Reactor这样做,也是为了解决上面提到的性能问题,只不过NIO比BIO做异步有个最大的优势就是NIO不会阻塞一个线程,类似read这种操作状态都是由selector负责监听的,不像BIO里都是阻塞的,只要被异步出去,那么一定是非阻塞的业务代码(除非是人为将代码搞成阻塞),而BIO由于read本身阻塞,因此会阻塞掉整个线程,这也是同样是异步为什么NIO可以更加高效的原因之一。
那么单线程Reactor适用于什么情况呢?适用于那种程序复杂度很低的系统,例如redis,其大部分操作都是非常高效的,很多命令的时间复杂度直接为O(1),这种情况下适合这种简单的Reactor模型实现服务端。